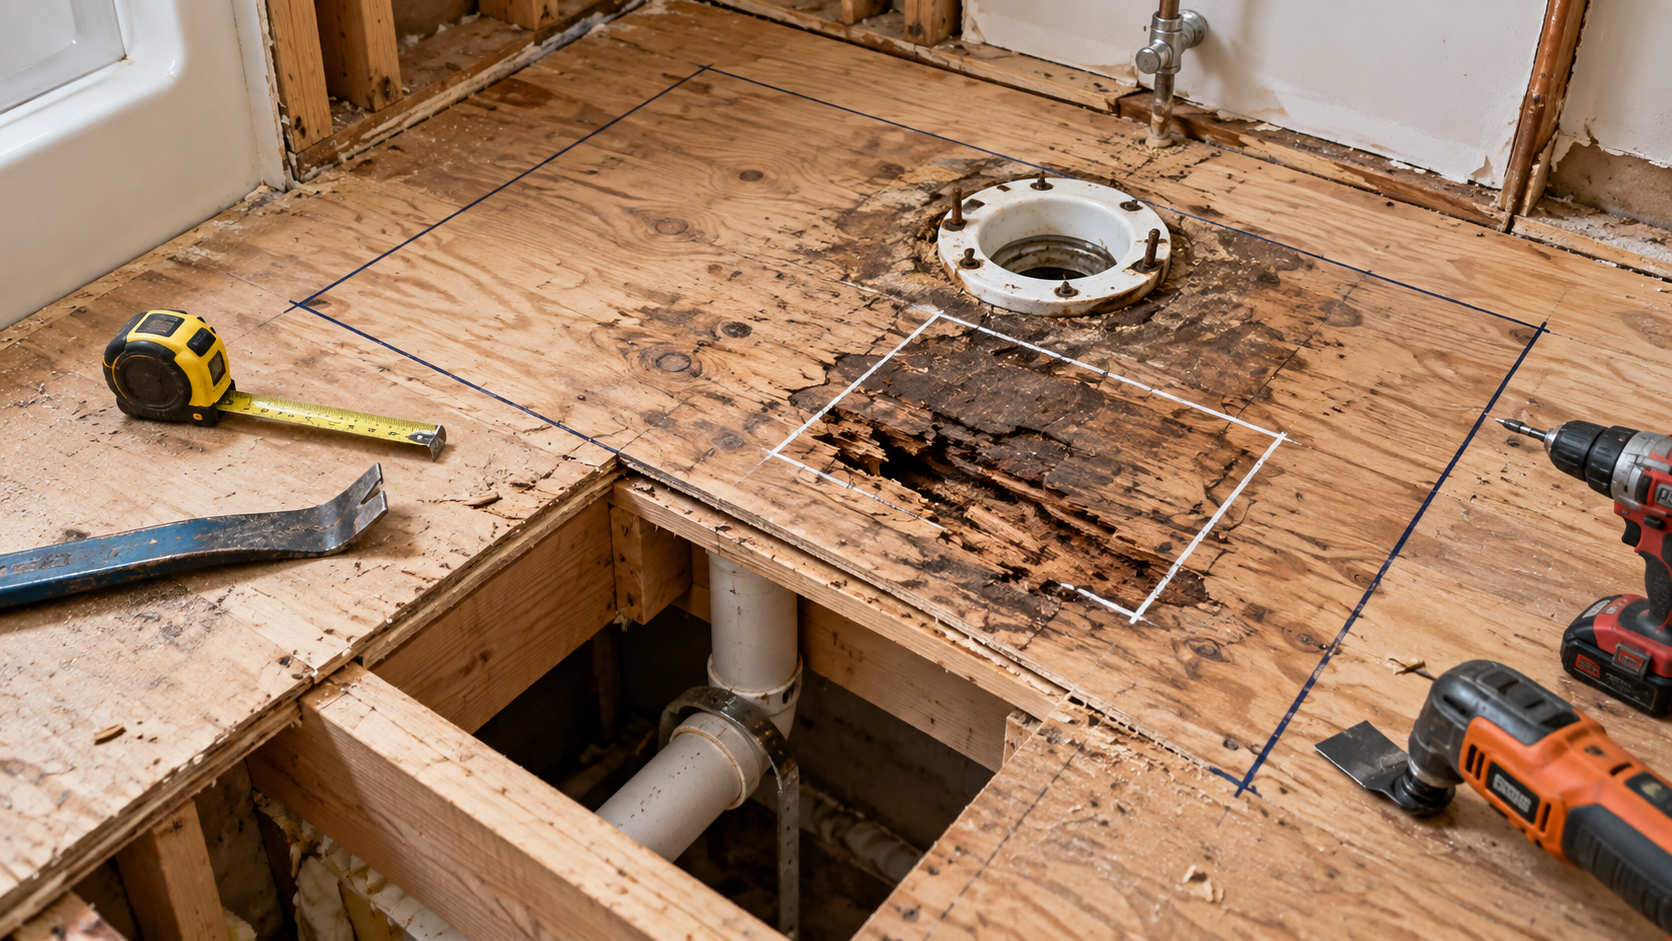
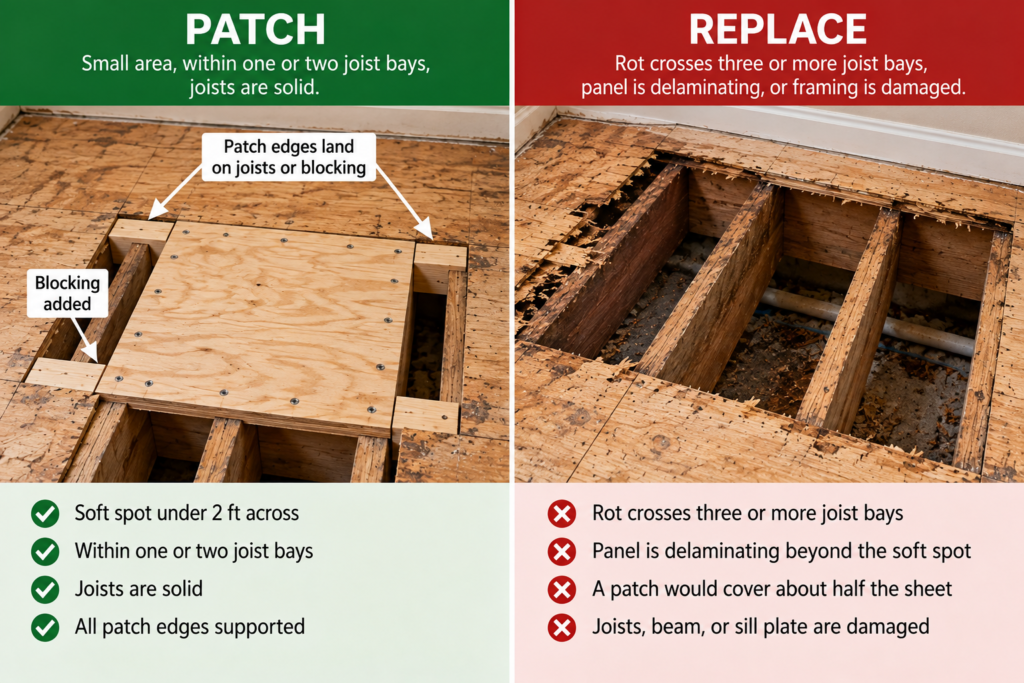
Whether to patch or replace rotted plywood subfloor comes down to how far the decay has spread and what’s underneath it. Small areas of rot can usually be patched if the surrounding plywood and the joists are still solid and every edge of the patch can land on a joist or new blocking. When rot crosses several joist bays, the panel is delaminating beyond the soft spot, or the framing underneath is damaged, replacing the entire sheet (and repairing the framing first) is the better repair. The key is finding where the rot actually ends before you cut, because it almost always extends past the visible stain.
Two floors can have the same 12-inch soft spot. One needs a patch that takes an afternoon. The other needs the whole 4×8 sheet out. This guide walks through that call in the order you’d make it on the floor itself: find the real edges of the rot, check the joists, then choose the repair.
Quick Answer
Patch it if the rot is in one area, the joists are solid, and the patch edges can land on framing or blocking.
Replace the sheet if the rot crosses three or more joist bays, the panel is delaminating, or a patch would cover about half the sheet.
Fix the framing first if the tops of the joists are soft.
Why Plywood Subfloors Rot in the First Place
Plywood subflooring rots when it stays wet long enough for decay fungi to establish. The USDA Forest Products Laboratory’s Wood Handbook notes that wood kept below about 20% moisture content is generally safe from decay, and our guide on dry rot vs. wet rot explains why nearly all subfloor damage is the wet-rot kind. Wet rot stays where the water is and stops once the wood dries out.
The usual sources are predictable:
A wax ring failing under a toilet
A slow drip at a supply line or dishwasher connection
A tub or shower pan leaking at the drain or the curb
Water getting in at an exterior door threshold
Crawlspace humidity condensing on the underside of the floor
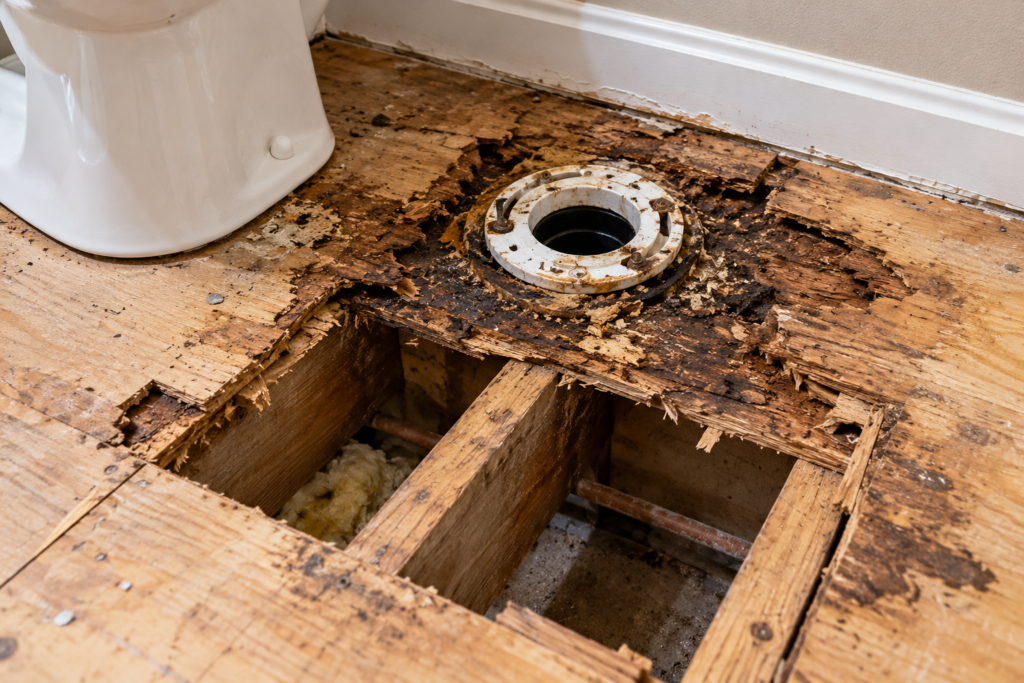
This matters for the patch-or-replace question because the source shapes the damage. A toilet leak usually makes a roughly circular soft spot. A threshold leak often runs along a panel edge. Crawlspace moisture can soften the underside of a whole floor while the top looks fine.
First, Find the Real Edges of the Rot
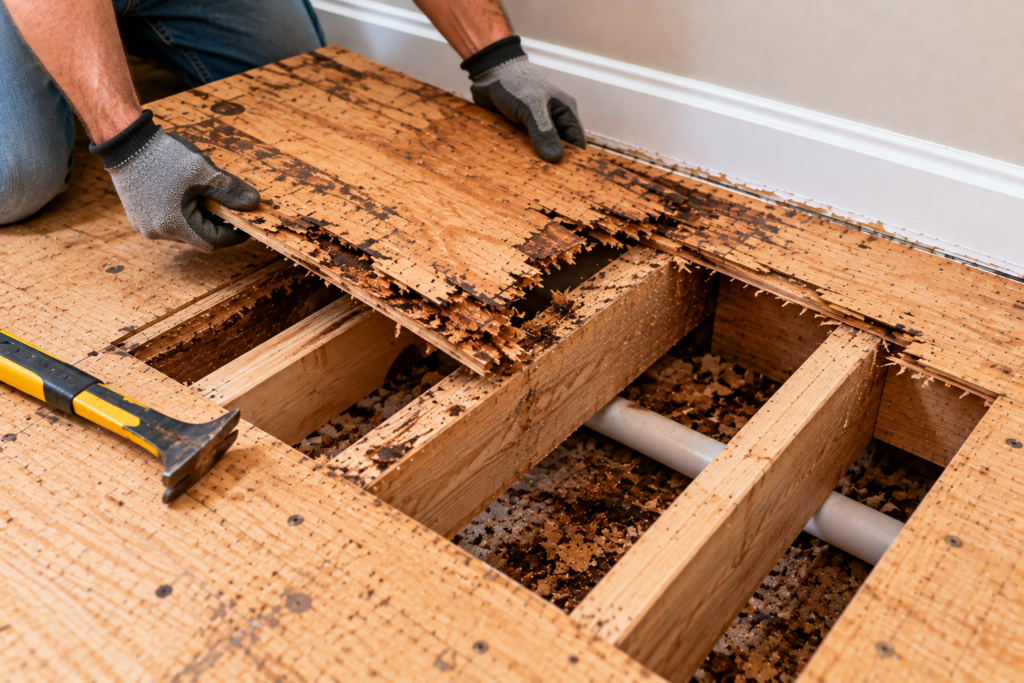
The discoloration you can see is not the boundary of the damage. Decay spreads into wood that still looks normal, and a patch cut to the visible stain is the most common way this repair fails.
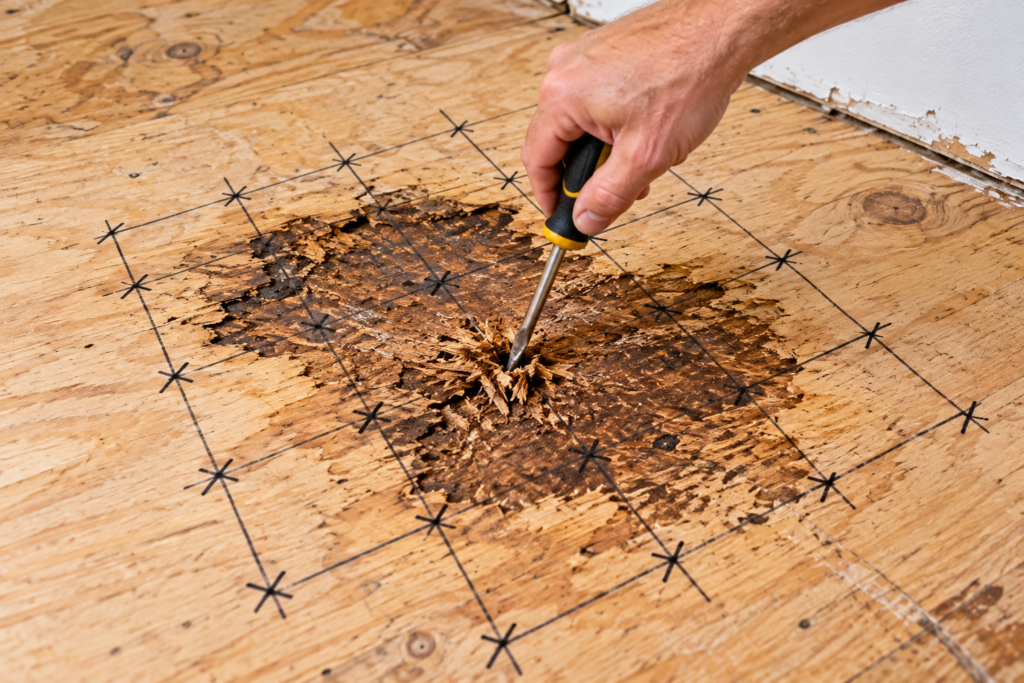
🧪 Test You Can Run: The Probe Grid
Take an awl or a stiff flat screwdriver. Starting at the center of the soft spot, press into the subfloor every 2 inches, working outward in a cross pattern. Sound plywood resists and the tip barely marks it. Decayed plywood lets the tip sink with light pressure, or the veneer crushes and splits instead of denting. Mark the point on each line where the wood turns firm, then add at least a few inches beyond that. That outline, not the stain, is your minimum cut area.
If you can get underneath, repeat the probe from below. Rot that started from crawlspace moisture is often worse on the underside.
Next, check the moisture. A pin-type moisture meter compares the damaged area to dry subfloor elsewhere in the same room. If the damaged zone still reads much higher than the rest, the leak may still be active. Fix that before you plan anything else.
The Joist Check That Decides Everything
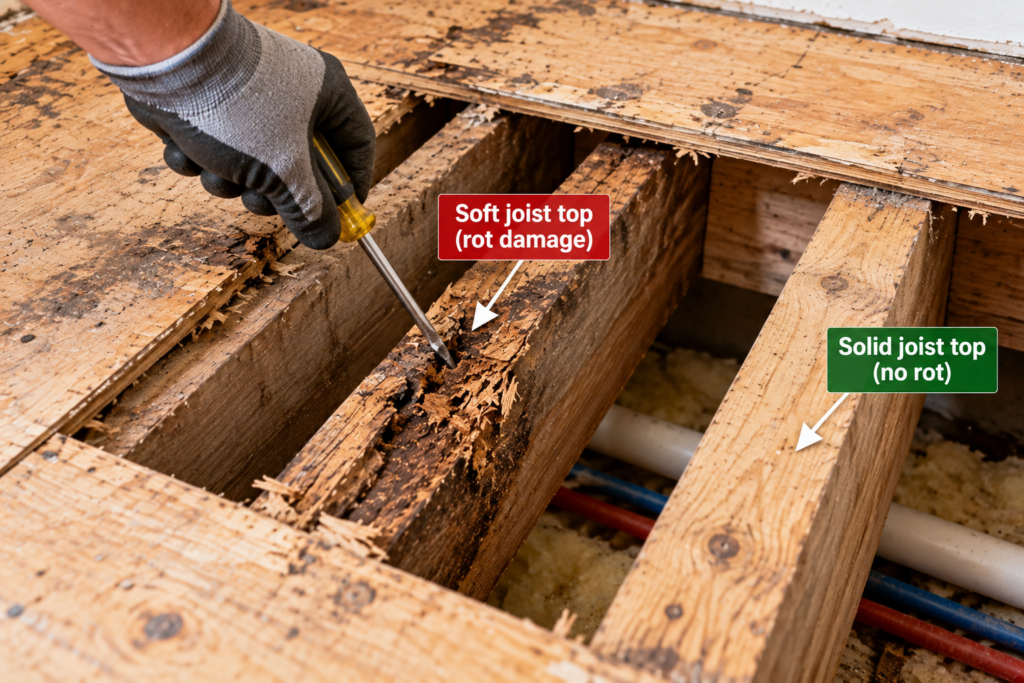
Once the subfloor is open, or from below if you have access, probe the tops of the joists under the damaged area the same way.
Joist tops are firm: You’re choosing between a patch and a sheet replacement. Keep reading.
Joist tops are soft but the damage is shallow: The joist usually needs sistering, meaning a new full-length or partial-length member fastened alongside it, before any new plywood goes down. Our guide to sistering joists covers that repair, and the guide to stiffening a plywood subfloor explains how floor framing carries load.
Joist is soft deep into its height, or the rot has reached a beam or sill plate: This is no longer a subfloor repair. Get a carpenter or structural engineer to look at it.
⚠️ Warning: Never screw a new subfloor patch into a soft joist. The screws won’t hold, and the new plywood will squeak, flex, and eventually crack whatever flooring sits on top of it.
Rotted Plywood Subfloor: Patch or Replace?
What you find
Framing condition
Best repair
Why
Soft spot under 2 ft across, within one joist bay
Solid
Patch
Can be cut to land on joists plus blocking
Soft spot crossing one joist
Solid
Patch (spanning two bays)
Patch edges can land on joists on both sides
Rot along a panel edge or T&G joint
Solid
Patch or replace, depending on length
Short run: patch. Most of the edge: replace
Damage across three or more joist bays
Solid
Replace the sheet
Patch would be close to a full sheet anyway
Panel delaminating or blistered beyond the soft spot
Any
Replace the sheet
Glue lines are failing across the panel
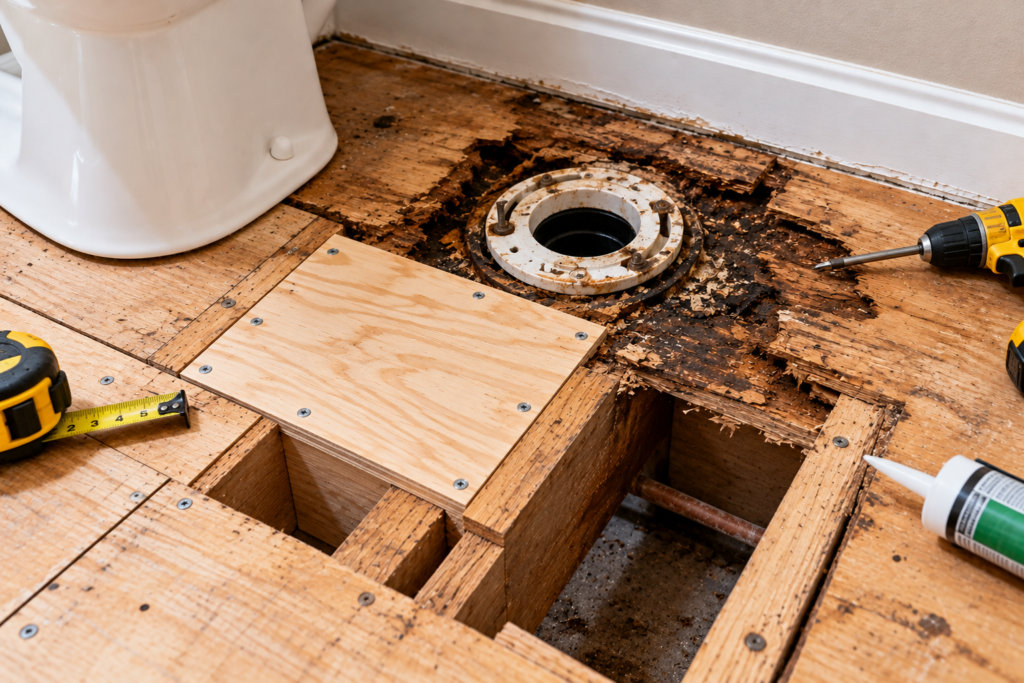
Soft spot under a toilet
Solid
Patch (sized to reach joists)
Flange needs solid wood all around
Any damage
Joist tops soft
Fix framing first
New plywood needs sound bearing
Damage extends under cabinets or walls
Solid
Patch to the obstructionplus blocking
Full sheet removal would mean tearing out cabinets
A practical rule of thumb (a field guideline, not a code requirement): if the patch outline would cover about half the sheet, replace the whole panel. You’ll end up with fewer seams, fewer places for flex, and a flatter surface for the finished floor.
When a Patch Is the Right Call
A well-built patch is not a compromise. A patch that’s the same thickness as the original, supported on every edge, glued and screwed, carries load the same way the original panel did.
It works best when:
The rot is local and the probe grid shows a clear, firm boundary
The joists are sound
The finished floor is going to be replaced anyway, so there’s no seam to hide
Removing the full sheet would mean pulling cabinets, a tub, or a wall plate
How to Patch a Rotted Plywood Subfloor
Shut off and fix the water source. Nothing else matters until this is done.
Check what’s under the floor. Look from below, or drill a small inspection hole, before cutting. Supply lines, drain lines, and wiring often run right under bathroom and kitchen subfloors.
Measure the subfloor thickness. Most modern panels are 23/32 inch (sold as 3/4). Older homes may have true 3/4-inch panels or layered subfloors. Set your circular saw’s depth to just that thickness so you don’t cut into the joists.
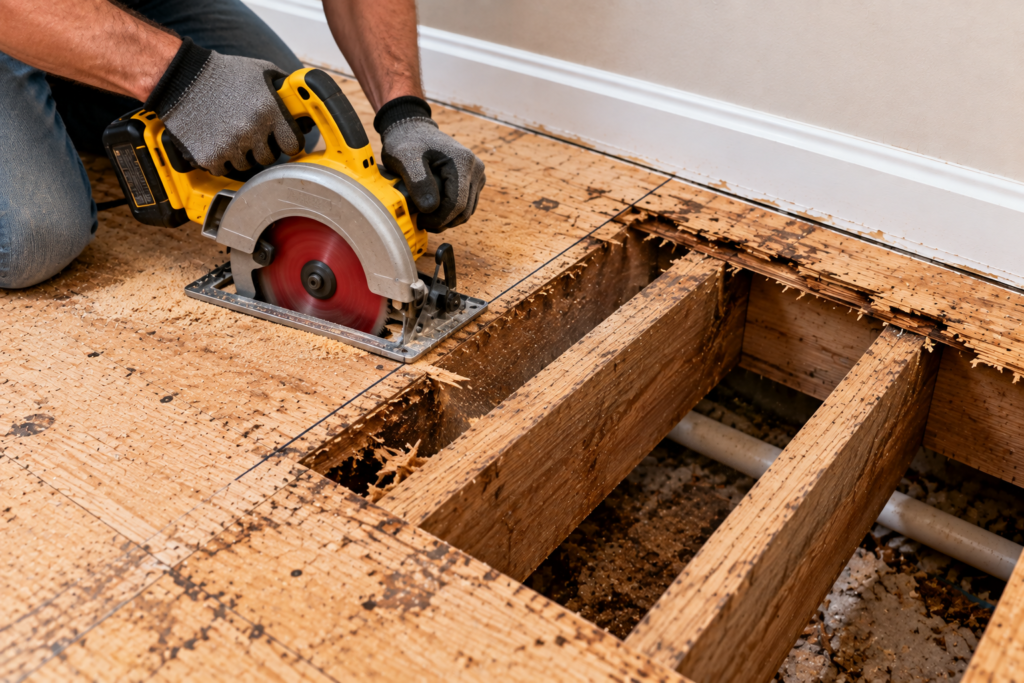
Lay out the cut lines. Draw a rectangle outside your probe-grid boundary. Run the two sides that are parallel to the joists along the inside edge of a joist, not down its centerline.
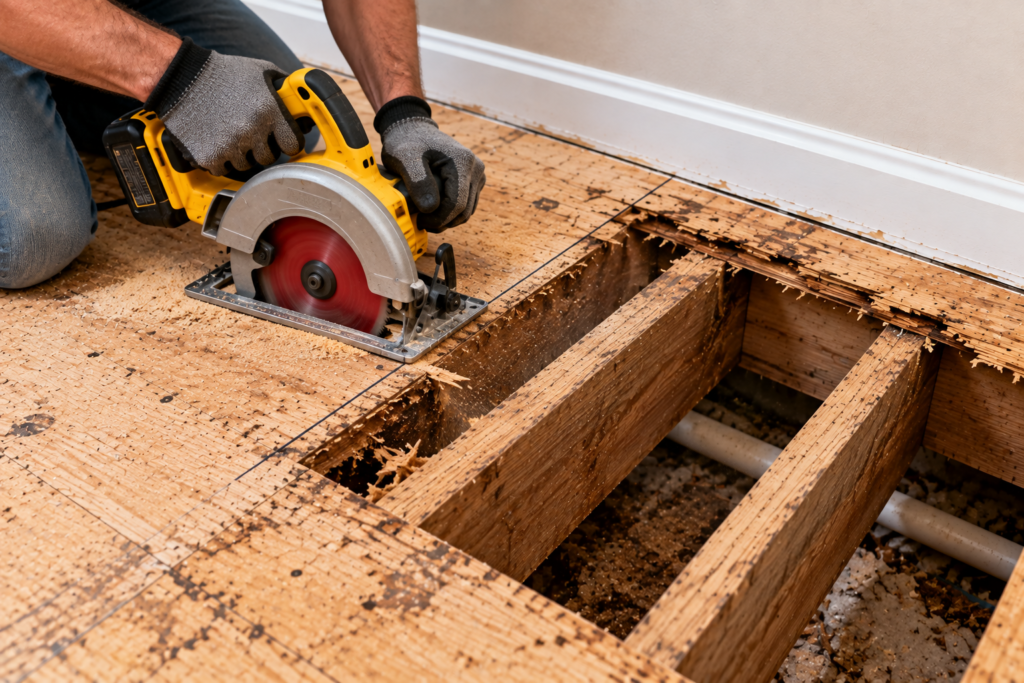
Cut and remove the damaged section. Use a circular saw for the long runs and an oscillating multi-tool to finish the corners.
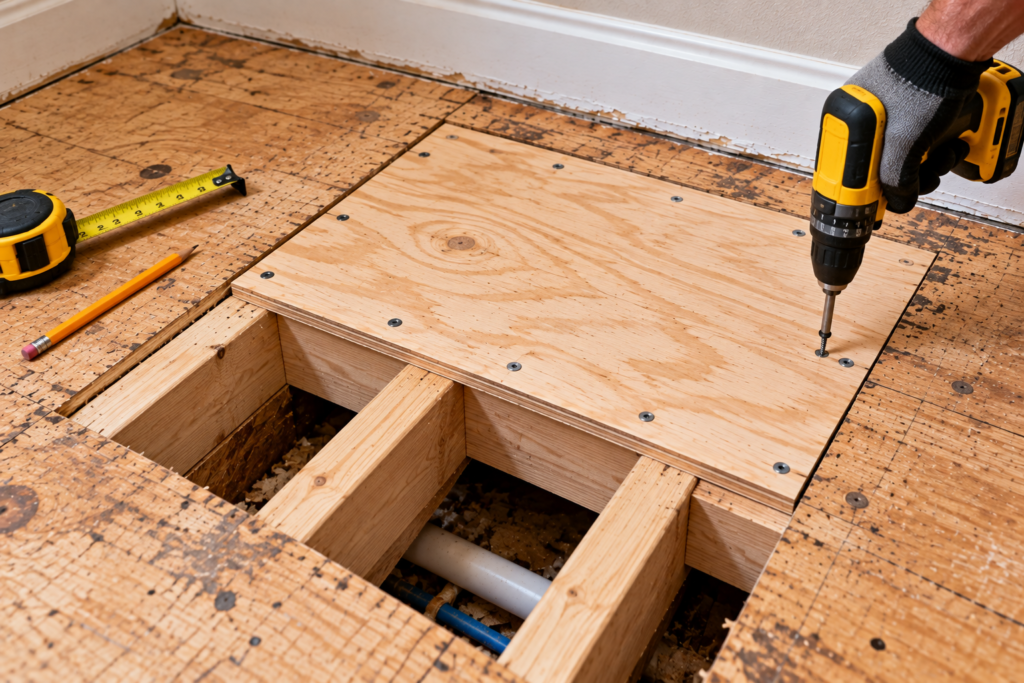
Add bearing under every cut edge. Screw and glue 2×4 or 2×6 cleats to the sides of the joists, flush with the tops, so the patch edges have solid support. Add blocking between the joists under the ends of the patch that run across the bay. APA installation guidance calls for supported panel edges, whether by tongue-and-groove joints or by blocking. An unsupported patch edge will flex.
Treat and dry the exposed framing. If there’s surface decay on the framing you’re keeping, dry it out and apply a borate preservative. Our wood rot guide covers treatment in more detail.
Cut the patch from panel stock of matching thickness. Leave about a 1/8-inch gap at the edges. APA recommends that spacing at panel ends and edges to allow for expansion.
Glue and fasten. Run a bead of subfloor adhesive rated to ASTM D3498 on the joists and cleats. Then screw the patch down. The typical schedule for 3/4-inch floor panels is 6 inches on center along edges and 12 inches in the field. Confirm against APA Form E30 and your local code.
Check flatness across the seams. Use a straightedge. A proud edge will show through vinyl and can crack tile. Plane or sand the high side flush.
❌ Mistake: Cutting the patch to the stain. The decay almost always extends past what you can see. Once a patch is screwed down over soft wood, the next step is tearing it back out.
When to Replace the Whole Sheet
Replacing the full panel takes more work on day one, but it’s often the cleaner repair. It makes sense when:
The damage crosses three or more joist bays
Delamination or blistering shows up beyond the soft area
The panel’s tongue-and-groove edge has rotted along most of its length
You’re already removing all the finished flooring in the room
The process is similar to the patch, with a few key differences. Cut the panel out along the joist lines on both ends, and cut or split the tongue-and-groove joints along the long edges. When you pull the old panel, clean the old adhesive off the joist tops so the new sheet sits flat. Then install the new sheet with its long dimension perpendicular to the joists, matching the original orientation. Use the same thickness and span rating as the rest of the floor. If you’re unsure what that is, our guide to plywood thickness for subfloors and the plywood span chart cover the ratings by joist spacing.
Where the Money Really Goes
On most subfloor rot jobs, the plywood is the cheap part. A patch uses a fraction of a sheet. A full replacement uses one sheet. The price gap between those two is small.
What drives cost is everything around the plywood:
Finished flooring removal and replacement. Tile especially, since pulling it usually destroys it.
Fixtures. Pulling and resetting a toilet, a vanity, or a tub.
Framing repair. Sistering joists adds real labor.
Doing the job twice. A patch that fails because the leak wasn’t fixed, or the cut didn’t reach sound wood, means paying for all of the above again.
💸 That’s why the cheapest repair is usually the one that’s sized correctly the first time, not the smallest one. For a full breakdown of pro pricing, see our guide on the cost to replace a plywood subfloor.
😬 Regret: A very common pattern plays out after a toilet leak. The homeowner patches only the ring of soft plywood around the flange, lays new tile, and resets the toilet. Within a year, the grout cracks around the toilet base. The rot had spread under the adjacent tile, and the small patch had no support at its edges. The fix means pulling up the new tile to redo a subfloor repair that should have been sized to the joists the first time.
Situations Where You Should Not Patch
Patching has real limits. Don’t patch, or at least don’t patch yet, when:
The leak isn’t confirmed fixed. New plywood over an active leak rots on the same schedule as the old plywood.
The framing is soft. Repair the joists or sill first.
Tile is going over a floor that’s marginal on stiffness. Tile needs a stiff, flat base. A patched floor that was already bouncy needs attention to stiffness, not just rot. Check our guide on preparing a subfloor for tile before you set any tile.
Mold growth covers a large area. The EPA’s homeowner guidance on mold says areas larger than about 10 square feet deserve more caution. At that size, consider professional remediation rather than handling it yourself.
You’re relying on epoxy or hardener to restore strength. Wood hardeners and epoxy fillers are good tools for trim, sills, and cosmetic voids. They are not a substitute for replacing structural subfloor that’s lost its strength. The best epoxy wood filler and best wood hardener guides explain where each product belongs.
Dehumidifier. Speeds drying in crawlspaces and bathrooms.
FAQ
Can you patch a rotted plywood subfloor?
Yes. A patch is a sound repair if it’s cut back to firm wood, supported on every edge by joists or blocking, matched to the original thickness, and glued and screwed down. It fails when the edges are unsupported or the rot wasn’t fully removed.
How far past the rot should I cut?
Cut to where probing shows firm wood, then go at least a few inches further. Where possible, extend the cut to the nearest joists so the patch has solid bearing.
Can I use OSB to patch a plywood subfloor?
It’s commonly done. The patch must match the existing thickness and have an appropriate span rating for your joist spacing. The bigger risk is a thickness mismatch that leaves a lip at the seam.
Do I need to replace the joists if the subfloor is rotted?
Not usually. Probe the joist tops. If they’re firm, only the subfloor needs repair. If they’re soft, sister or repair the framing before installing new plywood.
Can I put new plywood over rotted subfloor?
No. Overlaying hides the problem without removing the decay or restoring strength. The soft layer keeps flexing under the new panel. Cut out the rot first.
Is a rotted subfloor under a toilet a patch job?
Often, yes. Size the patch so it reaches the joists on both sides, and make sure the toilet flange mounts to solid new wood.
Related Posts:
Best Wood Hardener for Rotted Wood by Admin June 25, 2026 DIY The best wood hardener for rotted wood depends on the severity of the damage. For light surface rot, a single-part penetrating wood hardener is usually…
Rotted Fascia Board Repair: DIY Guide & Cost by Admin June 29, 2026 DIY I found my first rotted fascia board the way most homeowners do — by accident, with a screwdriver, poking at something that "looked a little…