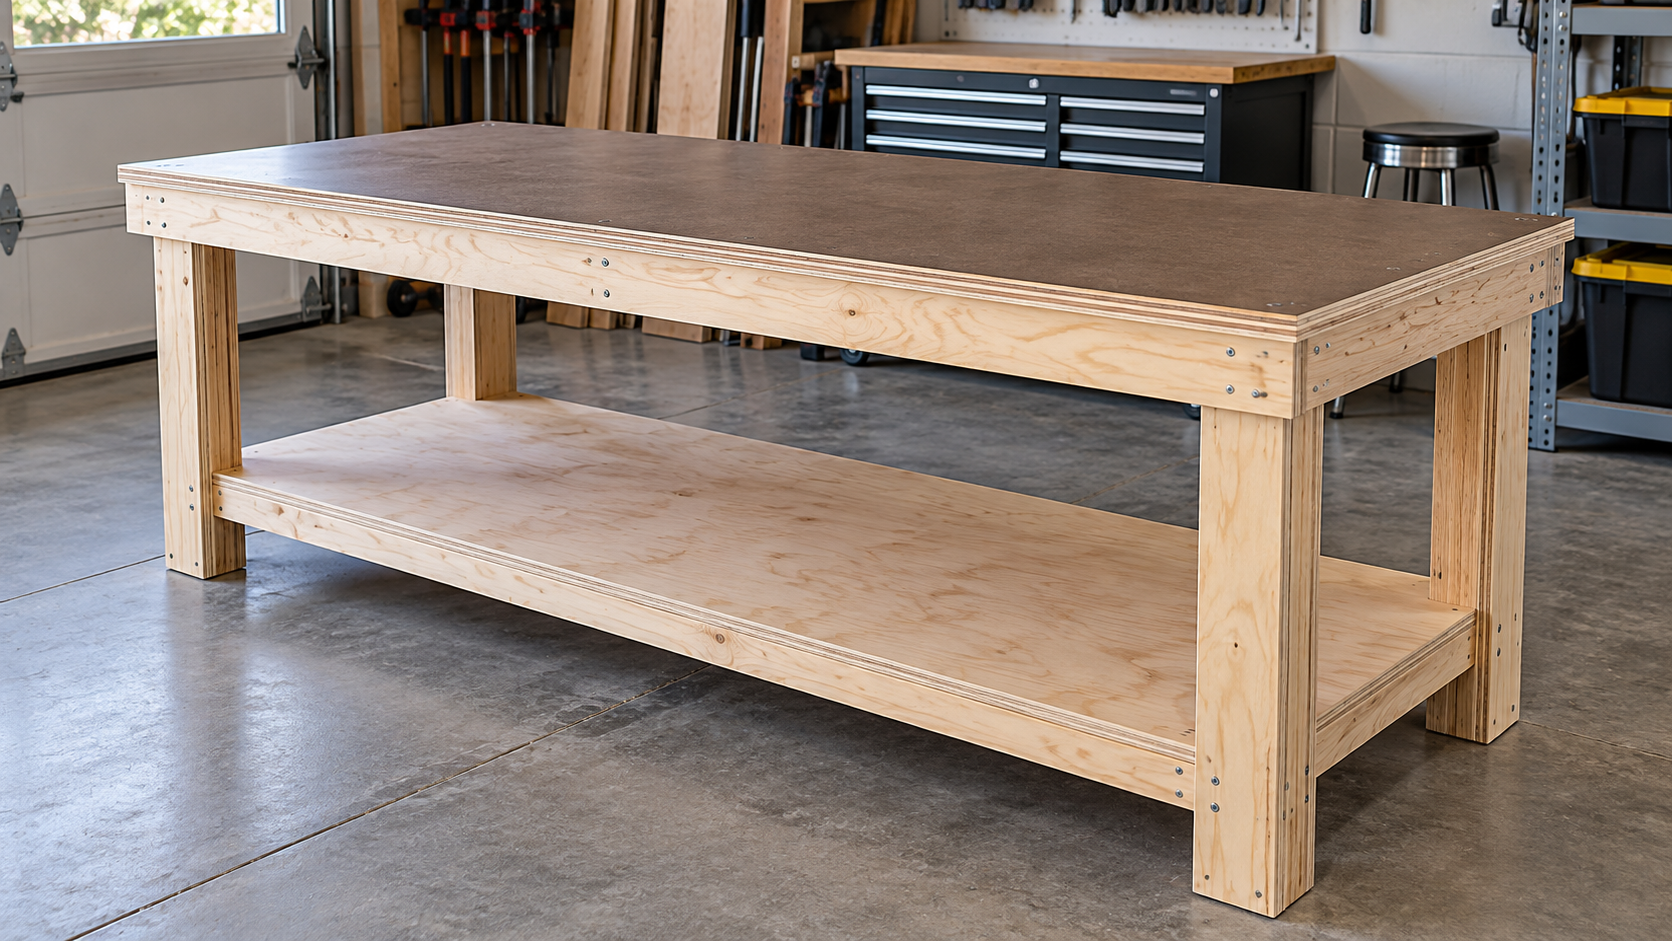
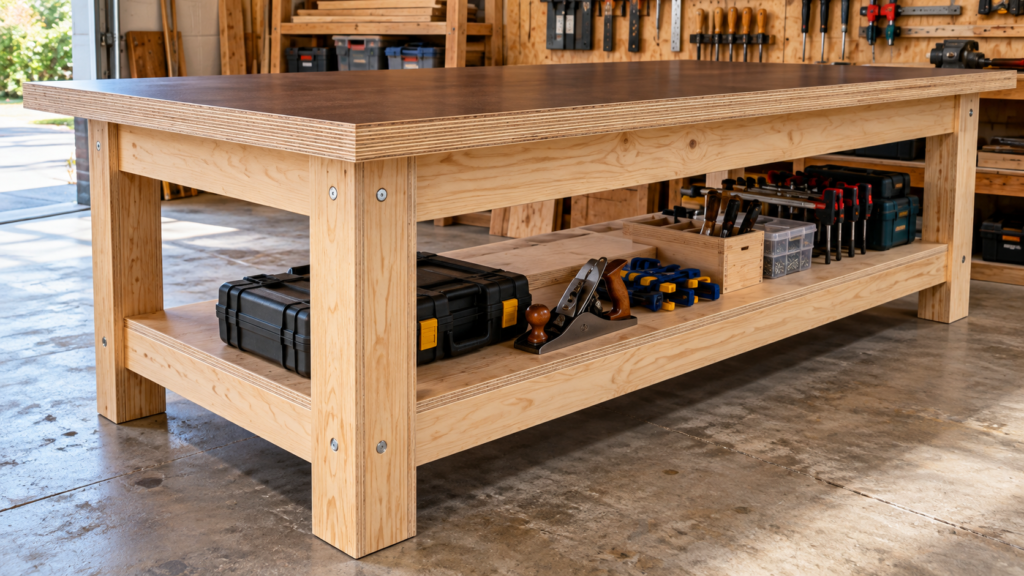
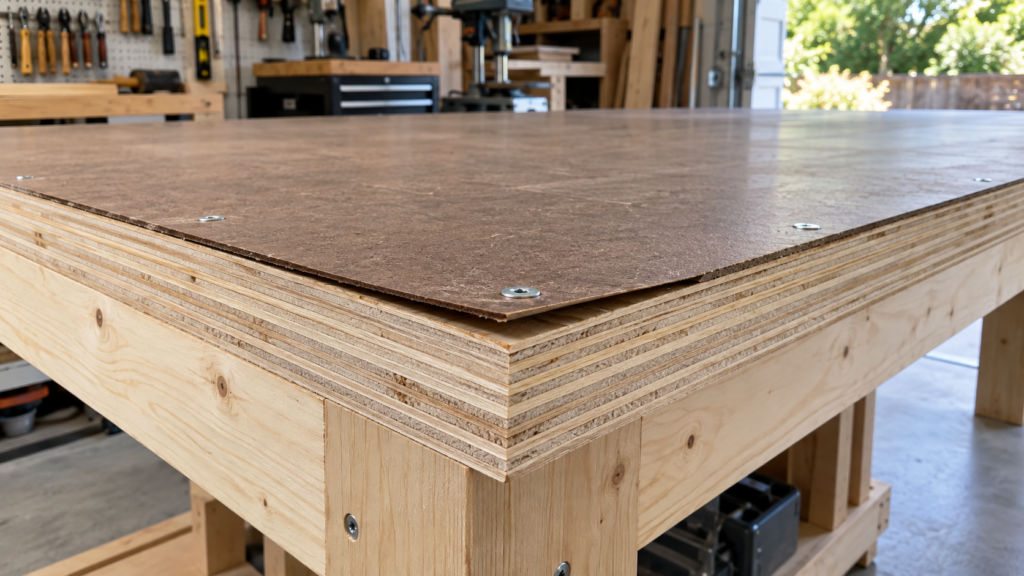
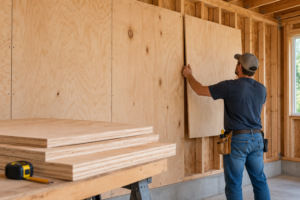
A solid plywood workbench takes two sheets of 3/4″ plywood plus one sheet of 1/4″ tempered hardboard. You get a bench about 72″ long, 23⅞” deep and 36″ tall, with a 1-1/2″ laminated top, a replaceable work surface and a lower shelf. Below are the cut list, the plywood to use for each part, and the build mistakes that make benches wobble.
Disclosure: This post contains Amazon affiliate links. If you buy through them, we may earn a small commission at no extra cost to you.
Quick Answer
Top: Two layers of 3/4″ plywood glued and screwed together, with a 1/4″ tempered hardboard skin on top. Screw the skin down. Don’t glue it.
Base: L-shaped plywood legs, 4″ aprons, and a plywood shelf that helps keep the base from racking.
Material: 2 sheets of 3/4″ plywood + 1 sheet of 1/4″ tempered hardboard
Finished size: About 72″ L x 23⅞” D x 36″ H. The depth depends on your saw blade’s kerf, and you can change the leg length to suit your height.
Best budget plywood: BC or ACX softwood plywood. Best upgrade: Baltic birch or another hardwood-core panel for the top layers.
Which Plywood to Use for Each Part of a Plywood Workbench
Each part of the bench does a different job, so it doesn’t need the same panel throughout. Spend the money where flatness and screw-holding matter.
Bench Part
Budget Pick
Upgrade Pick
Why It Matters
Top layers (2)
3/4″ BC or ACX softwood plywood
3/4″ Baltic birch or hardwood plywood
More plies and fewer core gaps make the top flatter and give screws better grip
Work surface
1/4″ tempered hardboard
1/4″ hardwood plywood
A sacrificial layer you replace once it’s chewed up
Legs
3/4″ BC softwood plywood
3/4″ Baltic birch
Glued-up L-legs make a stiff corner with either panel
Aprons and stretchers
3/4″ BC softwood plywood
3/4″ hardwood plywood
They resist racking. Grade matters less here
Shelf
3/4″ BC softwood plywood
Any 3/4″ panel
Adds racking resistance and holds heavy tools
Avoid in damp garages
MDF
—
MDF is flat and heavy but swells and crumbles when it gets wet
For a damp or unheated garage, use panels made with exterior glue, such as ACX plywood or BCX, instead of interior-only sheet goods. Exterior glue keeps the plies from separating. It doesn’t stop the wood from rotting if the panel stays wet. To compare core types and face grades, see the guide to plywood types or the breakdown of birch plywood.
Cost difference: Making only the two top layers from hardwood plywood and everything else from softwood plywood puts most of the extra spend into the one part you touch. Check local pricing. The gap between softwood and Baltic birch sheets varies a lot by region.
Plywood Workbench Cut List (Two Sheets)
This plan assumes a 36″ bench height and a base footprint of 66″ x 20″, measured to the outside faces of the legs. The top overhangs 3″ at each end and just under 2″ front and back, which gives you room to clamp.
Part
Qty
Size (inches)
Cut From
Top layers
2
About 23⅞ x 72 (half the sheet width, less the kerf)
Sheet A (3/4″)
Work surface skin
1
Trimmed to match the finished top
1/4″ tempered hardboard
Leg face strips
4
3-1/2 x 34-1/4
Sheet B (3/4″)
Leg side strips
4
2-3/4 x 34-1/4
Sheet B
Long aprons and long stretchers
4
4 x 59
Sheet B
Short aprons and short stretchers
4
4 x 13
Sheet B
Shelf (notch each corner 3-1/2 x 3-1/2)
1
20 x 66
Sheet B
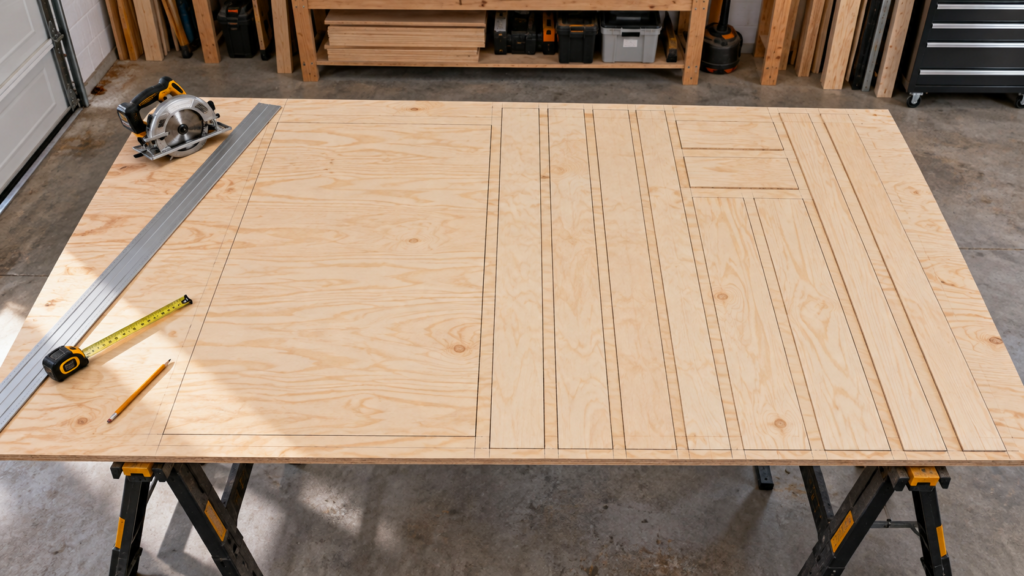
Sheet A: Rip the sheet into two equal-width strips, allowing for the saw kerf. Each strip will be slightly under 24″ wide, about 23⅞” with a standard 1/8″ blade. Crosscut both strips to 72″. That leaves two offcuts that are roughly square. Use them for a vise chop or to double up the front edge.
Hardboard: Cut the hardboard slightly oversize. After you laminate the top, lay the hardboard on it and trim it flush so the edges line up exactly.
Sheet B, in this order:
Rip a 20″-wide strip the full 96″ length. Crosscut 66″ off it for the shelf. Cut the four 4″ x 13″ short aprons and stretchers from the 20″ x 30″ leftover.
Rip four 4″-wide strips. Cut a 59″ piece from each. Rip each 37″ leftover down to 3-1/2″ and cut the four leg face strips from those.
Rip two 2-3/4″-wide strips and cut two 34-1/4″ leg side strips from each.
That uses about 42-1/2″ of the sheet’s 48″ width, which leaves room for kerfs and one bad cut. If you’re making long rips without a table saw, see cutting plywood in a straight line and making long cuts.
Test before you cut legs: Stack your two top layers and the hardboard, then measure the actual thickness. On nominal sizes it’s 1-3/4″, but real panels usually come in a little thinner. Leg length = target bench height minus your measured top stack. See nominal vs. actual plywood thickness.
How to Build the Plywood Workbench
1. Make the L-shaped legs
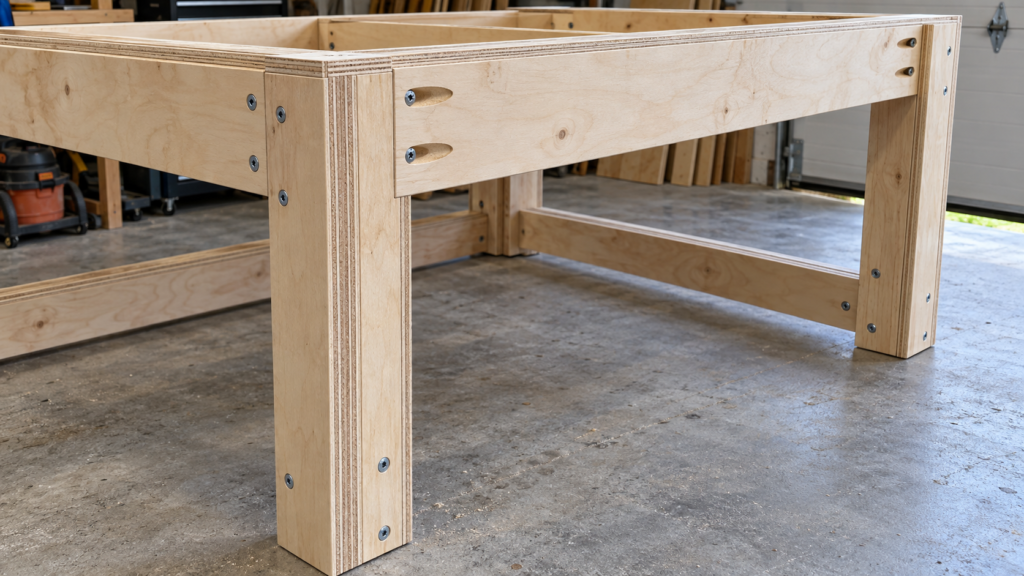
Glue each 2-3/4″ side strip to the back edge of a 3-1/2″ face strip to form an L. Then screw through the face strip into the side strip’s edge with 1-1/4″ screws. Drill pilot holes so the plywood edge doesn’t split. Each finished leg measures 3-1/2″ across in both directions, about the size of a 4×4.
2. Build the two end frames
Join a front leg and a back leg with one 4″ x 13″ short apron at the top and one short stretcher about 6″ up from the floor. Keep the aprons flush with the outside faces of the legs. Use glue plus pocket screws, or glue plus screws through the leg into the apron. Check each frame for square before the glue sets.
3. Join the end frames with long aprons and stretchers
Connect the two end frames with the 59″ long aprons at the top and the long stretchers at the bottom, front and back. Use the same joints as before. Measure both diagonals of the base. When they match, the base is square.
4. Drop in the shelf to help resist racking
Notch the four corners of the shelf to fit around the legs. Set it on the lower stretchers, then glue and screw it down every 8″ or so. Fastened along all four edges, the shelf acts as a brace and cuts down side-to-side movement. It doesn’t fix everything: weak apron joints will still let the base flex. If you do a lot of hand-planing, add a 3/4″ plywood back panel between the rear legs, or diagonal braces, so the bench doesn’t creep under heavy strokes.
5. Laminate the top on a flat surface
Lay the first top layer on a surface you know is flat, such as sawhorses with straight rails or a flat floor. Spread glue, set the second layer on it, and screw up from underneath with 1-1/4″ screws in a grid about every 8–10″. Pile weight on top while it dries. If your floor has a twist, the top will set with the same twist. The wood glue guide covers open times.
6. Attach the top to the base
Screw up through the aprons into the lower top layer, using pocket holes or corner cleats. Keep every screw short enough that it can’t reach the work surface.
7. Add the hardboard skin
Lay the 1/4″ tempered hardboard on top, trim it flush with the laminated top, and fasten it with countersunk screws in the outer 1″ around the edges, or with heavy double-sided tape. Don’t glue it. When it gets scarred, you unscrew it and put down a new one, and the rest of the bench stays in service.
Warning: A screw head sitting even slightly proud of the hardboard will scratch every piece you slide across the bench and can chip a plane iron. Sink every head below the surface.
Plywood Workbench Height: How Tall to Build It
Most plans land between 34″ and 38″, and 36″ (kitchen counter height) is a common default. That’s a rule of thumb, not a standard. Your height and the work you do decide the right number.
Hand-planing and chopping: Lower in the range, so your body weight goes into the tool.
Assembly, sanding, power tools: Around 36″.
Detail work (electronics, sharpening, fine layout): Higher, so you’re not hunched over.
Test before you cut the legs: Clamp a scrap of plywood to sawhorses at your planned height and do 10 minutes of the work you do most. Going a little high and trimming the legs later is easier than adding height afterward.
Upgrades Worth Adding
Bench dog holes: 3/4″ holes through the laminated top let you hold work flat without clamps hanging over the edge. Drill them after the hardboard skin is installed, so the holes go cleanly through all three layers. When you replace the skin, lay the new sheet in place and drill up through the existing holes from below, or mark them through from above, so the new holes line up exactly. Keep dog holes away from the skin’s edge screws. The bench dogs guide covers spacing.
A front vise: Double up the front edge under the vise with the Sheet A offcuts so the vise screws have more wood to grip.
Locking casters: Useful in a shared garage, but expect the bench to be less steady when you’re planing hard.
1. Gluing the hardboard skin down. Once it’s dented and stained, you can’t get it off without wrecking the plywood under it. Screw it or tape it.
2. Assuming every sheet is exactly 3/4″. Sheets from different batches can vary in thickness, so parts cut to a nominal 3/4″ won’t line up and the top layers end up with a step at the edges. Buy all your sheets at once and measure them with calipers before cutting.
3. Ignoring the saw kerf. Two 24″-wide pieces won’t come out of a 48″ sheet. Rip it down the middle, accept a top just under 24″, and trim the hardboard to match the top rather than to a number on paper.
4. Laminating the top on an uneven floor. The glue locks in whatever twist the surface had, and you get a top that rocks on its own legs. Find a flat surface first. If it’s already twisted, see flattening warped plywood.
5. Using a single 3/4″ layer over a long unsupported span. The top bounces under a mallet and sags under heavy loads. Span matters as much as thickness. See plywood thickness vs. strength for why.
6. Relying on the shelf alone for stability. The shelf helps, but weak joints or no back bracing still let the base lean and creep across the floor when you saw or plane. Glue every joint, drill pilot holes for every edge screw, and add a back panel if you plane by hand. More on fastener choice in nails vs. screws for plywood.
When a Plywood Workbench Isn’t the Right Call
A laminated plywood top is flat enough for most assembly, power-tool work and general shop use. If you regularly flatten big glue-ups like tabletops or doors against the bench, a heavier solid hardwood top or a torsion box will hold flat better over a big surface. The workbench top guide compares plywood, MDF, butcher block and steel tops.
Plywood Workbench FAQ
Is plywood good for a workbench? Yes, for most home shops. Plywood stays stable through seasonal humidity changes, comes flat from the mill, and needs no jointer or planer. Two laminated layers with a replaceable skin cost far less than a solid hardwood top.
What thickness of plywood for a workbench top? 3/4″ is the minimum. Double it to about 1-1/2″ for a top that doesn’t bounce under hammering. Some builders go to three layers, about 2-1/4″, for heavy chopping.
What is the best plywood for a workbench? For the top layers, Baltic birch or another hardwood-core panel, because it has more plies, fewer core gaps and better screw grip. For the base and shelf, BC or ACX softwood plywood is enough.
How tall should a plywood workbench be? Most fall between 34″ and 38″, and 36″ is a common default. Go lower for hand-planing and higher for detail work. Mock it up before you cut the legs.
Should I put a finish on a plywood workbench top? That’s a matter of preference. A light coat of oil or paste wax helps glue drips pop off and keeps stains from soaking in. A thick film finish makes the surface slippery and can transfer to your projects. On a replaceable hardboard skin, paste wax alone is usually enough. See how to finish plywood.
Can I use MDF instead of plywood for the top? Yes, if the shop stays dry. MDF is flat and heavy, which helps with stability, but it swells when wet and holds screws poorly in its edges. Plywood is the safer choice for a garage.
Bottom Line
Build the top from two laminated layers of 3/4″ plywood with a screwed-down hardboard skin trimmed to match. Glue every base joint and use the shelf plus a back brace to keep the bench from racking. Measure your actual top thickness before you cut the legs. Two sheets of 3/4″ plywood and one sheet of hardboard give you a bench that stays flat and lets you replace the work surface when it wears out.