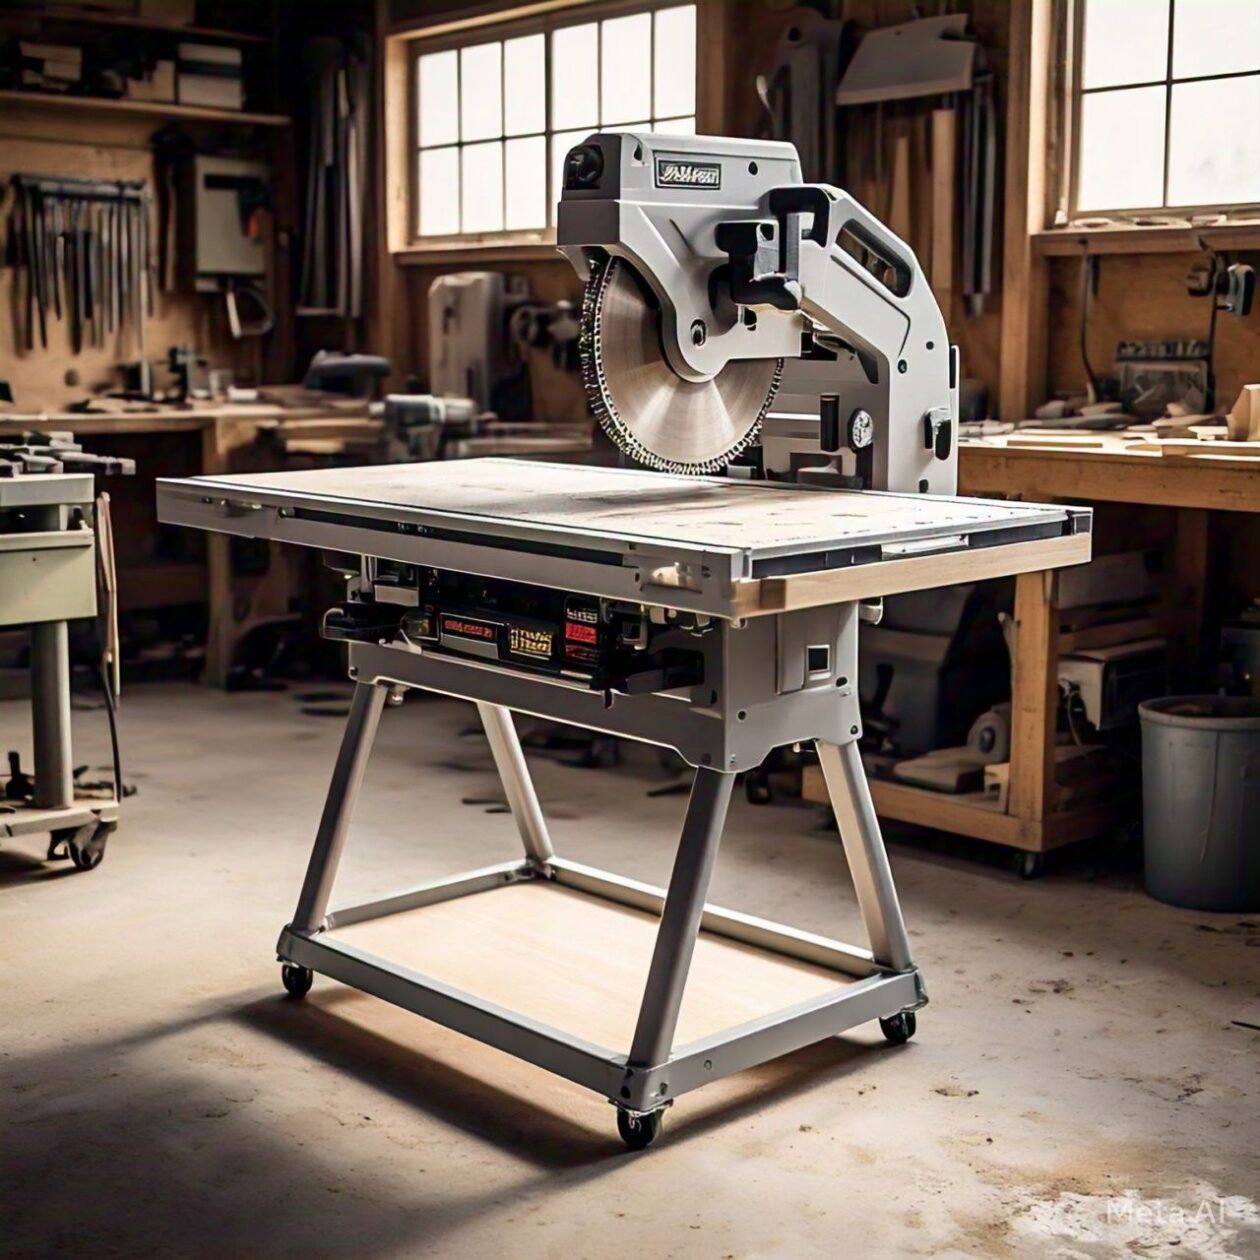
The table saw is probably the most popular and typical shop saw, showing up in more home workshops than any other benchtop or free-standing saw. Initially only available as a free-standing saw, tables saws have been shrinking and growing in size through the years. Professional cabinet saws have become more extensive, with an expansive table area for handling full sheets of plywood, while portable table saws have taken over much of the consumer marketplace.
Twenty-five years ago, portable table saws were basically a joke, tiny, poorly made units for those who couldn’t afford a “real” table saw. As building contractors have found more use for them on job sites, many power tool manufacturers have designed quality portable table saws that can provide power and accuracy.
Because they are more compact and less expensive than full-sized table saws, portable table saws have become popular for the home handyman or woodworker who needs a table saw but cannot afford the space or price of a larger unit.
There’s one problem with these portable table saws: to make them smaller, they also have a smaller table. That makes sense, as the idea is to make them lighter and more compact, but it makes it harder to cut large sheets of plywood and other engineered wood products quickly and accurately.
The solution to this problem is to extend the saw’s table to provide a larger support area. This is done by creating a DIY table saw stand with extensions at the same height as the table.
Keys to the DIY Table Saw Stand’s Design
You can design your DIY table saw stand in many ways, but you must keep a few key things in mind to make it usable.
The top of the stand must sit at the same height as the saw’s table for it to do you any good. It won’t act as an extension of the table saw’s table if it is higher or lower.
The easiest way to ensure the saw’s height is to make a shelf rather than a framework on which to sit.
The most valuable places to extend the table are to the left and behind. An extension to the right of the table is not as valuable as the fence is usually used to the right of the blade. If you are left-handed, you might want to consider reversing this.
The rear extension should be wider than the table saw’s table, especially to the left, to support the workpiece as it feeds out of the table.
You don’t want to extend the table to the front, as this will make it difficult to operate.
Since you need sufficient room to feed the workpiece and for it to feed out, it is best to make the table movable by putting locking casters under it.
The smoother you can make the top, the better, as there will be less friction with the workpiece.
If you have limited space for storing your table saw stand, consider making the extensions to the left and back of the table foldable so they can sit along the sides of the cabinet when not in use. You could also make them removable, but it will be easier to ensure they always return to the same height if you hinge them.
Making the DIY Table Saw Stand
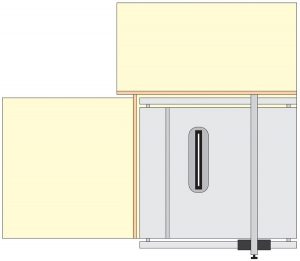
Start your table saw stand by planning out the top surface, which is the most crucial part. As you can see in the drawing below, the top consists of two sections, one to the left of the table and one behind the table. Some portable table saws come with support for the material, as they come off the back of the table, but by and large, these don’t work well. You’re better off making a tabletop here than using the integral support on the saw.
DIY table saw stand
The width and depth of your two extensions depend on what you want and need. I’d suggest making them as significant as you reasonably can while still being able to fit the stand in the area you have available. At a minimum, you want the width of the table and the extension to be four feet to support the entire width of a sheet of plywood. The back extension should be at least 18 inches, but if you have the room, it can be helpful to have it as much as four feet for ripping full sheets of plywood.
In the diagram above, the table saw stand has a small gap between the saw and the extensions. This is intentional to ensure a smooth transition of the material from one to the other. Chamfering the edges of the extensions can help with this transition.
The other important thing is that the side extension doesn’t come farther forward than the table’s edge. That’s so it doesn’t get in the way of the fence rail. If it sticks out past this point, there is a chance that the fence will not go all the way to the left.
Giving this freedom to the fence is also why there is no extension to the right of the table, as some portable table saws have a table that splits, allowing the right part to move farther to the right and increasing the distance between the fence and the blade. The saw I have can give me up to 24” in this way, allowing me to cut a full sheet of plywood right down the middle.
Before building, you have to decide how you will finish your stand. Most people use a sanded wood surface, perhaps sealed with varnish or paint. If you want a smooth surface, you might want to consider covering it with countertoplaminate, especially if you have some scrap laminate sitting around that you can use.
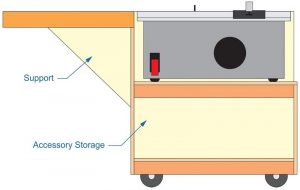
Table saw stand side-view
The rest of the stand consists of a basic cabinet with a shelf for the saw to sit on. The space under the saw can store accessories, such as the miter gauge and the blade guard, spare blades, feather boards, and push sticks.
Add hinges to the extensions and replace the support with a metal, folding one to make this a more compact design. These are available in the hardware department of the larger home improvement centers.
Even though the saw is just sitting on the shelf, I recommend using some thin strips of wood to form a lip and hold it there. That could help prevent you from pushing the saw off the stand on a problematic cut or when the blade jams.
One final detail is locking swivel casters under the unit, making it mobile. Ensure to buy locking ones to lock them in place when using them. The resistance of pushing a board through the saw and cutting it is enough to move the saw and stand if it is not locked. I’ve also found it helpful to put some extra weight, like a sandbag or pieces of metal, in the lower compartment. That helps prevent the saw and stand from being moved.
Related Posts:
Table Saw Push Stick by Admin July 8, 2023 DIY Power tools can be dangerous but easy to use. People get injured all the time doing seemingly effortless, normal work on their power tools; often…
Miter Saw Table by Admin June 29, 2023 Installing The miter saw table has become one of the most useful power tools in many workshops, replacing the radial arm saw, which has all but…