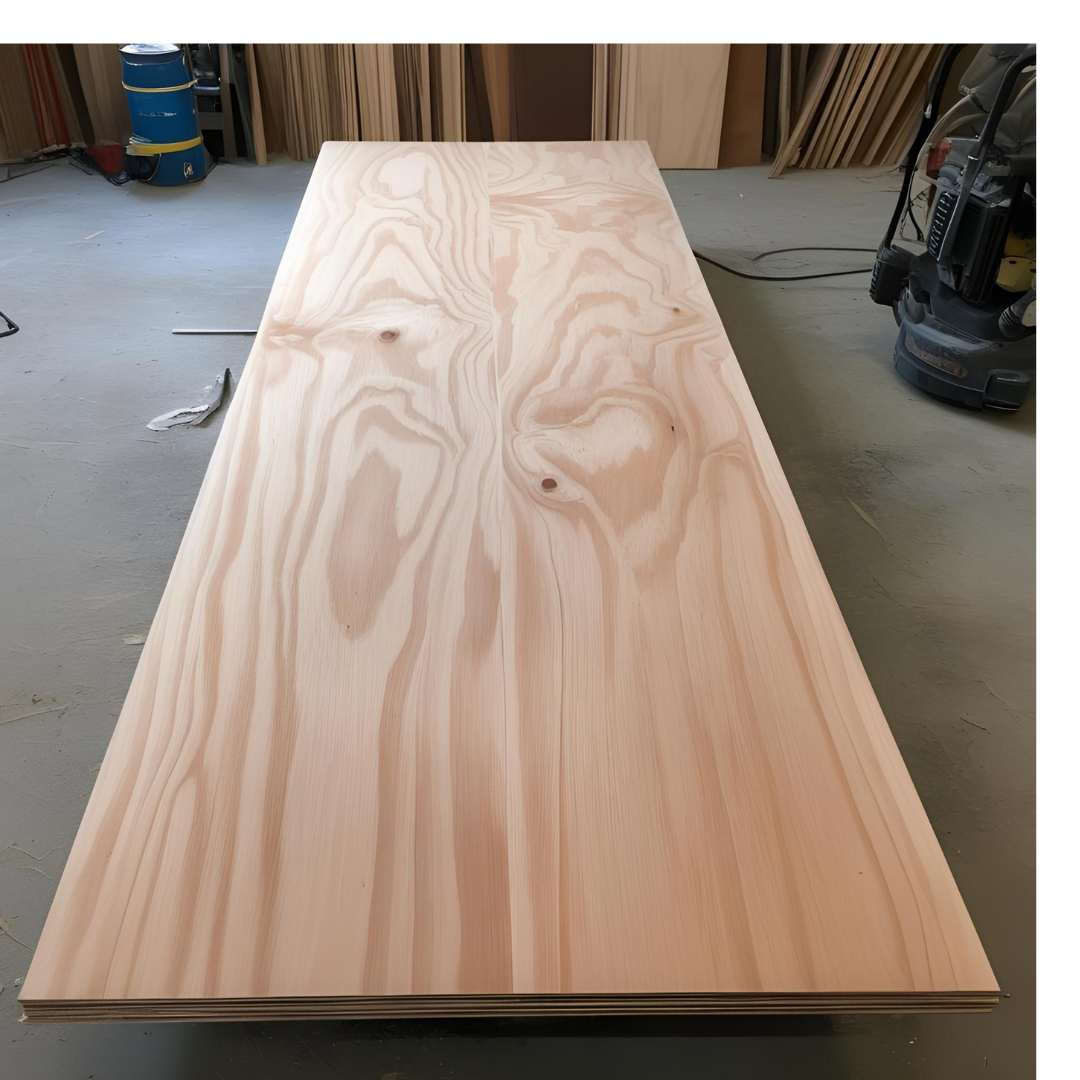
Anyone who has had plywood sitting around their garage or workshop for over a few days knows about the problems of warped plywood. It seems that just about any sheet of plywood is likely to bow or warp, even if stored the “right way.” Once bowed, it’s hard to work with and sometimes needs to be replaced, as it can’t be used for its original intent. However, it is possible to straighten warped plywood and use it as if nothing had happened.
Lumber core plywood is worse for this than veneer core, so if you do not use the plywood immediately, you’re better off avoiding lumber core plywood. It is also harder to flatten than the veneer core, with a greater chance of the plywood breaking during the flattening process.
Even though plywood will warp, it doesn’t do as badly as dimensional lumber, which is one of the reasons why plywood is so popular. However, as with all other wood products, plywood should be protected from moisture and especially water, as it will soak that water up. For this reason, plywood should never be stored outdoors or directly on the workshop floor.
Plywood that Doesn’t Warp
People ask for plywood that doesn’t warp all the time. There is no such thing. One of the characteristics of any plywood is that it doesn’t warp as badly as lumber boards. Even so, it can still warp, especially lumber-cored plywood.
However, some types of plywood don’t warp as readily as others. Marine plywood is specifically made to be void-free. It is also pressure treated. These two processes help to make it highly resistant to rot and warping. Likewise, many types of cabinet-grade plywood are void-free, especially those with more veneer layers. Pressure-treated exterior plywood is less likely to absorb moisture, helping keep it from warping.
Why does plywood warp?
Warping and cupping in plywood are caused by combining moisture and heat. If you were to measure the moisture content of the outer veneer on both sides, you’d find that the concave side has a considerably lower moisture content than the convex side. That difference in moisture is what is causing the bow or warp, regardless of how it happened. This can come about from plywood sitting in the sun or sitting somewhere where there is excessive moisture. The sun causes moisture to leave the wood, while the wood grain will naturally absorb excessive humidity.
Generally speaking, the way the board was laid allowed one side to be exposed to moisture or heat while the other was covered. In cases where both sides are covered equally, it is very rare for plywood to bow or warp.
In cases where the amount of bow or warp is slight, the plywood can still be used, especially if attached to a strong structure. The structure will hold the plywood straight, allowing the moisture content of the two sides to equalize and the sheet to flatten. Often, bowed plywood can be used for smaller pieces of a project, while the flattest sheets are used for large ones. Always start cutting with the biggest pieces needed so that you can pick them out of the best possible sheets.
Keeping Plywood from Warping
While moisture and heat cause plywood to warp, how we store it provides the opportunity. Most woodworkers have limited space in their shops to store materials. Therefore, they store plywood and other sheet goods on edge, usually leaning against a wall. This means that the weight of the plywood itself will work towards drawing the plywood into a warp.
The best way to store plywood, to prevent it from warping in the first place, is to lay it flat. Rather than laying it directly on the floor of your workshop, use pieces of lumber to create a platform, albeit a makeshift one, for the plywood to sit on. But don’t just support it at the two ends, as often happens in lumberyards and when shipping the plywood. The more support you can provide the plywood, the better. Four or five stringers, running across the width of the plywood, will provide good support.
If you don’t have the space to lay the plywood flat, you can still store it upright. To keep it from warping, build a rack supporting it as it leans against the wall. As long as the plywood even supports all across the sheet, its weight will not pull it into a warp. I built a metal rack for this, which has worked well to protect my plywood. The space under the triangle is used to store other materials.
If your ceiling height allows it, a similar rack, which allows you to stand the plywood on end, would be a space saver while still providing the support necessary to prevent your plywood from warping. Once again, the space under the triangle could be divided into vertical shelves for storing other materials.
Another more difficult option is to build a rack that hangs off the ceiling joists, which allows you to lay the plywood horizontally. While functional, you would need an assistant anytime you wanted to place plywood in the rack or remove it.
Seal the edges
Another option, which works for plywood and other wood products, is to seal the edges before storing it, specifically the end grain. All wood products, including plywood, absorb moisture 12 times faster through the end grain than they do through the side of the grain. Painting, shellacking, or varnishing the end grain to provide a seal will greatly reduce the ability of the wood to absorb water.
When sealing end grains, remember that capillary action will cause the wood to absorb a lot of sealants. Apply heavy coats until the wood reaches the point where you no longer see pits, where the sealant has soaked into the end grain.
Paint and Warping
It is common for painted plywood projects to warp, even after being built. Most often, this warping is caused by two culprits, which may be working together: lack of structural support and moisture.
Painting one side of the plywood seals that side from absorbing moisture. If the other side is not painted, it can still absorb moisture. As discussed earlier, the uneven moisture absorption will cause the plywood to warp. This problem is worse in laundry rooms and garages, which both tend to have high humidity. The simple solution is to paint the back side of the plywood panel.
Plywood is highly susceptible to warping when it is used for homemade cabinet doors without any door frame. Ideally, any such project should always use some frame on the doors. If you have existing warped plywood doors, the problem can often be solved by adding some battens to the back side of the doors. These could be disguised as shallow shelves, improving the storage space simultaneously. Make sure the hinges can handle that weight before adding these battens.
How to Straighten Warped Plywood?
Plywood can often be used, even though it is warped, especially if not bad. The projects most often made out of plywood combine the plywood with other wood structural elements. In some cases, two plywood parts are connected, at a right angle, allowing them to act as structural support for each other. In either of these cases, the structure may be sufficient to flatten the warping in the plywood, making it unnecessary.
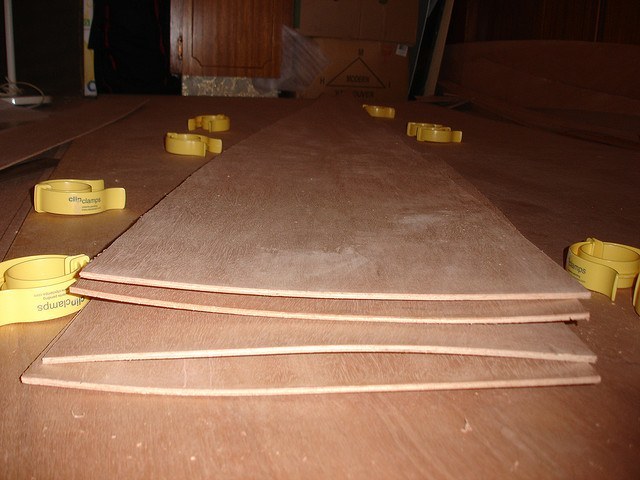
If there aren’t enough flat sheets for all the big pieces and the structure isn’t strong enough to straighten it, it will be necessary to straighten the plywood. Straightening the plywood requires balancing the moisture content of the two sides. Once that happens, the wood will be flat.
To do so, wet the concave side of the plywood with hot water applied from a spray bottle. If no spray bottle is available, you can use a sponge. Then place the sheet with that side down, either directly on a flat concrete driveway or shop floor or space above the floor by furring strips. The furring strips will allow air circulation, helping to prevent mildew and warping in the other direction. Weighing the sheets down with concrete blocks, filling five-gallon buckets, and other weights can also help. The sheet will flatten on its own if left in this condition.
If left this way in the sun, it will straighten surprisingly quickly and may even bow the other way if you are not careful. Keep an eye on the sheet of plywood as you remove the bow to ensure you don’t leave it sitting out too long.
How to straighten warped wood boards
Plywood isn’t the only wood that can become warped; boards do so regularly. As moisture is absorbed into the wood or leaves it, it often causes the boards to warp.
The easiest way to remove this warp, making the board straight again, is to use water and heat, the same things that caused the board to warp in the first place. To do this, you will need a flat surface that can withstand getting wet and heat. A flat workbench is ideal, but an ironing board can also be used.
Wrap the warped board in wet, but not dripping, towels, ensuring the board is covered. Then place it on the workbench or ironing board, ensuring it lays flat. Set this in the sun, allowing the sun’s heat to flatten it, or use a clothes iron, and set it to its highest setting. Either way, if needed, you must keep the board wet, adding more moisture with a spray bottle.
It is unnecessary, but you can help prevent the board from warping again once you’ve removed the warp. Do this by clamping the board to the workbench or ironing it while drying.
How to fix wavy wood paneling
Since wood paneling is thin plywood, with one side that has been finished, it is just as susceptible to warping as any other plywood. Because most paneling is extremely thin, this generally shows up as waviness in the paneled walls.
To eliminate the waviness, it is necessary first to remove the paneling from the walls. That usually means removing the baseboard and other trim as well. To remove the paneling, slip a stiff putty knife under the panel at the edge and pry it up. Once removed from the wall, lay the panel down and remove the nails. If they are not rusted or bent, they can be reused.
Now lay the panel flat on the floor to inspect it. Most of the time, you will discover that the waviness is not set permanently into the paneling. If so, the paneling can be reinstalled without flattening it. However, if the waviness remains in the panel, you’ll need to flatten it before reinstalling it, as mentioned in the section above.
In either case, sealing the back side of the paneling with paint or primer will help prevent it from absorbing additional moisture and becoming wavy again.
When reinstalling the paneling, nail one edge vertically. Then flatten the panel with your hands, ensuring that you don’t leave a buckle in the panel, stretch it to the next supporting stud and nail it there. Continue in this manner until the panel is fully attached to the wall. If it was necessary to remove the baseboard or other trim, reinstall it.
How to Fix Other Warped Wood Items
Plywood isn’t the only thing that can become warped, even after a project is finished. For your convenience, here are some ideas on how to fix other common warped wood items.
How to fix warped doors
Doors, not just cabinet doors, can also become warped, especially homemade doors made of plywood. Should yours become warped, take the door down and seal all the edges with paint, primer, or varnish. Shellac also works well and will dry quicker than any other materials. Once the sealant is dry, place the warped door on a flat surface, such as furring strips on your shop floor. Weigh down the door so the warp is removed and all the edges are in contact with the furring strips. Leave it there for 24 hours to dry.
How to fix a warped wood tabletop
Wood table tops, whether made of plywood or laminated wood boards, are also subject to warping. Much of this is due to the way the table is finished. Generally, only the top surface is stained and varnished, with the underside bare. This allows the bottom side to absorb moisture while the top cannot.
There are several methods of fixing this, all involving water and heat. A lot depends on how badly the tabletop is warped or cupped. For simpler cases, wet towels can be laid on the tabletop and then ironed with a hot, steamy iron (use the highest setting, with the steam on), leaving the iron to sit five to ten seconds in each spot before moving it.
For more serious cases of warping, you’ll need to remove the tabletop from the legs and sand off the varnish, giving you access to the bare wood. Set up a bed of 2”x 2” lumber strips, two inches longer than the width of the tabletop. These should be laid every eight to 12 inches apart.
Lay the table top on this bed and cover it with wet but not dripping towels. Add another 2”x 2” strip layer and clamp the tabletop between them using hand-screw clamps. Tighten the clamps as much as possible, flattening out the bow on the tabletop.
Allow this to set in the sun on a hot day, or place a heat lamp over the tabletop to heat the water in the towels and the tabletop. Check the tightness of the clamps periodically, tightening them more as needed. It will need to stay this way for three days to a week, depending on how badly the table top is bowed.
Once the table top is flattened, it can be reattached to the legs, and a new finish can be applied to match the original.
How to fix warped plywood shelves
Another common use for plywood, where it has a high tendency to warp, is for shelves. The problem, in this case, is the weight of the books, or other things, which are placed on the shelves. If the thickness of the plywood is not enough to support that weight, it will eventually cause the shelves to warp. This warp may only exist while the shelves are loaded, or it may set into the shelves so that it is there even when all the weight is removed.
The key to solving this problem is to reinforce the shelves in such a way as to have enough strength to support that amount of weight across the span between supports. Well-made commercial shelves do this by adding a lip hanging down from the front edge of the shelf. This lip functions essentially the same as an I-beam, making the shelf structurally thicker and better able to support the weight.
You can easily add such a lip to your shelves, whether homemade or dealing with one of the particle board bookshelves that are so common today. Simply rip a one-inch piece off a hardwood 1”x 4” board and attach it under the front edge of the shelf, with the 1” dimension mounted vertically. While attaching the two pieces, start from the center and work your way outwards so you don’t leave any gaps between the two pieces.
If you don’t have any hardwood available, you can accomplish the same thing using 1” steel angle iron or 1” square steel tubing. These would provide even more strength.
It is common to have problems with the pickets for wood fences warping, especially wood privacy fences. This usually happens because the wood was not fully dried before delivery to the lumber yard. The damp wood retains that moisture at the lumberyard because of being tightly packed together in bunks without allowing the water to evaporate. Once installed, it starts evaporating, causing the fence pickets to warp.
If you haven’t installed the fence yet or are getting ready to replace your pickets, set the wood in your garage, with the layers of pickets spaced to allow airflow between them. Allowing the wood a week to dry like this will save you a lot of problems later.
Warping most commonly happens at the tops of the boards, although it can happen in the middle and the bottom. How well the pickets are supported has much to do with preventing it. Many people only run two stringers between their posts, meaning the boards are supported only at the top and bottom. Adding a stringer halfway up gives you one more point of structural contact, reducing the chances of the board bowing in the middle.
This also allows you to move the top and bottom stringers closer to the ends of the pickets, where they can provide additional support, helping to eliminate the risk of warping and bowing.
If you already have your fence built and you are experiencing warping, wet the wood down and add a stringer, attaching the pickets to it. You may need to use screws to attach them. That’s not an elegant solution, but it will straighten them out.
Related Posts:
Dealing with Wet and Warped Plywood: What You Can Do by Admin March 21, 2025 Repairs Dealing with Wet and Warped Plywood: A Practical Guide We have prepared a reference guide for you—an easy checklist for your convenience. Wet_and_Warped_Plywood_Checklist_ThePlywoodDownload If you’ve…


")

")
