Pencils have almost become archaic, with most people doing the bulk of their writing on computers and tablets these days. Yet there is still a place for pencils in even our modern, technological world. If you do woodworking (and if you’re reading this website, I’m sure you do), then you probably use pencils for marking your cuts, making notations on your plans and a host of other things.
While pencils are fairly simple items, there’s really quite a bit of technology that goes into their making, especially the graphite core. Yes folks, even though we call it a “lead pencil” it doesn’t have anything to do with lead. The core of the pencil is made of finely ground graphite and clay, mixed together and baked to form a hard, small rod.
The grinding of the graphite and clay fine enough to be used for pencils is actually the most technologically demanding part of making a pencil. Fortunately for us, we don’t have to do that part. Instead, we can buy pencil leads under the name “drawing leads” from eBay, Amazon or a number of other online outlets. These “leads” are another archaic item, once used by draftsmen, making drawings of everything manufactured in any factory you can imagine. Now all that work is done on the computer.
Nevertheless, drawing leads are still widely available. They are 2 mm in diameter and usually about 130 mm long. You can even buy colored drawing leads, although they are harder to find.
The other thing we are going to need is wood; after all, pencils are made of wood, right? Depending on what you want and what you have available, you can make your pencils out of anything from scraps of fancy hardwoods to scarps of cabinet-grade plywood or applewood. They just need to be at least 130mm long (5 inches). The other dimensions don’t really matter, as we will be cutting the pencils down to size.
Although it is possible to make one pencil at a time, it is just about as easy to make several at the same time. If you are making a single pencil, you’ll need two pieces of wood that are at least ¼” thick and ½” wide. If you are making several at once, you’ll need two pieces that are ¼” thick by whatever width you have available. Just make sure they are roughly the same size.
In order to embed the pencil core, the graphite, in the wood, we need to make a channel for it to sit in. The easiest way to do this is to cut a shallow V-groove into the wood on a router table. Two matching grooves are needed, in the two pieces of wood, each of them about 1mm deep.
This is the one place where making several pencils at the same time could be tricky. To do several, we’ll want to cut several parallel V-grooves into the wood, ½” apart. The spacing is critical, as well as keeping them parallel, so that the various pencil leads can all go in their respective slots and the two pieces of wood can mate up properly.
With the V-grooves cut into the two pieces of wood, coat the mating surfaces generously with wood glue, smoothing it out and being sure to get it into the grooves as well. You need to apply the glue to both pieces, rather than just one, so as to ensure that the lead is glued to both pieces.
Lay the drawing leads into the grooves on the bottom piece of wood and then cover it with the other piece, ensuring that the leads line up with the grooves in that piece as well. The leads need to sit into both grooves evenly. If one lead is out of place, remove it and make the pencils out of the rest of the blocks, as that one piece being out of place is enough to cause your pencils to not glue up properly.
Finally, clamp the two pieces of wood together well, using enough clamps to ensure pressure throughout the length and width of the blocks. Remember, your wood blocks are thin, so you won’t get much spread of the clamping power. You can increase this spread by using blocks of scrap wood under the pads on the clamps.
Cutting the Pencils
Allow the glue to dry thoroughly before unclamping your block and taking out your pencils. Then, cut them to length, ensuring that the lead is visible at both ends.
Your pencils are still in one block, so you’ll need to cut them apart, being sure to cut evenly between the leads. A band saw with a fence is ideal for this, but if you don’t have one, you can do it on a table saw, preferably with a blade that has a 1/8” blade kerf.
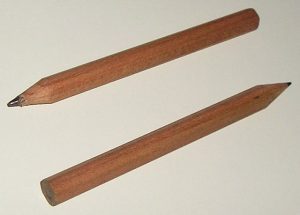
At this point you’ll have square pencils. That’s not very comfortable to use and won’t fit into a pencil sharpener very well. So we want to give them a hexagonal or octagonal cross-section. There are two ways of doing this, with a wood plane or with sandpaper.
Using a wood plane will give you an octagonal cross-section. To do this, clamp the wood plane upside-down in a vice, being sure to locate it in such a way that the vice’s jaws are putting pressure on a solid part of the casting, which will not bend or break. Carefully plane the four corners of the pencils, turning them into octagons. Use extreme caution during this operation, so as to not plane off the tips of your fingers in the process.
To sand the pencils into a hexagonal cross-section, you’ll need to make a sandingjig. Start by ripping a scrap of ¾” thick cabinet-grade plywood, with the blade set at 30 degrees. Then take one of the resulting pieces and glue the cut angle onto the flat top of the other piece. The resulting angle between the pieces will be 120 degrees. Glue some coarse sandpaper into this angle and use it to sand your pencils to shape.
You could use the pencils as is, once you’ve got them to shape. But if you’re going to go through all this trouble to make your own pencils, it only makes sense to make them look nice as well. One option to do this, which will work very well if you’ve used hardwood scraps for your pencils, is to dip them in urethane varnish and then hang them to dry. I’d recommend dipping one end, allowing it to dry and then dipping the other end.
You might also consider dipping your pencils in paint, to give them a colored coating, rather than a clear one. Or, if you want to make your pencils look like fancy artist’s pencils, go ahead and varnish them, then dip just the end of the pencil into a thick-bodied paint, to form a “cap” on the pencils.
Related Posts:
How to Make Barn Quilts by Admin June 3, 2025 DIY Walk through rural America and you’ll start noticing a charming trend on barns, sheds, and even garages—large, colorful quilt block patterns painted right onto the…
How to Make Cornhole Boards by Admin March 25, 2025 DIY I’ve built a few cornhole boards over the years — mostly for family barbecues and neighborhood game nights. It’s one of those backyard projects that’s…
How to Make a Bucket Toilet by Admin August 2, 2023 DIY Anyone who enjoys hunting or fishing has probably seen a bucket toilet sometimes. More and more campers are using them as well. Instead of buying…