Whether for cosplay, Comic con, a stage production, or just for fun, articulated wings give costumes extra panache. Here’s a quick how-to guide to crafting articulated wings with lightweight plywood. Note that this set of wings measures approximately 5 feet long, and extends to a full wingspan of about 10 feet. You can easily make them longer or shorter to suit your height, as well as your imagination! You can also add more sections to create bat wings or dragon wings.
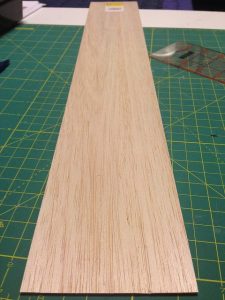
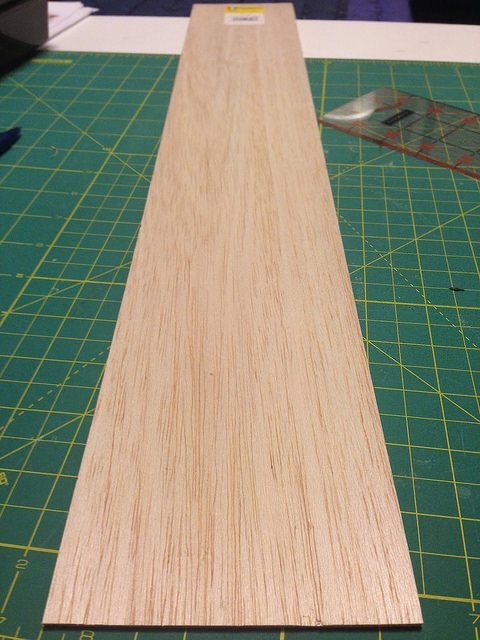
Balsawood plywood costs more than many other types of plywood, but it is strong, lightweight, and flexible. Poplar is a good alternative, but you’ll find that it weighs quite a bit more and you’ll need to use more force to move your wings when the time comes.
Finally, before you get started ensure that the smooth portions of your shoulder bolts are the right length to pass through the plywood pieces that you are using. You may need to choose a different size to accommodate different materials. This is important because the threaded portion of the shoulder bolt needs to be firmly attached with a corresponding nut, and a too-tight connection will prevent you from moving your wings.

Materials
- 1 body harness – An old backpack will work, or you can make one to suit your needs. For this easy articulated wings tutorial, we are using a backpack with comfortable padded straps. You can get a great custom fit by stitching more straps into place so that the wings do not shift while you are wearing them.
- Backplate – 1 piece of 1/4” plywood cut to about 7” wide x 12” long (poplar is a great choice for this piece)
- 20 ½” nuts and corresponding bolts to fasten the plywood panel to the backpack
- Wing base – 1 piece of 1/4” plywood cut to 4” x 9” (change dimensions to fit smaller or larger wearers)
- 2 ¾” nuts and corresponding bolts to connect the wing base to the backplate
- 2 3/8” bolts and corresponding nuts to connect the lower wing base with the lower wing extensions
- 2 pieces of very thin plywood (balsawood is ideal) cut to 2” x 24”
- 2 1/2” shoulder bolts and corresponding nuts to connect lower wing extensions to upper wing extensions
- 6 small eye bolts with corresponding nuts
- 2 pieces of very thin plywood (balsawood is ideal) cut to 2” x 36”
- 2 pieces of 1/16” steel braided cable, at least 72 inches long (use more or less if wings are longer / shorter)
- Lightweight decorative materials, glue, wire, fabric, feathers, etc. to finish up creative details
Tools
- Sharp scissors
- Drill with bits in sizes that correspond with the nuts/bolts you are using
- Xacto knife
Instructions:
1. Carefully cut the pouch off the backpack so only the straps and back section remains. You will be using this back section to attach the basic framework for your articulated wings.
2. Position the 7” x 12” plywood rectangle onto the backpack’s outside (the side opposite from the side that contacts your back). This rectangle should be in a vertical position with the shorter sides at the top and bottom. Drill a hole through one corner, all the way through the backpack.
3. Insert a bolt through the fabric side, and fasten it with a bolt on the plywood side.
4. Straighten the plywood rectangle and repeat step 3 on the opposite corner.
5. Repeat step 3 on the two bottom corners, and then place the remainder of the nuts and bolts into position at regular intervals.
Note – this might seem like overkill, but using plenty of fasteners ensures that your back harness is strong and stable. This is extra-important if you plan to rig an electric motor to your articulated wings at some point.
6. Position the 4” x 9” wing base toward the bottom of the back plate. Ensure that each side has a one-inch section extending from the back plate.
7. Pre-drill through the wing base, back plate, and backpack. Insert the ¾” nuts through the fabric side and attach the corresponding bolts on the outside of the wing base.
8. Position one end of a 4” x 24” piece of balsawood plywood (lower wing extension) over one end of the wing base. Pre-drill for a 3/8” shoulder bolt.
9. Repeat step 8 on the other side.
10. Attach the lower wing extensions to the wing base with the 3/8” bolts. Aim for a 45-degree angle. Note that this section does not move. You should be able to create an easy, gliding motion, but it shouldn’t seem loose. If the fit is loose, obtain washers to tighten the fit.
12. Leaving a 3-inch section free at the top, position one end of a 4” x 36” piece of balsawood plywood (upper wing extension) on the free end of the lower wing extension. Pre-drill for a 1/2” shoulder bolt.
Note – the 3-inch section is going to serve as the attachment point for the eye that lets you control wing motion. If you like, you can make this longer to make movement a bit easier; don’t make it shorter, since this will make it harder for you to move your wings.
13. Repeat step 12 on the other side.
14. Attach the upper wing extensions to the lower wing extensions with the 1/2” shoulder bolts.
15. Attach one eye bolt to the center of the lower wing extension, and a second eye bolt to the point where the lower wing extension meets the wing base. Repeat the process on the other side. Pre-drill for these if necessary.
16. Attach the remaining two eye bolts to the lower corners of the plywood back plates.
17. On the outside corner of each upper wing extension, use an Xacto knife to cut a 1/2” deep slot at a 45-degree angle. This should be just wide enough to accommodate your 1/16” braided wire cable. Drill a hole through the wing extension, approximately 1/2″ away from the end of your cut.
18. With pliers, thread one end of the wire cable through the hole in one of the upper wing extensions. Bring the cable up and through the slot, and fasten it tightly near the hole.
19. Thread the free end of the cable down through the eye bolts in the lower wing extension, across the wing base, and down through the eye bolt in the opposite corner of the backplate.
20. Repeat step 19 for the opposite wing. The cables should form an “X” shape where they cross one another on the bottom of the backplate. Your right hand will control your left wing, and your left hand will control your right wing.
21. Check the motion and ensure that the cables are not snagging on anything. You might need to add extra eye bolts or trim excess fabric from the bottom edge of the backpack.
22. Once you are comfortable with the way the wings operate, create loops in the cables at a distance that’s comfortable for you to reach. You may want to add some extra straps to your costume to support and hide the cables while keeping the handles within reach, and you may want to pad the handles with fabric, tape, or another soft material that complements your costume.
How much time does it take to make these articulated wings?
You can make this framework within an hour or so. The total time for your project depends on how complicated the decorative elements are.
How much does it cost to complete this project?
Depending on your location and where you buy the materials, you can expect to pay somewhere between $20 and $40 for all the materials listed. Specialty fabrics and trims can be costly so keep this in mind when determining your overall budget!
Additional Notes for a Successful Articulated Wings Costume Project
It’s a good idea to draw up a design for your completed project before you begin, so you know what craft materials to shop for! This basic tutorial is for the framework only, leaving the fun part completely up to your imagination. Here are a few more tips for ensuring that your articulated wings look great and work the way you want them to.
Ensure that you leave yourself a small access portal for each of the joints/shoulder bolts sections. These moving parts need to be inspected before and after each use since the nuts can come loose. It’s a good idea to keep a few extra shoulder bolts on hand in case you lose one!
If you want the lower wing extensions to move, you can use 2 3/8” shoulder bolts and corresponding nuts to connect the lower wing base with the lower wing extensions. You will need to modify the rigging to create the desired range of motion, and you may need to add extra support pieces depending on the wing design you create.
You might find it helpful to take a look at images of bird wing anatomy; these can help you create pieces that provide different types of motion for a one-of-a-kind costume design.
Design any additional moving parts carefully. Note that angled wires (45 degrees or so) are far easier to move than wires positioned at 90 degree angles. If you’re new to this type of project, consider starting with the basic design outlined here and then make small changes one at a time to see what happens.
Finally, it’s important to note that “lightweight” is the name of the game with this articulated wings costume design. If you opt for heavier ornamentation – a pair of leather dragon wings, perhaps – then you may want to go for a heavier plywood type that’s capable of supporting your wing membranes. The weight may be significant if you go for something like this – but there’s no doubt that you’ll look quite impressive!


