Laminate Floors
Laminate flooring has surged in popularity during the last two decades as an option for the home DIY type for a variety of reasons. Laminate flooring is tough, durable, reasonably straightforward to install, and visually appealing. However, laminate flooring still pales (aesthetically) as compared with real hardwood flooring and often adds value to the price of the house.
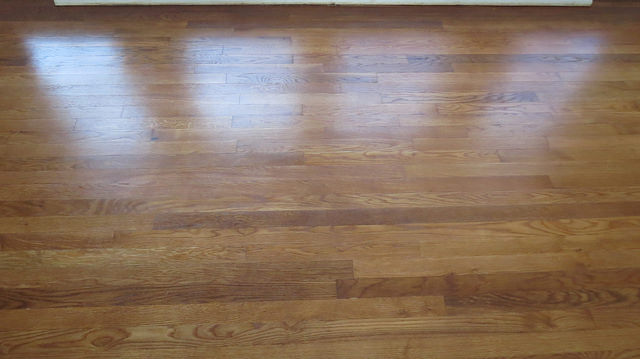
Many older homes in the USA have some type of hardwood floor (oak, maple, hard pine, chestnut) already installed and homeowners often discover them under layers of carpeting or linoleum. Unfortunately, once a homeowner has discovered the hidden treasure of a hardwood floor, they also likely discover years of neglect, spills, pet stains, mold and scratches, which require that the floor itself needs to be refinished. The time, money and effort spent on this DIY project are well worth it.
Sanding
For the home DIY-er who’s considering refinishing their hardwood floors, there are several things to consider. If the floors are in serious disrepair (deep grooves, discoloration in certain areas due to water/mold/pet urine), or if you want to change the color of the wood completely, the floors should probably be stripped using a power sander. When facing this type of restoration, it might be worth the money to hire a professional to refinish the floors.
The average rate for a professional to refinish a floor in this condition is between $3–4/sq. ft.1 The primary danger for the home DIY-er using a power sander is uneven sanding; this leaves grooves, swirled scratch patterns, burn marks, dips and ridges.
For the undaunted homeowner who’s comfortable using a power sander, these can be rented on a daily basis from hardware stores and home centers such as Ace Hardware, Home Depot, Lowe’s and Menard’s. Daily rates vary across the country, but generally run around $50/day (it’s wise to budget for at least two days’ use). You’ll need to purchase sanding discs for the rented sander as well as a number of other items such as belt sander, brushes, finishes, rags, etc. Fortunately, many of these other items are already in the toolbox of the average DIY-er.
Applying polyurethane
The most important aspect of refinishing hardwood floors is surface preparation; especially ensuring the surface is clean and free of debris. Surfaces that contain dust, hair, residual sanding particles or other debris tend to collect the applied finish and make the dried surface uneven which will be felt in the form of bumps.
This requires an additional sanding step between coats that adds time to the restoration. Once the surface has been sanded, normally to a grit of 180-220, and cleaned, it’s ready for the first coat of finish. If the color of the wood needs to be changed, the first coat is the new stain. If the color hasn’t been decided upon, trial applications of several different stain colors should precede finishing the entire floor. Apply test swatches of different stains on the floor in a variety of locations and observe for a day or two to see the impact of lighting at different times of the day.
Once the stain color has been determined, apply the stain and let dry (remember to sand the wood where other finishes were applied). Once the stain dries, or if the color of the wood was fine to begin with, then the next step is to apply the first coat of polyurethane.
There are two types of polyurethane available at most home centers, water and oil based (just like paints). Water based polyurethanes offer the advantages of faster drying times and easier cleanup (soap and water), but come with a bit of a markup in price. A gallon of water-based polyurethane runs for about $45 a gallon while oil-based polyurethane costs around $25-30 per gallon.

Once the first coat has dried (normally 12-24 hours), it can be scuff sanded. If the surface was well-prepped prior to the first coat, scuff sanding between coats won’t take much effort. Using 220-320 grit sandpaper to scuff-sand between coats creates a smooth surface for subsequent applications.
This step is generally necessary when using water-based polyurethane, as the water tends to raise the grain of the wood (creating a ‘fuzz’ on the surface).
Subsequent applications won’t see as much grain raising. Once the first coat has been scuff sanded and the surface cleaned, a second coat should be applied. In this step, thinning the polyurethane slightly by adding water or paint thinner depending on the type of polyurethane used helps create a more even coat and it goes faster than the first coat.
After 24 hours, a third coat (or more, if desired) can be applied following the steps for the second. Once the final coat has dried (at least 24 hours), a final light sanding to remove any imperfections followed by a light waxing will produce a beautiful floor that will last for years.
Follow the manufacturer’s instructions for when furniture and light foot traffic can resume on this floor after the final sanding/waxing. This is normally only 24 hours after application, though can extend to 72 hours for heavy traffic.


