Ceramic tile is a great floor covering. It’s tough, inexpensive, easy to clean, durable and attractive. Even so, it can eventually get to the point where it has enough chips in it, or doesn’t match your décor, leaving you with no option but to replace it. When that time comes, you need to know the right way to take out the old tile, so that it will make putting in the new tile easier.
Please note that we are talking about ceramic here. As it breaks, it can cause a number of hazards for you. So the use of proper personal safety equipment is a must. At a minimum, you’ll need:
⦁ Dust mask to cover your nose and mouth
⦁ Goggles or safety glasses
⦁ Good work gloves
⦁ Knee pads
While the knee pads could be considered optional, I seriously doubt you’re going to want to be kneeling on broken pieces of ceramic and grout for long without them. Gloves might be considered optional by some, but the glazing on tile is essentially glass. As such, it will have extremely sharp edges when it breaks, which can cut your hands.
You will also need some means of hauling off the scrap tile, as you remove it. Ceramic tile is fairly heavy, so if you have a wheelbarrow, that’s best. If not, a sturdy box or plastic bucket can be used to haul out broken pieces of tile and grout.
Removing Ceramic Tile from a Floor
Most of the time, you’ll be removing ceramic tile from a cement floor, rather than a plywood one. Ceramic requires a very stable substrate, that doesn’t flex. In order to mount it to a plywood subfloor, it is usually necessary to use two layers of ¾” construction grade (CD grade) plywood, to gain enough stiffness so that the tile doesn’t pop off.
Unless you already have a broken or missing tile, you’re going to have to break through the first tile to start. If there is an exposed edge, it is actually easier to start there. If not, try breaking the tile near a corner.
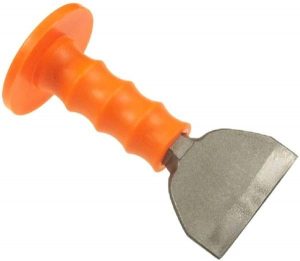
The tile is broken with a brick chisel. You’ll want a chisel that’s at least two inches wide. Some manufacturers make these chisels with a molded rubber handle and hand guard. This provides a better grip, while protecting your hand from inadvertent strikes from the hammer. If you are buying a chisel for this project, it is worth spending the few extra dollars for a chisel with a molded rubber grip/protector.
Any hammer will work for us with the brick chisel. For the first tile, you might want to use a three pound hand sledge, for the extra impact it can give. But for prolonged work, you’ll be better off working with a normal 16 oz. claw hammer. That first tile is going to be the hardest to remove, simply because you have to break it up to remove it. Once it is out, you can change your methodology and instead of using the chisel to come down on top of the tile, breaking it. You can lay the chisel down at the floor line, near the center of the tile, and strike it sideways into the bottom of the tile, breaking it free from the mastic. In this way, you will probably be able to remove a fair number of the tiles, without breaking them.
A Faster Way to Go
As an alternative to using manual force to remove the tile, you could use a rotary hammer, with a cement chisel in it. However, it is not a good idea to use the rotary hammer to remove the first tile, as you have to come straight down on the tile. There’s too much of a chance of damaging the subfloor with the rotary hammer and chisel in this case. Once that first tile is removed, the chisel on the rotary hammer can be used in the same way as the handheld chisel.
You must use extreme caution when working in this manner, so as to not chip the subfloor under the tile. Any chips that are made in the subfloor will need to be filled, smooth and level with the floor, before more tile can be installed.
Removing the Mastic
Generally speaking, the mastic (adhesive) will not come up with the tile. Rather, the tile will separate from the mastic, leaving it on the concrete floor. It must be removed and the floor made smooth, before new tile can be installed.
This can be done with a manual floor scraper, but it is much easier to do it with a power floor scraper, which you can rent from any major tool rental. A power floor scraper is much like a rotary hammer, with the exception that it doesn’t use a chisel, but rather a blade which looks much like a thick drywall knife. The power scraper is held vertically on the floor when in use, allowing the weight of the tool and the impact driving action to chip away at the mastic.
Removing Ceramic Tile from a Plywood Floor
Ceramic tile is removed from plywood floors in much the same way that it is removed from concrete floors. The main difference is that you have to take considerably more care in not damaging the plywood, than you would with the concrete. Do not try to cut between the mastic and the plywood, as you will most likely end up cutting into the plywood and removing the top veneer layer.
When removing the mastic with a power floor scraper, be sure to move the scraper around a lot, so as to not dig in to any one area. If necessary, use the scraper at an angle, being careful not to dig into the plywood with it.
Adding a New Underlayment Layer
Before installing new tile over plywood, the floor must be made smooth again. To start, fill any dents or gouges in the plywood with wood filler. An epoxy wood filler is best, as it is tougher than other wood fillers. Your finished surface doesn’t have to be perfect, but avoid leaving either dips or high spots.
Once the floor is clean and leveled, a layer of luaun underlayment should be glued and nailed to the floor. Use a standard construction adhesive to stick it to the floor, with enough nails to press it down into the adhesive and clamp it for drying. You want to end up with a perfectly level floor, so be careful to not leave any high spots or bubbles. Be especially careful along the edges, to ensure that adjoining pieces are level with each other.
Allow the structural adhesive ample time to dry, before installing the new tile.
Building a Dance Floor That Feels Right by Admin May 31, 2025 DIY If there's one thing I've picked up from years of helping my daughter chase her ballet dreams—and reliving a few moves from my dancing past—it's…


")


")

