We all consider wood a stiff material, but it’s not. All you have to do is take a thin branch from a tree or even a 1”x 4” and try to bend it to see how flexible wood is. Of course, the thickness of the wood and the type of wood affect just how adaptable the wood is, but it is all flexible to some extent or other.
The softwoods used for home construction are some of the more flexible woods around, as they aren’t as dense as many hardwoods are. This is advantageous, as it makes floors more comfortable to walk on, absorbing shock, so our knees don’t have to. It’s even more beneficial for physical activities like dance or gymnastics. But if a floor is too spongy, it loses its benefit and becomes more of a liability. When that happens, the floor wasn’t built adequately to prevent that sponginess. The floor will need some repairs to restore it before things get out of control.
What’s the best way to stiffen a plywood subfloor? What are some of the best configurations to use to accomplish that goal? Here, we discuss a few methods for stiffening a wood floor, whether an older one built of planks before plywood came into use or an existing plywood subfloor.
Understanding Floor Construction and Dynamics
The typical home’s structure has two elements unless your floor is a concrete slab. Those two elements are the floor joists and the subflooring. In a two-story house, the floor joists for the second floor are also the ceiling joists for the first floor.
Floor Joists
Floor joists in older homes are made of dimensional lumber: 2”x 6”s, 2”x 8”s, 2”x 10”s, and 2”x 12”s. The size of the joist is dependent on the span between support walls. The size of the wood is specified by building code; however, some contractors try to go with a smaller size when it’s right on the edge of what’s permissible or lower-grade lumber, making for a weaker floor structure.
Being solid lumber, floor joists are subject to moisture damage, specifically warping and twisting. The subflooring helps prevent this, providing lateral stability to the tops of the joists. However, that stability does not reach down through the height of the joist.
Newer homes often use engineered wood joists, which consist of a 2”x 2” piece of lumber at the top and bottom and a web of plywood or OSB between them. While less costly than dimensional lumber, the significant advantage of these engineered wood joists is that they are more stable and less prone to warping and twisting.
Since the strength in any joist or beam comes from the material that is the farthest from the centerline, it is actually the very top and bottom of the floor joist doing all the work. Having all that extra material in the center of a joist made of dimensional lumber doesn’t provide any benefit over the lighter engineered wood joists, which make more efficient use of material.
Subflooring
Subflooring fulfills two concurrent purposes in the floor’s structure. The first and most obvious is to provide a surface to support the finish flooring, which is strong enough not to flex excessively and will offer a smooth mounting surface for the finish flooring. The second is the aforementioned lateral support for the floor joists, helping to prevent them from warping and twisting.
The subfloor in older homes is made of ¾” thick planks, while that in newer homes is either ¾” plywood or OSB. Both provide similar structural strength, with each having its advantages. Plywood has been in use longer but has largely been replaced by OSB due to the latter’s lower cost.
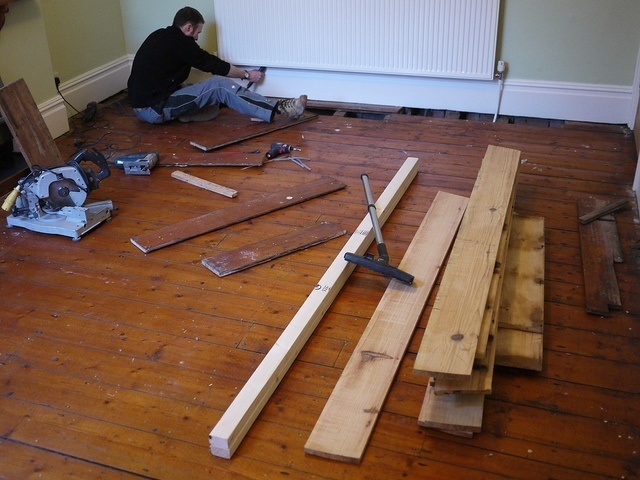
Three Basic Configurations to Stiffen a Floor
Did you know that whenever you put a load on your floor, even if you’re walking across it, at least two components will flex by bending or deflecting? One of those things is the wood between the joists (the subfloor), and the other is the joists themselves. Both contribute to the bounce or sense of movement you are experiencing, creating annoying squeaks that will only worsen over time.
To fix the problem, you have to address both of the bending areas. This doesn’t necessarily mean that you have to do two separate fixes; just that you need to be sure that you add support that will reinforce both parts of the problem area. Use one or more of the following configurations to add new life to your floor.
Structurally, the floor structure is always supported by something. This can be the basement’s perimeter wall, beams, columns, or support walls. In most homes with a basement, you can find that the floor joists are sitting on the perimeter walls and on a beam that runs centered through the length of the house. This beam is usually supported by one metal column.
By measuring their length, you can quickly check whether your floor joists are sufficient for the task. The chart below will tell you the maximum span each type of floor joist can make based on the joist’s dimensions and the wood quality. If your floor joists are near the end of this range, you might want to consider adding a support wall to add additional support for the joists.
Nominal Joist Size
Joist Spacing on Centers
Lumber Grade: Select Structural
Lumber Grade: No. 1
Lumber Grade: No. 2
2”x 6”
16
11’ 4”
10’ 11”
10’ 9”
20
9’ 11”
9’ 7”
9’ 1”
2”x 8”
16
15’ 0”
14’ 5”
14’ 1”
24
13’ 1”
12’ 4”
11’ 6”
2”x 10”
16
19’ 1”
18’ 5”
17’ 2”
24
16’ 8”
15’ 0”
14’ 1”
2”x 12”
16
23’ 3”
21’ 4”
19’ 11”
24
20’ 3”
17’ 5”
16’ 3”
Any wall can be a support wall. That designation isn’t so much a matter of how the wall is built as it is of its purpose. The support wall doesn’t have to be in the center of the basement or even the floor joist’s span. It can be a few feet from the foundation wall, adding closet space. Further from the foundation, this supporting wall can be the beginning of a new bathroom, utility room, or other useful space in your basement.
To make and add a support wall, you’ll want to build it in place rather than flatten it on the basement floor and then lift it into place. The difference is that if you make it on the floor and tilt it into place, you must build the wall a touch short. This means that it doesn’t support the joists once it is in place. By building it in place, you can make the wall fit tight, providing support.
Please note that support walls in a basement are customarily built over a footer, which provides extra strength to support the weight of the floor above and anything on it. Your support wall cannot be built on top of such a footer. However, it will still be able to provide support to your floor joists. Since it is a supplementary support wall, it won’t have as much weight as the original support wall or beam in the middle of the basement.
To build a wall in this manner:
Start by laying out where you want your wall on the floor and the bottom sides of the floor joists. Double-check your layout to ensure that the finished wall will end up plumb, with the top plate directly over the floor plate.
Nail the top plate to the bottom of the floor joists using 16D common nails. A pneumatic nailer is highly recommended because you will be nailing overhead.
Attach the floor plate to the basement floor with powder-actuated or concrete fasteners. If you install a wood baseboard, use a double floor plate.
Cut your studs to fit snugly between the floor and ceiling plates and toenail them to the floor and ceiling plates, using a level to ensure they are plumb. Due to the difficulty in toe nailing, without moving the stud, you are best off using a pneumatic framing nailer for this task.
The wall will not have structural integrity unless you cover it with drywall, as a square or rectangle is not a structurally stable shape without something that spans it and keeps the parallel elements from shifting regarding one another. However, finishing and painting the wall is unnecessary if you are not using this as additional living space.
Add Bridging Between the Joists
Sturdy metal bridging, also known as X-bracing, enables floor joists to share weight so force from above is transferred from one joist to its neighbors. This solution is suitable in cases where you have access to the floor joists from below. Note that this is an easy, inexpensive fix, but remember that it works best when used in concert with another of the methods discussed here. If your upstairs floors are finished and you don’t want to take them up, consider adding plywood to the undersides of your joists after completing the following steps.
Check your joists to see if they are centered 16 or 24 inches apart so you can purchase the proper metal bridging size.
Next, you’ll want to check the number of joist spans (areas between joists). You will need two sets of metal bridging for each span if the center of the spans already has to bridge. If the centers of the spans are not already bridged, you’ll need three sets of metal bridging per joist span. Double-check your math to be sure you get the count correct, so you don’t have to go to the hardware store twice.
Both metal bridging sizes are hung with 1-3/8 inch joist hanger nails, each requiring four of those nails (two at each end). Be sure you purchase enough nails for the job.
Start by checking the original bridging. Add nails and screws to secure any loose spots.
Divide the length of the floor joists into thirds. Add a new row of bridging along the span’s one-third and two-thirds points. For example, if your joists span 9 feet, place the bridging three and six feet from the foundation wall.
Alternatives to Metal Bridging
While metal bridging is easy to add bridging to the existing rafters, it is not necessarily the cheapest alternative. You can add wood bridging as well. If you look at any homes built over the last 50 years or more, you will find that this is a much more common means for home builders to add bridging than to use expensive metal X-bracing.
The first way of doing this is to use dimensional lumber the same size as the floor joists. Pieces of this lumber can be cut to fit snugly between the joists, perpendicular to the direction of the joists. Nail it into the gap by nailing through the existing joists into the bridge pieces with 16d common nails. These bridge pieces will have to be staggered, from one joist space to the next, to provide access for nailing both ends of all pieces.
The second way involves cutting pieces of 2”x 4” lumber at an angle so that they can be inserted between the existing joists, forming an “X” with two pieces of wood. In this case, 6d or 8d nails are driven through the mitered portion of the bridge piece into the joists. Unlike the first way, the bridges do not need to be staggered to allow nailing.
This configuration also requires access to the undersides of your floor joists. It is a fantastic way to stiffen a plywood subfloor, and it also adds life to older subfloors made of individual boards. If you’re working in an unfinished basement that you plan to finish at some point, be sure to consider electrical wires and heat ducts. You may want to prepare for overhead light fixtures, fans, etc., to be installed later. Finally, note that this job involves some heavy lifting. You’ll need a strong helper.
Measure the area you plan to reinforce so that you know how much plywood to purchase. Each 8-foot sheet of plywood will be centered on the span, exposing the joists’ ends. You can add more sheets of plywood to the ends of the joists if you want to – it will cost a bit more but will give your space a nice, finished look.
You’ll get the most from your investment by creating a rock-solid bond between the undersides of the joists and the new plywood you are installing. To make this bond, you’re going to need to apply a construction adhesive recommended for subfloors, along with plenty of drywall screws at intervals no more significant than four inches. To determine how many drywall screws to purchase, measure the length of one of the joists and divide it by four inches. Use 8 feet if you plan to install a single row of plywood sheets across the center of the span. The resulting number will tell you how many screws you’ll need for each joist (24 if covering only the center span). Double the number of screws for joists where two edges of plywood will meet (48 if covering only the center span). Add the numbers for each joist together to come up with your total.
Use 60- to 80-grit sandpaper to rough up the underside of each joist.
Apply adhesive just before putting each piece of plywood into place.
Screw the plywood to the joists at intervals of four inches or less, ensuring it runs parallel to them, not across them.
Add Plywood Underlayment to an Existing Subfloor
If you don’t have access to the underside of your floor joists, you can quickly stiffen a plank or plywood subfloor by installing an additional underlayment. Yes, carpeting, linoleum, or tile can be labor-intensive, but the tradeoff is a much stronger floor that ultimately adds longevity and value to your home. Choose quality plywood for the job, noting that even ¼” birch will add plenty of stiffness to an existing floor without raising the level too much. If floor height isn’t an issue, 1/2 to 5/8 inch, plywood will create an even sturdier bond.
Clear the room of furnishings.
Remove the flooring using the appropriate tools for the job.
Inspect the subfloor. If it’s an old board subfloor or the existing plywood is damaged, it probably is not doing much for you. Consider removing the old subfloor before moving forward or bit by bit as you install a new tongue and groove plywood subfloor and an additional plywood underlayment.
If the existing plywood subfloor isn’t screwed to the joists but only nailed, you can add stiffness by screwing it down with deck screws. Note the position of the joists and use a straight edge to draw a line from one end to the other so you can work more quickly.
Rough up the subfloor with 60- to 80-grit sandpaper.
Apply construction adhesive between all the joints of the existing subfloor. This will help eliminate existing squeaks.
Apply construction adhesive to the subfloor as you apply each piece of new plywood. Lay the new pieces perpendicular to the old ones. Fasten them with deck screws at regular intervals, not just along the joists but between the joists. Remember, you want to create a rock-solid bond between your layers of subflooring.
A Final Note
While any of the above methods will work to stiffen your subfloor, combining the methods will provide the most possible strength to your floor. You might also want to consider using different methods in different parts of your home, selecting each for the needs of that particular room. One such example would be using a support wall in one area where the support wall allows you to add a closet in the basement but using X-bracing in another area of the house where adding a support wall would break up a large room that you use for a recreational room.
How to Prepare Subfloor for Tile (Step-by-Step DIY Guide) by Admin February 19, 2026 DIY To prepare a subfloor for tile installation, inspect the surface for damage, secure loose panels, test for moisture, level uneven areas, install cement board or…

")

")

")