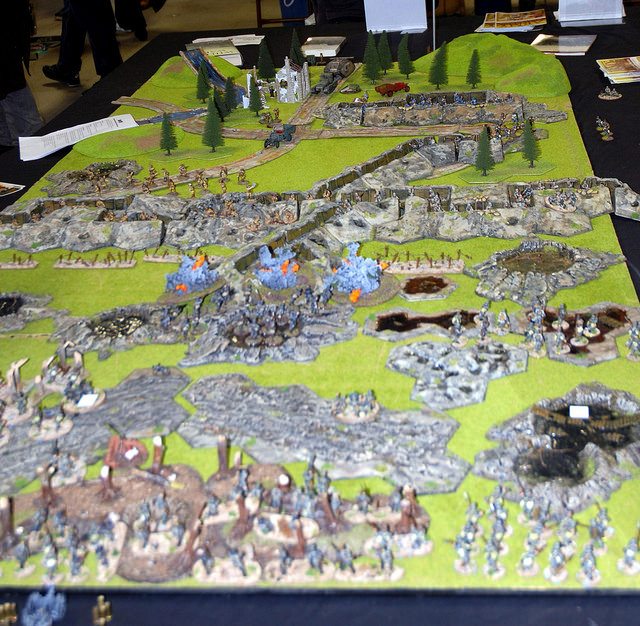
Wargamers are a unique breed of people. I know, I used to be one, many years ago. Most wargamers I have known will go to great extents to make their games more real, spending time and money buying characters, building models and creating terrain to play on.
This is not a new phenomenon, for I my involvement was over 40 years ago. Yet I know gamers today who do the same things I did back then, spending their time and money to make their gaming experience more real.
While it is possible to do this on any table, say the kitchen table, you can’t do a permanent setup on a table that the family uses for other things. That’s where a wargaming table comes in. It provides a surface that can be used just for gaming, which can have terrain built onto it permanently, without destroying your home’s furniture.
Many such wargaming tables are actually just tabletops, intended to be placed on top of a dining room table or folding table for use. This saves space in the home, while still providing a surface for gaming on. These table sizes can vary, but the standard for a Warhammer 40k Table is 4 foot by 6 foot.

Construction of the Wargame Tabletop
Start by determining what material you want to use for the tabletop. I’d recommend either sanded plywood or medium-density fiberboard (MDF). The plywood will be lighter than the MDF will, but it will also be more expensive. If you can find 3/8” thick material, that will make a lighter wargame table, but if you can’t than 1/2” thick will do.
If you’re buying plywood, check the pieces in the stack, looking for one that doesn’t have any knotholes or cracks on the sanded side. This won’t be an issue with the MDF, as the manner that it is made provides a surface that is finished smooth.
When you buy your plywood or MDF, I’d recommend having it cut to size. These materials come in a 4’x 8’ sheet, so you need two feet cut off of one end to make it standard size. The reason I’d recommend having it cut at the lumberyard or home improvement center is that they can make a much neater cut with their panel saw, than you can with a circular saw or even with a table saw.
Sanded plywood will only have one side that is sanded smooth. That’s going to be your top side. Keep track of that as you work, so that you don’t attach the stiffeners to the wrong side.
Making the Frame
While a flat sheet of plywood is a good surface to work with, it will warp or twist if not supported in some way. Painting it just increases the chances of warping. So, we’re going to need to attach a frame to it, providing it with some support. You can make that frame out of a variety of materials, but I’d recommend using 1”x 3” trim boards. They will be a bit more expensive, as that’s not as common a size as 1”x 2” or 1”x 4”, but it’s the right size for what you need.
You’ll need to cut two pieces of 1”x 3” to match the length of your table, six feet. But don’t assume that your tabletop is six feet long, just because you ordered it that way. The old rule of thumb of “measure twice, cut once” is as applicable here, as it is anywhere else. The guy in the lumberyard could get the cut just a little bit off.
Glue and clamp the 6’ long pieces to the bottom side of the long edges on your tabletop, aligning it with the edge of the plywood. I’d use short bar clamps for this; but use whatever you have. Then drill pilot holes 3/8” from the edge of the plywood and countersink them for the screws. You need the pilot holes so as to not split the wood.
I would use 1 ½” long drywall screws to attach the plywood to the 1”x 3”s. this is long enough to ensure a good grip, while not being so long as to be ridiculous. Tighten them down so that the screw head is below the surface of the plywood.
In addition to these two supports, you’re going to need four crossbars, going between them; one at each end and one two feet from each end. These should be made of the same material, cut to 46 ½” long. With the table top upside-down, attach these pieces to the two that are already attached, going through the long pieces and into the new ones. Then, flip the table top over so that you can drill and screw the table top to these new supports.
Finishing the Gaming Table
With the table screwed together, fill the countersinks with wood putty, slightly overfilling them. Once they are dry, you can sand them smooth. Fill any gaps you have on the edge of the plywood as well, so that you can have a smooth surface. Personally, I would fill the edge grain of the plywood all the way around, as there are always gaps in it.
Once the wood filler dries, you can sand your filled holes and edges smooth. Ideally, you won’t be able to see any dimple or protrusion, once you’ve sanded. If necessary, apply a second layer of putty, allowing it to dry and sanding it as well. A little patience here, will make your table look better when it is done.
There are two common ways of covering the surface of your gaming table: with green felt or with sand. Neither is very expensive. The key difference is how it looks and how that matches up with your gaming scenario.
Applying Felt
You can buy felt by the yard at craft stores and fabric stores. It probably won’t be as wide as your table, but you should be able to do two strips, with a seam in the middle. Make sure that you buy enough felt at one time to cover the entire table, as it can vary a bit from roll to roll.
The easiest way to apply the felt is with a spray adhesive. This is available from some big box stores and office supply stores. I personally like 3M Super 77 for projects of this type; but there are other brands as well. One warning about using these adhesives are that like spray paint, some percentage of the adhesive will linger in the air and settle on nearby surfaces, so you want to make sure that you spray it outside or in a workshop, with newspapers or dropcloths spread out under your work area.
Make a mark on your table where your seam is going to be. You’re going to want to work with an oversized piece of felt, so that all you need to concern yourself with is matching up with that line. Let the edges of the felt overlap the edges of the table. You can trim them later.
Roll the felt into a loose roll, then spray the adhesive on the tabletop, covering a band about a foot wide, working out from your line. You can’t spray the whole tabletop at once, as it will begin to dry. An area of about a foot is good to work with and won’t dry too quickly.
Lay the felt on the tabletop, carefully aligning its edge with your drawn line. You really only get one chance with this, so don’t set it down until you are sure that you have the spot correctly. It helps to work from one end of the line to the other, rather than trying to do it all at once.
One trick that helps with this is to cover the spray adhesive with waxed paper. The paper won’t stick to the adhesive and it will make an effective barrier between your felt and your adhesive, until you are ready to stick it down. You can gradually move the waxed paper out of your way, as you lay the felt in place, leaving the rest in place to protect your felt until you are ready for that section.
With the first part of your felt in place, go ahead and spray the next band, keeping the felt rolled to protect the top side. But this time, stick it down in the middle of the band first, and work your way to the outer edges, smoothing it out as you go. This will help prevent wrinkles.
For the other half of the table, you’ll want to cover the installed felt with newspaper or wax paper, to protect it from the spray adhesive as you continue working. Otherwise, you’ll end up with parts of your felt sticky when you are done.
To finish, wait until the adhesives has had a chance to dry, then trim the edge of the felt flush with the edges of your table.
Applying Sand
You’re definitely going to want to do this outdoors, as you will have loose sand that you have to brush off the table. Better to brush it off on the ground, then inside your home.
You can buy playground sand from any building material center. It can be stuck to the tabletop with wood glue. I would recommend using a paintbrush to apply the wood glue, so that you can spread it out well. Be sure to get a good, thick coat, with no gaps.
Once the glue is applies to the entire tabletop, start spreading sand over it liberally. You want enough sand so that there are no bare or thin spots. If you can see the wood or the glue, you don’t have enough sand.
It is a good idea to press the sand lightly into the glue. Probably the easiest way to do this is to take a large, heavy, hardcover book and cover it well with waxed paper to protect it from the sand. If you don’t have any waxed paper, you can do the same thing with a plastic bag. Then, place the book on the table, pressing down on it slightly to level the sand and press it into the glue.
Keep repeating this, overlapping areas, until you have gone over the entire tabletop. You should be able to see the areas you’ve done, easily enough, as the book will leave marks in the sand.
Allow the glue to dry fully, then lift the tabletop up on one edge, allowing the extra sand to run off. Brush the surface lightly, with a soft brush, to remove any loose sand. You may want to paint the sand surface, to bond the sand in place, or you can leave it as it is.
Paint the Edge
The last step in building your wargame table is to paint the edges of it. You may choose to merely paint it a solid color, do some sort of pattern, or use your team colors. This is a good time to personalize your table, so that it is uniquely yours.


