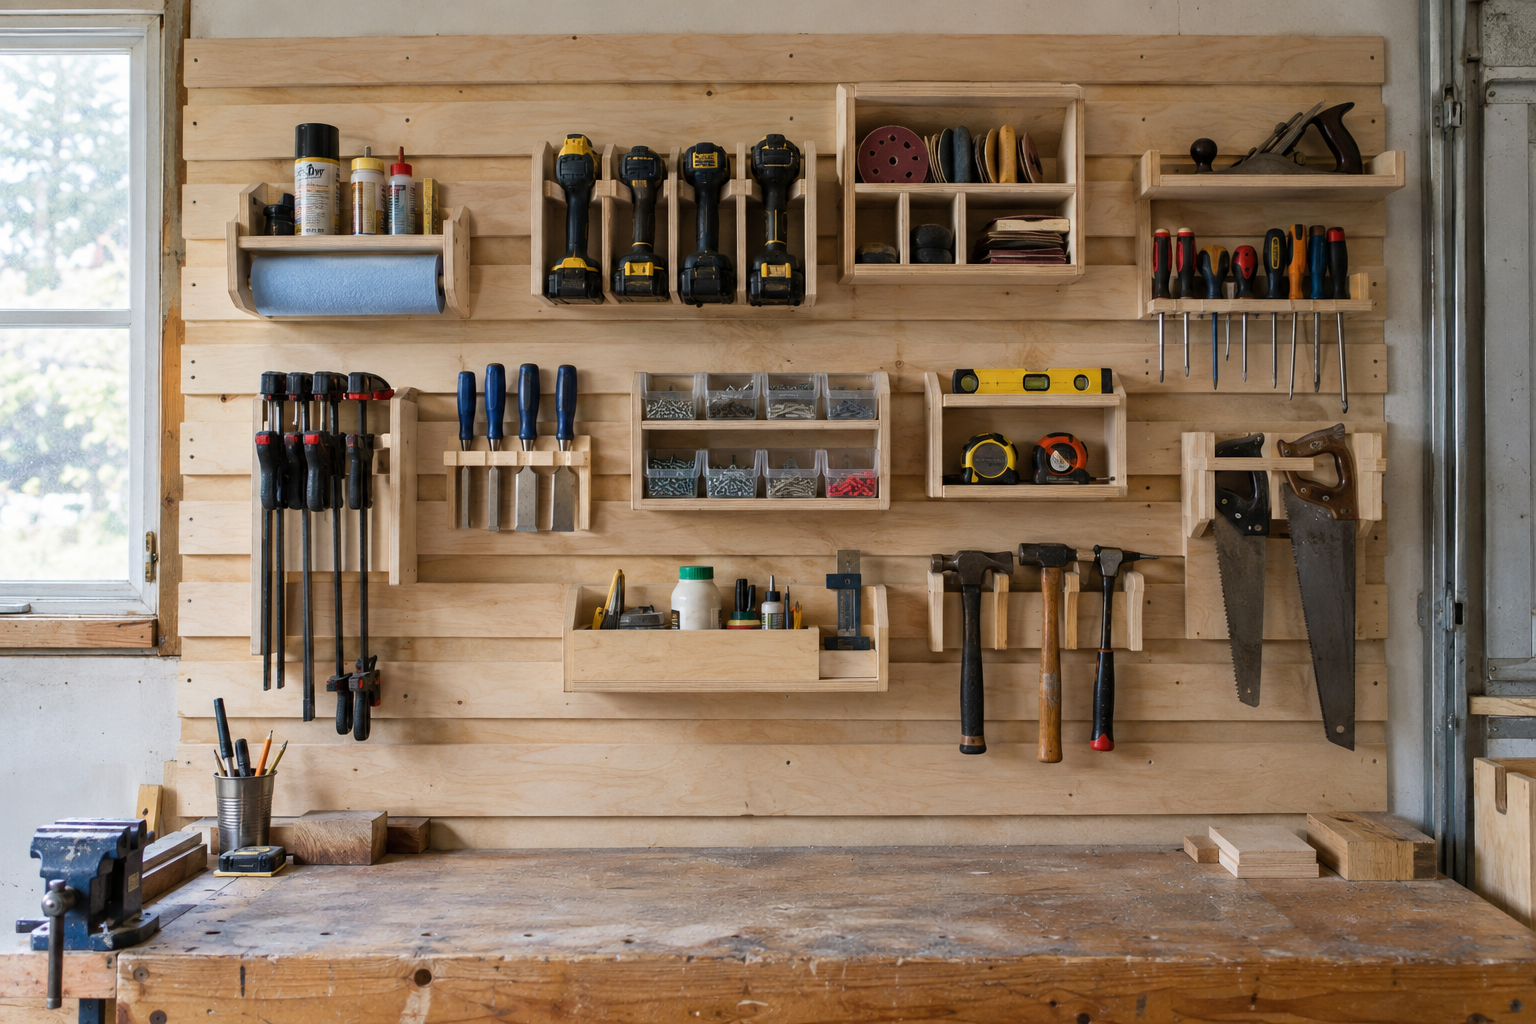
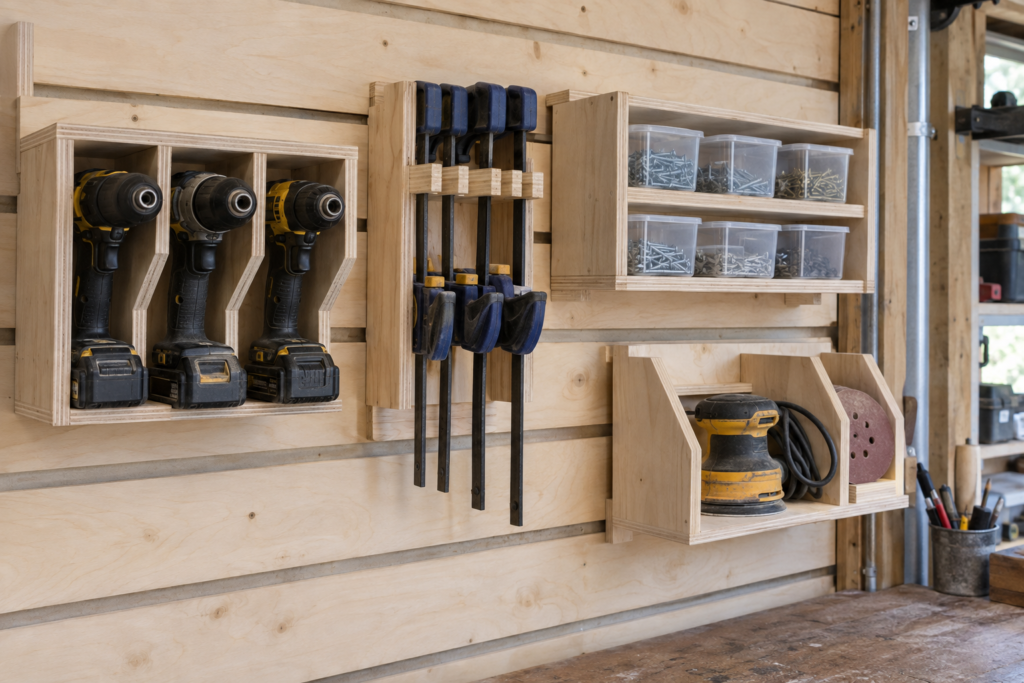
A French cleat wall is one of the simplest ways to organize tools without locking yourself into a permanent layout. Instead of attaching every shelf, rack and bin directly to the wall, you mount horizontal wooden cleats and hang movable tool holders from them.
The system is strong, inexpensive and easy to expand. When your tool collection changes, you can lift a holder off one cleat and move it somewhere else—without drilling another set of holes in the wall.
For most workshop storage, the best starting point is 3/4-inch plywood cut into 3- to 4-inch-wide strips with 45-degree bevels. Mount the wall cleats into studs using appropriate structural screws, then add matching cleats and lower spacers to the backs of your tool holders.
Quick answer: Use 3/4-inch plywood, make the cleats approximately 3 to 4 inches wide, and space the rows about 8 to 16 inches apart. Attach every wall cleat securely to the framing rather than relying on drywall alone.
What Is a French Cleat Wall?
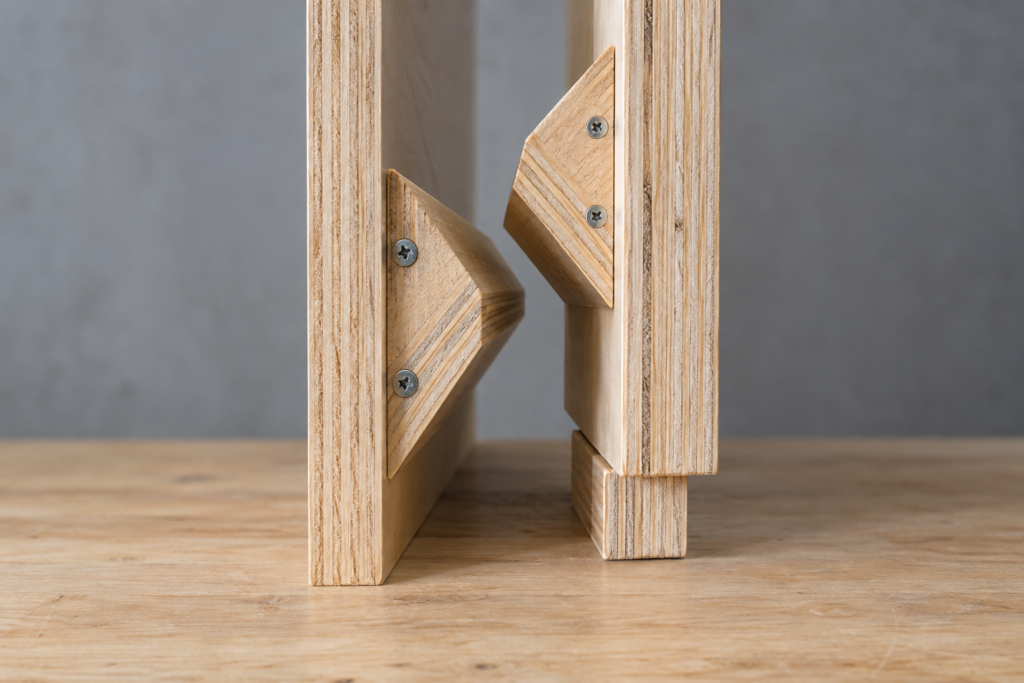
A French cleat consists of two matching strips of wood with opposing 45-degree bevels. The wall-mounted strip faces up and away from the wall. The matching strip on the tool holder faces down and toward the holder.
When the holder is lowered into place, the two beveled edges interlock. The wall cleat supports the holder while the lower edge or a spacer keeps it vertical. The holder can still be lifted and repositioned whenever necessary.
French cleats are commonly used for:
Drill and battery stations
Clamp racks
Hand-tool holders
Small shelves and storage bins
Cabinets and display panels
Sanding and finishing supplies
Although the connection can support substantial workshop storage, a French cleat does not have one universal weight rating. Its capacity depends on the material, fasteners, wall construction, number of studs engaged, holder design and distance the load projects from the wall.
Recommended French Cleat Dimensions
There is no single required size, but the following dimensions provide a practical starting point for a workshop tool wall:
Component
Recommended starting point
Cleat material
3/4-inch plywood
Finished cleat width
Approximately 3 to 4 inches
Bevel angle
45 degrees
Vertical row spacing
Approximately 8 to 16 inches
Wall attachment
Structural screws driven into studs
Holder spacer
Same thickness as the wall cleat
Three-quarter-inch plywood provides a useful balance of strength, screw-holding ability and ease of cutting. For light hand tools, narrower cleats may work. Deep shelves, large cabinets and heavy equipment require more conservative engineering and may need multiple cleats or a different mounting method.
Before cutting, consult our plywood thickness guide for a broader explanation of how panel thickness affects stiffness and strength.
How Much Does a French Cleat Wall Cost?
The cost depends primarily on plywood grade, wall size and whether you already own the necessary tools. A basic wall made from one sheet of plywood will often cost approximately $75 to $115 for plywood, fasteners and glue.
Material
Estimated cost
Notes
One 3/4-inch plywood sheet
$55–$85
Price varies by grade and location
Structural wood screws
$12–$20
Select the length for your wall assembly
Wood glue
$6–$10
Used when assembling holders
Estimated material total
$73–$115
Tools and holder hardware not included
A 4-by-8-foot sheet ripped into nominal 4-inch strips produces roughly 96 linear feet of individual strips before allowing for blade kerf and trimming. Because the system uses both wall cleats and matching holder cleats, that equals approximately 48 linear feet of matched cleat pairs.
Cabinet-grade birch plywood gives you cleaner edges and a smoother finished appearance. Lower-cost sheathing plywood can work, but voids, splinters and uneven panels make it less pleasant to cut and may weaken narrow sections. Inspect every strip and reject pieces with damaged edges or internal voids near the bevel.
French Cleat vs. Pegboard vs. Slatwall
Each wall-storage system has a different advantage. French cleats are especially useful when you want to build custom holders and rearrange them frequently.
System
Best feature
Main drawback
French cleat
Custom, movable holders
Requires cutting and building holders
Pegboard
Fast and inexpensive setup
Hooks can shift or pull out under heavier loads
Slatwall
Clean appearance and commercial accessories
Higher cost and system-specific hardware
Pegboard is sufficient for lightweight hand tools. Slatwall is convenient when you prefer ready-made hooks and baskets. A plywood French cleat wall makes the most sense for a workshop where storage needs will continue to change.
Eye protection, hearing protection and dust protection
Use fasteners approved for the wall material and expected load. Generic drywall screws are brittle and are not a substitute for structural screws. The required screw length must account for the cleat thickness, drywall or other wall covering, and adequate penetration into the framing. Follow the fastener manufacturer’s specifications.
How to Build a French Cleat Wall
1. Plan the layout
Measure the available wall and decide which tools you want to store. Keep frequently used hand tools between waist and shoulder height. Reserve lower rows for heavier items so they are easier and safer to lift.
Mark the height of each row. Spacing rows 8 to 16 inches apart works for many tool walls, but there is no reason every gap must be identical. Wider holders need more vertical clearance.
2. Locate the wall studs
Use a stud finder, then confirm the framing locations when practical. Mark the center of every stud across the installation area. A wall cleat should cross multiple studs whenever possible.
Do not depend on drywall anchors for the primary support of a workshop cleat wall. Drywall is a wall covering, not structural framing.
3. Rip the plywood into strips
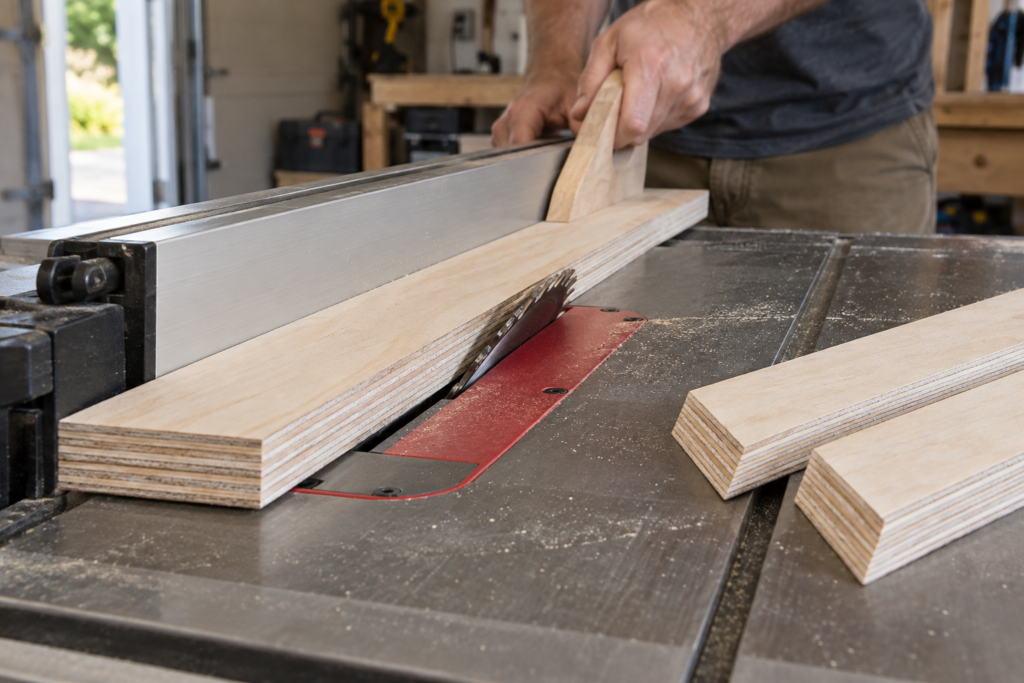
Cut the plywood into straight strips approximately 3 to 4 inches wide. Support the full sheet properly and use a straightedge guide if cutting with a circular saw.
If you are using a table saw, use suitable infeed and outfeed support. Keep hands away from the blade and use push blocks or push sticks as appropriate for the saw and cut.
4. Cut the 45-degree bevels
Set the blade to 45 degrees and cut each strip lengthwise to create the matching beveled pieces. Test the setup on scrap first. The two pieces should seat together without rocking or excessive gaps.
Sand splinters from the edges, but do not round over the interlocking faces. A clean, straight bevel helps the holder sit consistently along the cleat.
5. Install the first wall cleat
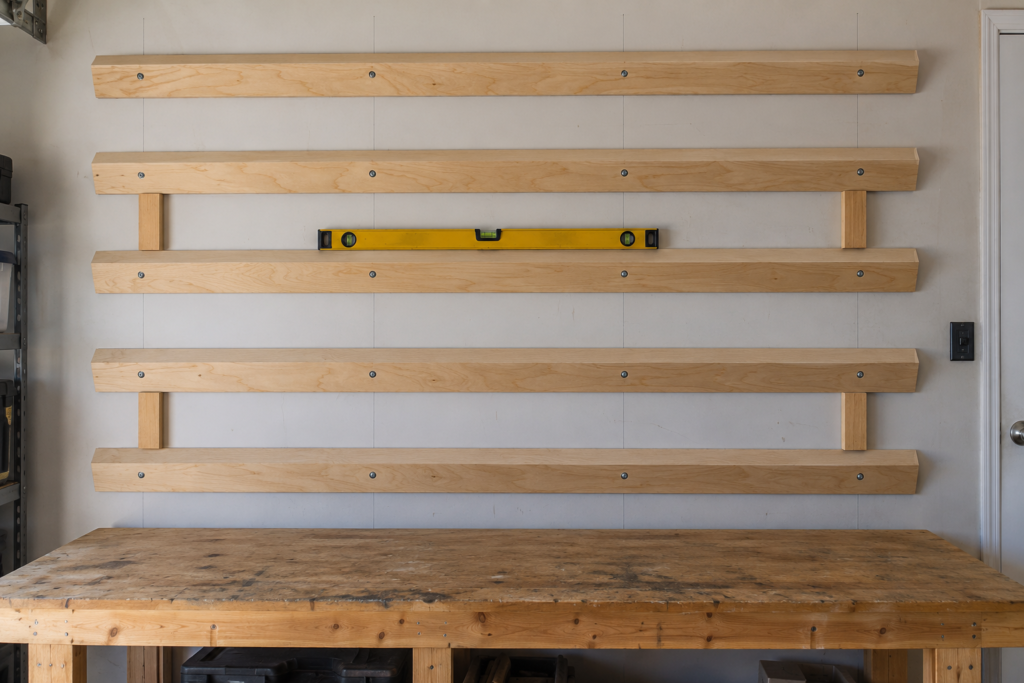
Position the first cleat with the bevel pointing up and away from the wall. Level it carefully, drill appropriate pilot or clearance holes, and fasten it into the marked studs.
The fastener heads should sit flush with the cleat without crushing the plywood. Follow the screw manufacturer’s requirements for pilot holes, edge distances and installation torque.
6. Add the remaining rows
Use a level and spacer blocks to keep the rows straight and evenly spaced. Check each cleat independently rather than assuming the previous row was perfect.
Leave enough clearance above each row to lift holders up and off the cleat. Cabinets and tall holders may require considerably more clearance than small bins.
7. Build the tool holders
Attach a matching cleat to the upper back of each holder with the bevel facing down and toward the holder. Use glue and appropriate screws when the holder design permits.
Add a lower spacer equal to the cleat thickness. Without this spacer, the bottom of the holder will tilt toward the wall. The spacer keeps the holder plumb and reduces movement during use.
Test every new holder with a light load before adding tools. Check that the cleat is fully seated and that the holder cannot tip, rotate or slide unexpectedly.
Start with two or three rows across a 4- to 6-foot section. Prioritize tools you use regularly, such as drills, drivers, measuring tools and small parts bins. You can add more rows later without rebuilding the original section.
Eight-foot workshop wall
Four to six rows can provide space for a charging station, clamp rack, sanding supplies and hand tools. Leave a clear work zone around outlets, switches and electrical panels.
Floor-to-ceiling installation
Divide the wall into zones. Keep lighter, infrequently used supplies higher and heavier tools lower. Do not position heavy objects where a falling item could strike a person, vehicle or delicate equipment.
How Much Weight Can a French Cleat Hold?
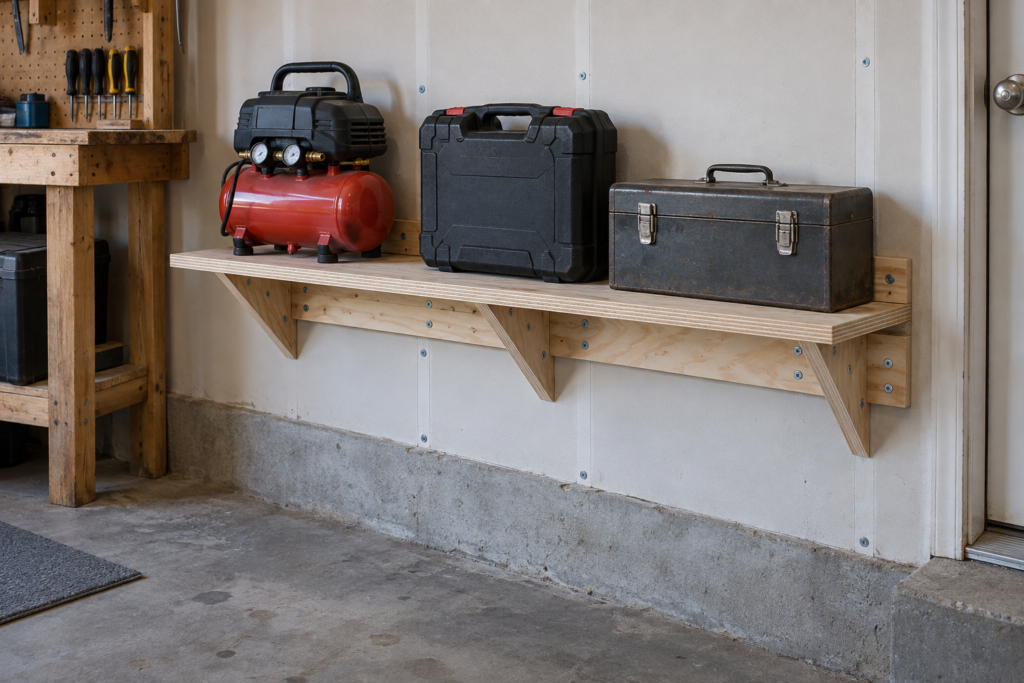
There is no reliable universal answer. Two French cleats of the same length may have very different capacities because of differences in plywood quality, screw type, framing, installation and holder geometry.
The distance between the wall and the tool’s center of gravity is especially important. A shallow rack pulls mostly downward. A deep shelf creates greater leverage that tries to rotate the holder and pull the upper fasteners away from the wall.
For heavier storage:
Use sound 3/4-inch plywood or properly selected hardwood
Cross and fasten into multiple studs
Keep the load close to the wall
Use a second cleat when the holder design benefits from it
Keep heavy items low
Inspect the cleat, holder and fasteners periodically
Do not use a homemade workshop cleat as the only support for an engine, vehicle component, overhead load or other object whose failure could cause serious injury. When the consequence of failure is significant, use a mounting system designed and rated for that specific application.
Best Wood for French Cleats
3/4-inch plywood
Good-quality plywood is the best general-purpose choice for a modular workshop wall. Its cross-laminated construction provides dimensional stability, and long strips are easy to cut from a sheet. Birch or cabinet-grade plywood generally produces cleaner bevels than lower-grade sheathing.
Straight, dry hardwood or construction lumber can also make strong cleats. Avoid boards with large knots, cracks or severe grain runout near the bevel. Predrilling can reduce the chance of splitting.
MDF
MDF is easy to machine, but its edges have lower impact resistance and fastener-holding ability than quality plywood or solid wood. It can crumble or split around heavily loaded fasteners, so it is not my first choice for a workshop cleat system.
Common French Cleat Mistakes
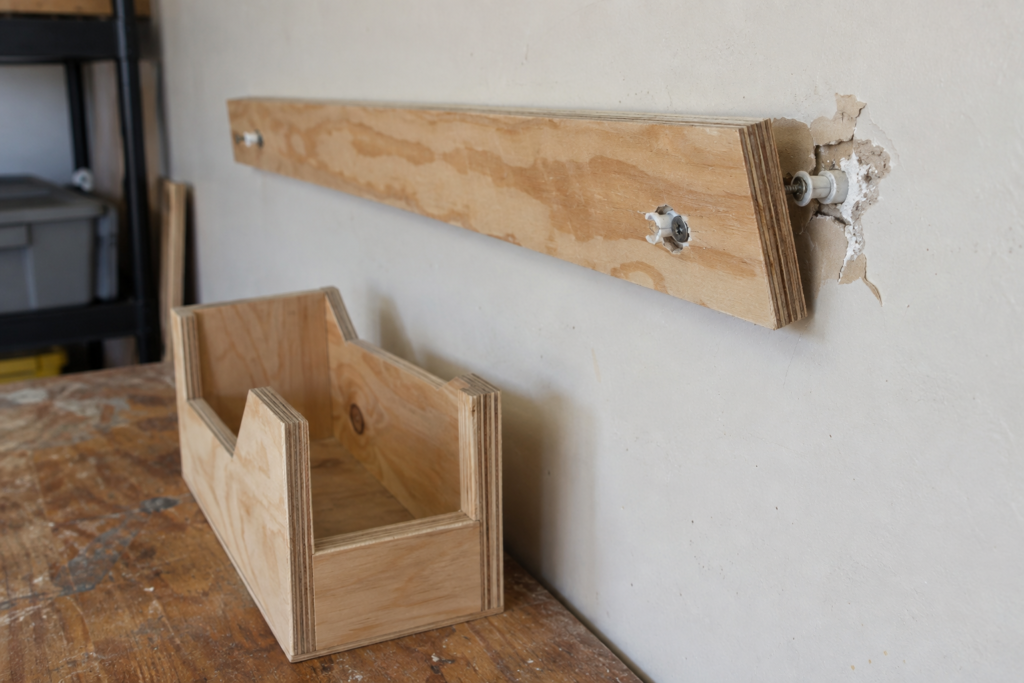
Attaching the system only to drywall
The wall covering may tear away even if the anchor itself remains intact. For a tool-storage wall, connect the primary wall cleats to structural framing or use fasteners designed for the masonry substrate.
Using unsuitable screws
Drywall screws are intended to attach drywall, not to serve as structural mounting fasteners. Select structural screws with published installation requirements and adequate length for the complete wall assembly.
Forgetting the bottom spacer
A holder with an upper cleat but no lower spacer will lean toward the wall. Add a spacer with the same thickness as the cleat.
Placing heavy tools too high
A cleat may remain attached while the person lifting the tool loses control. Store heavy tools close to the floor and avoid mounting them above work areas.
Making the holders too deep
Deep holders create more leverage on the cleat and fasteners. Keep heavy loads close to the wall and reinforce deeper holders appropriately.
Failing to inspect the plywood
Voids, delamination, damaged veneers or splits near the bevel can weaken a cleat. Reject questionable strips rather than hiding the damaged area behind a holder.
French Cleat Wall Maintenance
A well-built indoor cleat wall can provide many years of service, but it should still be inspected. Periodically remove the holders and look for:
Loose or protruding fasteners
Cracks around screw holes
Split or damaged bevels
Moisture damage or delamination
Holders that rock or no longer seat completely
Overloaded shelves or racks
Tighten or replace loose hardware and remove damaged cleats from service. Never assume that a storage system becomes stronger with age.
Frequently Asked Questions
Can you install a French cleat on a concrete wall?
Yes. Use fasteners approved for the specific concrete or masonry substrate and the intended load. Another option is to attach suitable furring or backing to the masonry first and then mount the cleats to that structure. Follow the anchor manufacturer’s instructions and avoid drilling where concealed utilities may be present.
Can you install French cleats without studs?
For lightweight decorative objects, a properly selected hollow-wall anchor may sometimes be suitable. A workshop tool wall should generally be attached to framing or masonry. Do not assume that an anchor is safe merely because it feels tight during installation.
Do French cleats damage drywall?
Any wall-mounted system leaves fastener holes. When the cleat is screwed through the drywall into studs, the damage is normally limited to those holes. A cleat supported only by drywall anchors can pull away and cause substantially more damage.
How far apart should French cleats be?
Approximately 8 to 16 inches between rows works for many workshop layouts. The correct spacing depends on the height of your holders and the clearance needed to lift them off the wall.
How long should a French cleat be?
Wall cleats may run across an entire storage area or cover only part of the wall. They should be long enough to engage the necessary framing members. The holder-side cleat is normally about as wide as the holder, provided the holder is designed to resist tipping and rotation.
Can French cleats be painted?
Yes. Sand the surfaces and apply a suitable primer and paint. Avoid heavy paint buildup on the mating bevels because it can interfere with a close fit. Allow the finish to cure completely before installing the holders.
A French cleat wall gives you modular storage without the cost of a proprietary track system. Start with good-quality 3/4-inch plywood, accurate 45-degree bevels and fasteners properly anchored into the wall structure. Keep heavy loads low and close to the wall, test each holder gradually and inspect the system as your storage needs change.
The result is a workshop wall that can be reorganized one holder at a time instead of rebuilt whenever you buy a new tool.
Dart Wall Ideas: How to Build a Durable One by Admin January 28, 2026 DIY Most dart wall ideas you see online look fine at first, but a lot of them don’t survive real use. I learned that the hard…
How to Build a Cob Oven (Complete DIY Guide) by Admin May 12, 2025 DIY I was at a friend’s off-grid homestead a few summers back when I watched them pull a bubbling pizza from a dome of sculpted earth.…