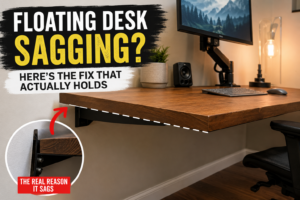
To fix a sagging plywood shelf that’s still sound, take everything off, flatten it, then glue and fasten a hardwood strip to the front edge so it hangs below the shelf. If the shelf is wider than about 42 inches or carries heavy items, it usually needs a center support as well. If the plywood is peeling, soft or water-damaged, replace it instead. Flipping the shelf only buys you time. Below are published sag measurements by span, a quick way to work out the cause, and which repair fits which shelf.
Quick answer
Most sound bookcase shelves (30–36 inches wide, 3/4-inch plywood): fix the ends in place and add a 3/4-inch hardwood strip at least 1-1/2 inches deep on the front edge, glued and fastened.
Spans of 42 inches or more, or heavy loads (large hardcovers, tools, paint cans): add a center support or divider. A front strip alone often won’t get sag down to a level you can’t see.
Target: about 0.02 inch of sag per foot of span when first loaded. Wood keeps sagging slowly under a constant load.
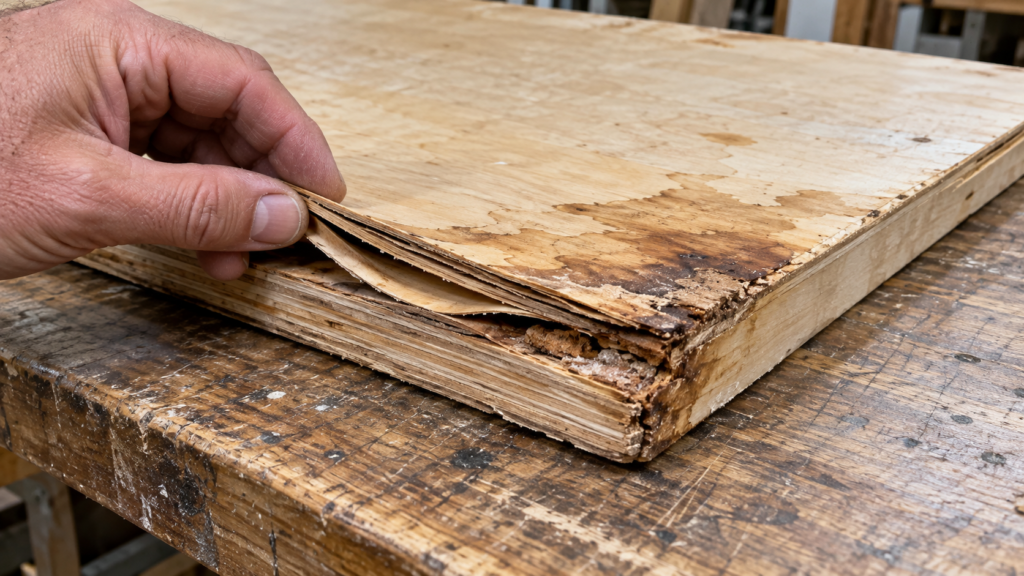
Don’t repair it: if the veneer is peeling or bubbled, the shelf is soft, or it has water damage. Replace it.
How Much Sag Is Too Much?
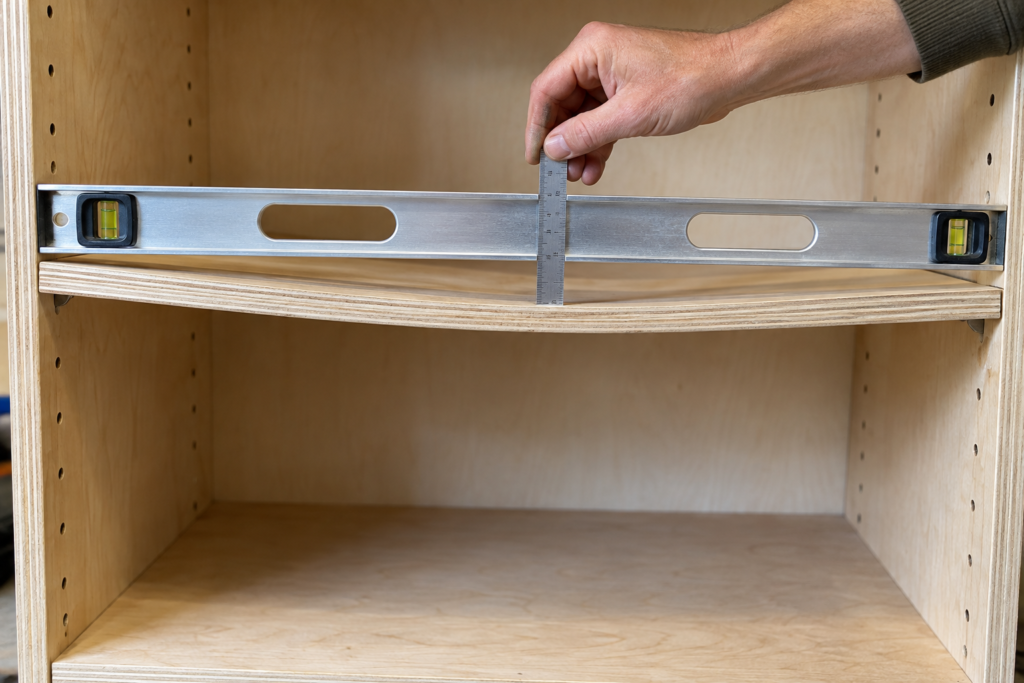
Lay a straightedge or level across the front edge, resting on both ends, and measure the gap at the center.
The usual design target comes from woodworker Jeff Reid’s Sagulator calculator and Fine Woodworking: keep initial sag at 0.02 inch per foot or less. The reasoning is that the eye notices about 1/32 inch per foot, and wood shelves typically sag about 50% more over time than they do the day you load them. On a 36-inch shelf, that target is about 0.06 inch, which is just under 1/16 inch.
If your gap is already 1/8 inch or more on a 3-foot shelf, the shelf is well past the target. The repair has to add stiffness. Flattening it alone won’t last.
Measured Sag: What Each Fix Actually Does
These numbers are WoodBin’s, not ours. Jeff Reid measured real shelves with a shop-built gauge and published the results in his 12-inch shelf sag tables. The shelves were 3/4-inch plywood, 12 inches deep, loaded evenly at 30 pounds per foot, which is about the weight of large hardcover books. Sag is in inches.
Shelf width (span)
Loose on its supports
Ends fixed
Ends fixed + front edging
Ends fixed + front and rear support
Target sag
30 in.
0.05
0.04
0.01
0.01
0.05 or less
36 in.
0.10
0.06
0.03
0.02
0.06 or less
42 in.
0.18
0.15
0.06
0.04
0.07 or less
48 in.
0.30
0.19
0.11
0.07
0.08 or less
54 in.
0.50
0.35
0.19
0.12
0.09 or less
Source: WoodBin shelf sag measurements, 12-inch shelves; test setup described in WoodBin’s methods notes. As tested: “ends fixed” means the shelf ends were clamped to their supports; “front edging” was a 1-1/2-inch pine strip screwed under the front edge; “rear support” was a wood beam under the back edge. The repair method later in this article is similar but not identical (see “How this compares to the tested setup”).
What the table tells you:
A 36-inch shelf sitting loose on its supports sagged about 0.10 inch at this load, which is clearly visible. Fixing the ends brought it to about 0.06. Adding front edging brought it to about 0.03.
Above 42 inches, edging alone isn’t enough under heavy loads. At 48 inches, even front plus rear support only got to about the target at 30 pounds per foot. At 40 pounds per foot, the same 48-inch shelf measured 0.09 inch with every support added. That’s still over the 0.08-inch target. At that width, a center support is the real fix.
Calculators can understate real sag. WoodBin found that fixed-end shelves sagged roughly 2.5 to 3.5 times more than the Sagulator’s calculated figure. So if a calculator says you’re right at the limit, build in more stiffness than it asks for.
How heavy is your shelf load?
WoodBin weighed typical items per foot of shelf. Paperbacks came in around 6 pounds per foot, small hardcovers around 20, large 9 × 11-inch hardcovers around 32, and stacked magazines around 40. In garages and pantries, cans, tools and paint often run heavier than books. If that’s your shelf, plan on a center support.
Diagnose the Problem First
Not every drooping shelf is a sag problem. Match what you see to the cause before you buy anything.
What you see
Likely cause
Fix
Even bow, lowest in the middle, ends level
Span too long for the load; slow sag over time (creep)
Front stiffener, fixed ends, or center support
Shelf tilts down toward one end
Loose or broken shelf pin, worn pin hole, or a cleat pulling away
Replace the pins or re-fasten the cleat. The shelf may be fine.
Wall shelf tips forward, front lower than back
Bracket or hidden-rod mounting, not the board
Re-anchor the bracket into studs or blocking
Bowed, with peeling veneer, bubbles or soft spots
Delamination or water damage
Replace the shelf
Edge shows no layers, just a uniform pressed core
It’s MDF or particleboard, not plywood
Add a stiffener or replace it with plywood
Garage or basement shelf that gets worse every year
Humidity swings speed up sag
Stiffen it, shorten the span, and expect to keep checking it
On that last row: the USDA Forest Products Laboratory’s Wood Handbook notes that ordinary swings in temperature and humidity increase creep. That’s why shelves in unconditioned spaces keep creeping lower. Sealing or painting the shelf doesn’t make it stiffer.
5 Ways to Fix a Sagging Plywood Shelf
1. Unload and flip it (temporary)
Take everything off and turn the shelf over so the bow points up. Part of the sag recovers once the load comes off: the Wood Handbook describes wood regaining part of its long-term sag after unloading. Under the same load, though, the bow comes back. Use this to buy time, or as the first step before a real fix.
2. Fix the ends in place
If the shelf sits loose on pins or cleats, screw it down. Go through the case sides into the shelf ends, or up through the cleats into the shelf. In WoodBin’s tests, where the ends were clamped, fixing the ends cut sag on a 36-inch shelf from about 0.10 inch to 0.06 inch at 30 pounds per foot. Screws should give a similar result, though that wasn’t what was measured. It’s the quickest real improvement, but you lose adjustability.
3. Add a hardwood stiffener to the front edge (the usual fix)
This is the repair that solves most bookcase sag, as long as the shelf itself is sound.
Flatten it before you glue. Lay it bow-up on a flat bench, or clamp it to a straight board. Many woodworkers push it a hair past flat, with a slight upward crown, so it settles flat under load. If you glue a strip onto a shelf that’s still bowed, you lock the bow in for good.
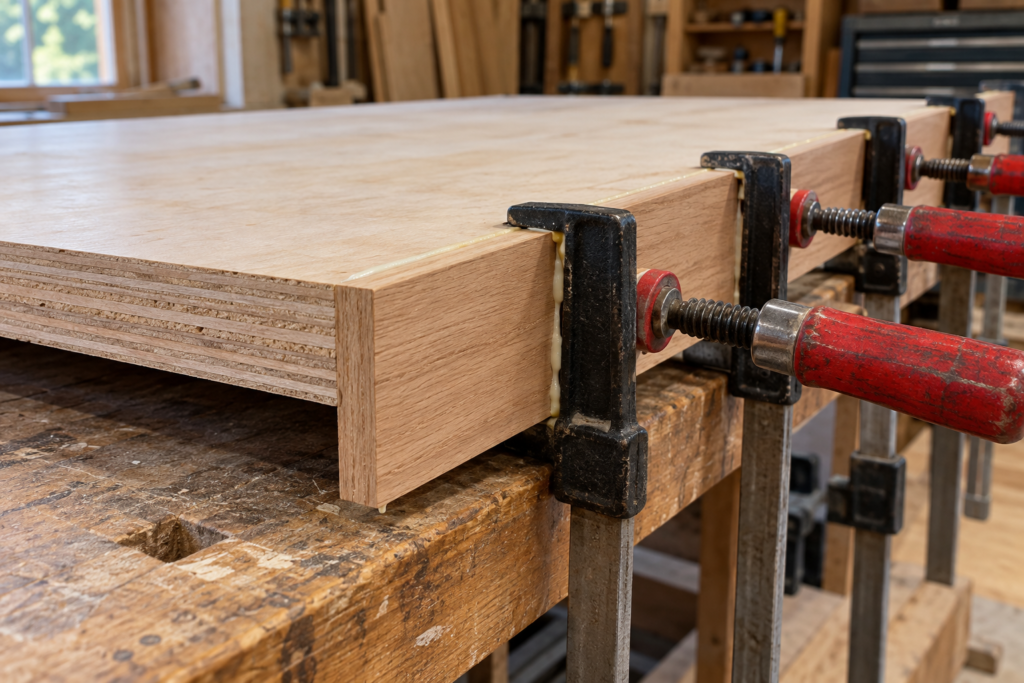
Cut a strip of 3/4-inch hardwood at least 1-1/2 inches wide, the same length as the shelf. Deeper is stiffer. A 2-1/2-inch strip is far stiffer than a 1-1/2-inch one, but it hangs lower below the shelf.
Glue the strip to the shelf’s front edge with its top flush to the shelf top, so the rest hangs below. Clamp it, and add screws or brads every 8 to 10 inches. The glue line does the structural work. Screws alone let the strip slide, so the two parts don’t act as one stiff piece. Our wood glue guide covers which glue to use.
Let the glue cure for the time on the label before loading the shelf, then reinstall it.
On adjustable shelves, check the front pin positions. If the strip hits a pin, notch the strip’s ends.
For the stiffness math on different strip sizes, including why a thin flush edge band adds almost nothing, see how to strengthen plywood.
How this compares to the tested setup
WoodBin tested a 1-1/2-inch pine strip screwed under the front edge, not a glued hardwood strip set flush with the shelf top. A strip fastened underneath makes the shelf and strip deeper together than a flush-top strip of the same size, and deeper means stiffer. So expect a 1-1/2-inch flush-top strip to do somewhat less than the “front edging” numbers show. That’s our reading of the geometry, not a measurement. If you want margin, use a 2-1/2-inch strip. If you can live with more of it showing, fasten the strip under the shelf.
4. Add rear support
Screw a cleat to the back panel under the rear edge, or screw through a solid case back into the shelf’s back edge. Rear support alone helped less than front edging in WoodBin’s tests. Combined with front edging, it gave the lowest sag at every width. Use it when the shelf is deep, or when you can see the back half sagging more than the front.
5. Add a center support or divider
Cutting the span in half is the strongest fix. Sag rises with roughly the fourth power of the span, so two 18-inch spans sag only a small fraction of what one 36-inch span does. A vertical divider cut to fit between shelves, or a center bracket into a stud on wall shelving, does the job. This is the right answer for 42-inch-plus shelves, garage shelving and heavy collections.
When to replace the shelf instead
Replace it if the plywood is delaminating, water-stained and soft, or cracked. Replace it if it’s 1/2-inch material on a 36-inch span carrying books, or if it’s particleboard that has swollen. A new 3/4-inch plywood shelf with a front stiffener costs little more than the repair time. Our plywood thickness chart covers sizing for the replacement.
Common Mistakes When Fixing Shelf Sag
Gluing a stiffener onto a bowed shelf. The glued strip locks the bow in. Flatten first, every time.
Counting on a thin edge band. A 3/4-inch strip that’s flush top and bottom looks finished, but it’s too shallow to add real stiffness. The strip has to hang below the shelf. Our edge banding guide is about looks, not strength.
Flipping the shelf and calling it fixed. The bow comes back under the same load, usually within months.
Trusting a calculator at the limit. Measured sag on fixed-end shelves ran several times higher than calculated figures. Leave a margin.
Reinforcing a damaged shelf. A stiffener can’t restore delaminated or water-softened plywood. The shelf can keep failing behind the new strip.
Treating a tipping wall shelf as a sag problem. If the front droops evenly along its whole length, the mounting is failing. See our floating shelves guide for bracket and anchoring fixes.
Tools and Materials
As an Amazon Associate, ThePlywood.com earns from qualifying purchases.
Wood glue: a PVA glue such as Titebond II works for indoor shelves. It’s what makes the strip and shelf act as one piece.
Bar clamps: you need several, both to hold the shelf flat and to clamp the strip. Bar clamps on Amazon.
Metal shelf pins: a good swap if plastic pins are bending or the shelf tilts. Metal shelf pins. Match the hole diameter in your case.
Shelf support brackets: for adding a center support on wall-mounted shelving. Shelf brackets.
FAQ
Can you permanently straighten a sagging plywood shelf?
Not by flipping or weighting it alone. Part of the sag recovers when the load comes off, but it returns under the same load. A permanent fix flattens the shelf and then adds stiffness: a glued front strip, fixed ends, or a shorter span.
How much does 3/4-inch plywood sag on a 36-inch shelf?
In WoodBin’s measurements, a 12-inch-deep, 3/4-inch plywood shelf loose on its supports sagged about 0.10 inch at 30 pounds per foot. That fell to about 0.03 inch with clamped ends and a 1-1/2-inch pine strip screwed under the front edge. Plywood type, depth, load and how the strip is attached will change your result.
Does MDF sag more than plywood?
Yes, in the same tests. A 36-inch MDF shelf loose on its supports sagged about 0.22 inch at 30 pounds per foot, more than twice the plywood shelf’s sag. If your “plywood” shelf shows no layers on the edge, that’s likely part of the problem.
Will painting or sealing a shelf stop it from sagging?
No. A finish slows how fast moisture moves in and out of the wood, but it adds essentially no stiffness. Sag is fixed by depth, support and span.
For stiffness, yes. Halving the span cuts sag far more than any practical edge strip. The tradeoff is that it splits the shelf into two bays. Use the strip on sound 30- to 36-inch shelves and the center support on wider or heavily loaded ones.
Bottom Line
For a sound 30- to 36-inch plywood shelf, flatten it, fix the ends, and glue a 3/4-inch hardwood strip at least 1-1/2 inches deep to the front edge. Go to 2-1/2 inches if you want margin. At 42 inches and wider, or under heavy loads, add a center support. Replace any shelf that’s delaminated or water-damaged instead of reinforcing it. For more shelf builds and material choices, see our plywood shelves guide, or build sag resistance in from the start with our bookshelf plans.
Rev-A-Shelf Cabinets: Best Pull-Outs & Prices by Admin April 18, 2026 DIY What is Rev-A-Shelf? Rev-A-Shelf is a cabinet organization system that adds pull-out drawers, trash bins, and storage inserts inside existing cabinets, improving accessibility and storage…