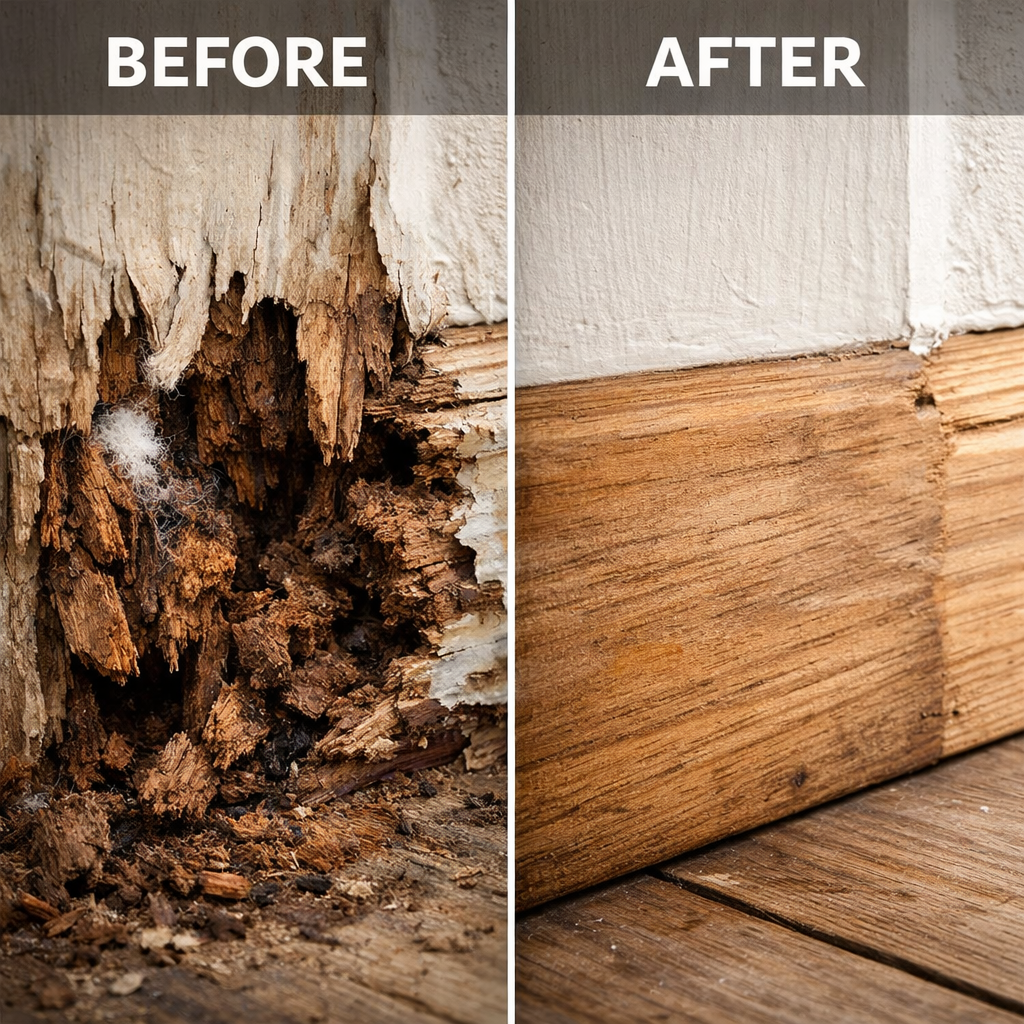
Wood rot is caused by moisture and fungal growth. To stop it, fix the moisture source, remove damaged wood, dry the area completely, and treat or replace affected sections.
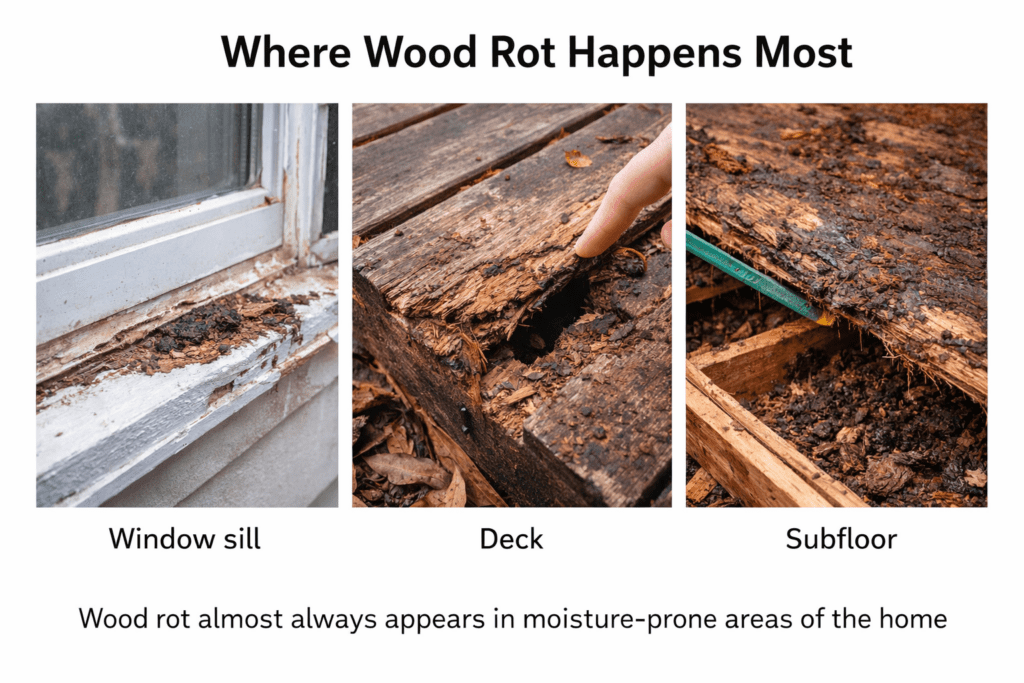
Most people don’t notice it right away. The early signs are subtle—slight discoloration, a faint musty smell, or wood that feels just a little softer than it should.
By the time it becomes obvious—crumbly wood, fungal growth, or sagging sections—the repair is already more involved.
The good news is this: wood rot can be stopped. But only if you address the cause first.
This guide breaks down exactly what causes wood rot, how quickly it spreads, and how to stop it before it becomes a major repair.
Can Rotting Wood Be Saved?
Whether you can save rotting wood depends on two variables:
the type of rot (wet vs dry)
how deep the damage goes
Wet Rot (Most Common)
Wet rot occurs when wood remains damp for extended periods. Common causes include:
leaking pipes
roof damage
condensation
poor drainage
It typically causes wood to become:
soft
swollen
discolored
weak
Wet rot is usually limited to the area where moisture is present. Once the water source is fixed and the wood dries out, the spread stops.
If plywood or lumber hasn’t lost its structural strength, it may still be usable after drying. If you’re unsure, choosing the correct panel strength is critical—especially when replacing damaged sections that are part of your flooring system.
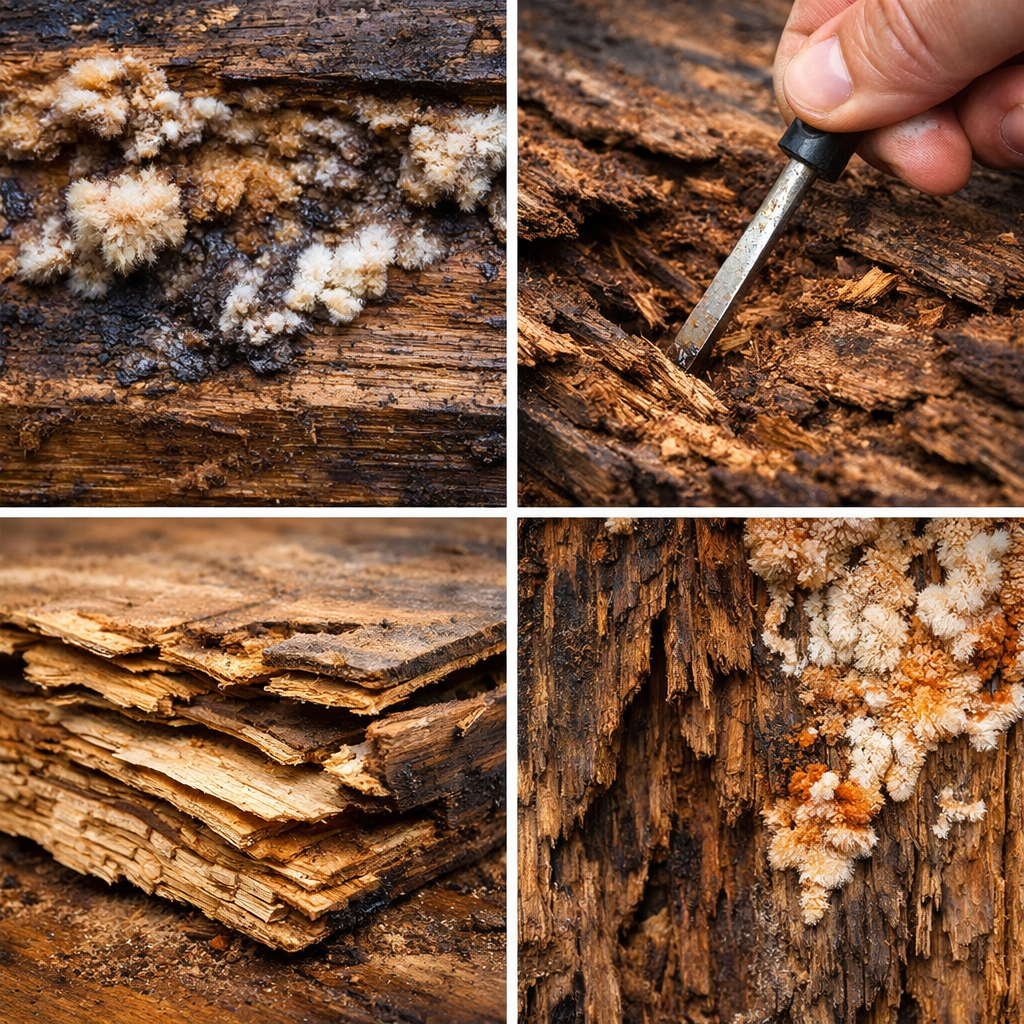
Dry Rot (Serious Structural Threat)
Dry rot is much more aggressive. It’s caused by a fungus that develops in damp, poorly ventilated conditions.
You’ll often find it in:
subfloors
joists
window frames
attic framing
Unlike wet rot, dry rot spreads beyond visible damage. It can travel through hidden cavities, behind walls, and even across masonry surfaces.
In most cases, dry rot means one thing: cut it out and replace it.
Which Types of Wood Rot the Fastest?
Not all wood reacts the same way to moisture.
Some materials are far more vulnerable:
Softwoods (pine, spruce) → absorb moisture quickly and rot faster
Interior-grade plywood → especially vulnerable at edges and glue layers
Untreated lumber → highest risk in damp environments
If you’re replacing damaged sections, the choice of material matters just as much as the repair itself.
Why Plywood Is Especially Vulnerable to Rot
Plywood behaves differently from solid wood when exposed to moisture.
Because it’s made of thin layers glued together, water can:
penetrate between layers
weaken adhesive bonds
cause delamination
The edges of plywood sheets are especially vulnerable. Once moisture gets inside, it spreads quickly across the layers, even if the surface looks intact.
Interior-grade plywood is the most at risk. Exterior-rated or marine plywood performs much better in damp environments because of water-resistant adhesives.
If you’re replacing rotted plywood, always choose a material rated for the conditions it will face.
Can Dry Rot Be Stopped?
Yes—but only with the right approach.
Stopping dry rot requires:
eliminating the moisture source
removing infected wood
treating surrounding materials
Anything less is temporary. Surface sprays alone won’t stop the spread.
How Do You Stop Wood Rot From Spreading?
All rot starts with moisture. Without fixing that, nothing else works.
Common causes include:
leaking plumbing or roofing
poor window or door sealing
clogged gutters
standing water near wood structures
high indoor humidity
lack of airflow in basements or attics
If rot has reached structural areas like flooring, you need to repair it properly before installing new materials—or the problem will return beneath the surface.
How to Treat Wet Rot (Step-by-Step)
Wet rot is usually manageable with basic tools and materials.
Step 1: Fix the moisture source
Stop the leak or drainage issue first.
Step 2: Remove damaged wood
Cut out soft, crumbling sections.
Step 3: Dry the area completely
Use fans or a dehumidifier if needed.
Step 4: Treat the surrounding wood
Apply a borate-based preservative to stop fungal growth.
Step 5: Repair or replace
small areas → filler or hardener
structural areas → replace fully
Step 6: Seal the surface
Paint, stain, or apply polyurethane to prevent future moisture issues.
Can You Use Epoxy to Repair Rotted Wood?
Epoxy is one of the most effective ways to repair partially damaged wood without replacing it.
It works by:
penetrating weakened fibers
hardening the structure
sealing out future moisture
When epoxy works best:
window frames
door trim
decorative wood
non-load-bearing areas
When epoxy should NOT be used:
structural beams
joists
subfloors
heavily rotted wood
Epoxy is a repair solution—not a structural fix. If the wood has lost strength, replacement is still the correct approach.
These are high-conversion tools because they solve the problem immediately.
How to Tell If Wood Is Structurally Compromised
One of the biggest mistakes people make is assuming wood can be saved when it’s already too far gone.
Here’s how to check:
Simple field tests:
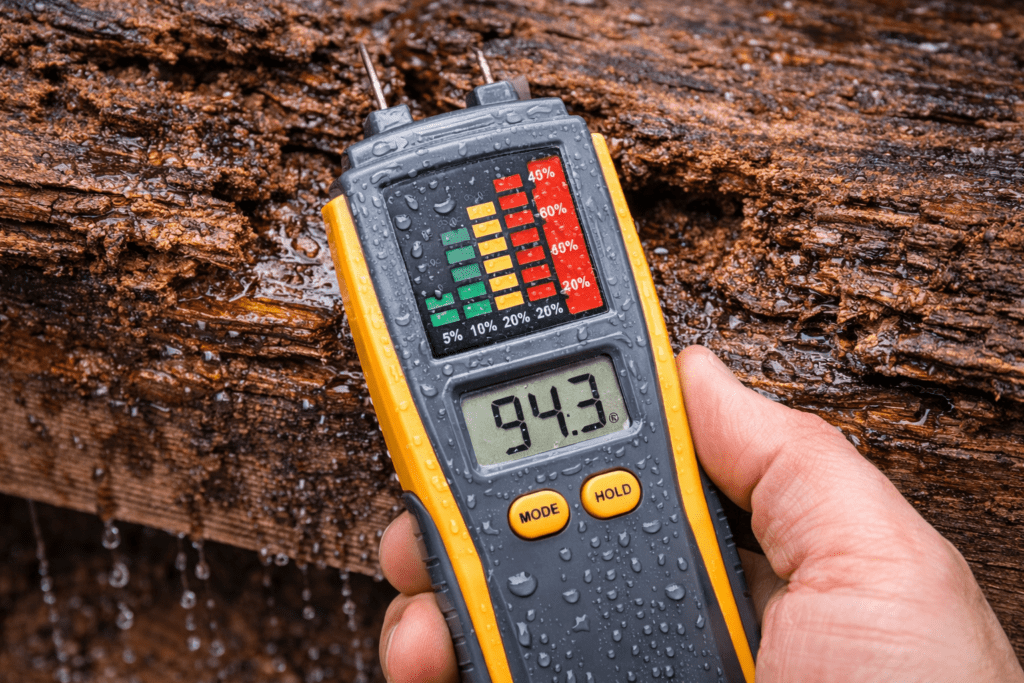
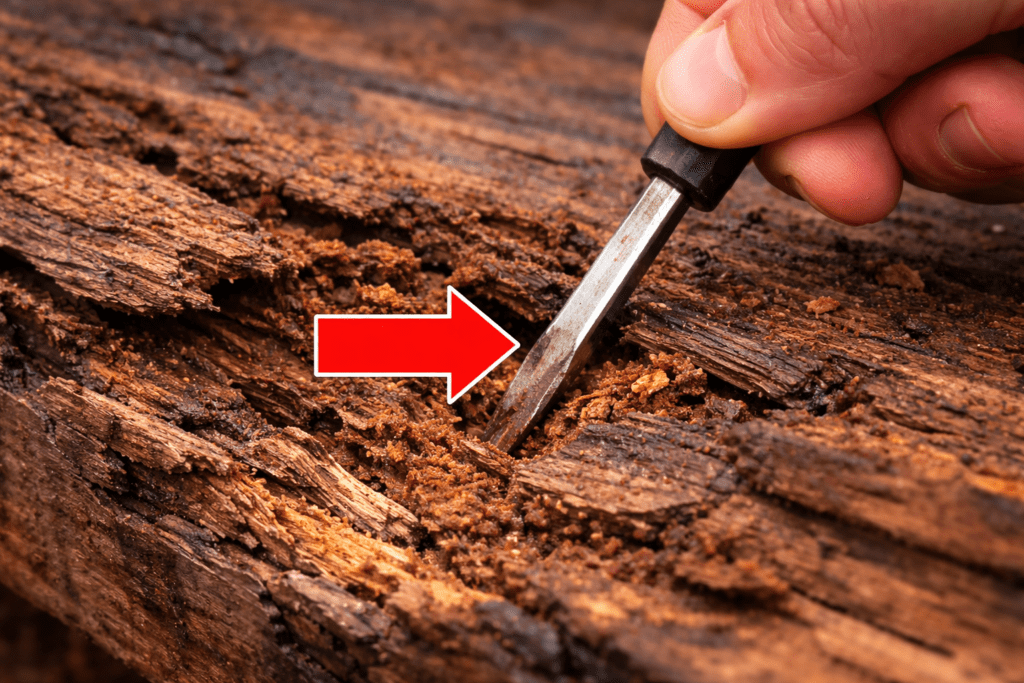
Screwdriver test Press into the wood. If it sinks easily, the fibers are compromised.
Sound test Tap the wood. Solid wood sounds sharp, while rotted wood sounds dull or hollow.
Load test If the wood flexes under normal pressure, it’s no longer structurally sound.
Visual check Deep cracks, splitting, or flaking are signs of advanced decay.
If the wood is structural and fails any of these tests, replacement is the safer option.
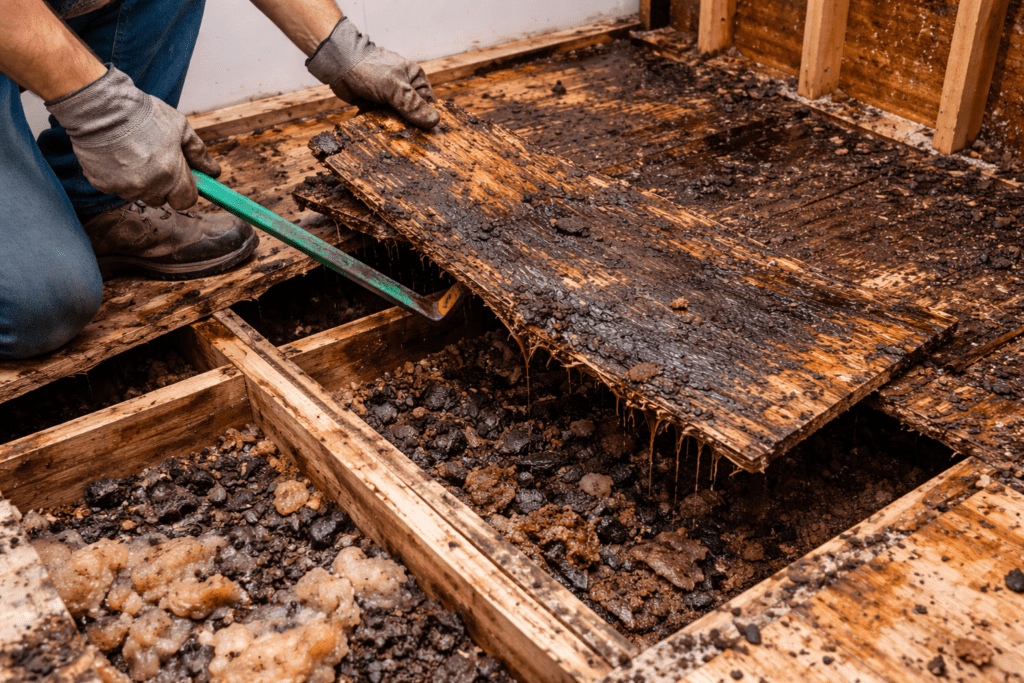
How to Fix Rotted Plywood Subfloor
Rotted plywood subfloors are one of the most common structural problems caused by hidden moisture—especially in bathrooms, kitchens, and basements.
Leaks from toilets, tubs, or sinks can go unnoticed for weeks. By the time you feel a soft spot underfoot, the plywood underneath has already started breaking down.
Properly fixing a rotted subfloor is critical. If you only patch the surface, the damage will continue to spread beneath your flooring.
Step 1: Identify and Mark the Damaged Area
Walk across the floor and locate soft or spongy spots.
Look for:
sagging sections
loose or cracked tiles
water stains or discoloration
Use a pencil or chalk to outline the damaged area. Always plan to remove slightly beyond what looks affected—rot spreads further than you can see.
Step 2: Cut Out the Rotted Plywood
Use a circular saw set to the correct depth (just the plywood thickness).
Cut along your marked lines
Remove the damaged section carefully
Avoid cutting into joists below
If the plywood is severely deteriorated, it may break apart as you remove it.
Step 3: Inspect the Floor Joists
Before installing new plywood, check what’s underneath.
Prevention tools tend to convert extremely well because they stop problems before they start.
Does Wood Rot Keep Spreading?
Dry rot: spreads aggressively, even through walls and masonry
Wet rot: stops once moisture is removed
Dry rot can generate its own moisture, allowing it to continue spreading if untreated.
How Fast Does Wood Rot Spread?
Dry rot can begin forming within 7–10 days in damp conditions.
In enclosed areas with poor ventilation—like basements or bathrooms—it spreads significantly faster. Warm temperatures combined with humidity create ideal conditions for rapid expansion.
For example, a slow plumbing leak beneath a bathroom floor can cause subfloor rot within weeks if left unnoticed.
What Conditions Make Wood Rot Faster?
Wood rot doesn’t just depend on moisture—it depends on the environment.
The fastest rot growth happens when these factors combine:
Moisture + warmth → ideal fungal growth
Poor ventilation → traps humidity
Dark, enclosed spaces → prevent drying
Organic debris (dust, dirt) → feeds fungal spores
For example, a poorly ventilated bathroom floor with a slow leak creates near-perfect conditions for rapid rot development.
On the other hand, exposed wood that dries quickly (like a deck in full sun) is far less likely to develop severe rot.
Best Wood to Use to Avoid Rot
If you’re replacing damaged wood, choosing the right material reduces future risk.
Best options:
pressure-treated lumber (affordable + durable)
cedar (natural resistance to moisture and insects)
redwood (premium durability)
marine-grade plywood (best for high-moisture environments)
Using the wrong material is one of the most common reasons rot comes back.
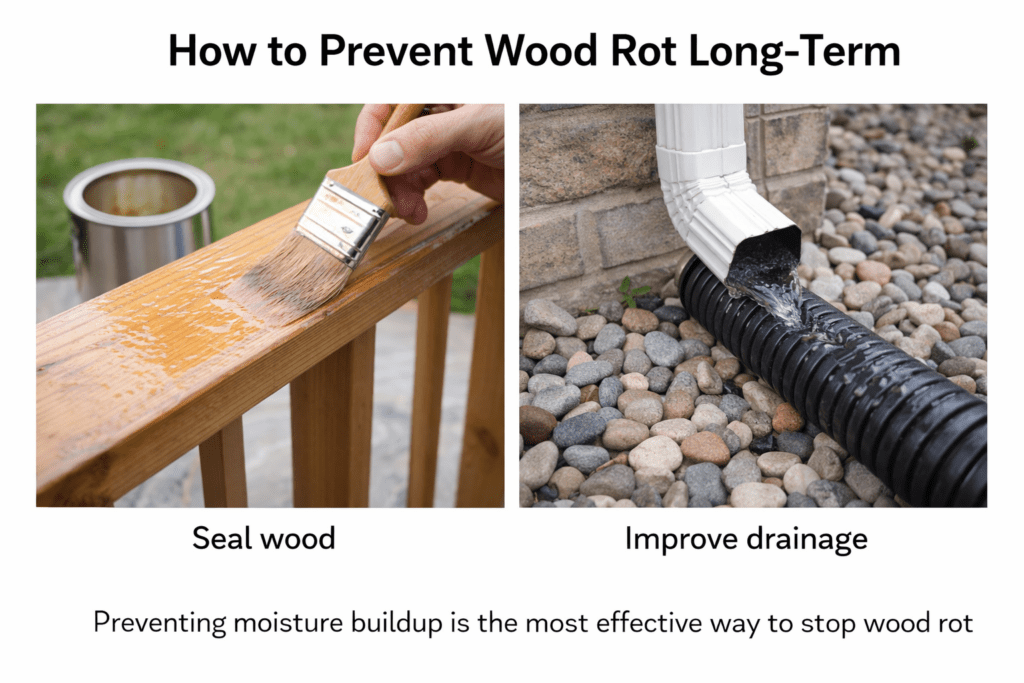
How to Prevent Wood Rot Long-Term
Prevention is where most homeowners fail.
Key strategies:
seal all exposed wood surfaces
maintain gutters and drainage
keep wood elevated off soil
use exterior-rated materials
improve airflow in crawl spaces and attics
control indoor humidity
These steps are simple but extremely effective.
How Much Does It Cost to Fix Wood Rot?
Costs vary widely depending on severity.
Typical ranges:
minor repair: $50–$200
trim or window repair: $200–$800
subfloor repair: $500–$2,500+
structural dry rot repair: $2,000–$10,000+
Factors that affect cost:
accessibility
labor requirements
structural involvement
material type
The earlier you catch rot, the cheaper it is to fix.
Wet Rot vs Dry Rot (Quick Comparison)
Feature
Wet Rot
Dry Rot
Cause
Moisture exposure
Fungal infection
Spread
Localized
Aggressive
Repair
Easier
Complex
Structural Risk
Moderate
High
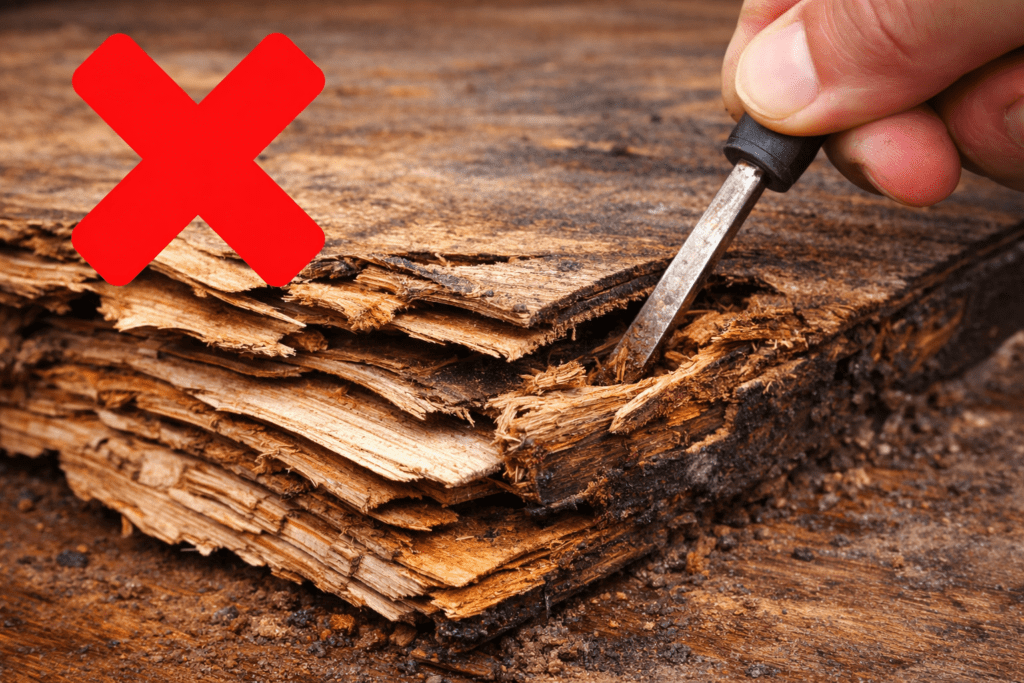
❗ Common Mistakes That Make Wood Rot Worse
sealing wood before it dries
using bleach instead of proper treatment
ignoring ventilation issues
not removing damaged wood enough
repairing structural wood instead of replacing it
Does Wood Keep Rotting After It Dries?
Wet rot stops once moisture is removed
Dry rot continues if the fungus is active
This is why drying alone is not enough for dry rot.
Should You Repair or Replace Rotted Wood?
This is one of the most important decisions in any rot repair.
Repair if:
damage is shallow
wood is still firm underneath
area is non-structural
rot is localized
Replace if:
wood is soft deep inside
structural components are affected
rot has spread across a large area
plywood layers are separating
Rule of thumb:
If the wood supports weight, don’t risk repairing it—replace it.
FAQ (Quick Answers)
Can rotting wood be saved? Sometimes. Wet rot can often be repaired if caught early. Dry rot usually requires removal.
Does vinegar stop wood rot? Only minor surface fungus. It won’t fix deep rot.
Does bleach kill wood rot? No. It only cleans the surface.
How fast does dry rot spread? It can begin within 7–10 days and spread rapidly in damp conditions.
Will wood rot stop if it dries out? Wet rot will. Dry rot will not go away without treatment.
Final Thoughts
Wood rot isn’t complicated—but it spreads faster than most people expect.
The biggest mistake isn’t the repair—it’s ignoring the cause. If moisture isn’t fixed, the problem always comes back.
If you catch it early, most repairs are simple and inexpensive. If you wait, it can turn into structural damage that requires cutting out large sections of your home.
The process is straightforward:
identify the moisture source
stop it completely
remove weakened wood
repair or replace correctly
protect the area from future exposure
Done properly, you won’t just fix the problem—you’ll prevent it from happening again.


")


")

