Dry rot vs wet rot is one of the most important distinctions homeowners need to understand when inspecting damaged wood. It often starts with a faint, musty smell you only notice when it rains. Then, a strange patch of white fuzz appears behind the baseboard, or a section of your floorboard feels unexpectedly soft underfoot.
By the time most homeowners realize something is wrong, timber rot has already taken hold.
Wood rot isn’t just an eyesore; it’s a living fungal infection eating away at your home’s structural skeleton. Most wood-decay fungi begin growing once wood moisture exceeds about 20%, while severe wet rot is commonly associated with much higher moisture levels. If left unchecked, it can lead to catastrophic structural failure, uninsurable repair bills, and years of homeowner regret. But before you panic and call a contractor, you need to know exactly what you are dealing with. Treating wet rot with dry rot protocols—or vice versa—is a massive mistake that can waste thousands of dollars.
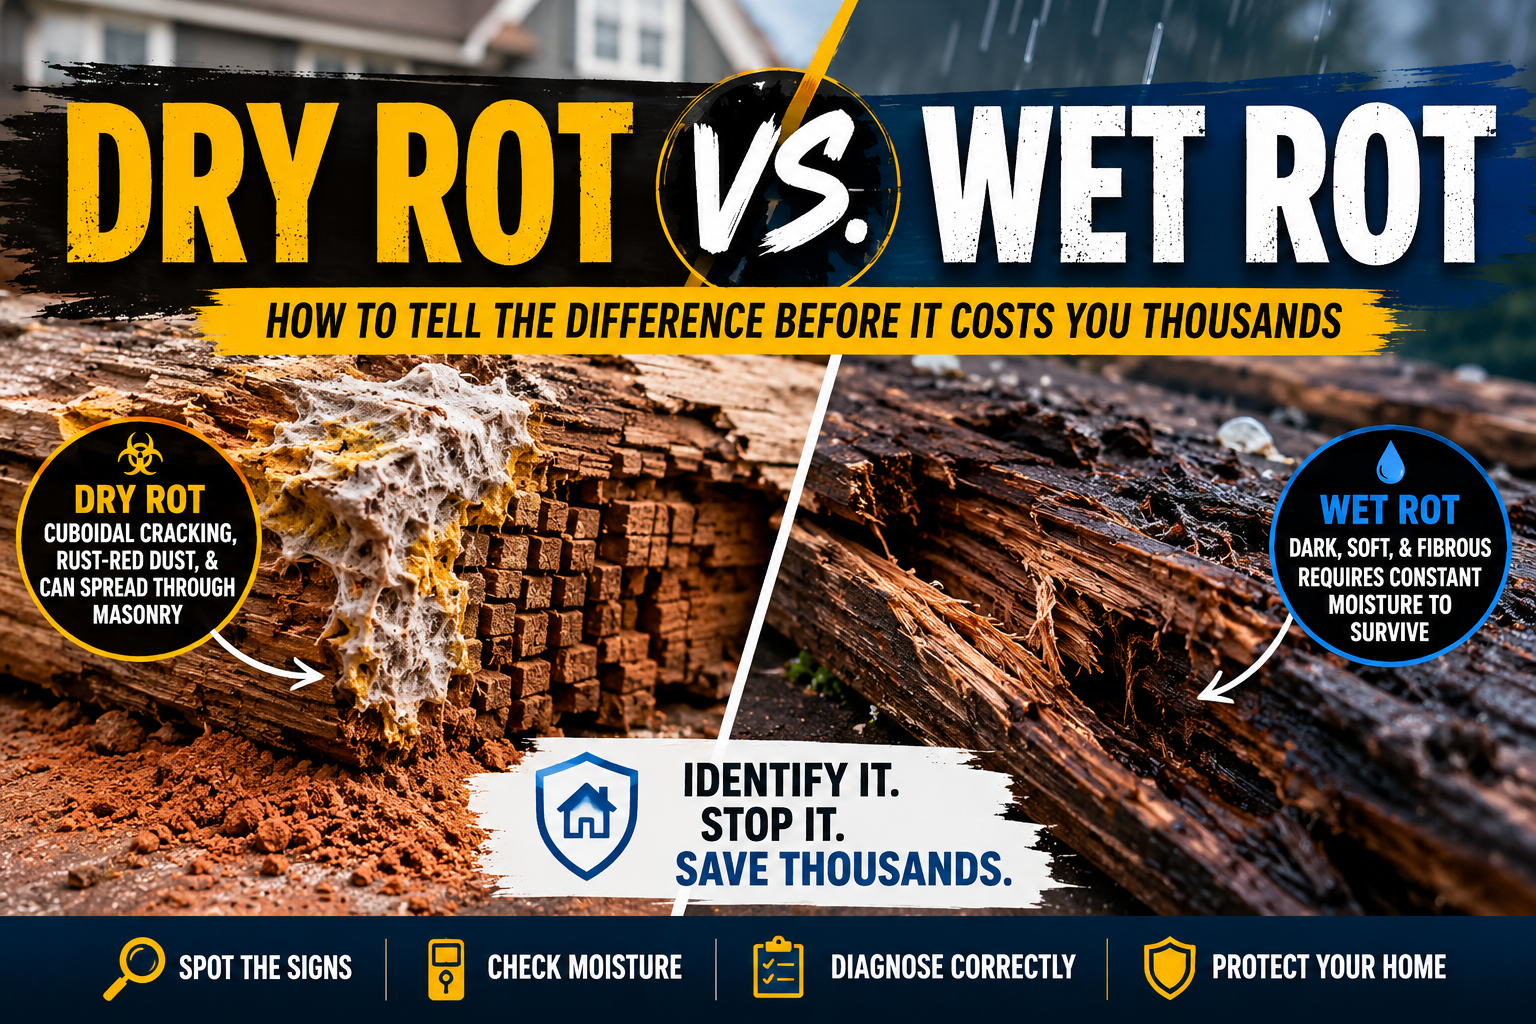
Dry Rot vs. Wet Rot
Dry rot and wet rot are both fungi that destroy wood, but they behave very differently. Wet rot stays where moisture exists and stops growing once the leak is fixed. Dry rot can spread beyond the original damp area by transporting moisture through its fungal network, making it far more destructive.
Here is the definitive guide to understanding, identifying, and treating Dry Rot vs. Wet Rot.
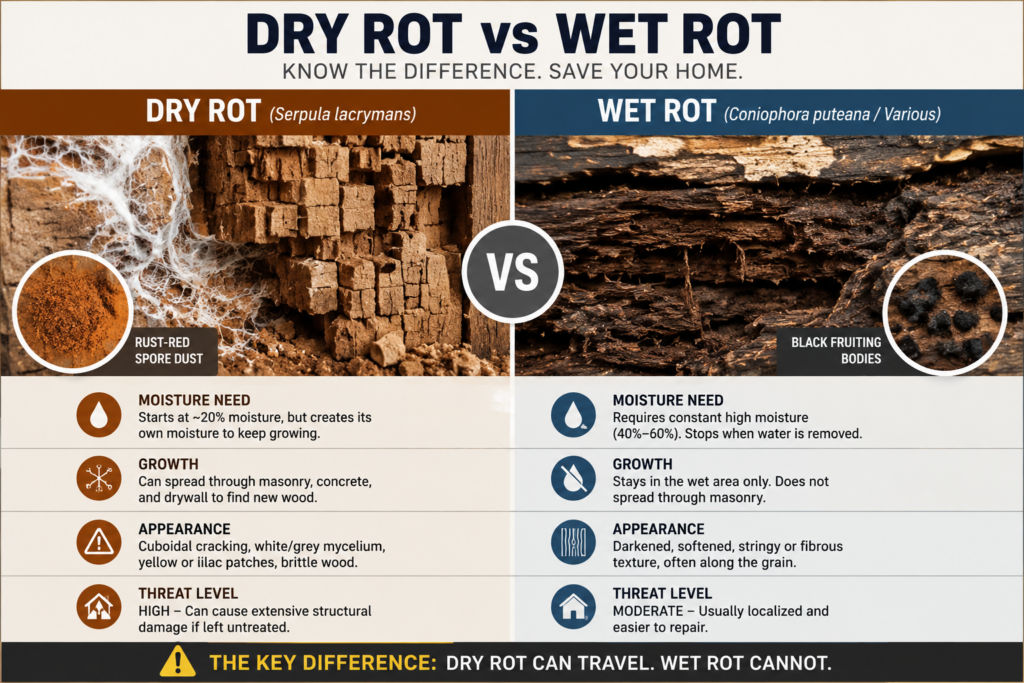
At-A-Glance: Dry Rot vs. Wet Rot Comparison
If you are standing in your crawlspace right now with a flashlight, use this quick-reference table to diagnose the issue immediately.
Feature
Dry Rot (Serpula lacrymans)
Wet Rot (Coniophora puteana / Various)
Moisture Requirement
Needs ~20% moisture to start, but produces enough moisture during decay to continue spreading to completely bone-dry timber.
Requires constant high moisture (40%-60%). Stops immediately if the water source is cut off.
Darkened, softened wood, longitudinal cracking, stringy texture, or a bleached appearance.
Spore/Dust Profile
Massive amounts of rust-red or brick-dust-colored powder covering nearby surfaces.
Minimal visible spore dust; localized black or dark brown fruiting bodies.
Growth & Mobility
Highly aggressive. Can travel through brick, mortar, plaster, and concrete to find new wood.
Restricted. Stays confined strictly to the wet area where the active leak or damp exists.
Structural Threat
Severe Hazard. Can compromise a whole house rapidly if left untreated.
Localized Hazard. Dangerous to the immediate area, but slower-moving and easily contained.
Average Repair Cost
💸 High to Extreme ($2,500 – $15,000+)
💸 Low to Moderate ($500 – $3,000)
The Fundamental Science of Wood Rot
To effectively combat wood rot, you have to understand that you aren’t fighting a chemical stain or simple weathering. You are fighting a fungus.
Wood is primarily composed of cellulose and lignin. Wood-rotting fungi survive by consuming these compounds, breaking down the cellular walls that give your timber its strength. However, the mechanism of destruction varies wildly between the two main types.
What is Dry Rot?
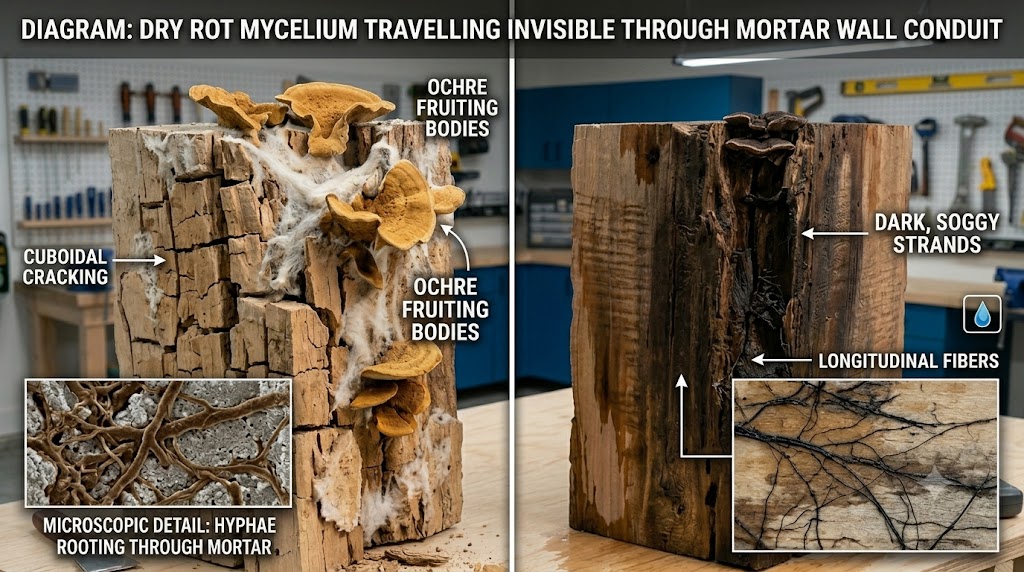
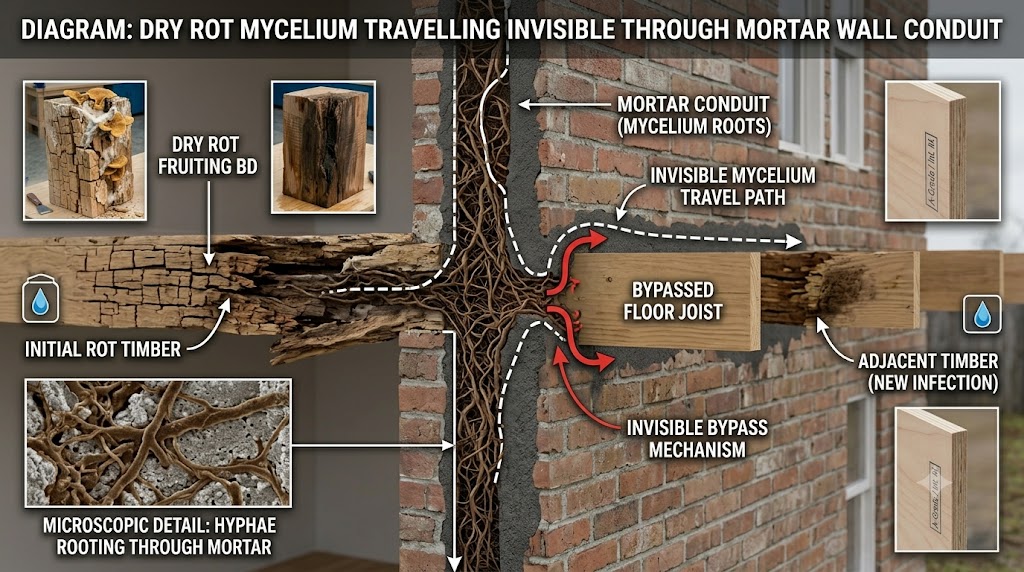
Despite its name, dry rot does not begin in dry conditions. The spores require an initial moisture level of around 20% to germinate. However, once established, Serpula lacrymans becomes a biological powerhouse. It develops root-like strands called hyphae that weave together into a thick, wool-like mat called mycelium.
⚠️ Warning: Dry rot can transport water from a damp source across non-organic materials like concrete walls and brickwork to infect perfectly dry wood rooms away. This makes it incredibly insidious.
What is Wet Rot?
Wet rot is a broad term covering several fungal species, most notably Coniophora puteana (the cellar fungus). Wet rot is far more common than dry rot but significantly less sophisticated. It is an opportunistic fungus. It requires a constant, high-moisture environment—typically between 40% and 60% moisture content—such as a leaking pipe, failing roof valley, or blocked gutter. The moment you completely remove the water source, wet rot stops growing and dies.
Dry Rot vs Wet Rot: Check Moisture Levels First
Because moisture levels dictate which fungus you are fighting, your very first action step should be to deploy a digital tool. Do not guess the dampness by feel. Read our comprehensive moisture meter guide at theplywood.com to learn how to scan your structural timber instantly. If the wood reads between 20% and 30%, you are in the dry rot danger zone; readings pushing past 40% typically indicate an active wet rot leak.
Recommended Tool: A pin-style digital moisture meter provides much more accurate readings than pinless models when diagnosing structural timber. Check out the General Tools Digital Moisture Meter on Amazon for a reliable, highly accurate option.
Quick-Snippets: Quick-Fire Identity Check
Use this quick-reference matrix to target specific diagnostic questions instantly.
Question
Dry Rot
Wet Rot
Needs constant moisture?
No
Yes
Spreads through masonry?
Yes
No
Easy DIY repair?
Usually no
Often yes
Dangerous structurally?
Very
Moderate
🧪 Dry Rot vs Wet Rot: 4 Steps to Identify the Problem
Don’t rely purely on a visual guess. Use this simple, field-tested diagnostic sequence to determine exactly what type of rot is attacking your property.
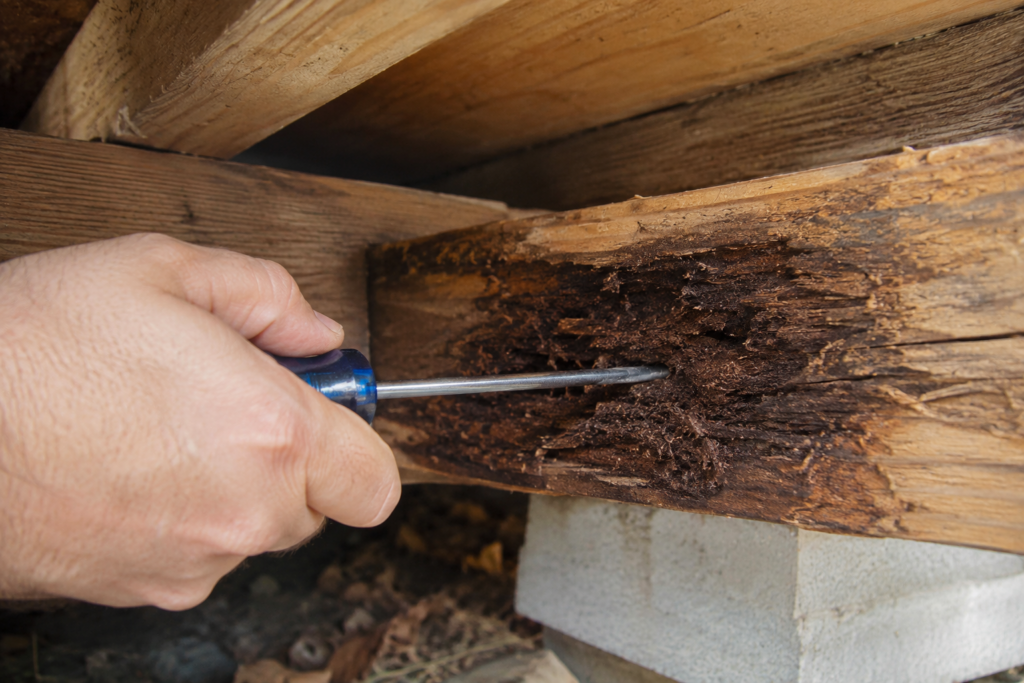
Step 1: The Screwdriver Penetration Test
Take a flat-head screwdriver and gently push it into the suspect wood.
If it sinks in like butter or crumbles into fine, powdery cubes, you are likely dealing with the advanced cuboidal cracking of dry rot.
If the wood feels fibrous, spongy, or splits along the natural grain line, it’s a classic indicator of wet rot.
Step 2: The Color and Texture Check
Look at the color variations of the affected timber.
Dry Rot: Look for a dull, brownish color in the wood itself, accompanied by a white or grey skin that looks like a pancake. If you see bright lemon-yellow or lilac patches, that is active dry rot growth.
Wet Rot: The wood typically looks significantly darker than the surrounding healthy timber (often blackish-brown). In some variations, it may look strangely bleached and fibrous, like shredded hemp rope. For those rebuilding exposed framing, matching the right material is vital; read up on exterior plywood grades at theplywood.com.
Step 3: The “Brick Dust” Inspection
Examine the horizontal surfaces around the damaged wood (shelves, floors, pipes).
Dry Rot: Infested homes will often feature a fine layer of rust-red dust. These are millions of dry rot spores looking for a new place to land.
Wet Rot: Spore dust is rarely visible to the naked eye. The damage stays localized to the damp zone.
Step 4: Trace the Moisture Path
If the damage extends far beyond any visible water source and migrates up dry plaster walls, it is dry rot.
If the damage perfectly mirrors a leaky pipe, a window condensation path, or an exterior ground-level damp issue, it is wet rot. For subfloor areas prone to heavy splash zones, learn about CDX plywood utility at theplywood.com to ensure proper structural replacement.
😬 The True Cost of Regret: A Real-World Case Study
A homeowner noticed bouncy floorboards in a downstairs guest bathroom. Assuming it was a minor leak from an old toilet flange, they hired a cut-rate handyman who simply swapped out the toilet wax ring, cut away a tiny patch of soft wood, and covered the area with a fresh sheet of underlayment.
This was a catastrophic mistake.
The issue wasn’t wet rot; it was a dry rot outbreak triggered by historical rising damp behind the plasterwork. Because the handyman failed to kill the underlying mycelium network hidden within the subfloor joists, the fungus continued to feast undetected underneath the beautiful new vinyl floor.
Two years later, the entire bathroom floor structure gave way, dropping into a three-foot crawlspace. The subsequent remediation required stripping the bathroom to the studs, chemically treating the brick foundations, and replacing four structural floor joists.
The Total Cost of Regret: The initial patch job cost $400. The ultimate structural remediation bill topped $14,500. Had they run a proper diagnostic check and used targeted treatments initially, they would have saved thousands.
Step-by-Step Eradication Protocol
The treatment pathways for these two fungi are entirely different. Treating them with a one-size-fits-all approach guarantees failure.
[Identify Rot Type]
       │
       ├──► Wet Rot  ──► Stop Water Source ──► Cut Out Soft Wood ──► Apply Wood Hardener/Preservative
       │
       └──► Dry Rot  ──► Stop Water Source ──► Strip Plaster 1 Meter Past Infection ──► Sterilize Substrates ──► Replace with Treated Timber
How to Treat Wet Rot
Isolate and Eliminate the Water Source: Fix the plumbing leak, clear the gutter, or repair the roof flashing. Without a constant supply of water, wet rot cannot survive.
Track Drying Progress: Use your pin-style moisture meter to verify the lumber drops back below 20% before sealing anything up.
Assess Structural Integrity: If the timber has lost more than 20% of its structural mass, it must be cut out and replaced. For major structural repairs in highly damp conditions, consider upgrading to specialized materials by checking the pressure-treated wood applications at theplywood.com.
Apply Fungicide: Treat the remaining timber with a high-quality wood preservative to prevent future spore germination. For non-structural cosmetics, refer to our forthcoming wood hardener guide at theplywood.com to save original decorative trims.
How to Treat Dry Rot
Locate the Moisture Core: Stop the original moisture source immediately. Monitor the surrounding framing with a moisture meter to map how far the drying zone needs to extend.
Establish the “Buffer Zone”: Remove all plaster and drywall within one meter (approx. 3 feet) of the last visible sign of rot in all directions.
Sterilize Non-Timber Elements: Spray and deeply inject masonry and concrete walls with a heavy-duty, professional-grade biocide.
Remove Infected Wood: Cut away all infected timber, ensuring you cut back into healthy wood by at least 500mm.
Install Pre-Treated Timber: Replace all removed joists or studs with wood that has been industrially pressure-treated with fungicidal preservatives. For marine environments or extreme wet-zone subfloors, review marine-grade plywood specifications at theplywood.com.
Tools to Fix It Right
When addressing wood rot, using the right tools and chemical formulations is the difference between permanently solving the problem and letting it return next season. Below are the industry-standard products required for professional-grade remediation.
1. Detection and Diagnostics
Before you cut into your walls, you must map the hidden moisture levels inside your studs and joists. A pin-style digital moisture meter lets you locate hidden plumbing leaks and determine whether your wood is in the hazard zone.
If your wet rot is localized to a non-structural area—like an expensive exterior window frame, decorative trim, or entry door jamb—you can dig out the worst soft spots and inject a liquid wood hardener to petrify the remaining soft wood fibers.
3. Professional Grade Fungicides and Borate Preservatives
For both wet and dry rot, long-term timber defense requires deeply penetrating borate treatments. Boron salts dissolve into the wood fibers, rendering the timber permanently toxic to wood-destroying fungi.
By this stage, you should have a clear understanding of dry rot vs wet rot, how to diagnose each condition, and which repair strategy is appropriate.
Frequently Asked Questions (FAQ)
Can dry rot spread after the wood dries?
Yes. While dry rot needs an initial source of moisture (~20%) to germinate and establish its core, an active infestation produces enough moisture during decay to continue spreading into perfectly bone-dry timber across your home.
Does bleach kill dry rot?
No. Bleach is a surface-level cleaner that contains mostly water. When sprayed on porous wood, the chlorine evaporates quickly on the surface, while the water content sinks deep into the timber. This can actually feed the underlying fungal roots (hyphae) rather than destroying them.
Can wet rot become dry rot?
No, they are entirely different biological species. Wet rot (Coniophora puteana) cannot mutate into dry rot (Serpula lacrymans). However, a high-moisture environment that currently breeds wet rot provides the perfect conditions for dry rot spores to land, germinate, and take hold.
Is wood rot covered by homeowners’ insurance?
Typically, no. Most standard homeowners’ insurance policies explicitly exclude coverage for wet or dry rot, classifying it as a maintenance issue. Coverage is usually only granted if the rot was the direct, immediate result of a sudden, accidental covered peril—such as a burst pipe that was reported immediately.
How long does it take wood rot to spread?
Under ideal conditions (warmth, stagnant air, and optimal moisture content), wood rot can germinate from spores and begin visibly destroying timber cells within 1 to 3 months. Dry rot can spread through walls at up to several inches per week if left unaddressed.
Can I repair wood rot without replacing the wood?
Only if it is non-structural wet rot. Minor wet rot on decorative trim, window sills, or door frames can be hollowed out, treated with a wood preservative, and stabilized with a specialized liquid wood hardener and epoxy filler. Any structural elements, such as joists, rafters, or load-bearing studs, that are suffering from rot must be replaced or structurally sistered.
When comparing dry rot vs wet rot, the biggest differences come down to moisture requirements, mobility, and the amount of structural damage each fungus can cause.
Wet rot is a localized nuisance that requires a continuous leak to survive; it can be repaired simply by removing the water and patching the wood. Dry rot is an aggressive, cancer-like fungal infection that can travel through your foundation walls, generate its own moisture, and destroy entire structural sections of a house if left alone.
If you’re unsure whether you’re dealing with dry rot or wet rot, don’t guess. Measure the wood’s moisture level, identify the water source, and act immediately. Early intervention can save thousands of dollars in structural repairs.
Related Posts:
Dealing with Wet and Warped Plywood: What You Can Do by Admin March 21, 2025 Repairs Dealing with Wet and Warped Plywood: A Practical Guide We have prepared a reference guide for you—an easy checklist for your convenience. Wet_and_Warped_Plywood_Checklist_ThePlywoodDownload If you’ve…
Hardboard vs MDF: What’s the Real Difference? by Admin September 12, 2025 DIY Hardboard vs MDF:Hardboard (HDF) is thinner, denser, and stronger in small sheets—best for backs, drawer bottoms, and underlayment.MDF is thicker, smoother, and easier to paint—making…
Rot-Resistant Woods: The Best Choices by Admin May 16, 2025 Grades Wood has always been prized for its natural charm and durability. But when used outdoors, not all wood holds up the same. Some species begin…