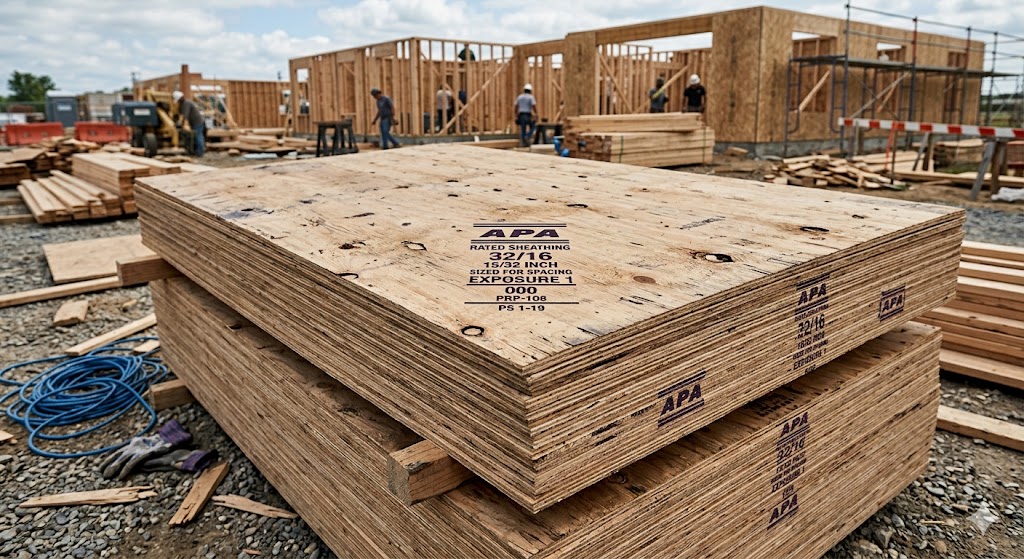
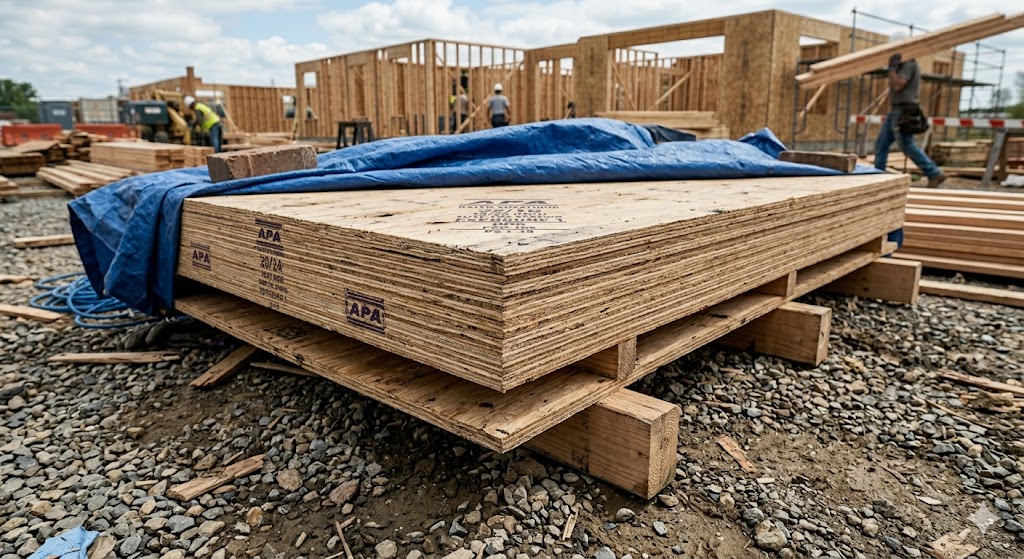
If you are standing in a lumber yard staring at a stack of rough, knotty wood with a purple stamp, you’re looking at CDX plywood. It is the undisputed workhorse of the construction world, but it is also the most misunderstood sheet good on the market.
I’ve been there—standing in my driveway two years after a build with a pry bar in my hand, ripping out a “spongy” floor because I fell for the same myths you’re likely hearing today. Before you load your truck, you need to know exactly what that “X” stands for—and why choosing the wrong grade is a $600 mistake waiting to happen.
CDX plywood is a structural-grade panel manufactured with a Grade C front veneer and a Grade D back veneer. The “X” refers to its Exposure 1 bond classification, meaning it uses waterproof adhesive designed to resist moisture during normal construction delays. It is not waterproof wood and is not intended for permanent exposure to the elements.
⚠️ THE CDX WARNING: What the “X” Really Means
The single biggest mistake I see (and one I made early on) is assuming the “X” stands for “Exterior.”
In trade usage, “CDX” is shorthand for a C-face, D-back plywood sheathing panel with an Exposure 1 bond classification. That “X” relates to the glue bond, not the wood’s weather resistance.
Why the Glue Matters (And Why the Wood Fails)
The adhesive used in CDX is a phenol-formaldehyde resin. This glue is virtually indestructible once cured; it won’t dissolve in water. However, the wood veneers (usually southern yellow pine or Douglas fir) are not treated with any preservatives.
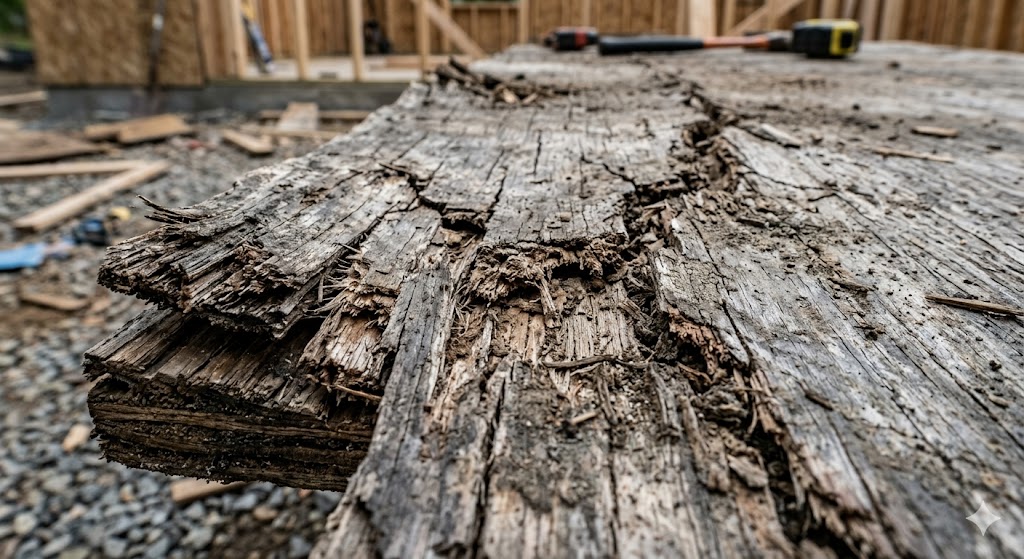
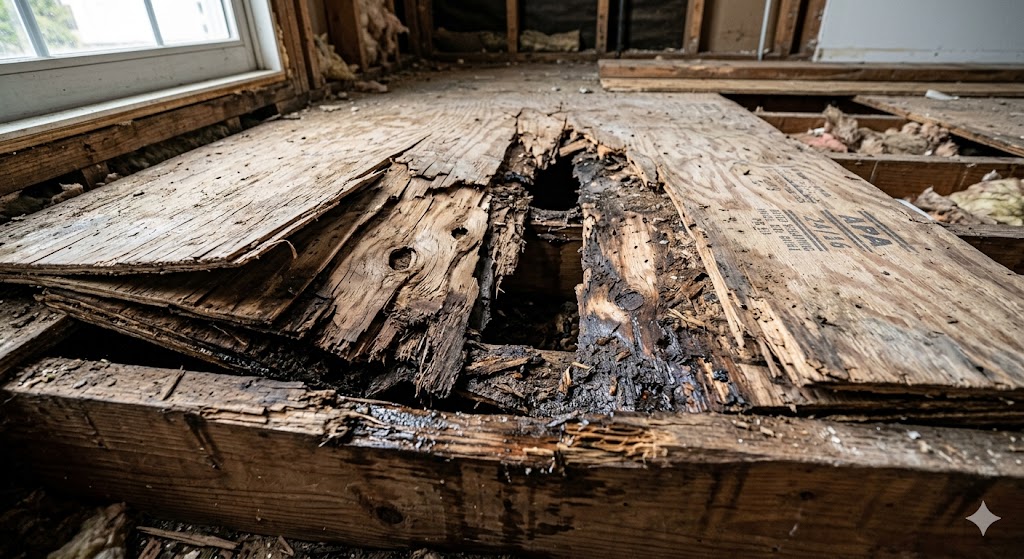
When water hits the panel, the wood fibers swell. Because the glue is rigid, the swelling wood pushes against the glue line. Over time, this causes “checking”—tiny cracks on the surface—which then allow even more water to seep into the core.
⚠️ Quick Reality Check
If CDX gets wet repeatedly:
It will swell and “mushroom” at the edges
It will check and crack on the surface
It will fail structurally faster than expected
👉 The glue holds. The wood doesn’t.
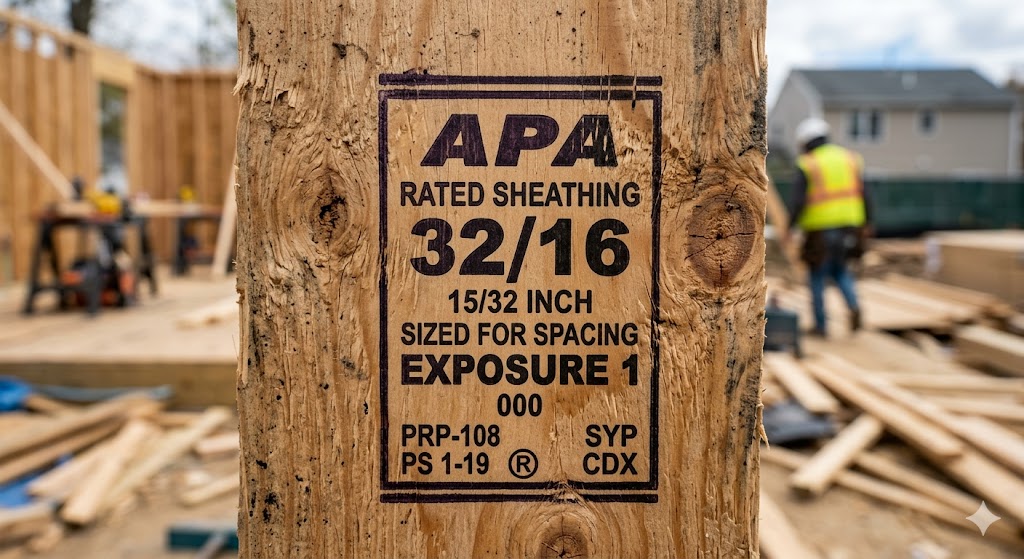
📐 Decoding the Stamp: Span Ratings vs. Thickness
One thing that confuses many first-time buyers is the “Span Rating” found on the APA stamp. You might see a fraction like 32/16 on a sheet of 15/32″ CDX.
The First Number (32): This is the maximum recommended support spacing in inches if the panel is used for roof sheathing.
The Second Number (16): This is the maximum recommended support spacing in inches if the panel is used for subflooring.
Why this matters: If you try to use a “roof-only” rated sheet (like 24/0) for a floor, the panel will be too flexible, leading to cracked tiles or bouncy floorboards. Always match your span rating to your joist spacing. If you’re unsure, choosing the right plywood thickness guide can help you avoid a structural mismatch.
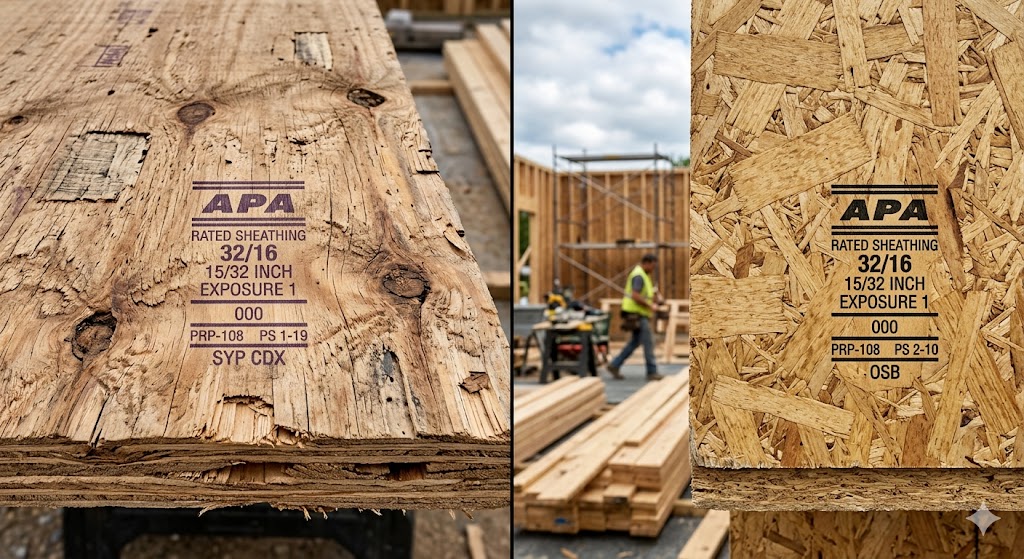
🆚 CDX vs. OSB: The Great Sheathing Debate
When you’re deciding on materials for a build, the decision usually comes down to a CDX vs OSB comparison for subfloors and roofs.
The Case for CDX:
Structural Memory: If CDX gets wet and then dries out, it generally returns to its original thickness.
Fastener Retention: CDX has a “cross-grain” structure. When you drive a nail or screw into it, the wood fibers “clasp” the fastener.
Edge Resilience: Unlike OSB, CDX edges don’t turn into a “sponge” after a single rainstorm.
The Case for OSB:
Price: It is almost always 20–30% cheaper.
Consistency: There are no knotholes or internal voids in OSB. Every square inch is the same density.
The Verdict: For roofs, OSB is the industry standard for cost. But for subfloors where moisture might be present (like a bathroom or kitchen), CDX wins every time.
💸 The $60 Mistake That Turns Into $600
Saving $40–$60 per sheet by choosing CDX over exterior-rated or pressure-treated plywood is a classic “false economy.”
From My Experience: I once used 19/32″ CDX for a ramp leading into a garden shed. I painted it with heavy-duty floor enamel, thinking it would be fine. Two years later, the underside had absorbed ground moisture. The D-grade back layer rotted, and the ramp collapsed.
If I had used pressure-treated plywood designed for ground contact instead, I wouldn’t have had to rebuild the entire frame from scratch.
Real-world takeaway: Any plywood that relies on surface coating for protection—but leaves the underside exposed—is going to fail over time.
🛠 Project Deep Dive: Where CDX Belongs
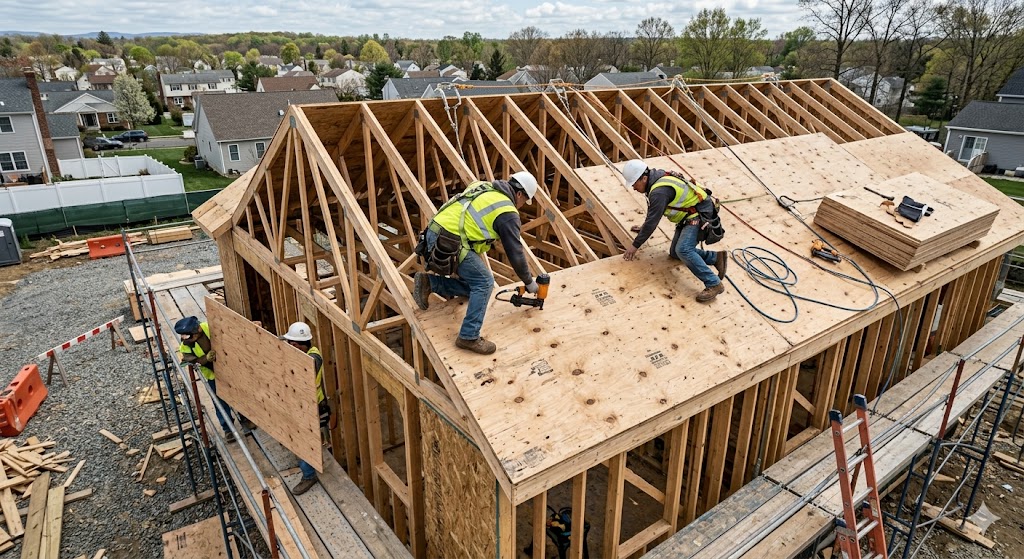
1. Roof Sheathing
CDX is the gold standard here. The Grade C face provides a solid enough surface for shingles to grip. Even if the roofers take three days to finish and it rains, the Exposure 1 bond ensures the roof won’t fall apart.
2. Wall Sheathing
In most residential builds, CDX is used behind vinyl or wood siding. Here, it provides “shear strength,” preventing the house from leaning during high winds. Because it’s covered by a house wrap (like Tyvek), it stays dry for decades.
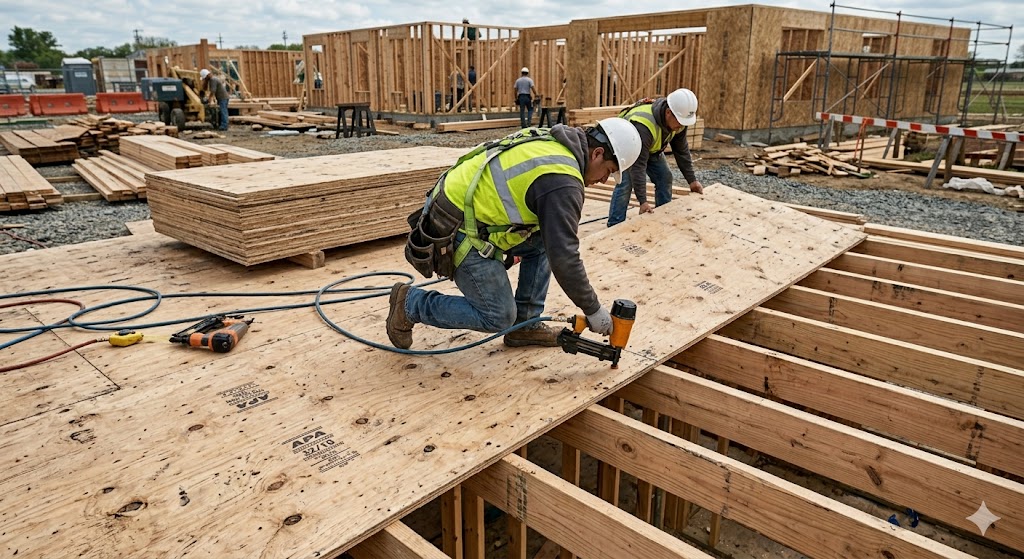
3. Subfloors
If you are laying down a subfloor for hardwood or tile, 23/32″ CDX (often labeled 3/4″) is the way to go. It is stiffer than OSB and less likely to “creep” or squeak over time. However, you must ensure that the C-grade (smoother) side faces up.
🔩 Fastener Secrets: How to Nail CDX
Standard construction codes usually require a specific “nailing schedule.” For most wall and roof sheathing, you should place a nail every 6 inches along the edges of the sheet and every 12 inches in the “field” (the middle of the sheet).
The “Gap” Rule: Never butt CDX sheets tightly together. Wood expands. You should leave a 1/8-inch gap at all edges and end joints to allow for expansion. If you don’t, the sheets will “buckle” or “tent”, creating ridges in your finished roof or floor.
🔧 Tools That Make CDX Actually Usable
CDX is rough. If you don’t use the right tools, you’ll end up with “tear-out” (shredded edges) and a structural mess.
Structural Bite:GRK Fasteners R4 Multi-Purpose Screws. Problem: CDX often has internal “voids.” Solution: These screws have a CEE thread that slightly enlarges the hole, allowing the head to sit flush without splitting the rough C-grade face.
Edge Protection:Thompson’s WaterSeal. Problem: Edge swelling. Solution: If your CDX is at a job site, a quick brush of sealer along the edges can prevent the “mushroom” effect after a rainstorm.
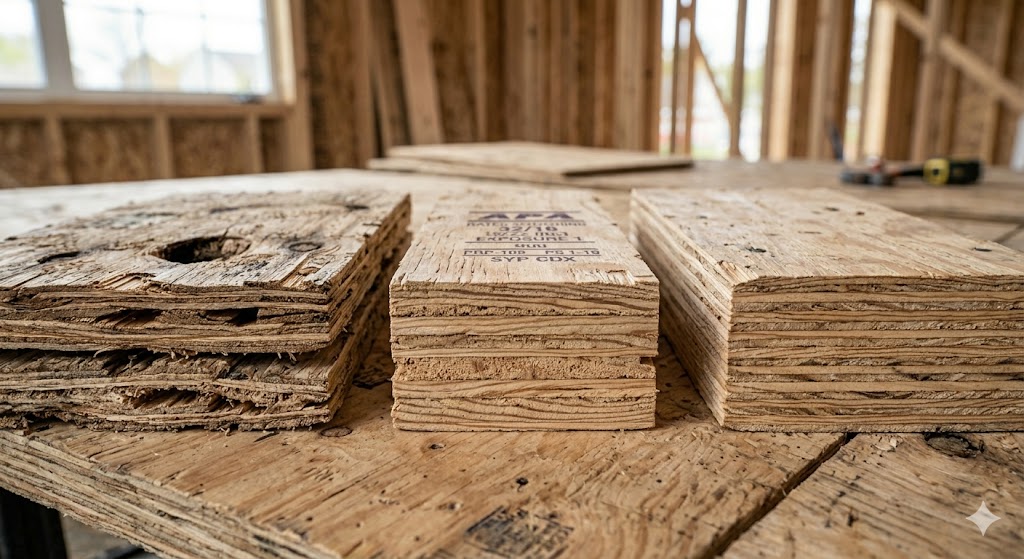
🧪 3-Ply vs. 5-Ply CDX (The Structural Test)
Not all CDX sheets are built the same—even at the same thickness. This is where most DIYers get tricked at the big-box stores.
The 3-Ply Trap
Many 1/2″ (15/32″) sheets are sold as 3-ply. This means there are only three thick layers of wood.
The Problem: Thicker veneers are more prone to warping and have larger internal voids. If a knot falls out of the center ply of a 3-ply sheet, 33% of the board’s thickness is suddenly air.
The 5-Ply Advantage
High-quality 1/2″ or 5/8″ CDX is 5-ply.
The Benefit: Thinner veneers are more stable. Even if one layer has a void, the other four layers maintain the sheet’s integrity. If you’re building a subfloor, always choose 5-ply to ensure structural stability and minimize floor squeaks.
🛠 Pro-Level Installation: Avoiding the “Squeak” Regret
If you’ve decided to use 23/32″ CDX for your subfloor, the installation method is just as important as the wood itself. The most common regret homeowners have after a renovation is a floor that squeaks every time they walk to the kitchen.
The Glue-and-Screw Method: Never rely on nails alone. Even the best CDX will eventually “work” against a nail as the house settles. Use a high-quality subfloor adhesive (such as Loctite PL Premium) on the joists before laying the sheet.
The “Rough Side” Rule: In the trade, we always say “C-side up.” You want the Grade C face (the smoother side with fewer open knotholes) facing your finished flooring. This provides a more consistent surface for your underlayment.
Acclimation is Key: Before you screw down your CDX, let the sheets sit in the room where they will be installed for 48–72 hours. Plywood is a natural product; if it moves from a humid lumber yard to a dry, climate-controlled house, it will shrink. If you install it while it’s “wet” from the yard, the 1/8-inch gaps you left will expand to 1/4-inch, compromising your floor’s rigidity.
🏗 Jobsite Storage: Protecting Your Investment
I’ve seen $2,000 worth of CDX ruined after being stacked improperly on a driveway for a week. Plywood is incredibly strong when flat, but it is highly susceptible to “permanent set” if it bows.
Get it off the ground: Never stack CDX directly on concrete or grass. Use “stickers” (scrap 2x4s) every 2 feet to create an air gap. This prevents moisture from wicking into the bottom sheet.
The Tarp Trap: If you cover your stack with a plastic tarp, don’t wrap it tight. You need airflow. If you “gift wrap” your plywood in plastic, you create a greenhouse effect that will cause the wood to mold and delaminate before you even cut it.
Weighted Stacking: If you know your project is a few weeks away, keep the stack weighted down. The heavy C-D grade veneers have different tension levels; left to their own devices, the top sheets will almost always start to “curl” toward the sun.
🚨 When CDX Fails: Real Scenarios
The “Rain Delay”: If left exposed to rain for months without a roof, the face will “check” (small cracks). This ruins the smooth surface needed for shingles.
Soil Contact: CDX installed near or on soil will rot from the underside up.
The Splinter Trap: Using CDX for a workbench. Within a month, the rough C-grade face will catch on your sleeves. You’ll regret not using a sanded panel like ACX.
🛒 How to Choose the Right CDX Sheet (Don’t Guess)
Not all CDX is equal. Here’s what actually matters when you’re in the store:
Check the Edges: Look for “voids” (empty gaps). If you see large gaps in the center layers, your screws won’t hold.
The Stamp Matters: Look for the APA rating and the actual thickness (e.g., 23/32″ for a 3/4″ nominal sheet).
Avoid the Warp: Sight down the edge of the sheet. If it looks like a Pringle, leave it at the store. CDX is prone to “cupping” when stored improperly.
❓ CDX Plywood FAQ
Is CDX waterproof?
No. It resists short-term moisture during construction but will fail under long-term exposure.
Can CDX be used outside?
Only if fully covered by roofing or siding. It is not an exterior finish material.
Can you paint CDX?
Yes, but you should use the best primers for plywood to stop the rough knots from soaking up all your paint and bleeding through.
What is the difference between CDX and BCX?
BCX has a Grade B face, which is sanded and has fewer knots. It is much better for projects where the wood will be visible, such as garage shelves.
If you can see it, touch it, or expose it—CDX is probably the wrong choice. It was built to be the “skeleton” of your project, not the skin. I’ve spent more money fixing “cheap” CDX mistakes than I ever would have spent just buying the right exterior-rated panel in the first place.
Final Verdict
CDX is the king of the job site for a reason—it is incredibly efficient for structural framing. But the mistake lies in asking it to do a job it wasn’t rated for. Respect the Exposure 1 bond, hide it behind a finish material, and it will serve you for decades.
Related Posts:
Plywood Thickness Guide: Don’t Guess—Use This Chart by Admin March 9, 2026 More About Selecting the correct plywood thickness is one of the most important decisions in woodworking and construction. The thickness of the sheet determines how strong the…
Marine Grade Plywood: Avoid This Costly Mistake by Admin April 7, 2026 DIY Marine grade plywood is a high-performance plywood made with waterproof phenolic glue, no internal voids, and multiple thin veneer layers. It is designed for high-moisture…