Learning how to frame a basement is often the turning point in a remodel—it’s when the space starts to feel like part of the home instead of a cold, unused storage area. Framing gives you more than just walls; it gives you a solid structure for insulation, wiring, and drywall, while also hiding plumbing and ductwork for a clean, finished look.
I’ve worked on basements in every condition you can imagine—crumbling stone walls in century-old houses, bare concrete boxes in suburban builds, even one with a floor so out of level it dropped almost two inches from one side to the other. No matter the challenges, the starting point was always the same: a solid layout, quality materials, and solving any moisture problems before picking up a saw.
The moment the walls go up, you can walk the floor plan, picture where furniture will sit, and see how the finished rooms will come together. Doing the framing yourself means you control every detail—where the outlets go, how doorways are placed, and how you’ll work around awkward features like support posts or bulkhead vents.
In this guide, I’ll take you through how to frame a basement step-by-step, sharing techniques I use to keep walls straight, sturdy, and ready for whatever you plan to build next.
Why Framing Matters When Finishing a Basement
When you frame a basement, you’re not just putting up boards — you’re shaping how the space will feel and work. This is the step where an empty, echoing room starts to take on a real purpose.
Good framing lets you carve out rooms where there was nothing but concrete before. It gives you solid backing, so insulation actually does its job, and drywall hangs straight. It hides all the ugly stuff — pipes, wires, and duct runs — but still leaves access where you’ll need it later.
It’s also when you set the flow. You decide where the doors swing, where the walls meet, and how each area connects. Once those walls are up, you can finally walk through the space and picture it furnished. And if you ever sell, a basement that’s been framed well doesn’t just look nicer — it feels like part of the home, which buyers notice.
Step 1: Inspect and Plan Before You Frame a Basement
The most important part of learning how to frame a basement is thorough preparation. Skipping this step can mean building beautiful walls over a problem that will ruin them later.
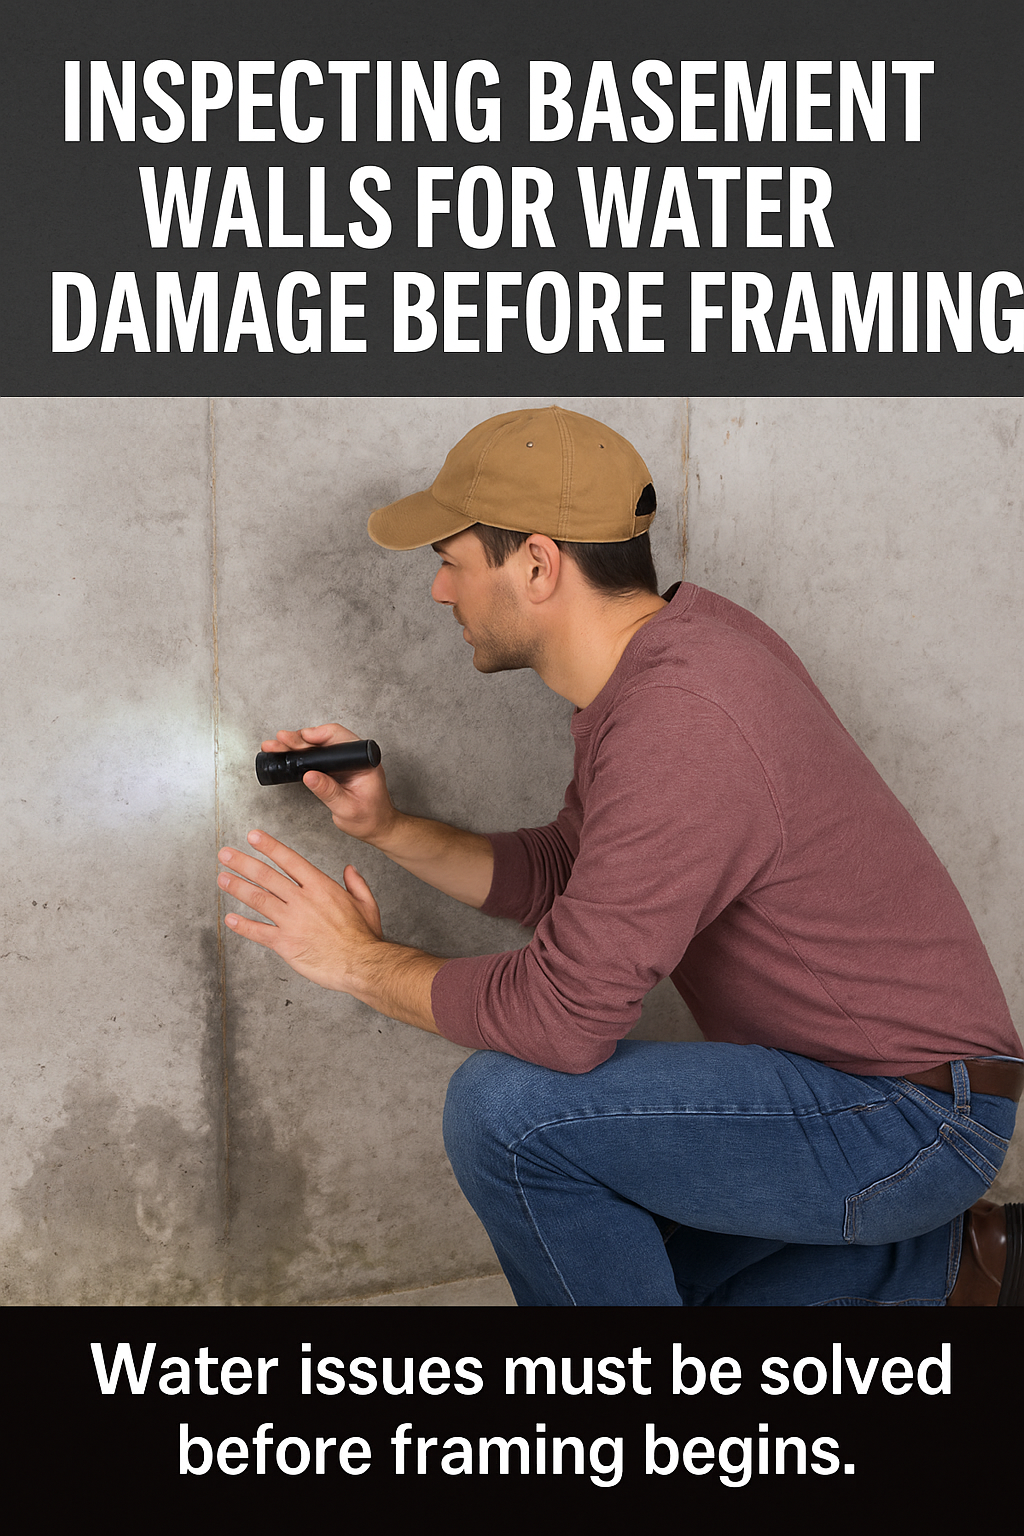
Check for Moisture
Before you even think about picking up a saw, take time to walk through the basement with a bright flashlight. Look closely for:
Water stains or efflorescence — a white, chalky residue on the walls that signals water movement through concrete or block.
Musty odors — often the first sign of hidden mold growth.
Drips or damp spots after rain — check during or right after a storm if possible.
Peeling paint or rusted metal — another indicator of moisture.
Even small moisture problems can lead to mold, wood rot, and unhealthy indoor air once the walls are closed up. Fix them first with masonry waterproofers, French drains, or sump pumps before starting any framing. For a full walkthrough of these fixes, see our How to Waterproof a Basement Wall article for step-by-step guidance.
Also, inspect for structural issues like cracks, bowing walls, or uneven floors. If you see anything concerning, get it checked by a contractor or structural engineer before proceeding.
Finally, plan your layout carefully — account for electrical runs, plumbing, and HVAC so you’re not tearing down fresh framing to make changes later. A couple of extra hours of planning here will save days of work and frustration down the road.
Fix issues with masonry waterproofers, French drains, or sump pumps before starting.
Step 2: Gather Your Basement Framing Tools and Materials
Before any lumber goes down, I like to spend some quiet time mapping out exactly where the walls will sit. It might not feel like you’re making progress yet, but trust me — these lines will guide every cut and nail from here on out.
Pick a solid reference point, like a main support beam or an existing wall, and measure out to where your new wall will stand. Make small pencil marks at each end, then snap a chalk line between them. That crisp line is your roadmap. I always think of it like drawing the first lines on a fresh blueprint — everything else depends on them being straight.
In basements, I leave about a half-inch between the framing and the foundation. That little gap may not seem like much, but it helps keep the studs dry and makes space for insulation or a vapor barrier.
Once the floor lines are done, transfer them to the ceiling with a plumb bob or a laser. This way, when you go to set the top plate, it’ll be perfectly in line with the bottom one. Take your time. A few extra minutes here can save you hours of fighting crooked walls later.
Preassembling walls on the floor speeds things up and helps keep them square.
Cut the top and bottom plates to length.
Mark stud spacing (16 inches on center is standard).
Nail or screw studs into place.
Tilt the wall upright and position it on your layout line.
Step 5: Secure the Bottom Plate to the Concrete
Once the bottom plate is in place, it’s time to secure it. The way you anchor it matters — not just for strength, but for how well it holds up in a basement environment where concrete and moisture are always part of the equation.
Tapcon screws are my go-to for DIY work. They bite into concrete like nothing else, and all you need is a hammer drill with a masonry bit to pre-drill the holes. I like them because they’re straightforward — drill, drive, done. If you ever have to move or adjust a wall later, you can back them out without destroying the plate.
Powder-actuated fasteners are the speed option. They shoot a nail right into the slab using a small explosive charge, which feels a little like using a tool from a construction movie. They’re fast and hold strong, but they’re loud — so ear protection is a must, and I usually only use them in bigger open areas where noise isn’t a problem.
Adhesive plus screws are another solid approach. A bead of construction adhesive under the plate before you set it not only adds holding power but also helps seal out moisture between the wood and the concrete. In damp climates, that extra barrier is worth the few extra minutes it takes.
Step 6: Attach the Top Plate to Joists
With your bottom plate anchored, it’s time to mirror that layout overhead. I start by holding the top plate in position directly above the bottom plate, making sure the edges line up perfectly. If you’ve already transferred your chalk lines to the ceiling using a plumb bob or laser level, this part goes quickly.
For joists running perpendicular to your wall, it’s straightforward — you can drive 3-inch screws or nails right through the plate into the joist above. I prefer screws for basement work because they grip well and make adjustments easier if something shifts.
If your joists run parallel to the wall, you won’t have anything to attach to directly. This is where blocking comes in. Cut short pieces of 2×4 to fit snugly between the joists, then attach them securely. These blocks give you solid nailing points for your top plate and help stiffen the joist bays.
Before locking everything down, I like to double-check plumbing with a long level from the bottom plate to the top plate. Even a small lean now will be obvious when you install drywall. Taking a few extra minutes here to get it perfect saves a lot of frustration later.
Step 7: Frame Around Obstacles
Basements rarely give you a perfect blank slate. More often, you’ve got ductwork, support posts, and plumbing that need to be worked around. This is where a little creativity in framing comes in.
For ductwork, I build soffits. Start by measuring the width and depth of the duct plus a little clearance for insulation or drywall. Frame a simple box using 2×2 or 2×4 lumber, securing it to the ceiling joists and wall framing. Keep it square — crooked soffits stand out like a sore thumb once they’re finished.
For support posts, I frame small columns. Cut four studs to match the height from floor to ceiling, and wrap them around the post with blocking at the top and bottom. This not only makes the post look intentional but also gives you something solid to attach drywall or paneling to.
Don’t forget access panels for shut-off valves, cleanouts, or anything else you might need to reach later. You can frame a small opening and use a removable panel or a purpose-built access door. It’s tempting to cover everything for a clean look, but being able to reach those utilities later will save you from tearing out finished walls.
Step 8: Square and Plumb the Walls
Before locking anything in place, grab a 4-foot level and check each stud and plate for vertical plumb. I like to check both faces of the wall, because a stud can look straight from one side but lean the other way slightly. Once plumb, measure the diagonals from corner to corner — if both measurements match, your wall is square. If they’re off, gently push or pull the frame until they match. This step only takes a couple of minutes, but it saves headaches later when hanging drywall or trim. Adjust now, while everything can still move easily.
If you’re framing a basement bedroom, remember that most building codes require an egress window large enough for safe escape in case of fire. That means specific minimum widths, heights, and sill heights — check your local code before you frame, so you don’t have to redo the opening later. For doors, proper framing is essential for strength and smooth operation. Use king studs running full height, jack studs to support the header, and a header sized for the span and load above. Even in non-load-bearing walls, a properly built doorway keeps the frame rigid and the door square.
Final Basement Framing Tips
Always use pressure-treated wood where it touches concrete.
Plan for utilities before you close in walls.
Don’t skip permits—they protect you and future buyers.
Attic Insulation Removal: Complete Guide for Homeowners by Admin August 6, 2025 Repairs Rising energy bills and drafty rooms often mean the attic isn’t doing its job. Attic insulation removal can help. Warm air naturally travels upward, and…