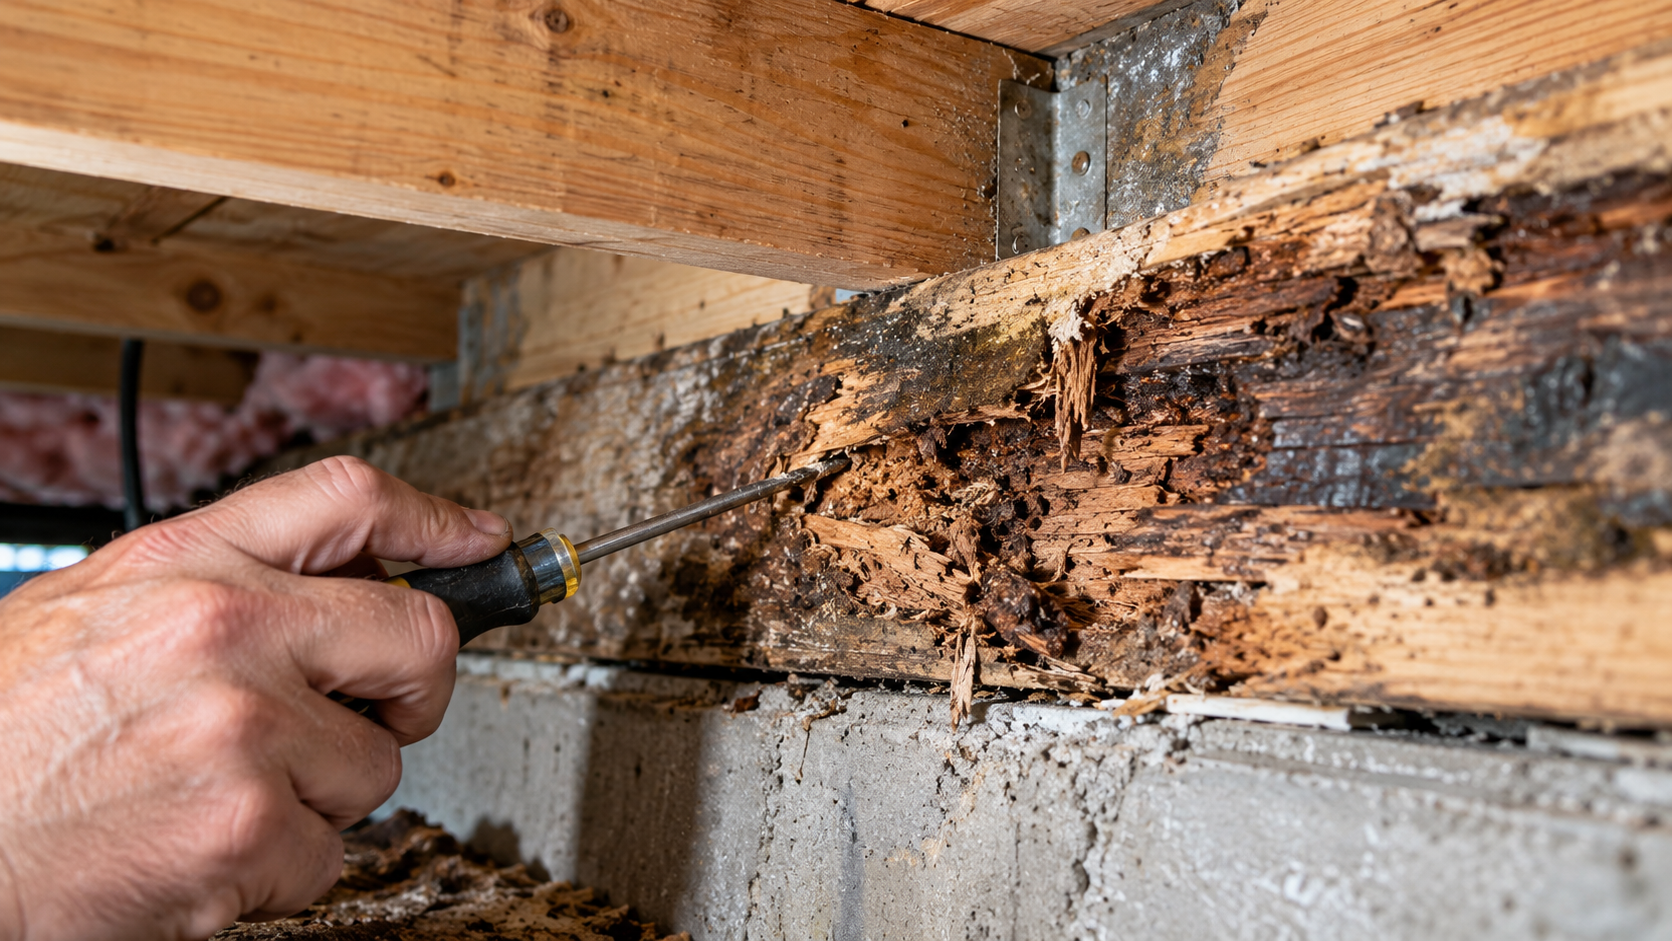
The rot that looks worst is often not the rot that matters. A crumbling piece of window trim is ugly but carries almost nothing. A floor joist can look fine under a flashlight while the wood inside has already lost much of its strength. Whether rot is “structural” has less to do with how bad it looks and more to do with what that piece of wood is holding up and how far the decay has gone inside it.
This guide gives you a way to answer that question on your own house before you buy epoxy, call a carpenter, or paint over anything.
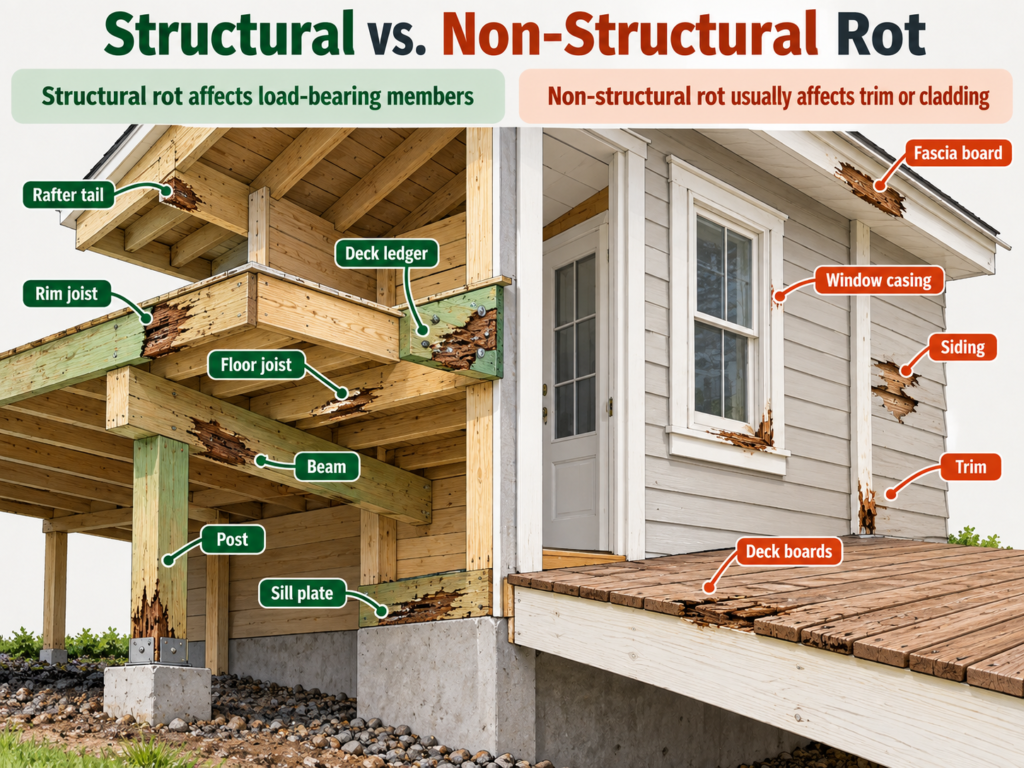
Quick answer: Wood rot is structural when it affects a member that carries load (joists, beams, posts, sill plates, rim joists, deck ledgers, rafters, headers, stair stringers) or a connection point where load transfers. Rot in trim, casing, fascia, or siding is usually not structural by itself, but it often marks a water path that leads to framing. To check, identify what the wood supports, probe it with an awl at the bearing ends and underside, do a splinter test, take moisture readings, and look for sagging or movement. If a load-bearing member is soft, wet, or brash-breaking at a connection, plan on replacement or reinforcement, not filler.
What “Structural” Actually Means for Rot
“Structural” is about the load path. If a piece of wood is part of the chain that carries the weight of the roof, floors, people, or snow down to the foundation, damage to it is structural. If you could remove it and nothing would sag, it is not.
The trouble is that rot rarely respects that line. Water that rots fascia keeps going to the rafter tails. Water that rots a door jamb works down to the sill plate. So the honest answer to “is my rot structural?” is often “not yet, but check what is behind it.”
Component
Carries load?
What structural failure looks like
Usual repair path
Window/door casing, trim
No
None directly; watch for rot spreading inward
Hardener + epoxy filler, or replace piece
Fascia board
Mostly no
Soft rafter tails or roof sheathing behind it
Replace board; probe rafter tails
Siding
No
Soft sheathing or studs behind
Replace section; open wall if sheathing is soft
Deck boards
Partly (walking surface)
Board breaks underfoot
Replace boards
Deck joists, beams, posts
Yes
Bounce, sag, post base crushing
Replace or sister; no filler-only fixes
Deck ledger
Yes, critical
Gap at house, rot around bolts
Replace; often needs permit
Sill plate / rim joist
Yes
Floor sag near walls, gaps at baseboard
Replace sections; usually a pro job
Floor joists
Yes
Bouncy or sloped floors, cracked tile
Sister or replace
Rafters, headers, studs in bearing walls
Yes
Sagging roofline, sticking doors, drywall cracks
Replace or reinforce; engineer if extensive
Why a “Small” Soft Spot Can Still Be a Big Problem
Most rot in houses is brown rot, and brown rot does its worst damage early. In the early stage of decay, serious strength losses can occur before the decay is even detected, and strength under sudden loads (toughness, impact bending) is the most sensitive.
The numbers from Forest Products Laboratory research are sobering. In lab tests, toughness losses ranged from 6% to more than 50% by the time wood had lost just 1% of its weight to fungal attack. In Douglas-fir heartwood studies, weight losses of 1 to 18% were linearly related to strength losses of 5 to 70%. The reason: brown rot fungi produce enzymes that diffuse well away from the fungal hyphae, so the damage extends beyond the area you can see.
What that means in practice: the soft spot you can feel is the far end of the damage, not the edge of it. The wood around it that still feels hard may already be weaker than it looks.
If you are not sure which kind of rot you have, our dry rot vs. wet rot guide covers the visual differences, and that distinction matters, because true dry rot can spread beyond the wet area.
How to Check Whether Rot Is Structural: The 6-Step Check
🧪 Run this test yourself. It takes 20 to 40 minutes per area and needs an awl, a flashlight, and ideally a pin moisture meter.
Step 1: Identify what the wood holds up
Before touching anything, trace the load. Is this piece of wood supporting another piece, or is it attached to one? Follow it: fascia → rafter tail; door jamb → threshold → sill plate → rim joist; deck board → joist → ledger or beam → post. Write down every member in that chain. Those are the ones you need to test, not just the one you noticed.
Step 2: Probe the right places, not just the obvious spot
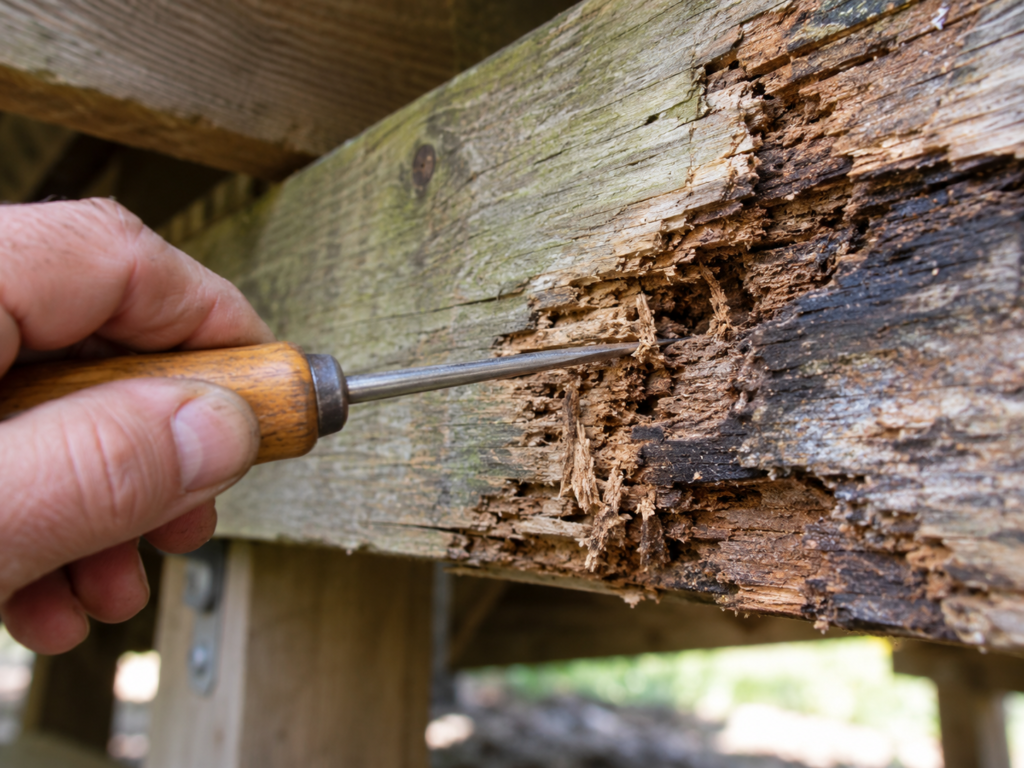
Push an awl or thin screwdriver into the wood with firm hand pressure. Sound softwood resists; a tip that sinks in easily, or wood that feels spongy or crumbly, means decay.
Where to probe on load-bearing members:
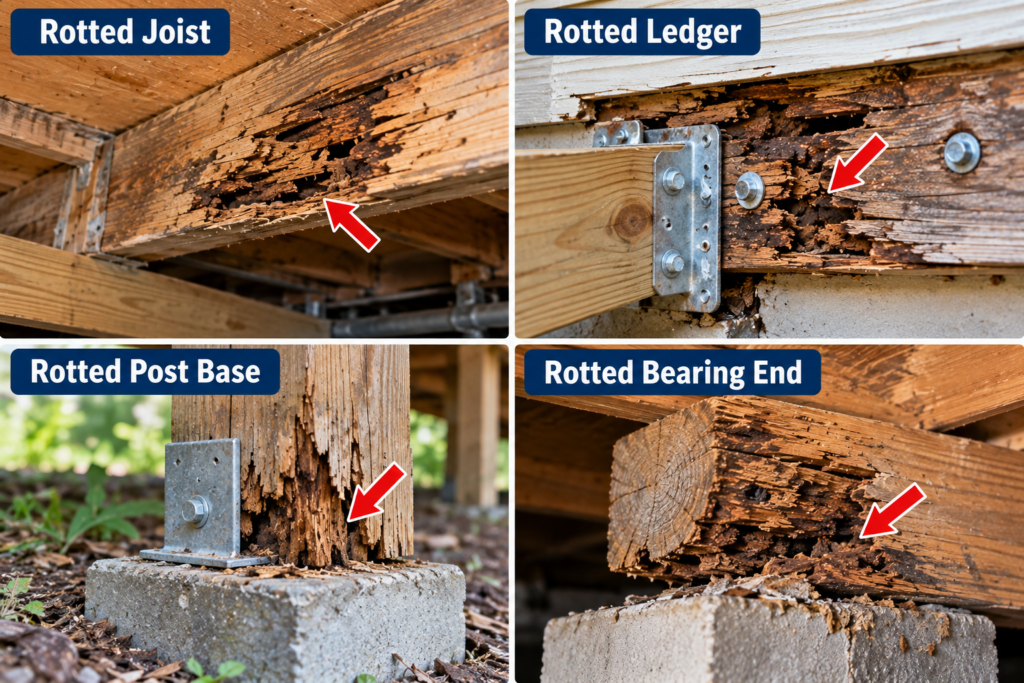
The bearing ends, where a joist sits on a beam or a post meets its base
Around every fastener, including ledger bolts, joist hanger nails, and lag screws
The underside and top edge, where water sits
End grain and any cut surface, which absorbs water fastest
❌ Mistake: Probing only the middle of the visible soft patch. The critical failure points are usually connections and bearing ends, which are often in the dark corner you have to crawl to.
Step 3: Do the splinter test
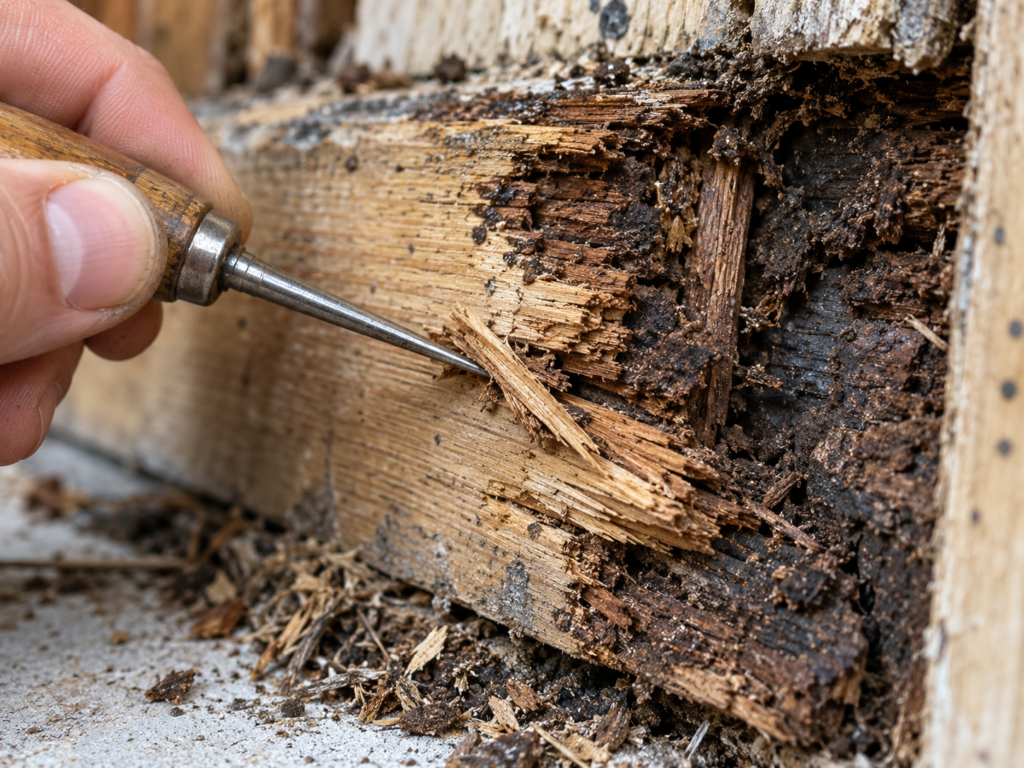
Pry up a small sliver of wood with the awl, going with the grain. Sound wood lifts in a long, stringy splinter. Decayed wood breaks off short and abruptly across the grain, sometimes with a brittle, “brash” snap. This picks up decay that the probe test can miss, because early decay can still feel hard.
Step 4: Take moisture readings
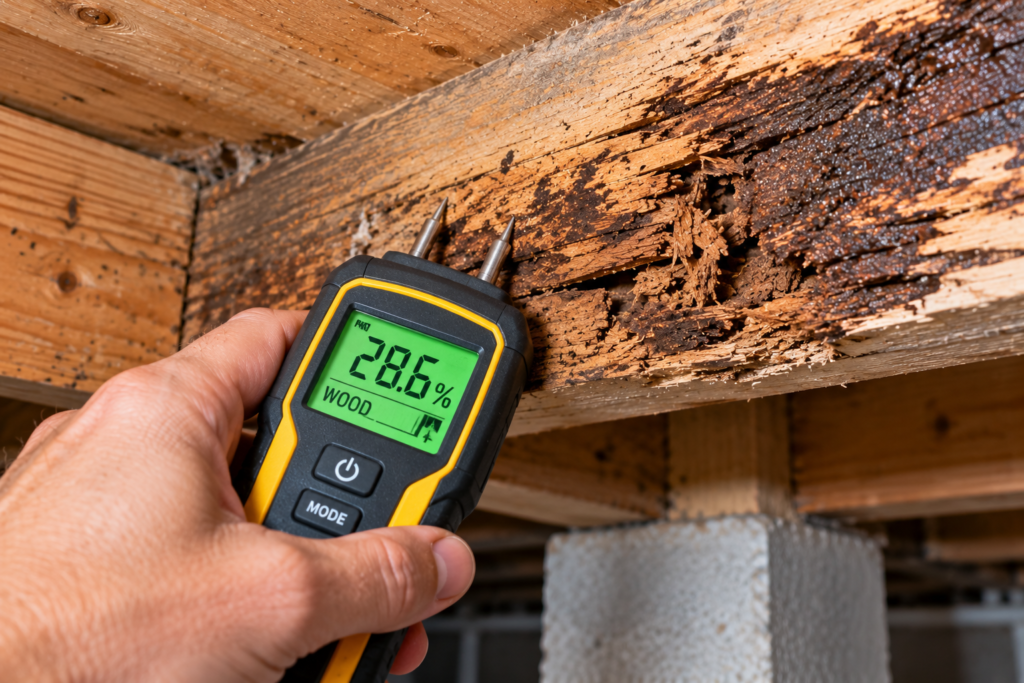
Use a pin moisture meter on the member, next to it, and on a sound reference piece somewhere dry. Readings around 20% and above mean conditions where decay fungi can stay active. A high reading on a load-bearing member means conditions may still support decay, even if the wood passes the probe test today.
Step 5: Look for movement
Structural rot usually shows up in the building itself:
Floors that bounce, slope, or feel soft near exterior walls
Doors and windows that start sticking in one area
New drywall cracks above doors or at ceiling corners
A deck that sways, a ledger pulling away from the house, or a post that has settled
A roofline dip visible from the street
Any of these symptoms near visible rot are a reason to investigate the affected framing before making a cosmetic repair.
Step 6: Find the water source
Rot is a water problem first. If you cannot find the source (failed flashing, gutter overflow, a leak, splash-back at a threshold, wood touching soil), any repair is temporary. The IRC’s decay provisions (Section R317) exist for exactly this reason: wood close to grade or in contact with concrete and soil needs to be naturally durable or preservative-treated. Rot at those locations often means the original build did not follow that, and the replacement needs to.
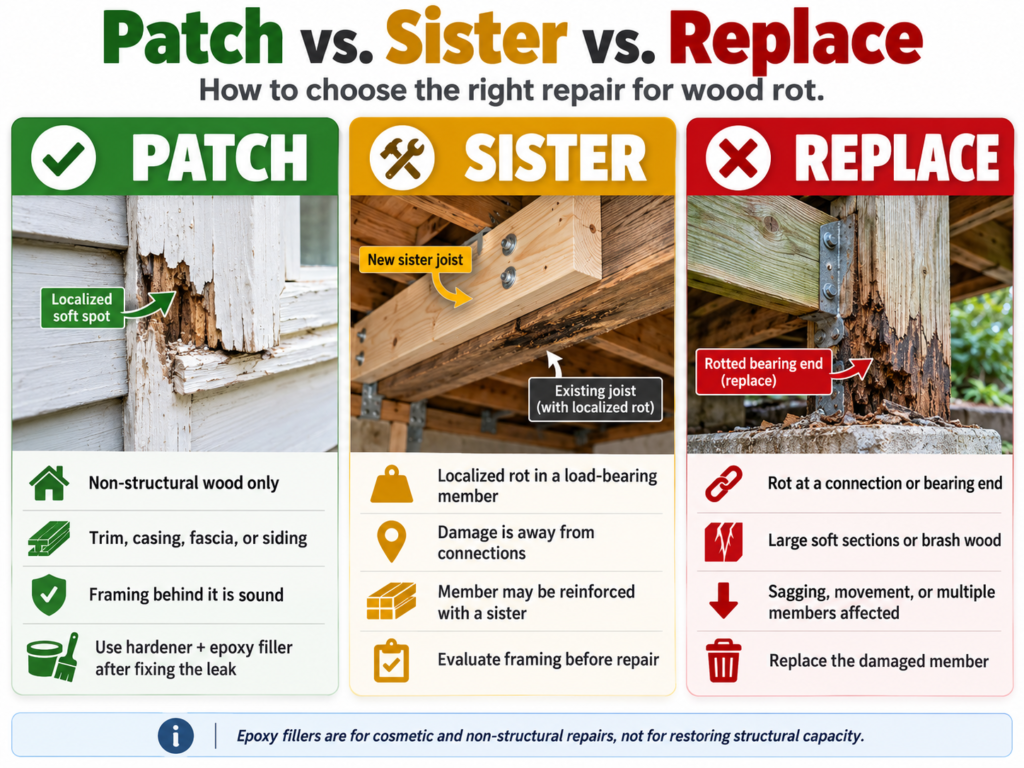
Soft spot in trim, casing, or siding only; framing behind passes probe and splinter tests
No
DIY repair with hardener and epoxy (see below)
Rot in a non-structural piece; framing behind is wet but firm
Not yet
Fix the water source now, repair the piece, re-check the framing in a season
Localized rot in a load-bearing member, away from connections
Yes
Have the member evaluated for sistering or replacement; don’t rely on filler to restore structural capacity
Rot at a connection (ledger bolts, joist hanger, post base, bearing end)
Yes
Replace the member or connection; don’t patch
Brash breaks throughout, or large sections soft
Yes
Replace
Any sagging, movement, or multiple members affected
Yes
Get a contractor; an engineer if beams, headers, or multiple joists are involved
Where reinforcement is an option, our guide to sistering joists walks through how it’s done, and the building code for sistering joists covers what inspectors look for. Structural repairs often need a permit, so check with your local building department.
Some repair pros use a rough field heuristic: if more than about a third of a member’s cross-section is decayed, replace it. That’s a rule of thumb, not a code or engineering threshold, and it doesn’t make a member with less damage safe.
When Epoxy and Wood Hardener Should Not Be Used
⚠️ Warning: Consolidants and epoxy fillers are good products for the right job. They are the wrong answer in these cases:
The member carries load. Epoxy can restore shape and hold paint, but it does not bring back the strength brown rot has already destroyed in the surrounding “hard” wood.
The rot is at a connection. Bolts and nails need sound wood around them. Filler around a ledger bolt is a failure waiting for a heavy party load.
The wood is still wet. Hardener will not penetrate saturated fibers; it skins over the surface.
The water source is not fixed. You will be doing the repair again.
You suspect true dry rot that may have spread through masonry or behind finishes. That needs cutting back well past the visible damage.
💸 Cost difference: The gap between the two is large. Homewyse puts the basic cost to repair dry rot at $592 to $1,112 per repair as of May 2026, with wide variation by site conditions. That covers typical localized work. Once framing is involved, costs climb fast, because you are paying for shoring, removal, new members, and often a permit and finish work on top.
😬 Regret: The most expensive rot repairs are usually the ones where someone filled and painted a structural member years earlier. The filler hid the damage while decay kept moving along the member, and what could have been a single sistered joist becomes a rim joist and sill plate replacement.
Limits of Checking It Yourself
These tests can’t tell you everything:
Early decay can pass the probe test. Wood can lose significant toughness before it softens. The splinter test and moisture readings help, but they don’t guarantee sound wood.
Moisture meters read the outer part of the member. Short pins read the shell; a dry surface can hide a wet core, and readings vary by species calibration.
Hidden rot stays hidden. Rot inside wall cavities, under subfloors, or behind siding can’t be probed without opening things up.
Treated lumber is not rot-proof. Cuts and drilled holes expose untreated interior wood, and that’s where rot often starts on pressure-treated decks.
Paint and caulk hide damage. A firm painted surface can sit over soft wood.
A homeowner check can tell you when something needs attention. It can’t certify a load-bearing member as safe. If your check turns up anything borderline on framing, pay for a professional look, which is cheap compared to guessing wrong.
Tools for the Check
If you only buy one diagnostic tool for rot, make it a pin-type moisture meter. It helps you tell an old, dry repair from an active moisture problem.
Is wood rot a structural problem? It is when it affects a load-bearing member or a connection, such as joists, beams, posts, sill plates, deck ledgers, or rafters. Rot in trim, casing, or siding is usually cosmetic, but it often points to water reaching framing nearby.
Can you tell if rot is structural just by looking? No. Brown rot can cause major strength loss before wood looks or feels decayed. Combine a probe test, a splinter test, moisture readings, and a check for sagging or movement.
Can epoxy fix structural wood rot? Not as a stand-alone fix. Epoxy restores shape and seals wood, but it doesn’t bring back strength lost in the surrounding decayed wood. Load-bearing members with rot should be evaluated for replacement or reinforcement.
How much rot is too much to repair? Some pros use a rough rule of thumb: if more than about a third of a member’s cross-section is decayed, or rot is at a connection point, replace it. This is a field guideline, not a code requirement, and load-bearing members with any rot should be evaluated.
Is rot in a deck ledger serious? Yes. The ledger attaches the deck to the house, and rot around its fasteners is one of the more dangerous rot locations. Replace it rather than patching.
Does homeowners insurance cover structural wood rot? Usually not when it results from long-term moisture or lack of maintenance. Some policies cover rot caused by a sudden covered event. Check your policy wording.