Christmas decorations come in all sorts of shapes and styles. Just spend a few minutes in a Christmas shop and you’ll see how inventive people can be in finding new ways of decorating. While many of these are commercially produced, there’s always a good representation of handmade décor from local artisans. One of the favorite materials for these decorations is wood. So there’s hope for us woodworkers, at least in the area of Christmas decorations.
When you look at some people’s homes, you’ll see Christmas decorations everywhere. One of the last frontiers for those decorations is the walls. It seems that tables get hit first, but it takes a while for the walls to get decorations, other than around doorways. So a wall decoration for Christmas, like these wall shelves, would be a welcome addition to most people who are really into decorating their homes.
Both of these shelves are easy to build and can be made out of readily available 1”x 4” dimensional lumber. As I was thinking about that, I realized that a smaller version could easily be made by resawing the 1”x 4”s and cutting down the overall dimensions accordingly. The only real challenge with the thinner material will be installing the fasteners, without them breaking out the sides of the lumber. That’s a common problem, even with 1” pine boards. Nevertheless, it can be solved by taking care in the nailing process and noticing the wood’s grain, as finish nails will tend to follow the grain.
Before building either project, check the material being used to ensure that the pieces are dimensionally equal. Lumberyards and home improvement centers may not always receive their stock from the same source, so there’s a good chance that different pieces are different widths or thicknesses, even if bought at the same time. If it turns out that the pieces are not dimensionally equal, it will be necessary to joint or plane them to make them equal.
The easiest way to assemble these projects is with a pneumatic nailer and brad nails. I’d highly recommend this investment to any woodworker who doesn’t have one. While nailing with a brad nailer isn’t considered to be the methodology appropriate for fine furniture or any other fine woodworking, there are many projects, including jigs and fixtures in the workshop, which are most easily assembled with a brad nailer. It’s a great tool for convenience sake, especially where the nail holes can be hidden or filled.
Brad nails also function as a clamping system for gluing, especially in cases where it can be difficult to properly clamp the pieces together, such as with the snowflake shelf. Since the parts all fit together on 30 degree angles, it becomes extremely difficult to clamp them together. But that’s not a problem, as the brads will hold the parts together as the glue dries and then function something like rebar does in concrete, helping to protect the joint from shear that might break the glue free, especially in the end grain.
Building a Snowflake Shelf
The snowflake shelf requires 18 feet of 1”x 4”, or for those of us who make cutting mistakes, it might require more. Actually, I’d recommend buying extra for another reason as well, so that only the good sections can be used and the knotholes/holes-without-electric-drill be cut out as scrap. This is what many of the better woodworkers do, even with high-cost quality hardwoods.
Keep in mind that all snowflakes are different, so even though I’m giving you a specific design with specific dimensions, that’s not as much a requirement as it is a guideline. Part sizes may be changed, additional parts may be added and anything else necessary to make the snowflake an original. The same techniques will work with just about any design that the woodworker can come up with. About the only thing that has to stay the same is that all snowflakes are hexagonal, so it must have six arms, making the cut angles 30 degrees.

Before starting the assembly of this project, it can be helpful to spread out some newsprint or butcher paper on the workbench and draw the six spokes of the snowflake drawn out on it, 60° apart. Using that as a pattern will help with alignment of the arms when assembling the snowflake.
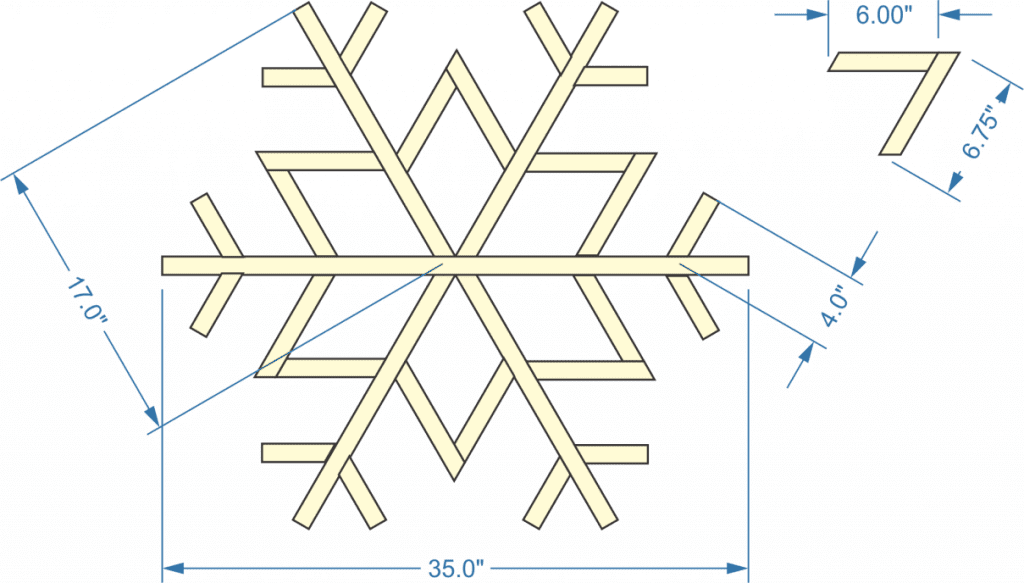
Assembly of the snowflake shelf starts with building the six arms. This consists of the main horizontal piece, which is 35” long and holds the whole thing together. There are also four pieces that are 17” long, with a 30° angle cut at one end. These four pieces are attached to the main horizontal piece, at the center, using wood glue and 1-1/4” brad nails, nailing diagonally through the arms and into the main horizontal piece. Allow the wood glue to dry before continuing.
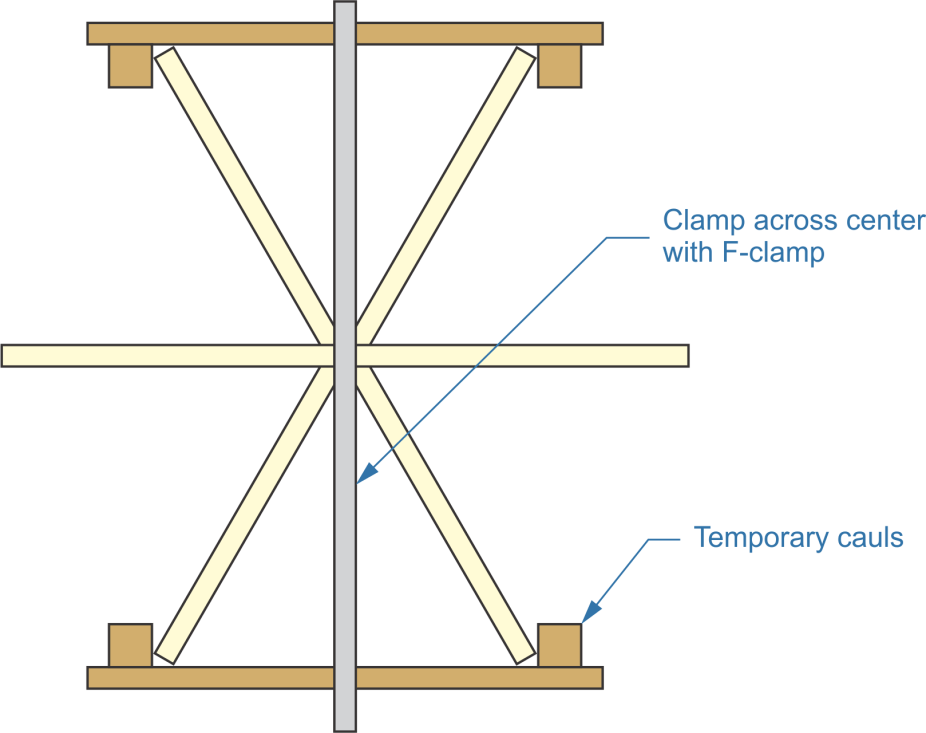
It’s a good idea to clamp this together while drying, but that can be extremely difficult to do, considering the angles the parts are held together at. However, it is not impossible to clamp it. The trick is making some temporary cauls out of extra 1”x 4” or 1”x 2” material. This will allow a F-clamp or bar clamp to be placed across the shelf, while the glue dries. The other parts to be added to this shelf should not need clamping, if they are fastened securely, without any gaps.

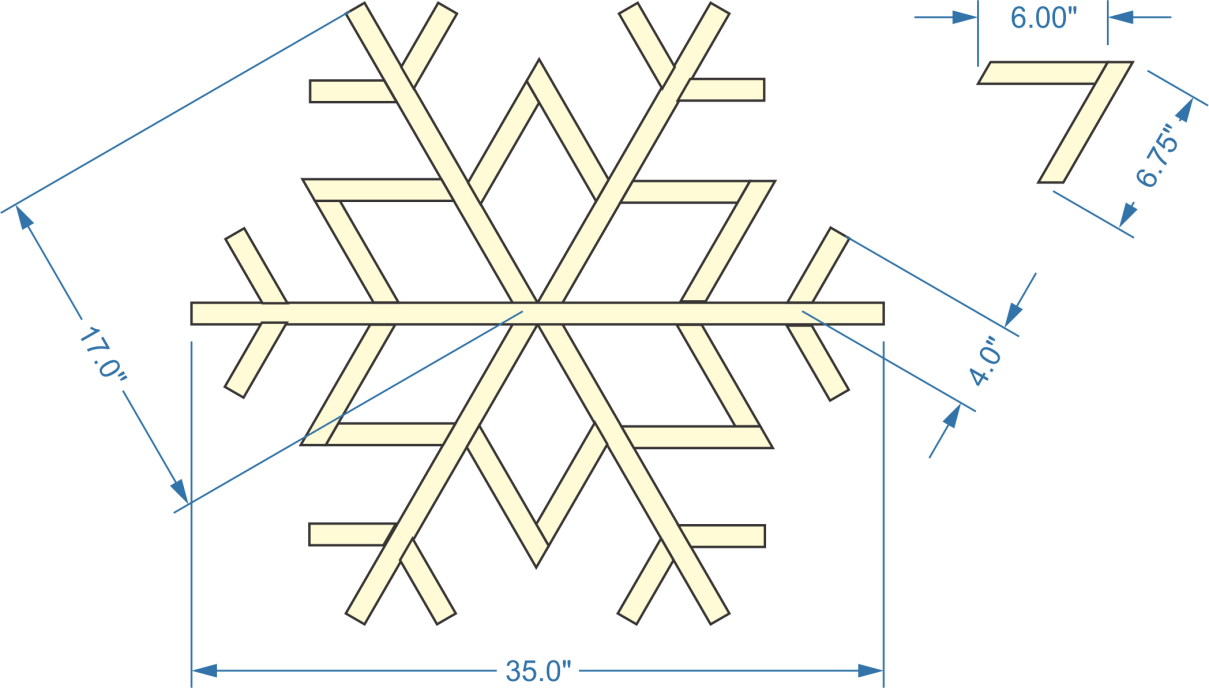
While the glue is drying for the six arms of the snowflake, the six points can be made. Each of these is made of one piece that’s 6” long and one that’s 6-1/4” long, as shown in the first diagram. Note that both ends of all of these pieces are cut at a 30° angle. The longer piece is overlapped over the shorter, making it so that both arms of the point will be the same length, once assembled.
As with the arms, these parts are both glued and nailed together with 1-1/4” brad nails. It doesn’t matter if you allow time for the glue to dry, before attaching these between the arms. Just make sure that the joint is solid, without any gaps. Clean off any glue that oozes out of the joint with a damp rag.
These six points are pretty much self-locating, in that the angles cut on the parts align with the existing angles of the arms. When the pieces are placed between the arms, the cut ends of the points should mate up neatly with the arms, without any gap. If there’s a gap, either the arms were not assembled at the right angle, the points were not cut or assembled correctly, or the points are not in the right place. glue and nail the points in place, using the same brad nails being used elsewhere.
The last parts to add to the snowflake shelf are the secondary tips, branching off the main arms. I chose to add a single set of these to the arms, but a double set can be used as well. They are 4” long pieces of material, cut at a 30° angle on one end.
Locating these pieces on the arms can be a bit trickier, as there is nothing for them to locate against, other than the arms they are attaching to. Without a secondary point of reference, it is easy to end up with the tips all over the place, some sticking out farther than others. What I did for the diagram above is to draw a line between the ends of the arms and align the outer tips with that line, while making sure they had a solid contact with the arms themselves. But for making the snowflake shelf out of wood, I’d cut a gauge block out of some scrap and use it to ensure that each of these is mounted the same distance from the end of the arms.
Building a Christmas Tree Shelf
The same techniques are used for building the Christmas tree shelf, that are used for building the snowflake shelf, although the parts and angles differ. The same material and hardware is used for assembly; but the angles for the bottom three tiers are cut at a 25° angle, not a 30° one. The only part of the tree shelf that is cut at 30° is the very top of the tree.
While the actual size of the Christmas Tree shelf can vary, a good size is 32” tall. This will consist of three shelf sections, a top section that makes a fourth shelf and a trunk, which makes a very small shelf. Each of the shelves is spaced 6” apart, with the exception of the trunk, which only has 4” of vertical room. It’s best to work from the bottom up while assembling the shelf, as that gives the most room for fitting the pneumatic nailer in, so that the sides of each shelf section can be attached to the shelf above. While it is possible to do it without taking this precaution, it is more difficult.
Although I don’t normally provide a cut list for projects, it really makes sense to cut all the material at one time for this one. All the dimensions given below are measured to the farthest point. To make a 32” tall tree, the following will be required:
- 1 piece of 1×4, 18-3/4” long, with both ends beveled to opposite 25° angles, for bottom tier
- 1 piece of 1×4, 15-1/8” long, with both ends beveled to opposite 25° angles, for second tier
- 1 piece of 1×4, 11-3/8” long, with both ends beveled to opposite 25° angles, for top tier
- 6 pieces of 1×4, 7-1/2” long, with both ends beveled to 25° angles, parallel, for the sides of the tiers
- 1 piece of 1×4, 7-3/4” long, with both ends beveled to opposite 30° angles, for top section
- 1 piece of 1×4, 8-5/8” long, with both ends beveled to opposite 30° angles, for top section
- 1 piece of 1x 4, 9-182” long, with both ends beveled to opposite 30° angles, for top section
- 3 pieces of 1×4, 4” long, cut at 90°, for trunk
- Remember that the three pieces to make up the top section are cut at 30°, while the other three tiers are cut at a 25° angle. That five degrees can make a lot of difference, creating a gap that the wood glue can’t fill.
Start working from the bottom up, connecting the three pieces for the trunk together and attaching them to the center of the 18-3/4” long piece that is used for the shelf on the bottom tier. Then attach the sides of that bottom tier to the bottom. The next shelf can be added to that. Check carefully to make sure that the amount of overhang on each shelf is the same, before nailing, so that the design stays centered.
Some people like to add a vertical divider in the largest tier or even the second tier, separating the area into two display areas. If that is to be done, it is best to do so while those tiers are being built, giving plenty of access space for the pneumatic nailer. The divider can be made of the same material, cutting a 6” piece of the 1”x4” to fill the space exactly. Use a square when installing, to ensure that it will end up vertical.
As with the snowflake, it is essential that the pieces be placed together, when gluing, in a way that there are no gaps. If gaps occur while nailing, use a hammer or mallet to drive the pieces back together. The glue is providing the main structural strength, not the nails. So if the pieces are not put together snugly or the corner are out of alignment, leaving a gap, the shelf will not have any strength.
Finishing the Shelves
Either of the shelf designs can be varnished or painted. Be sure to clean off any excess glue in either case, either using a damp rag, while the glue is still wet or waiting until the glue dries and removing it with a chisel. If the piece is going to be stained and/or varnished, it’s best to wait until the glue dries and then remove the dried glue with a chisel. Removing it with a wet rag will push some of the glue into the wood’s pores, resulting in an area that will be discolored, as it will not accept the stain or will show as a different color underneath the varnish.
Before finishing, be sure to sand the project with various grits of sandpaper, working from a coarse grade through a fine grade, taking special care to sand the outer and face edges of the shelf. Interior shelving areas are not as critical, as they are not as visible.
One thing to be considered, especially for the snowflake shelf, is to add glitter to the paint. Not only will that increase the effect of the shelf being an actual snowflake, but the coarse glitter will act as an anti-skid coating, helping prevent knick-knacks or other décor placed upon the shelf.
Either shelf will need some sort of hanger. There are several ways of doing this, such as installing keyhole hangers on the backs, adding picture frame hangers or using jute twine, tying it to the shelves.


