Quilt-making isn’t just an American tradition—it came across the Atlantic with European settlers. But in the U.S., it quickly grew into a full-blown art form. Over the years, quilting evolved from a luxury pastime for the wealthy into a hands-on craft cherished by families across generations. Whether it’s patchwork or whole cloth, the artistry and sentiment behind quilts have made them treasured heirlooms. And when it comes to displaying them? That’s where a good quilt hanger makes all the difference.
In this DIY guide, we’ll walk you through how to make your own compression quilt hanger, plus a modern magnetic variant. Whether you’re a woodworker, quilter, or just want to display grandma’s handmade masterpiece without damage, this article is for you.
🧵 A Brief History of Quilting in America
Early American quilts weren’t always the patchwork style we often picture. In fact, some of the earliest quilts were “whole cloth”—a single large piece of fabric layered with batting and backing, stitched together with decorative patterns.
Why the stitching? Because fabric didn’t come in bed-sized pieces, and blankets were made by combining several smaller sections. Quilting made the result warmer and more comfortable, and also more beautiful.
Initially, quilting was reserved for the wealthy. Only women with ample time and resources could afford to sew for fun. But as fabrics became more accessible, quilts became more functional and widespread.
Today, quilting is both an art and a practical craft. And many finished quilts are just too beautiful—or meaningful—to stay folded in a trunk.
🧱 Why Use a Compression Quilt Hanger?
Hanging a quilt presents a challenge. You want to show it off without damaging it. Commercial quilt hangers abound, but many come with problems:
Clip-style quilt hangers can distort fabric over time.
Bar quilt hangers sometimes require you to sew sleeves or casing on your quilt.
Point fasteners cause sagging or uneven stress.
Compression quilt hangers solve these problems. Instead of hanging a quilt at a few points, they hold it gently but firmly across its entire top edge. That means no sagging, no sewing alterations, and no fabric distortion.
✂️ Step-by-Step: How to Make a Classic Compression Quilt Hanger
1. Cut the Boards
Cut two hardwood boards to the same length, just a bit longer than the width of the quilt you want to hang. For best support, aim for 3/4″ thick by 2″ wide boards.
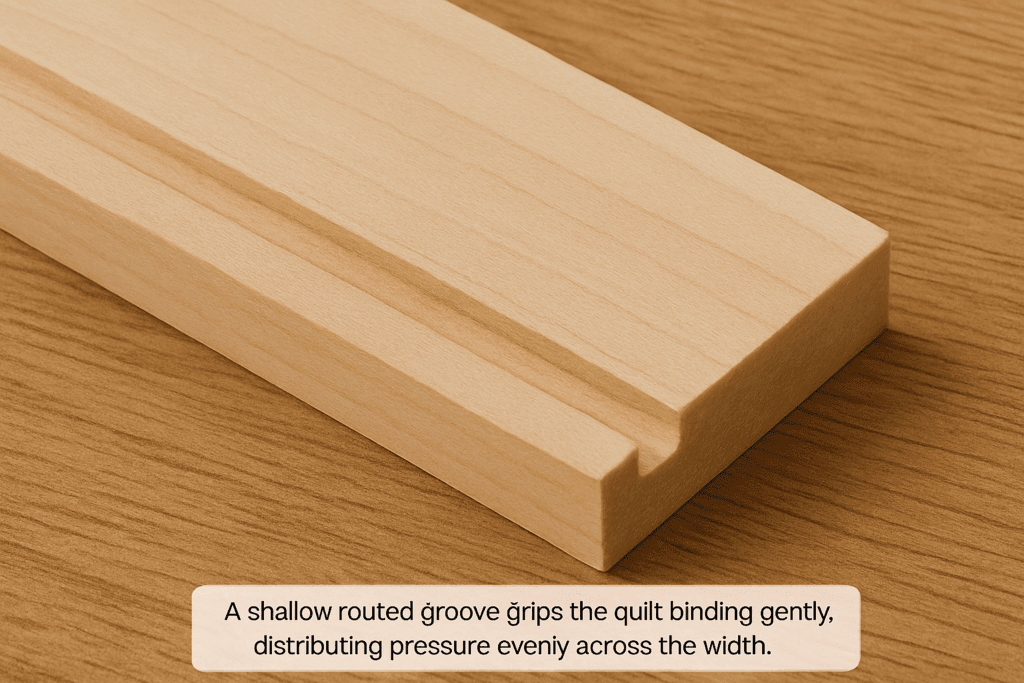
2. Route the Groove
Using a 1/2″ straight bit, rout a groove 1/8″ deep and 1/4″ up from the bottom edge of both boards (on the inside face). This groove will cradle the edge of the quilt binding.
3. Drill Fastener Holes
Rather than just screwing the two halves of the hanger together and having screw heads showing, it will look nicer to use round drawer pulls as the “nuts,” with the screws coming through from the back side of the clamp. To do this, align the two clamp pieces and tape them with the painter’s tape. Then mark the locations for the attached hardware. Drill through both pieces of wood together, preferably with a drill press, ensuring that the drill holes are perpendicular to the surface of the wood.
Remove the tape from the two pieces and sand them smooth, then stain and varnish the pieces. Take care not to let sawdust get into the varnish while drying. Even so, it’s a good idea to lightly sand the surfaces between coats to remove any bumps caused by dust settling in the finish while it is drying.
With both boards aligned, mark where your screws will go. Drill evenly spaced holes (every 16″ for 3/4″ thick wood). You can drill straight through both boards or recess the screws from the back to hide them behind decorative knobs.
4. Sand, Stain, and Finish
Sand all surfaces smooth. Pay extra attention to the grooves and mating surfaces. Apply wood stain or finish of your choice and allow it to dry completely.
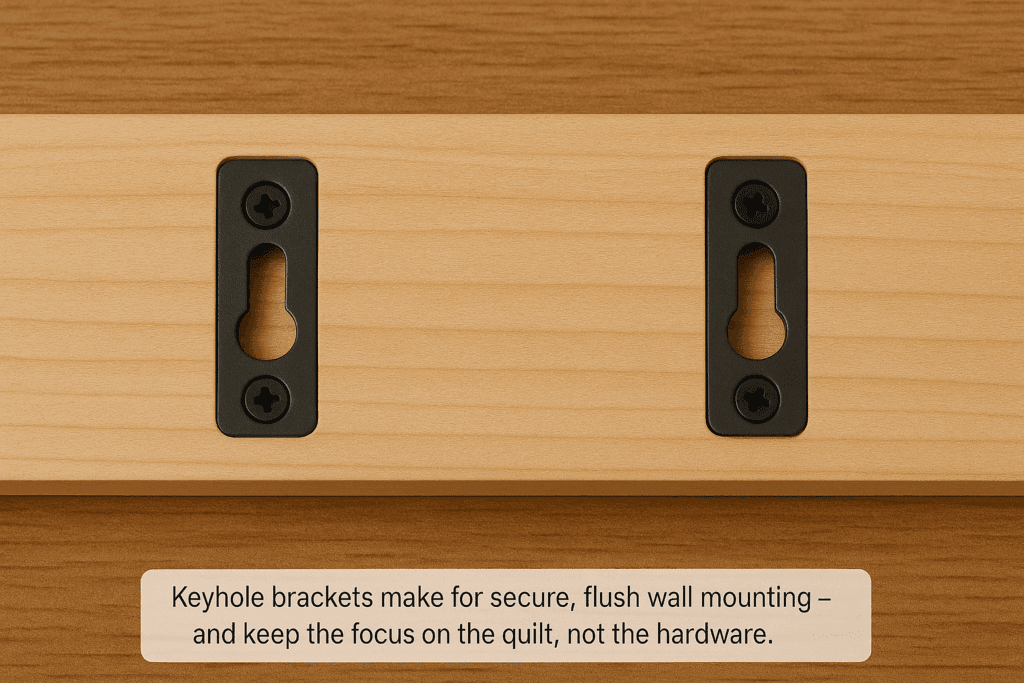
Install keyhole hangers on the backboard. Make sure they’re level and positioned to align with wall studs or wall anchors.
6. Clamp the Quilt
Lay the backboard on a table. Position the quilt edge in the groove, then lay the front board on top. Insert screws from the back and tighten gently with drawer pulls or a screwdriver.
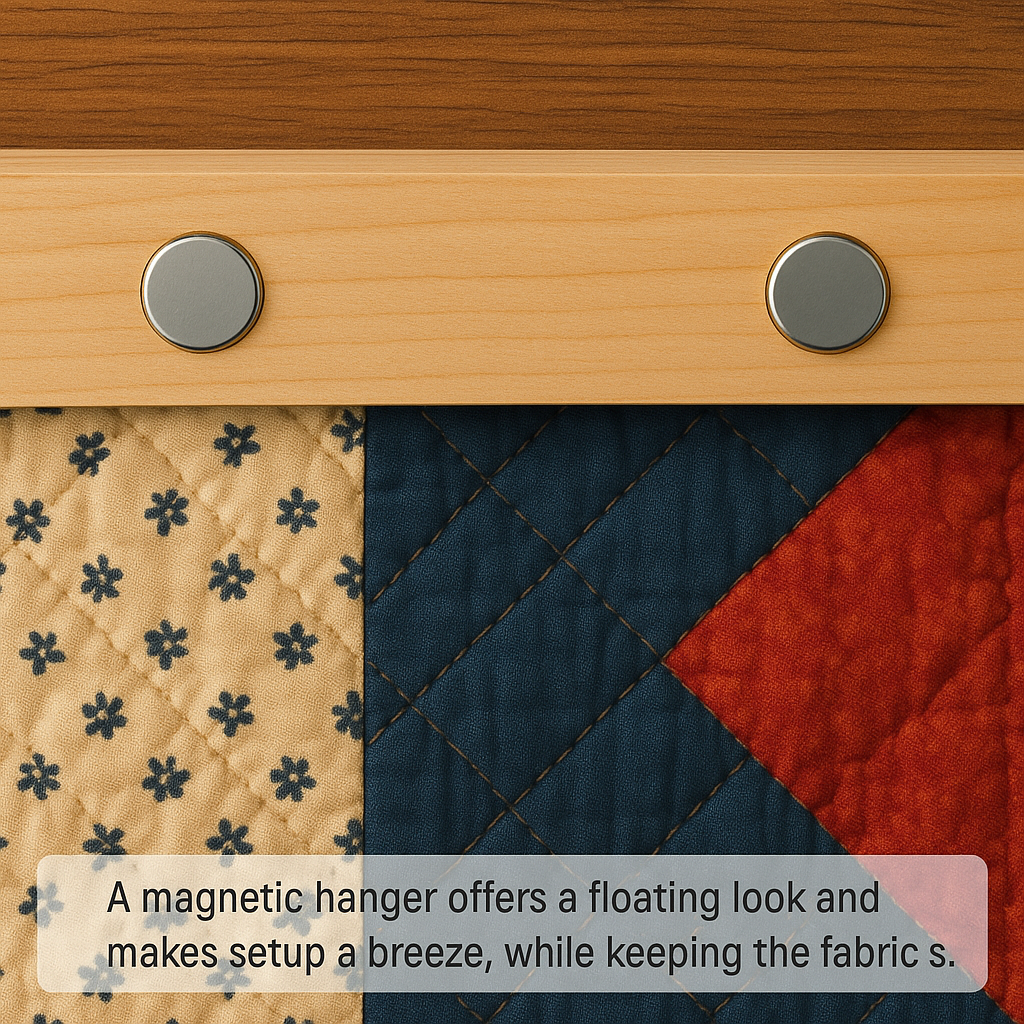
🧲 Making a Magnetic Quilt Hanger
Want a sleek, modern alternative to clamping boards? Magnetic quilt hangers use hidden steel strips and powerful magnets to hold your quilt in place. This design minimizes wall contact and avoids screws through the front board.
Groove the back of the bar to hold the steel strip.
Mount steel strip with flat-head screws.
Attach the end brackets with dowels, mortise & tenon, or countersunk screws.
Mount the quilt hanger on the wall with anchors or into studs.
Lay the quilt across the back and press the magnets on from the front.
🧩 Tips for Hanging Quilts with a Quilt Hanger
Always use at least two wall anchors or screws for wide quilts
Avoid placing hangers in direct sunlight (to prevent fading)
Check the fabric monthly for stress or sagging
Don’t overtighten—especially with antique fabric
For rotating seasonal quilts, consider labeling hardware positions for easier swaps
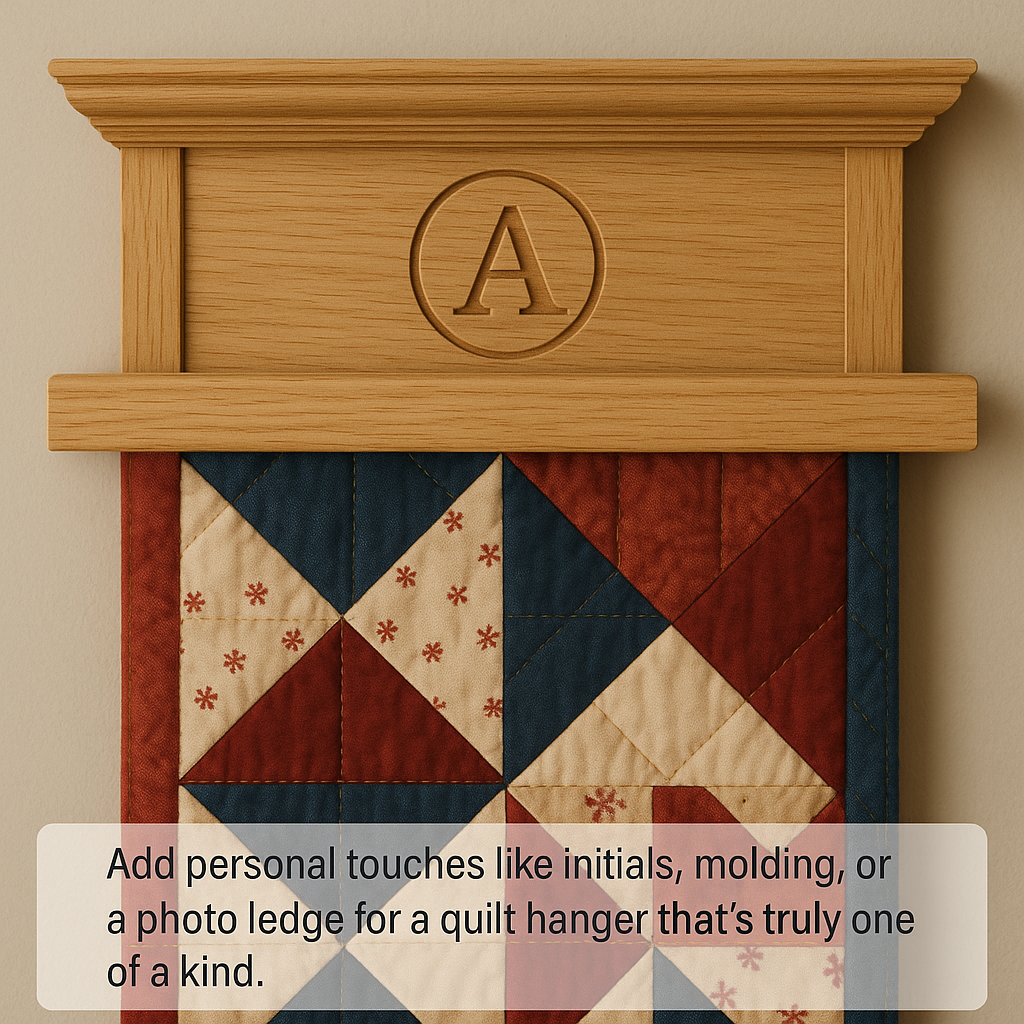
🪚 Project Variations & Finishing Touches for Your Quilt Hanger
Use a Roman ogee or roundover bit for decorative front edges
Add a stenciled monogram or engraving on the front piece
Use cherry, walnut, or painted poplar to match the room decor
Build a shelf into the top of your quilt hanger for displaying photos or keepsakes
❤️ Why Display Quilts This Way with a Quilt Hanger?
Quilts are more than bedding—they’re works of art. Many are passed down across generations and deserve to be seen and preserved. Whether it’s a wedding quilt, a baby quilt, or a Civil War-era heirloom, a proper quilt hanger can protect its structure while allowing it to brighten your home.
Compression quilt hangers let you:
Avoid permanent changes to the fabric (no stitching, no damage)
Prevent sagging or stretching over time
Switch out quilts seasonally with ease
🧵 Final Thoughts
You don’t need to spend a fortune to hang a priceless quilt. With a few tools, some hardwood, and a little DIY motivation, you can craft a quilt hanger that preserves and showcases your quilt for years to come. Whether you go traditional or magnetic, make it yours—and let your quilt shine.
How to Make Plywood Look Nice: 6 DIY Finishes by Admin March 31, 2025 Finish Most people think of plywood as just cheap, utility-grade wood. For years, I thought the same—until I started working on weekend furniture builds in my…


")

")
")