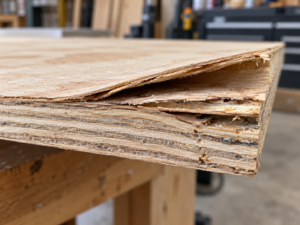
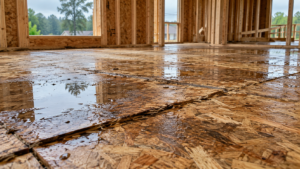
If rotten plywood is holding up a roof, floor or wall, cut it out and replace it. Remove it back to sound wood, and make sure every edge of the new piece sits on framing or on added blocking. Epoxy is only worth using on small, shallow rot at an edge or corner of a panel that carries no real load. Both repairs fail if you skip the first step: find the water and stop it, and let the surrounding wood dry before you close anything up. Wood decay fungi need wet wood.
The research summary from the USDA Forest Products Laboratory says wood decays above about 30% moisture content and does not decay below 20%. Between those two numbers is a gray area.
This guide covers how to tell how far the rot goes, which repair suits each location, which replacement panel to buy, and the mistakes that bring rot back.
Quick answer
Structural panel (roof deck, subfloor, wall sheathing) that is soft or spongy: cut it out and replace it with a panel of the same thickness and rating. Put edges on framing, or support them with blocking, tongue-and-groove edges or panel clips.
Small rot at an edge or corner of a panel that carries no load: dig out the punky wood, then use an epoxy consolidant and epoxy filler.
Always first: fix the leak and dry the wood. Existing decay can keep going until the wood is below about 20% moisture.
Not a fix: paint, sealer or a preservative spray on its own. A preservative kills fungi but does not give back lost strength.
Rotten Plywood Repair or Replace: Decision Chart
Where the rot is
What you find
What to do
Why
Roof sheathing
Soft spot underfoot, sagging, dark or crumbly wood seen from the attic
Strip the roofing, then cut out and replace the panel section to framing centers
It carries snow, wind and foot loads, and shingles need solid wood to nail into
Subfloor (bathroom, kitchen, by doors)
Floor gives way underfoot, tiles crack, flooring lifts
Replace the section and check the joists under it
Point loads from people and fixtures; epoxy won’t firm up a spongy floor
Wall sheathing
Rot behind siding near windows, doors or the bottom plate
Replace the section and check studs and the bottom plate
Sheathing often braces the wall against racking
T1-11 or panel siding
Bottom edge swollen or soft, paint failing
Small and shallow: epoxy. Long run or soft through the panel: replace that section
The bottom edge soaks up water through end grain and splashback
Cabinet base, shelf, trim panel
Swollen or soft at an edge, no load
Epoxy repair, or replace the piece
No structural load; looks and fit decide it
Shed floor or ground-level panel
Soft at the edges or across the panel
Replace with pressure-treated plywood rated for that exposure
It will get wet again; standard panels have no decay protection
Step 1: Find Out How Far the Rot Goes
Rot nearly always runs further than the stain you can see. Water moves along framing and panel layers, and decay inside a panel can be well along before the face looks bad.
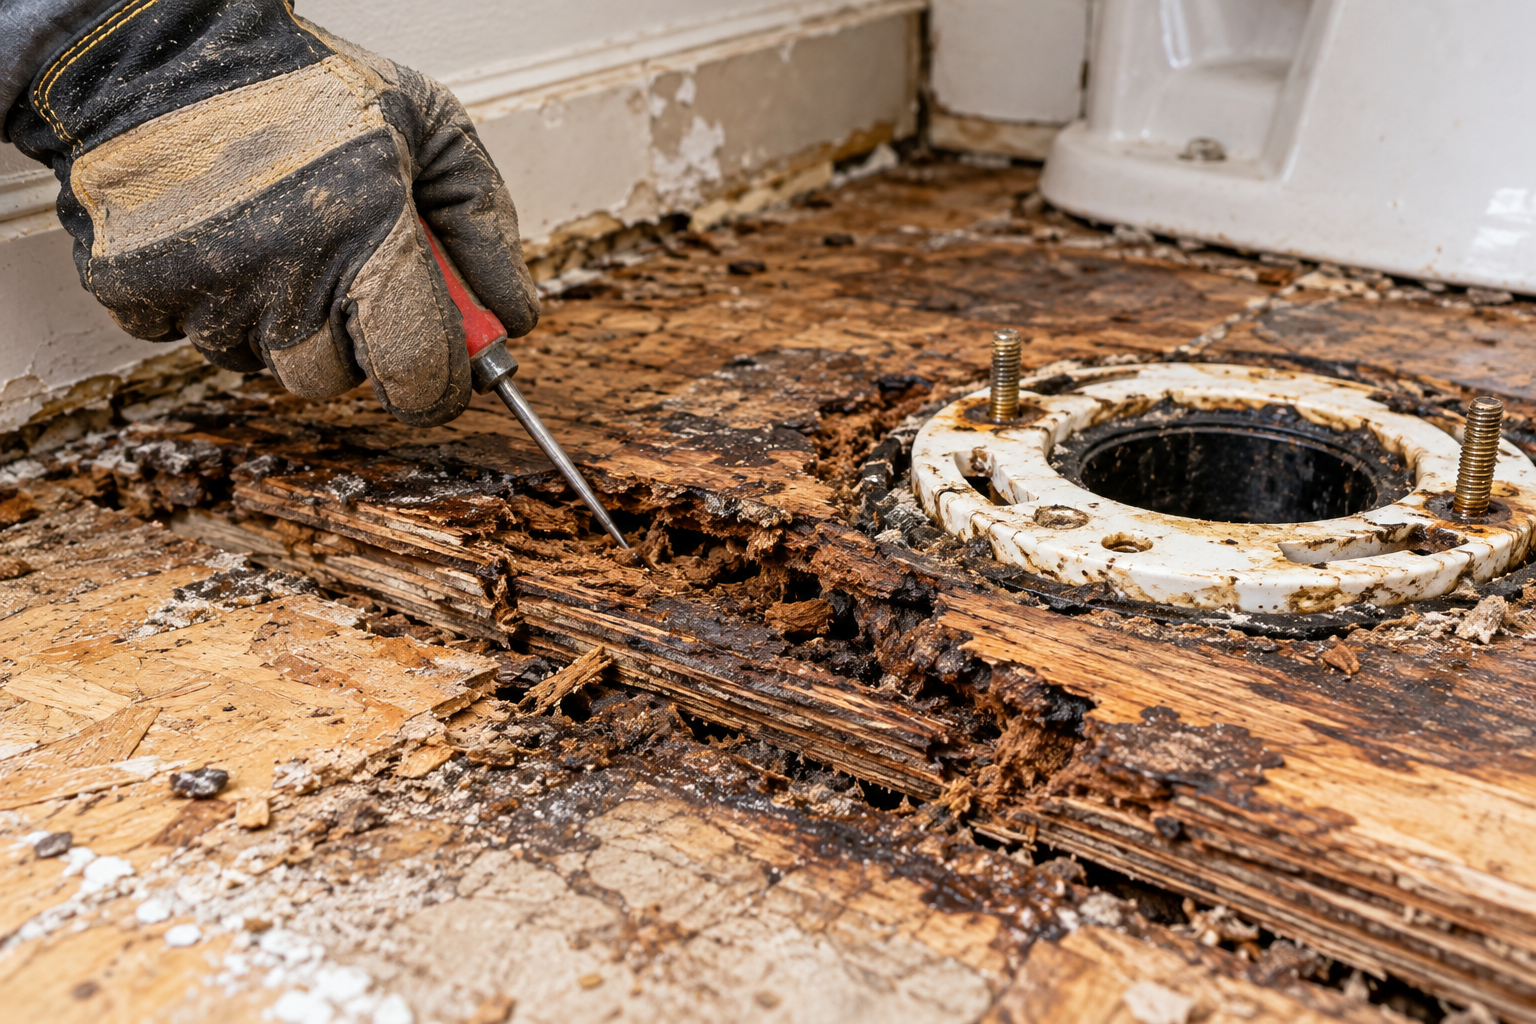
The pick test. The U.S. General Services Administration’s historic-preservation repair procedure uses a simple check. Push a sharp pick or awl into the wood and pry it up. Sound wood splinters out in long pieces. Decayed wood snaps off short right where the pick lifts. Work outward from the obvious damage until you get long splinters in every direction, and mark that line.
Other signs of rot:
The surface dents under thumb pressure, or a screwdriver sinks in easily
Dark stains, or wood that breaks into small cubes or stringy fibers
Plies peeling apart (delamination), especially at panel edges
A soft or bouncy spot underfoot on a roof or floor
Musty smell, mold growth, or fungal strands on the back face
Check the framing too. Rot in sheathing often comes with rot in what sits behind it: rafter tails at the eaves, joists under a toilet, the rim joist along an outside wall, studs under a leaky window. Do the pick test on every framing member you uncover.
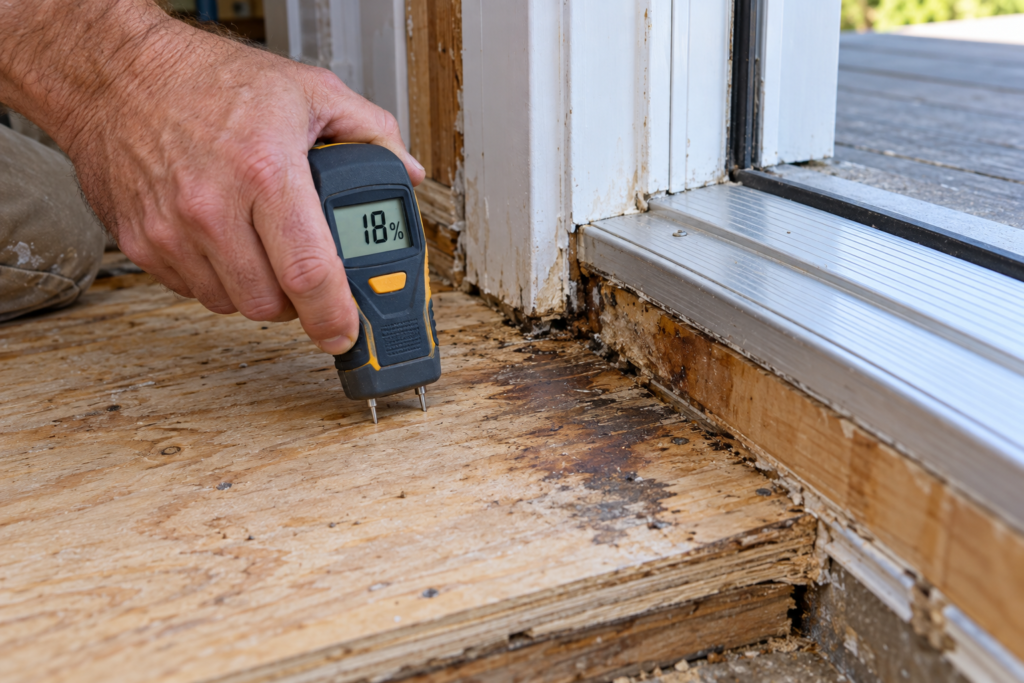
Measure moisture. A pin-type moisture meter tells you whether the area is still wet. APA notes that readings vary with panel type and meter, so use the meter to compare spots and follow a trend over days. Don’t treat one reading as an exact figure.
Step 2: Stop the Water and Let It Dry
This is the step that decides whether the repair lasts. A Forest Products Laboratory research paper gives these moisture ranges:
Wood moisture content
What decay fungi do
Below 20%
Decay does not start; 20% is treated as the safety margin
20% to 30%
Gray area; decay that is already established may keep going
Above about 30% (fiber saturation)
Conditions decay fungi need to grow
The same paper notes that decay already under way may continue until the wood dries below 20%. Common water sources are roof leaks at flashing, valleys and penetrations; gutters overflowing at the eaves; leaking toilet and tub seals; window and door flashing; and condensation from bathroom fans that vent into the attic.
Expose the whole damaged area. Take off shingles and underlayment, flooring or siding. Save pieces you can reuse.
Mark the cut lines in sound wood, past where the pick test showed rot.
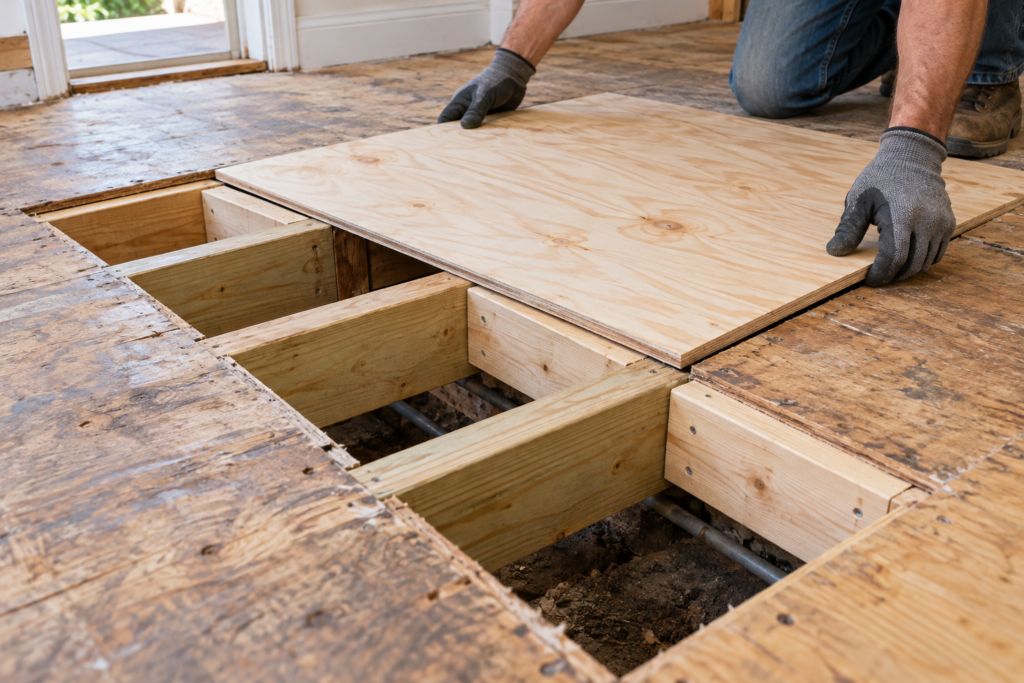
Make the cuts that run along the framing at framing centers. Find the joists or rafters on each side and cut along their centerlines so the old panel and the patch each get half the framing to bear on. On a roof, the APA-based guidance is to replace damaged areas back to framing centers.
Set the saw depth to the panel thickness so you don’t cut into the framing or wiring below. An oscillating multi-tool is good for cuts that end next to a joist.
Support every edge. Edges between framing members need support. APA roof guidance lists tongue-and-groove edges, panel clips or solid blocking. For subfloors, the IRC span table footnotes call for tongue-and-groove edges or blocking at unsupported edges. The exceptions are where an approved underlayment or a qualifying finish floor goes on top. Screwing a 2x cleat or block under the edge is the usual DIY fix.
Match the thickness. Measure the old panel with a tape or calipers. Don’t go by the label alone. Older sheathing may be a slightly different actual thickness than the “15/32” or “23/32” panels sold now. Shim to make the surface flush so roofing and flooring sit flat.
Leave a gap. APA recommends a 1/8-inch gap at panel edge and end joints unless the panel maker says otherwise. Panels swell with moisture, and tight joints can buckle.
Fasten to the schedule for that use. Follow the nail or screw spacing for roof or floor sheathing in your local code. On floors, construction adhesive on the joists helps prevent squeaks; subfloor adhesive is made for this.
Close it up the right way. Put back underlayment, flashing and roofing, or the floor or siding layers, so water sheds the way it should.
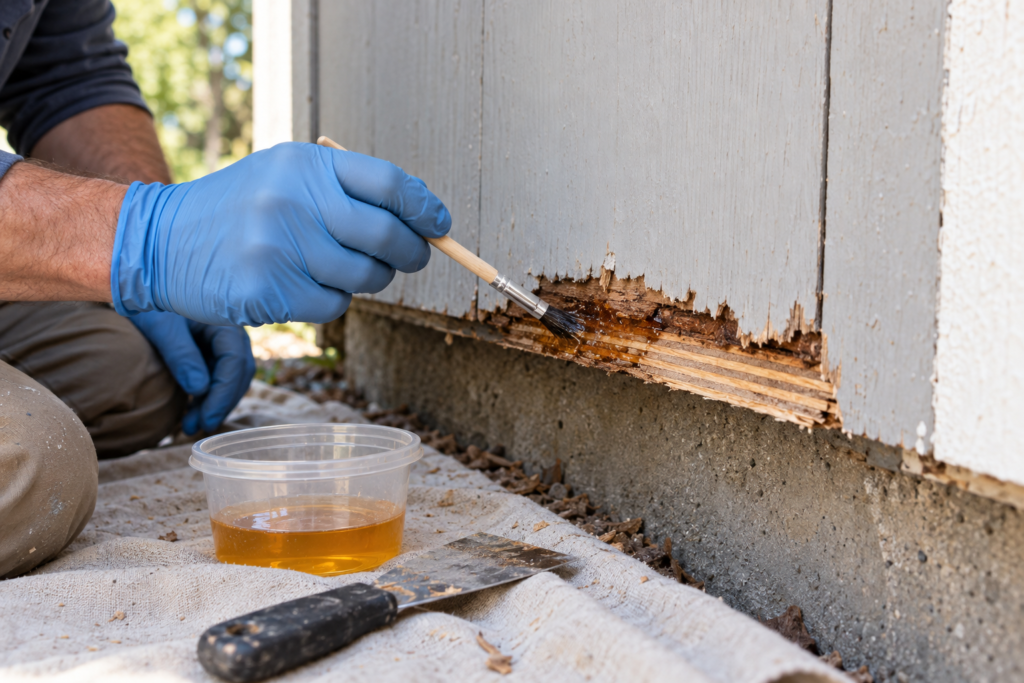
Epoxy suits small, shallow rot at the edge or corner of a panel that carries little or no load. Typical cases are T1-11 bottom edges, trim panels, cabinet sides, and spots where replacing the whole panel would mean tearing out much more. This is how the original version of this page described edge repairs, and it is still a sound method in the right place.
How the epoxy repair works
Dig out the punky wood with a chisel, pick or carbide scraper until you reach firm fibers.
Let the area dry. Epoxy sealed over wet wood traps the water inside.
Apply a low-viscosity epoxy consolidant. It soaks into the softened fibers and hardens them. For deeper areas, the GSA procedure drills 3/16- or 1/4-inch holes to carry consolidant inward. It warns against drilling all the way through and suggests damming cracks with modeling clay so the liquid doesn’t run out. An epoxy wood consolidant is sold on its own or in kits with filler.
Rebuild the missing wood with epoxy filler within the window the maker gives, then shape it.
Prime and paint with an exterior primer and paint, and give the bottom edge an extra coat.
When epoxy is the wrong choice
The panel carries a load and is soft across a large area. The GSA procedure notes that epoxy has good compressive strength but is not the best choice for a member in tension, where replacement is usually better. A spongy subfloor or roof deck is a replacement job.
The water source isn’t fixed. A hard epoxy patch can keep water in the wood next to it and speed up rot there.
The rot goes through the full thickness over a wide area. You would be rebuilding the panel from resin.
What Does Not Fix Rotten Plywood
Paint or sealer over soft wood. It hides the damage and slows drying.
Preservatives or borates on their own. GSA’s procedure says preservatives stop fungal growth but do not restore strength to decayed wood. Use them as an extra step on sound wood next to the repair, not as the repair.
Laying a new sheet over the rotten one. Overlaying can stiffen a floor that is sound but thin. Over rotten wood, fasteners grip nothing and the rot stays in place.
Switching to marine plywood for rot resistance. APA states that marine plywood is not treated with any chemicals to resist decay. Marine plywood has a stricter veneer specification, which is a different thing from rot resistance. See exterior vs. marine plywood.
Which Plywood to Use for the Replacement
Location
Replacement panel
Note
Roof deck
APA Rated Sheathing, same thickness and span rating as existing
Check the span rating against rafter or truss spacing
Subfloor
APA Rated Sturd-I-Floor or Rated Sheathing matching existing; T&G helps at edges
Match thickness to keep the floor flat
Wall sheathing
APA Rated Sheathing matching existing
Don’t skip the weather-resistive barrier and flashing over it
Long-term weather exposure
Panel with an Exterior bond classification
APA warns that “CDX” (Exposure 1) is often mistaken for Exterior; it isn’t meant for long-term weather
Above-ground and ground-contact treatments differ, so check the tag
Keep two ratings separate. APA says a panel’s bond classification describes how well the glue line holds up to moisture. It does not describe the panel’s resistance to fungal decay. A panel with an Exterior bond rating will still rot if it stays wet. For grades and uses, see our exterior plywood guide.
Rotten Plywood Examples (Illustrative)
These are typical situations, not measured test results.
Bathroom subfloor at the toilet. A failed wax seal has wet the subfloor around the flange. The floor flexes and floor tiles near the toilet have cracked. Pull the toilet, cut the subfloor back to the joists on each side, check the joist tops with the pick test, block the patch edges, and reset the toilet with a new seal.
Roof deck at the eave. A clogged gutter overflowed for several seasons. The first two feet of sheathing are soft and the fascia is rotted. Replace the sheathing to the nearest framing centers, and check the rafter tails before closing up.
T1-11 bottom edge. Only the bottom inch or two is soft, and the panel is firm above it. Epoxy repair, then prime and paint the bottom edge. If the rot climbs higher, see T1-11 siding repair.
Sink base cabinet floor. Check what the material is first. Many cabinet floors are particleboard or MDF, not plywood. Swollen particleboard is usually replaced, not repaired.
Common Mistakes With Rotten Plywood
Fixing the wood before the leak. The new panel gets wet the same way the old one did. Trace the water path; it can show up far from where it gets in.
Cutting only to the visible stain. Decayed wood is left at the patch edge and the rot keeps going. Use the pick test to find sound wood.
Leaving patch edges unsupported. The joint flexes, shingle seals or tile grout crack, and fasteners loosen. Block every edge that doesn’t land on framing.
Closing up wet wood. Existing decay can continue above about 20% moisture. Check with a meter before you cover anything.
Using CDX where it will stay exposed. Exposure 1 panels are rated for weather during construction, not years outdoors. Use an Exterior-rated or treated panel there.
Using epoxy on a spongy structural panel. The surface feels hard but the panel is still weak. Replace load-bearing panels that are soft over a wide area.
When to Call a Pro
Get a contractor or structural assessment if the joists, rafters, rim joist or studs are soft, if a floor or roofline sags, if the rot covers a large area, or if the repair means removing a lot of roofing. Sheathing repairs are often straightforward DIY. Framing repairs may need temporary support and, in many areas, a permit.
Can you fix rotten plywood without replacing it? Yes, if the rot is small, shallow and in a panel that carries no real load. Dig out the soft wood, harden what’s left with an epoxy consolidant, and fill with epoxy filler. Load-bearing roof, floor and wall panels that are soft over a large area should be replaced.
Does rot spread to good plywood? Decay fungi can spread into sound wood next to the damage while the wood stays wet. Once the wood dries below about 20% moisture, decay stops spreading, but the fungi aren’t necessarily dead and can return if the wood gets wet again. That’s why stopping the water matters more than any coating.
Is it OK to put new plywood over rotten plywood? No. Fasteners can’t grip rotten wood, the rotted layer stays in place, and the new surface can still flex. Cut out the rot, then overlay only if you need extra stiffness on a sound floor.
Will pressure-treated plywood stop the rot from coming back? It resists decay much better than untreated plywood when the treatment matches the exposure: above ground or ground contact. It doesn’t make up for a leak that hasn’t been fixed. See how long plywood lasts for exposure factors.
Is marine plywood more rot-resistant? Not by itself. APA states that marine plywood is not chemically treated for decay resistance. If you need decay resistance, use pressure-treated plywood.
How do I know if plywood is just wet or actually rotten? Wet plywood may be swollen or stained but still firm. Pick-test it, dry it, and check again. Rotten plywood is soft, breaks off in short pieces under a pick, or crumbles. See wet and warped plywood for panels that got wet but didn’t decay.
Bottom Line
Find and stop the water first. Then replace any load-bearing rotten plywood back to sound wood, with every patch edge supported. Save epoxy for small, shallow rot in panels that don’t carry a load, and only once the wood is dry. Paint, sealer and preservatives don’t restore strength to decayed wood.
Affiliate disclosure: ThePlywood.com is a participant in the Amazon Services LLC Associates Program. If you buy through the Amazon links on this page, we may earn a commission at no extra cost to you.
Plywood Delamination: When to Repair vs Replace by Admin October 12, 2026 DIY Repair plywood delamination only when the separated area is small (about the size of your palm or less), the wood is dry and firm, and…
Can OSB Get Wet? Swelling, Repair and When to Replace by Admin October 6, 2026 DIY Yes, OSB can get wet. A standard Exposure 1 panel is built to handle normal construction delays without losing its structural strength. The catch is…