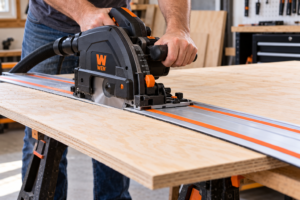
The best clamps for plywood are parallel-jaw clamps for gluing up cabinet boxes and one-handed bar clamps for everyday holding. Add edge clamps for solid-wood edging and a clamp-edge guide for straight circular-saw cuts. No single clamp does all four jobs well. A plywood box, a glued edge strip and an 8-foot rip cut each put different demands on a clamp.
This guide shows which clamp fits which plywood job, how many you actually need, and the clamping math that explains why some glue-ups fail even when every clamp is tight.
Affiliate disclosure: ThePlywood.com is reader-supported. Some links on this page are Amazon affiliate links. If you buy through them, we may earn a commission at no extra cost to you. We have not shop-tested the products listed here. Picks are based on published manufacturer specifications and how each clamp design suits sheet-goods work.
Quick Answer: Which Clamp Should You Buy First?
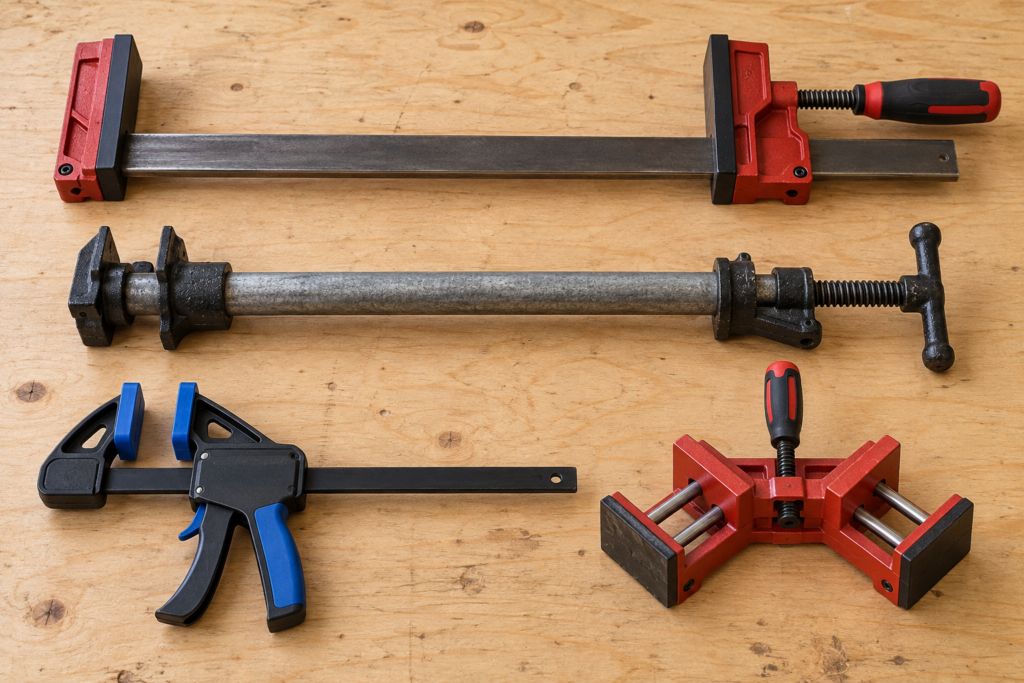
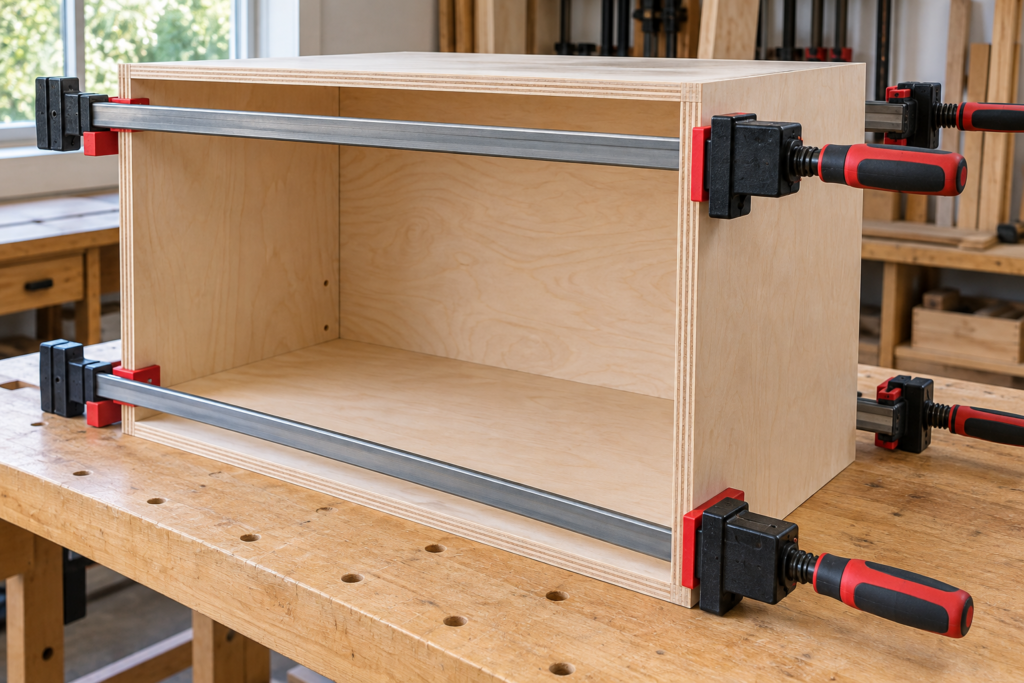
Cabinet boxes and carcasses: Parallel-jaw clamps. Their jaws stay parallel and spread pressure across a wide face, so 3/4-inch panels are less likely to bow or rack.
General holding, jigs and quick glue-ups: One-handed bar clamps (trigger clamps).
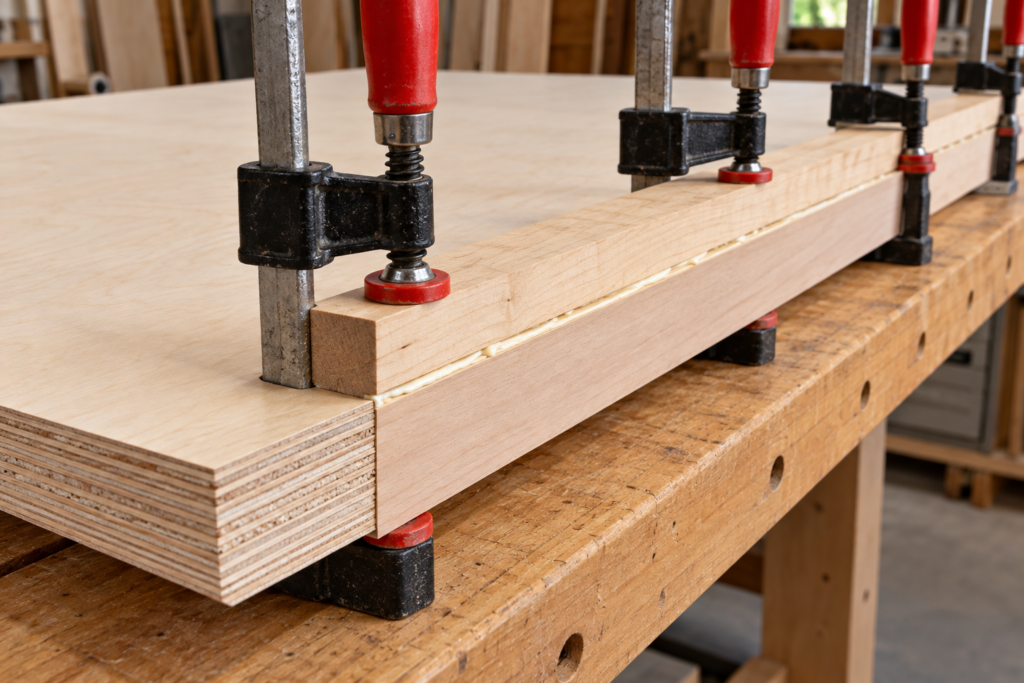
Solid-wood edging on shelves: Three-way edge clamps, or bar clamps with a stiff caul.
Straight cuts with a circular saw: A clamp-edge straightedge, 50 inches for crosscuts and 100 inches for full-length rips.
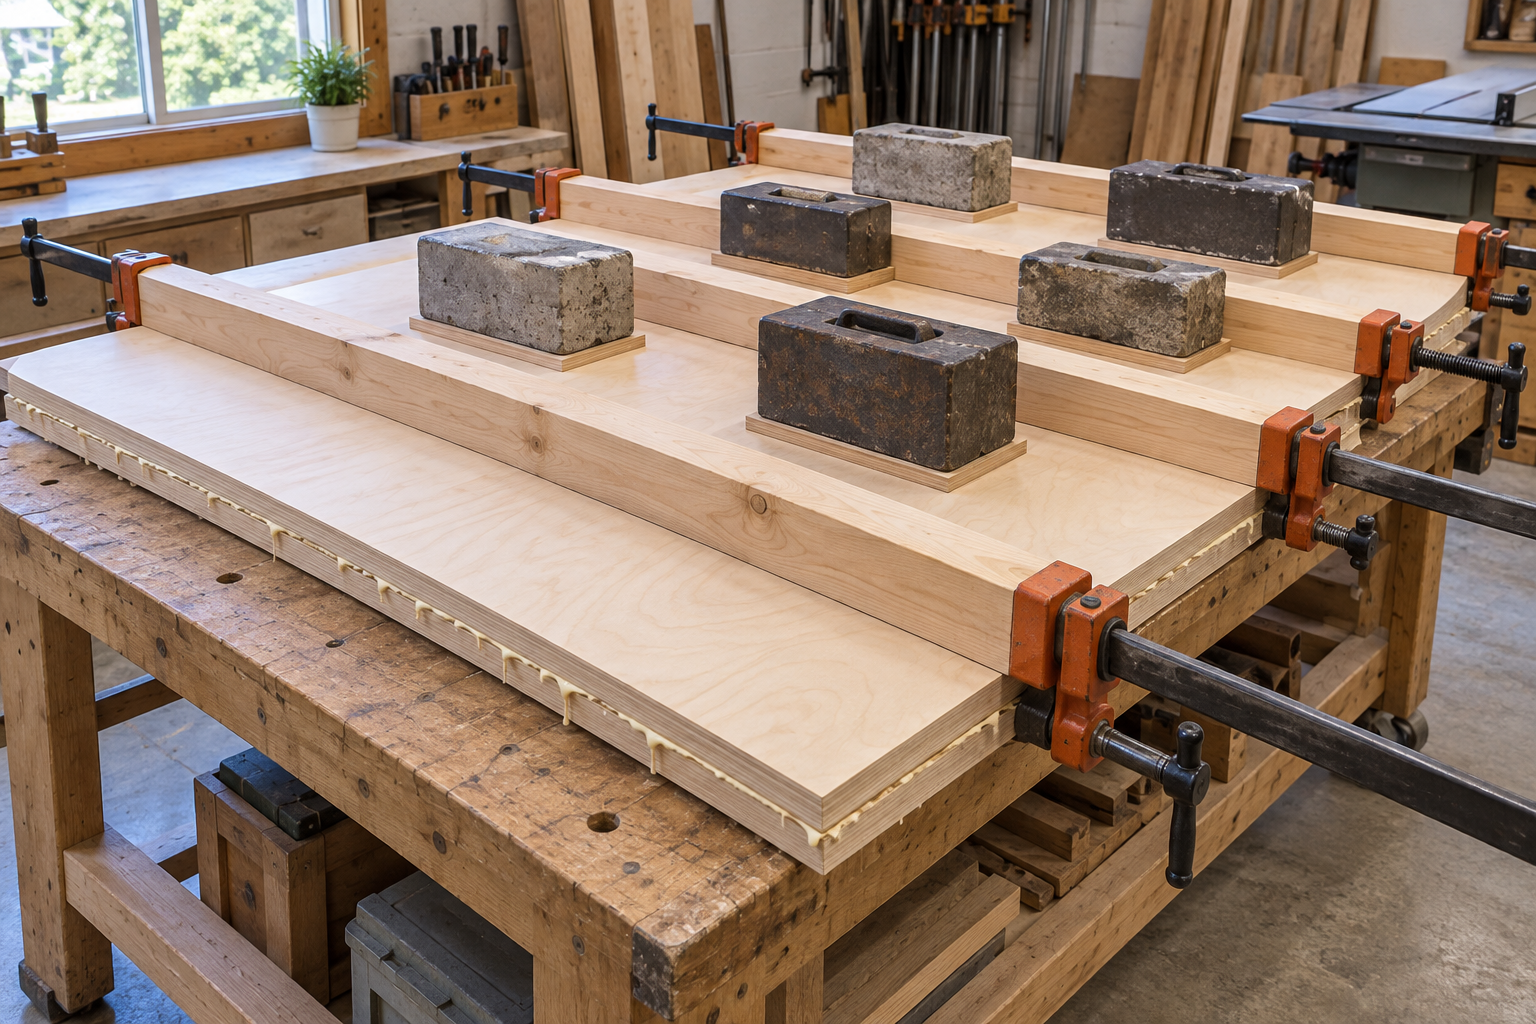
Most important limitation: Clamps press near the edges only. They cannot press the middle of a wide face-glued panel. Face lamination needs a different setup: cauls combined with screws or weights, or a vacuum press with a glue suited to it.
Plywood Clamp Chart: Best Clamp Type by Job
Plywood job
Best clamp type
Why it works
Main limitation
Cabinet carcass glue-up
Parallel-jaw clamp
Wide, parallel jaws spread force and help keep corners square
Heavy; more expensive per clamp than bar or pipe clamps
Long glue-ups on a budget
Pipe clamp (3/4-inch pipe)
One fixture set works on any pipe length
Small jaws mark veneer without pads; iron pipe can stain some woods
Holding jigs, quick tacking, dry-fits
One-handed bar clamp
Fast, one-hand operation
Lower force than parallel clamps; bars can flex at full pressure
Solid-wood edging and banding
Three-way edge clamp
Presses the edging straight into the panel edge
Each clamp covers only a few inches of edge
Screwed or pocket-hole boxes
90-degree corner clamp
Holds the corner square while you drive fasteners
Holds position only; not a glue-pressure clamp
Straight cuts on full sheets
Clamp-edge straightedge
Clamps from one side and guides the saw base
Must be long enough for the cut (50″ vs 100″)
Laminating two sheets face-to-face
Stiff cauls with screws or weights, or a vacuum press
Moves pressure toward the center of the panel
No method guarantees perfectly even pressure; match the glue to the method
Why Plywood Needs Different Clamps Than Solid Wood
Plywood brings three clamping problems that solid boards mostly don’t:
Size. A 4 x 8 sheet or a 24-inch-deep cabinet side means the clamp opening has to be longer than the assembly, and the throat has to reach in from the edge. Most bar and parallel clamps reach only about 3 to 4 inches in from the edge.
Thin face veneer. The face veneer is a thin layer over the core. Heavy pressure on a steel jaw or pipe-clamp foot can dent it. On sanded or prefinished panels, that dent shows through the finish. Use pads or a sacrificial block under any metal jaw.
Edges are part plies, part end grain. Glued edging bonds to the alternating layers you see on a cut edge. The bond area is only as wide as the panel is thick: about 23/32 inch on nominal 3/4-inch plywood. Our plywood thickness guide explains nominal versus actual thickness. That narrow strip changes how many clamps you need, as the next section shows.
Clamping Math: How Many Clamps Plywood Actually Needs
Titebond’s published guidance for Titebond Original asks for clamping pressure “enough to bring joints tightly together.” It gives general ranges of 100–150 psi for softwoods, 125–175 psi for medium woods and 175–250 psi for hardwoods. Those are the glue maker’s general guidelines, not a test result from us. The formula for using them is simple:
Force needed per clamp (lb) = target pressure (psi) × glue area each clamp covers (sq in)
The tables below are idealized. They assume each clamp delivers a known, steady force spread evenly over its section of the joint. Real clamps don’t always work that way. The force printed on a clamp is the maker’s maximum rating, not the force you reach at the bench.
Scenario 1: Solid-wood edging on a 3/4-inch plywood shelf (illustrative)
Assumptions: the plywood is 23/32 inch thick, edging is glued to the full edge, and clamps are evenly spaced.
Clamp spacing
Glue area per clamp
Force at 100 psi
Force at 150 psi
Force at 250 psi
Every 6 inches
4.3 sq in
about 430 lb
about 650 lb
about 1,080 lb
Every 8 inches
5.75 sq in
about 575 lb
about 860 lb
about 1,440 lb
What this means: A clamp delivering 500 pounds of actual force across a 6-inch section of 23/32-inch plywood would produce an idealized average pressure of about 116 psi. However, advertised clamp ratings are maximum capabilities, not necessarily the force achieved during use. Actual glue-line pressure varies with clamp position, joint fit, cauls and how the force spreads.
The practical takeaway is that spacing matters as much as clamp size. Closer clamps, or a stiff caul that spreads each clamp’s force, help close the gaps between clamps. Spring-style banding clamps are lighter-duty tools, and most don’t publish a force rating.
Scenario 2: Laminating two 24 x 48-inch panels face-to-face (illustrative)
The glue area is 24 × 48 = 1,152 square inches. At 100 psi, that is about 115,000 lb of total force.
Method
Idealized total force
What it means
Parallel clamps rated 1,500 lb
about 77 clamps to reach 100 psi, even at full rated force
Not realistic. Clamps also only reach the outer 3–4 inches
One-handed clamps rated 600 lb
about 192 clamps
Not realistic
Vacuum bag, perfect vacuum at sea level (about 14.7 psi)
about 16,900 lb at most
Pressure is spread across the whole face, but it is a theoretical ceiling and still far below 100 psi
Warning: A ring of clamps around the edge of a laminated panel puts most of its pressure near the edges and leaves the middle unsupported. That can leave dry spots or gaps in the center that you won’t see until you cut through it.
About vacuum presses: The 16,900-lb figure assumes a nearly perfect vacuum at sea level. A real vacuum press produces less, depending on the pump, leaks in the bag and your altitude. A vacuum press spreads pressure over the whole face, but even pressure does not make up for using less pressure than the glue maker calls for. For example, Titebond lists 100–250 psi, depending on the substrate, for Titebond Cold Press for Veneer, which is more than any vacuum bag can produce. If you vacuum press, choose an adhesive whose maker approves it for the pressure your press delivers, or confirm with the manufacturer before you start.
Best Clamps for Plywood: Picks by Job
Specifications below come from manufacturer documents or retailer listings of manufacturer specs (see Sources and Product Specifications at the end). Clamping-force figures are the makers’ maximum ratings. Check current specs on the product page before you buy.
1. Best for Cabinet Boxes: Parallel-Jaw Clamps
Bessey K Body REVO (KRE series). Bessey rates it at up to 1,700 lb of clamping force, with a 3-3/4-inch throat and lengths from 12 to 98 inches. The replaceable pads are about 2 inches wide by 5-3/4 inches long. Large pads spread pressure over more of the plywood face, which helps protect the veneer. Check Bessey K Body REVO clamps on Amazon
Jorgensen Cabinet Master. Listed at 1,500 lb of force, with a throat of about 3-7/8 inches. It has a built-in stand and a head that reverses for spreading. Check Jorgensen Cabinet Master clamps on Amazon
Sizing tip: The clamp opening must be longer than the outside dimension of the assembly. A 30-inch-wide cabinet box needs clamps longer than 30 inches, and 36-inch clamps give working room. If you are choosing panels for cabinet boxes, see our best plywood for cabinets guide.
When not to buy these first: If you mostly screw boxes together rather than glue them, parallel clamps are a big outlay for a job that corner clamps and bar clamps can handle.
2. Best Budget Long-Reach Option: Pipe Clamps
Pony 50 fixture for 3/4-inch black pipe. Pony says one fixture set works on any length of 3/4-inch pipe, as long as the pipe is about 7 inches longer than the workpiece. The clamping face is 1-3/4 inches. One set of fixtures can serve several pipe lengths, and the pipe is bought separately. Pony doesn’t publish a clamping-force figure for this fixture. Check Pony 3/4-inch pipe clamp fixtures on Amazon
Limitation: The jaw face is small, so always pad it on plywood. Glue squeeze-out touching bare iron pipe can leave dark stains on tannin-rich species such as oak. Lay plastic or tape between the pipe and the glue line.
3. Best Everyday Holding Clamp: One-Handed Bar Clamps
Irwin Quick-Grip XP600, 18-inch (model 2021418N). Irwin rates it at 600 lb of sustained clamping force, with an 18-inch maximum opening and a throat of about 3-5/8 inches. It has removable non-marring pads and an I-beam bar meant to reduce flex. The XP600 also comes in 6- to 50-inch lengths. These are the clamps you reach for to hold a straightedge, a jig, or parts during a dry-fit. Check the Irwin Quick-Grip XP600 on Amazon
Limitation: Lighter trigger clamps are fine for holding but weak for wide glue-ups. Check the rated force of the exact model you’re buying.
4. Best for Edging and Banding: Three-Way Edge Clamps
Bessey EKT-55 one-hand edge clamp. Bessey lists a 2-1/8-inch capacity, a 3-inch throat and up to 500 lb of force. Two jaws grip the panel faces while a center pad pushes the edging inward, all from one handle. The 2-1/8-inch capacity covers 3/4-inch shelves and doubled 1-1/2-inch tops. Check the Bessey EKT-55 on Amazon
When you don’t need one: Iron-on veneer edge banding uses heat-activated glue and doesn’t need clamps. Our edge banding guide covers that method. Edge clamps are for glued solid-wood strips.
5. Best for Screwed and Pocket-Hole Boxes: 90-Degree Corner Clamp
Kreg 90° Corner Clamp (KHCCC). Kreg says it holds 90-degree corners and T-joints in material up to 1 inch thick. A cutout lets you drive a pocket-hole screw without removing the clamp, and a thumbwheel sets the pressure. It holds parts in position; it doesn’t replace glue-up clamps. Check the Kreg 90° Corner Clamp on Amazon
6. Best for Cutting Full Sheets: Clamp-Edge Straightedge
BORA 50-inch NGX Clamp Edge (544050). This is an aluminum straightedge that clamps from one end. Bora lists a 50-inch cutting capacity, which covers a crosscut across a 48-inch sheet. Adding the 50-inch extension gives 100 inches for full-length rips. Your saw’s base rides against it as a fence. Check the BORA NGX Clamp Edge on Amazon
Limitation: A straightedge only guides the saw. You still have to support both sides of the cut so the sheet doesn’t sag and pinch the blade.
Shop-Made Option: Cauls
A caul is a stiff strip of wood placed between the clamp and the workpiece. It spreads one clamp’s force over a longer stretch. For edging and narrow glue-ups, cauls are cheap and effective. Planing a slight curve along a caul’s length, high in the middle, helps push pressure toward the center of the joint.
Know the limits on large panels: Cauls help a lot on wide glue-ups, but they are not a complete fix for laminating two full panels. A caul spanning a 24-inch-wide panel has to be stiff enough not to flex, which usually means deep stock set on edge. It also needs clamps at both ends, and you need several cauls spaced across the panel. Even then, a few cauls cannot guarantee even pressure over a 24 x 48-inch surface. For large laminations, combine cauls with screws or weights in the field of the panel, or use a vacuum press with a suitable glue. Check the cut edges of a test piece if the result matters.
Common Clamping Mistakes With Plywood
Mistake 1: Bare Metal Jaws on Face Veneer
Why it happens: Pipe clamps and some bar clamps have small cast-iron or steel feet. What goes wrong: Dents or crushed fibers in the thin veneer, which show clearly once you finish the panel. How to spot it: Shiny, compressed spots where each jaw sat. Fix: Put pads, scrap blocks or a full-length caul under every metal jaw.
Mistake 2: Assuming Parallel Clamps Make a Box Square
Why it happens: “Parallel jaw” sounds like “square assembly.” What goes wrong: If clamps sit above or below the joint line, or are tightened unevenly, the box racks. Doors then won’t hang evenly. How to spot it: The two diagonals measure differently. Fix: Center each clamp on the joint and measure both diagonals before the glue grabs. Shift a clamp slightly at an angle to pull the long diagonal in.
Mistake 3: Clamping Only the Edges of a Laminated Panel
Why it happens: It looks clamped all over. What goes wrong: The center gets little or no pressure (see Scenario 2). How to spot it: Gaps on the cut edges, or a hollow sound when you tap the middle. Fix: Use stiff cauls together with screws or weights across the panel, or a vacuum press with a glue suited to its pressure.
Mistake 4: Spacing Edge Clamps Too Far Apart
Why it happens: Not enough clamps to cover an 8-foot shelf edge. What goes wrong: The edging bows away between clamps and leaves open glue lines. Fix: Clamp closer together, or put a stiff caul over the edging so fewer clamps cover the whole length.
Mistake 5: Leaving Iron Pipe Touching Glue Squeeze-Out
Why it happens: Pipe clamps sit right on the panel. What goes wrong: Dark marks on tannin-rich woods such as oak. The marks can show through stain. Fix: Put plastic film or packing tape between the pipe and the work.
How to Build a Plywood Clamp Kit Without Overbuying
The step list below is an editorial suggestion, not a requirement. Buy in this order and stop when your projects stop needing more:
Four one-handed bar clamps (12–24 inch). Use them for holding guides, jigs and dry-fits.
A clamp-edge straightedge if you cut sheets with a circular saw.
Four parallel or pipe clamps that open wider than your widest cabinet box. Four clamps let you put two on each side of a box at once.
Edge clamps or a set of cauls when you start gluing on solid-wood edging.
Corner clamps if you build mostly with pocket screws.
Cost difference to know: Parallel clamps generally cost several times more per clamp than pipe-clamp fixtures plus pipe. Check current pricing. If you build a few boxes a year, pipe clamps with pads cover most of the same work. If you build cabinets often, parallel clamps save setup time and fix fewer racked boxes.
If you’re building furniture rather than cabinets, our plywood thickness for furniture chart helps you plan panel sizes before you size your clamps. Denser panels such as Baltic birch handle clamp pressure on the face better than soft-core sheets; see Baltic birch vs. birch plywood.
FAQ
How many clamps do I need to glue up a plywood cabinet box?
It depends on box size and joinery. A practical starting point is two clamps per side across the width, so four for a simple box, with each clamp longer than the box is wide. Glued-only butt or dado joints need more clamps than joints also held by screws.
Are pipe clamps good for plywood?
Yes, for glue-ups where you need long reach on a budget. Pad the small jaws to protect the face veneer, and keep bare iron pipe away from glue squeeze-out to avoid stains.
Sometimes. Screws, brads or pin nails can hold a joint while the glue dries, and iron-on edge banding needs no clamps at all. For face lamination, screws or weights combined with cauls, or a vacuum press, can take the place of clamps. Use a glue rated for the pressure that method delivers.
What is the best clamp for cutting plywood with a circular saw?
A clamp-edge straightedge long enough for the cut: about 50 inches for crosscuts on a 4-foot-wide sheet, and about 100 inches for full-length rips. Ordinary bar clamps holding a straight board also work if the clamps stay clear of the saw motor.
How tight should I clamp plywood glue joints?
Titebond’s own wording is enough pressure to bring the joints tightly together. It also gives general ranges of 100–250 psi, depending on wood density. A thin, even bead of squeeze-out along the whole joint is a common sign of good contact. Heavy pressure on bare metal jaws can dent the face veneer, so pad the jaws.
Can clamps damage plywood?
Yes. Small metal jaws can dent the face veneer, and clamps placed off the joint line can rack a box. Pads, cauls and centered clamp placement prevent both.
Bottom Line
For most plywood work, start with one-handed bar clamps for holding and parallel or pipe clamps for cabinet glue-ups. Add edge clamps or cauls when you glue on solid-wood edging. For face-laminated panels, edge clamps alone won’t do it. Plan on cauls with screws or weights, or a vacuum press paired with a glue suited to its pressure.
Related Posts:
Miter Clamps: Perfect Corners Made Easy by Admin March 3, 2025 Joints One of the first lessons every woodworker learns is that miter clamps turn good corners into great ones. These specialized tools squeeze freshly cut angles…
Best Budget Track Saw for Plywood: 5 Picks Compared by Admin October 13, 2026 DIY Affiliate disclosure: ThePlywood.com is reader-supported. As an Amazon Associate, we earn from qualifying purchases at no extra cost to you. Links to other retailers are…
Best Basement Wall Systems: 7 Options Compared by Admin August 27, 2026 DIY The best basement wall systems do more than cover bare concrete. A properly designed wall assembly must control moisture, reduce condensation, insulate the foundation, provide…