When a vinyl floor bubbles, dents, or telegraphs seams within its first year or two, the flooring itself usually gets the blame. In many of those failures, though, the real problem sits one layer down: the wrong underlayment panel was used, or the right panel was installed against the manufacturer’s instructions.
Underlayment grade plywood is one of the most misunderstood products in the plywood aisle, partly because the word “underlayment” gets printed on everything from warranted premium panels to bargain lauan that some resilient-flooring manufacturers specifically prohibit. This guide sorts out what actually qualifies, what it costs, and where the expensive mistakes hide.
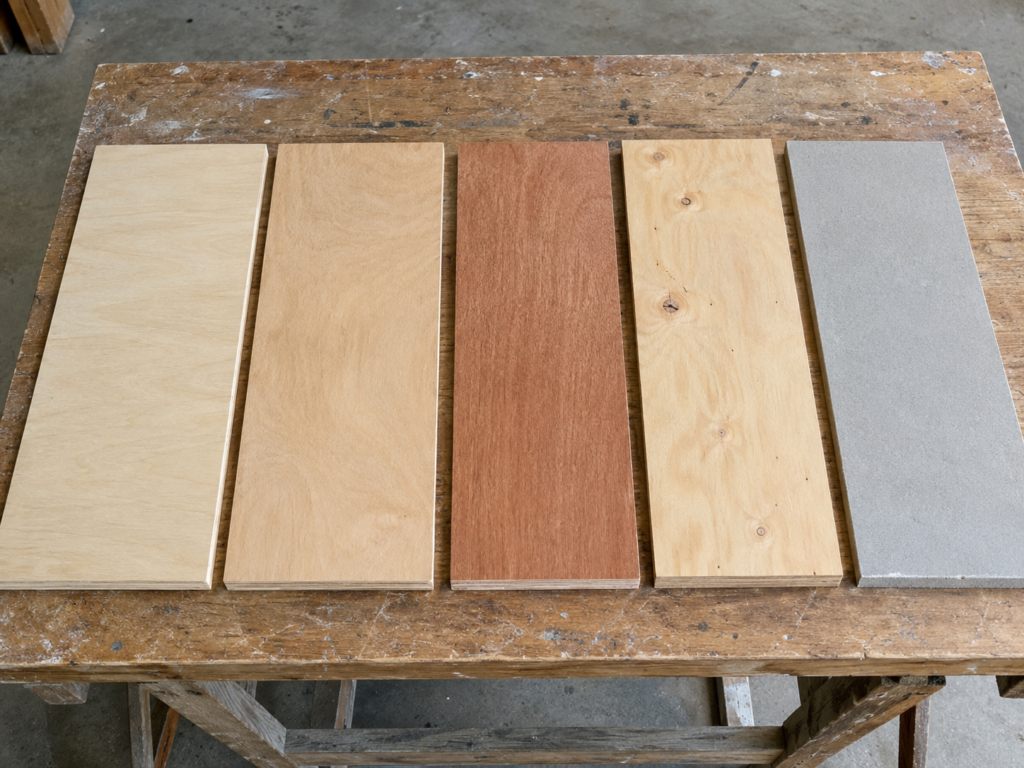
Quick Comparison: Underlayment Panel Options
Panel Type
Typical Thickness
Face Quality
Best For
Watch Out For
Approx. Cost (4×8)
APA-Trademarked Plywood Underlayment
1/4″–1/2″
Fully sanded face; qualifying APA grade and notation
Resilient flooring and other finishes when specified
Verify the grade, exposure classification, and underlayment notation in the APA trademark
$25–$45
Proprietary Premium Plywood Underlayment — such as SurePly
1/4″ (5.2mm)
Smooth, warranted for resilient flooring
Sheet vinyl, VCT, resilient flooring
Follow that brand’s install method exactly
$30–$50
Lauan / Meranti “Underlayment”
1/4″ (5.2mm)
Varies wildly
Only where both flooring and panel makers approve it
Prohibited by some resilient-flooring manufacturers
$15–$25
Sanded BC Plywood
1/4″–3/4″
B face, may have core voids
General use
Not manufactured for resilient flooring
$30–$55
Cement Board
1/4″–1/2″
N/A
Ceramic and stone tile
Primarily intended for tile; use under resilient flooring only when specifically approved
$12–$18 (3×5)
The one-sentence answer: when the flooring manufacturer requires plywood underlayment beneath sheet vinyl or thin glue-down vinyl, choose a panel whose trademark or written warranty specifically covers resilient flooring — not generic lauan or standard sanded plywood.
What Makes Plywood “Underlayment Grade”?
Underlayment grade is not determined by the visible face alone. A smooth surface tells you nothing about what’s inside the panel, and what’s inside is what matters when a refrigerator foot or chair leg concentrates its load on thin vinyl.
Look for an APA trademark or a proprietary panel warranty showing that the product is suitable for resilient flooring. Acceptable APA configurations can include panels marked Underlayment, C-C Plugged with a sanded face, and certain A-C or B-C panels carrying the required underlayment notation (“Plugged Crossbands Under Face”) in the trademark. Those plugged crossbands are the key: ordinary sanded plywood can have knotholes and voids hidden in its core layers, and a thin face veneer over a core void can deform or indent under a concentrated load — leaving a permanent dent in the finished floor above it. APA’s underlayment installation guidance covers panel selection, handling, and fastening in detail.
The specs to look for on the stamp or data sheet:
A qualifying trademark: APA Underlayment, C-C Plugged with a sanded face, or an A-C or B-C panel with the underlayment notation — or a proprietary panel with a written warranty for resilient flooring
Core construction: plugged crossbands beneath the face, which is what separates true underlayment from ordinary sanded plywood
Moisture durability: for APA plywood that may encounter temporary construction moisture, use Exposure 1 or Exterior-rated material; for proprietary panels, follow the product’s stated moisture limitations and warranty
Surface: fully sanded, uniform, and non-staining under the flooring adhesive
If you’re still getting familiar with how panel grade stamps work, the letter system is the same one covered in our full guide to plywood grades — with the twist that underlayment cares about what’s inside the panel, not just the face you can see.
How Thick Should It Be?
Proprietary underlayment panels are commonly sold in nominal 1/4-inch thicknesses (about 5.2mm for import panels). APA guidance allows 1/4-inch plywood over a smooth subfloor but recommends at least 11/32 inch where the panel must bridge lumber subflooring or other uneven surfaces — the situation covered in our guide to installing plywood over a plank subfloor. Thicker 3/8″ and 1/2″ panels are also used to raise a floor to match an adjacent surface. In every case, thickness adds smoothness and bridging ability — not structural capacity.
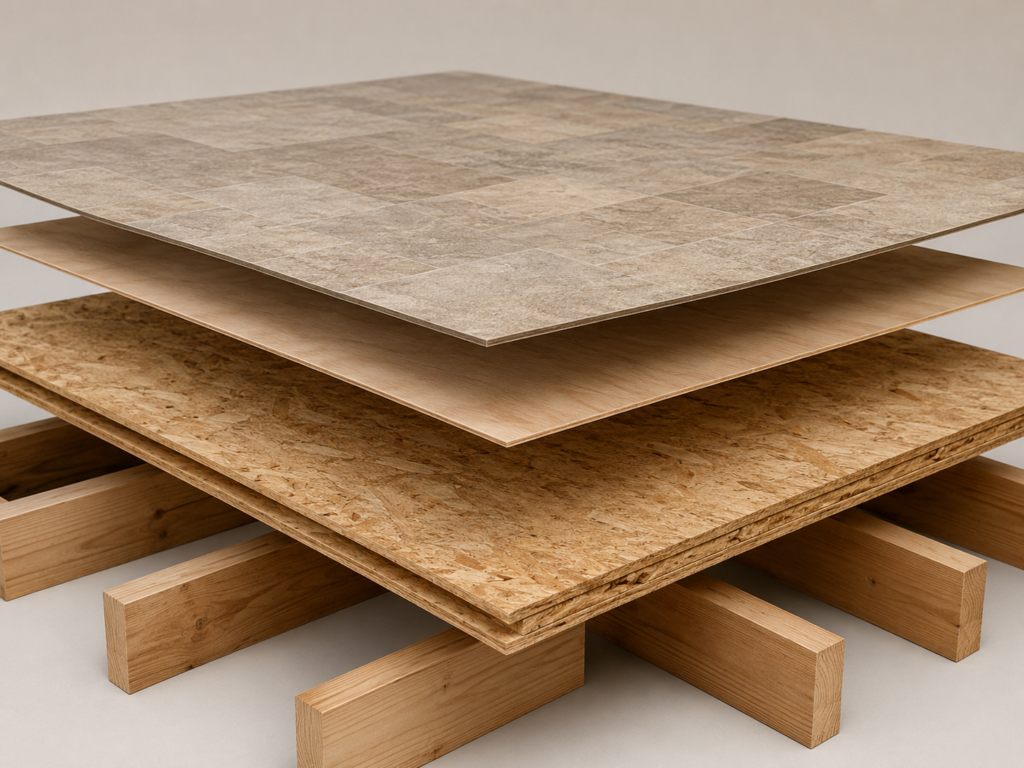
Underlayment vs. Subfloor: Two Different Jobs
This distinction trips up a lot of DIYers, so let’s make it clean.
Your subfloor is structural. It’s typically 3/4″ tongue-and-groove plywood or OSB spanning the joists, and it carries the load of everything in the room. If you’re working on that layer, the span and thickness requirements are covered in our guide to plywood thickness for subfloors.
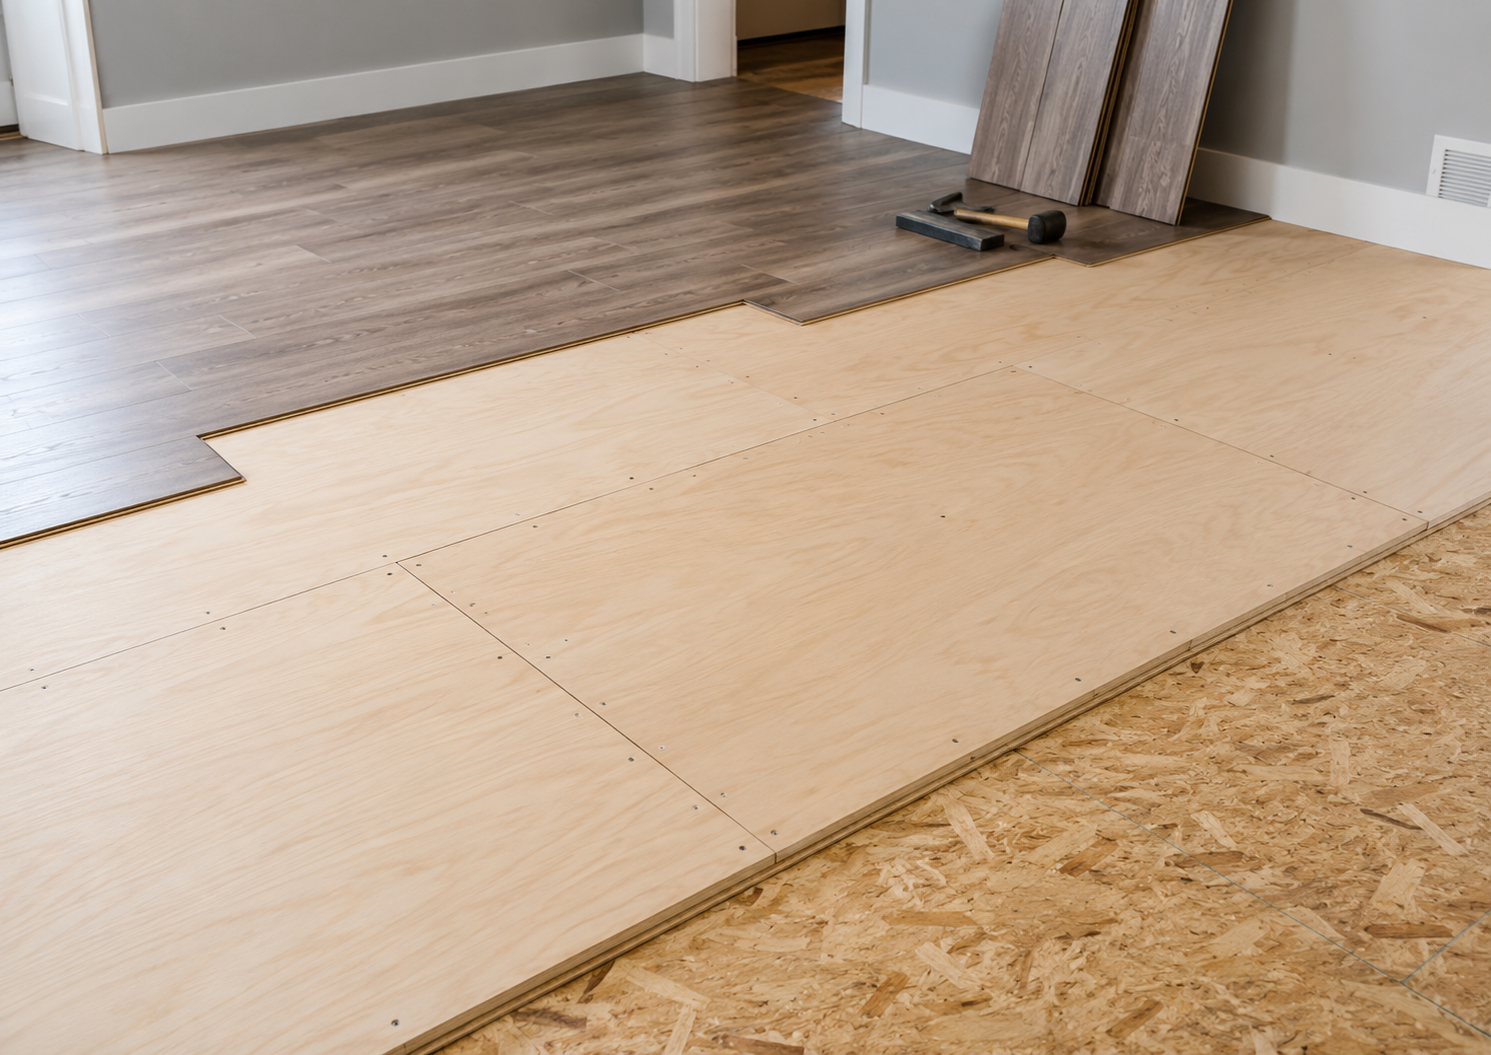
Your underlayment is a finish-surface layer. Its jobs are to give resilient flooring a flat, uniform, non-staining surface and to resist indentation. Plywood underlayment must not be relied upon to correct inadequate joists, excessive deflection, damaged subflooring, or other structural deficiencies — those problems have to be fixed at the structural layer first.
You don’t always need both layers. Sheet vinyl, VCT, and glue-down LVT or LVP frequently require an approved underlayment over wood, especially when the existing subfloor is rough, damaged, porous, or not classified as an acceptable underfloor. Some products and installation methods — including certain loose-laid and click-lock floors — permit direct installation over a properly prepared subfloor, so check the flooring manufacturer’s instructions before buying panels you may not need.
The Mistake: Grabbing “Underlayment” Lauan for Sheet Vinyl
This is the most common failure path, and the box stores make it easy to walk down. There’s usually a stack of 1/4″ lauan (meranti) sitting in the plywood aisle with “underlayment” printed on the sticker. It’s the cheapest panel there — around $15–$25 a sheet — and it looks smooth.
The problem is approval, not appearance. Lauan quality varies considerably, and some resilient-floor manufacturers specifically prohibit it — a December 2020 Tarkett SureStart installation guide, for the products covered by that document, requires qualifying APA-trademarked plywood underlayment and prohibits installation over lauan, OSB, particleboard, chipboard, and composite underlayments. Always check the current instructions for the exact Tarkett flooring product being installed.
Other manufacturers don’t name species at all; instead they require an underlayment panel with uniform density, dimensional stability, a fully sanded face, and construction that will not stain the finished flooring, backed by a suitable performance history or written warranty. Generic lauan sold without an applicable technical data sheet or warranty may not provide documentation showing that it meets those requirements, which means a failure can land on you rather than the flooring warranty. (More on the species itself in our lauan plywood guide.)
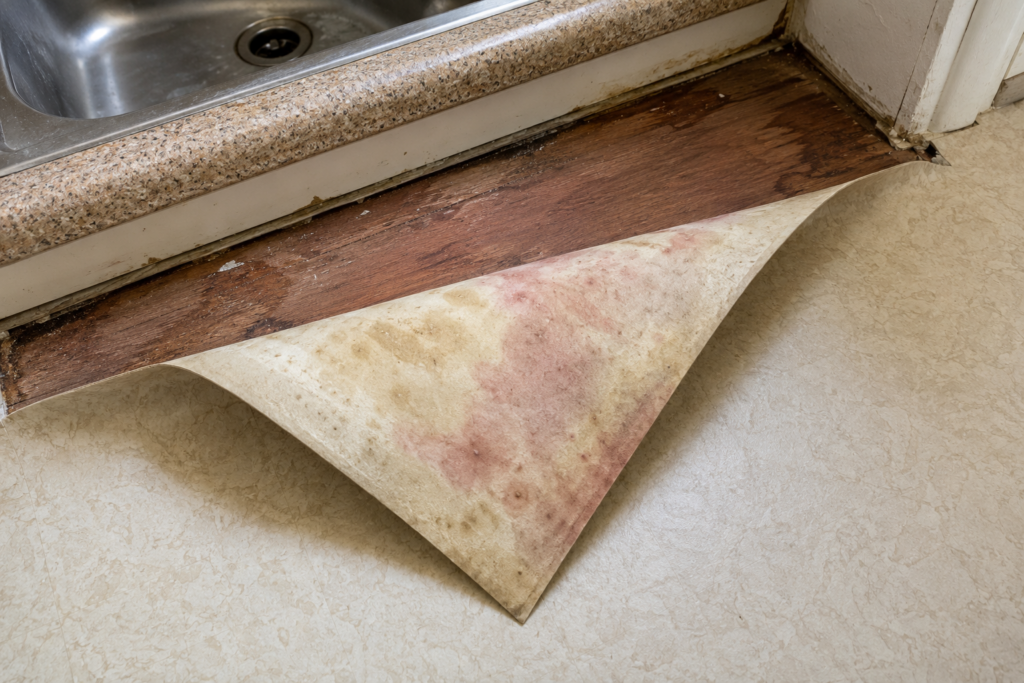
A typical failure scenario reported with unapproved panels under sheet vinyl: the floor looks perfect at installation, then months later a yellow or discolored blotch appears — often in a kitchen or bath where moisture is present. Depending on the cause and extent of the discoloration, repair may require removing both the finished flooring and the underlayment. A $60–$100 material savings becomes a four-figure redo.
Use lauan only when both the flooring manufacturer and the panel manufacturer approve that specific product and installation. When in doubt, the warranted proprietary panel is the cheap option once risk is priced in.
The Real Cost Difference (And Why Cheap Loses)
Here are the numbers on a typical 12′ × 15′ kitchen — 180 square feet, six 4×8 sheets:
Option
Per Sheet
6 Sheets
Risk Exposure
Generic lauan “underlayment”
~$18
~$108
Staining, warranty exclusion
Qualifying APA-trademarked plywood underlayment
~$32
~$192
Low
Warranted proprietary panel
~$42
~$252
Manufacturer-backed when installed according to its instructions and warranty terms
The spread between the cheapest and best option is about $144 for the whole room. Meanwhile, the vinyl or LVP going on top costs $500–$1,500, and the labor to replace a failed floor runs well beyond that. Underlayment is usually a relatively small portion of the complete flooring budget, but a panel or installation failure can require removal of the entire finished floor — and once a subfloor layer has to come out, the labor math gets ugly fast, as our subfloor replacement cost breakdown shows. It is the last place in the project to save money.
Inspecting Panels Before Installation
A quick observation at the lumberyard can screen out obviously poor panels before they end up in your cart: inspect the edges for obvious open gaps, delamination, crushed areas, or poorly bonded plies. This cannot reveal the entire core, but it can identify visibly damaged or badly manufactured sheets. Some manufacturers also publish their own pre-installation checks — SurePly’s instructions, for example, include a flex inspection to reveal delamination or core imperfections before a panel goes down.
These observations can expose obvious damage or poor manufacturing, but they cannot establish that a panel is approved for resilient flooring. The panel stamp, technical data sheet, warranty, and finished-floor manufacturer’s instructions remain controlling.
Warning: Fastening and Seam Prep Are Where Good Panels Go Bad
Even an approved panel fails if it’s installed like a subfloor. Underlayment has its own rules, and the single most important one is this: the panel manufacturer’s installation guide overrides any generic advice, including this article. The reason is that different systems genuinely conflict:
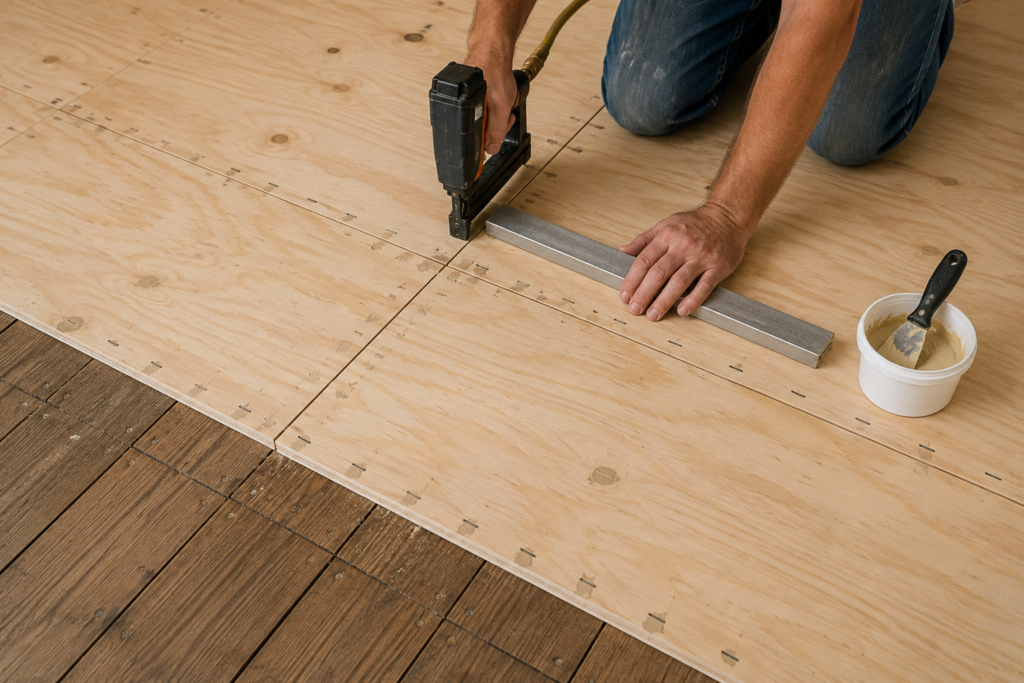
Fastening. Fastener type, length, crown width, and spacing must match the panel manufacturer’s instructions. APA’s general schedule for 1/4-inch plywood over a smooth subfloor uses 3-inch edge spacing and 6-inch field spacing, while SurePly’s installation guide specifies 2-inch edge spacing and 4-inch field spacing. Either way, that’s a dense schedule — often 100+ fasteners per sheet. Use non-staining, corrosion-resistant fasteners (galvanized ring-shank nails, approved staples, or approved screws), avoid overdriving them, and don’t let them protrude below the subfloor. Smooth-shank nails are a poor choice because they can back out and telegraph through the flooring.
Seams and gaps. Follow the panel manufacturer’s joint instructions. APA’s general guidance recommends approximately 1/32-inch spacing between panels, followed by filling and finishing the joints. Some proprietary panels use a different system entirely — SurePly, for example, prefers lightly butted joints without seam filler, or alternatively a 5/64-inch joint with an approved filler. Do not combine one manufacturer’s gap with another manufacturer’s finishing method.
Seam offset. Unless the panel or finish-flooring manufacturer specifies otherwise, offset underlayment joints from subfloor joints by at least 2 inches. Also stagger the panels so four corners do not meet. Stacked seams flex together and can crack or ridge the finish floor above.
Surface prep. Drive fasteners flush or slightly below the surface without breaking through the face veneer. Correct visible depressions, damaged areas, and joints only as required by the panel and flooring manufacturers, using an approved patching compound. Thin resilient flooring will telegraph surprisingly small imperfections.
Acclimation. Condition the panels to the installation environment before fastening, per the panel manufacturer — especially in humid seasons, and never over a subfloor that hasn’t fully dried out, a problem covered in our guide to getting moisture out of a plywood subfloor.
One more caution for kitchens, bathrooms, and other spill-prone areas: confirm that the selected plywood and flooring system are approved for the location. Tile assemblies may require cement board or a waterproof membrane, while vinyl flooring requires a substrate specifically approved by its manufacturer.
Recommended Tools & Materials for Underlayment Installation
These are the items worth having on hand for an underlayment job. (As an Amazon Associate, theplywood.com earns from qualifying purchases at no extra cost to you.)
Henry 549 FeatherFinish Patch & Skimcoat— a Portland-cement-based patch and skimcoat widely used for fastener dimples and approved seam filling before resilient flooring. It can dry in as little as 15 minutes and is designed to be troweled to a smooth finish.
Pneumatic Narrow-Crown Stapler — hand-nailing 100+ fasteners per sheet is how schedules get cut short; a stapler keeps the spacing honest. Buy staples that match your panel manufacturer’s specified crown width and length.
Pin-Type Wood Moisture Meter — use a properly calibrated meter and compare readings against the maximum permitted by your flooring manufacturer, and confirm the subfloor and underlayment have been conditioned to the installation environment.
Oscillating Multi-Tool— the only sane way to undercut door jambs so the underlayment slides beneath instead of being scribed around.
4′ Aluminum Straightedge— for checking flatness across seams after patching; thin resilient flooring finds every high spot you don’t.
Frequently Asked Questions
What is underlayment grade plywood?
Underlayment grade plywood is a thin panel — commonly 1/4″ — manufactured with plugged crossbands beneath a fully sanded face, designed to create a smooth, indentation-resistant surface between a structural subfloor and finished flooring like vinyl, LVP, or carpet. Qualifying panels carry an APA trademark with a qualifying grade and underlayment notation, or a proprietary warranty covering resilient flooring.
Can I use regular plywood as underlayment?
Generally no for resilient flooring. Standard sanded plywood can contain core voids that dent under concentrated loads, and it isn’t warranted for staining or surface performance under vinyl. For resilient flooring, use a panel whose APA trademark or written warranty specifically covers underlayment use. Certain A-C or B-C panels can qualify only when the trademark carries the underlayment notation — the trademark, not the face, is what matters.
Is lauan plywood safe under vinyl flooring?
It depends entirely on approvals. Lauan quality varies considerably, and some resilient-flooring manufacturers specifically prohibit it in their installation instructions, which can shift failure costs onto the installer. Use lauan only when both the flooring manufacturer and the panel manufacturer approve that specific product for that installation; otherwise choose a qualifying APA-trademarked or warranted proprietary underlayment panel.
How thick should plywood underlayment be?
Proprietary underlayment panels are commonly sold in nominal 1/4-inch thickness. APA guidance permits 1/4-inch plywood over a smooth subfloor but recommends at least 11/32 inch where the panel must bridge lumber subflooring or other uneven surfaces. Thicker panels are also used to match floor heights. Thickness adds smoothness and bridging ability, not structural strength.
How do you fasten plywood underlayment?
Match the panel manufacturer’s fastener type, size, and spacing exactly. As reference points, APA’s general schedule for 1/4-inch plywood over a smooth subfloor uses 3-inch edge and 6-inch field spacing, while SurePly specifies 2-inch edge and 4-inch field spacing. Use non-staining, corrosion-resistant fasteners, drive them flush or slightly below the surface, offset seams at least 2″ from subfloor seams, and follow that same manufacturer’s joint-gap and filling instructions.
Usually not plywood underlayment. Most floating laminate and click-lock LVP use a thin foam or attached pad rather than plywood, provided the subfloor meets the flooring manufacturer’s flatness requirement. Plywood underlayment under laminate is mainly used to correct a rough or uneven subfloor surface — check the flooring instructions before adding a layer you may not need.
The Bottom Line
Underlayment grade plywood is cheap insurance with expensive failure modes. The panel itself costs $25–$50 a sheet, but choosing wrong — an unapproved panel under vinyl, voided cores under thin flooring, or mixed-and-matched installation methods — can turn into a four-figure tear-out. Buy a panel whose trademark or warranty actually covers resilient flooring, install it to that manufacturer’s fastening and seam instructions rather than generic advice, and the flooring above it will look new for as long as the flooring deserves to.
What Is Sheathing Plywood? Uses, Thickness and Cost by Amy Reed February 27, 2026 DIY Sheathing plywood is a structural wood panel used for wall and roof framing. It strengthens the framing system, distributes loads, and provides a base for…