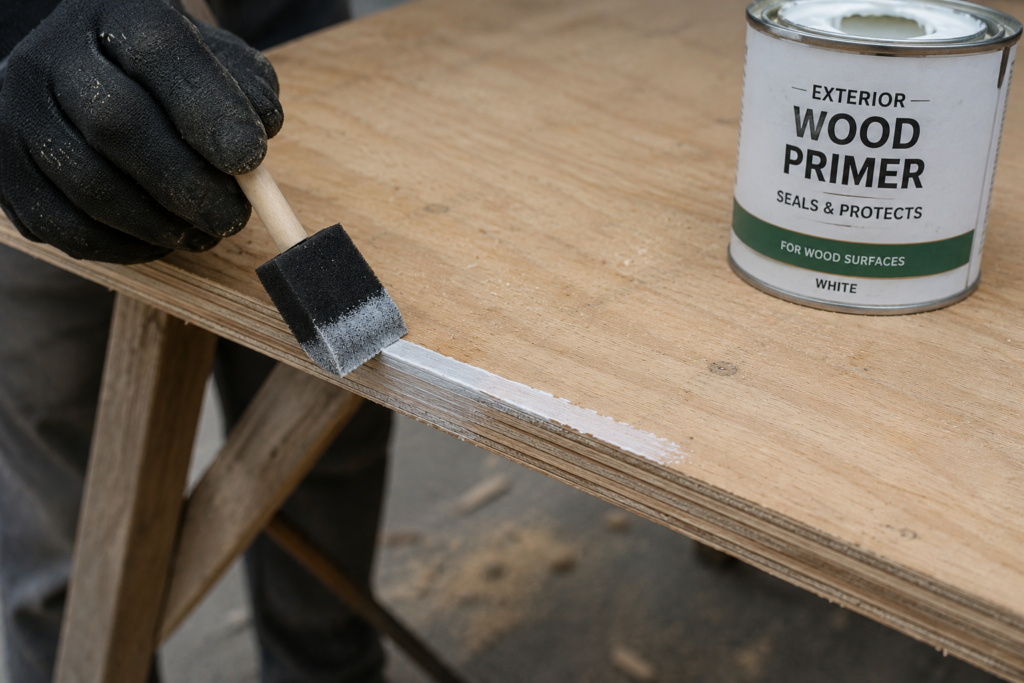
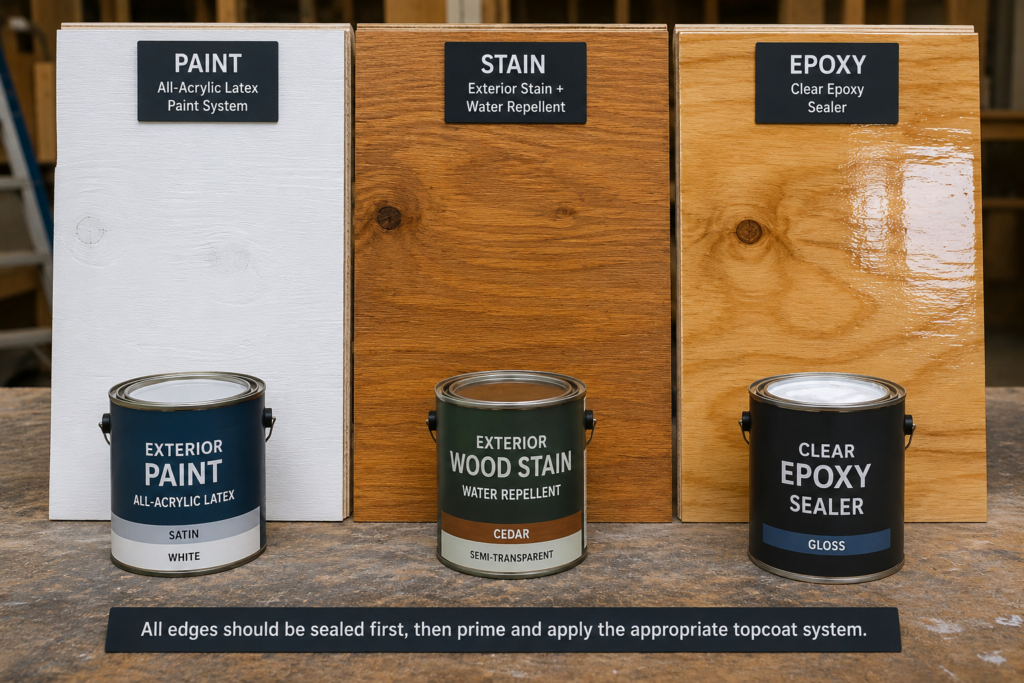
To seal exterior plywood, seal all four edges first with the same primer you’re using on the faces (or a paintable water-repellent preservative if you’re staining), then prime the faces and apply the manufacturer-recommended exterior topcoat system. Reseal every edge you cut on site. Edges absorb moisture far more readily than finished faces, which is why panels usually fail at the edges rather than in the middle.
One thing to settle before you buy anything: don’t rely on the “X” in names like CDX to decide whether a panel can stay outdoors. Check the APA grade stamp. Panels marked Exposure 1 can tolerate temporary moisture during construction but are not intended for permanent weather exposure. Panels marked Exterior are manufactured for long-term exposure to weather and moisture.
Neither marking makes the wood itself decay-resistant. Preservative treatment provides resistance to decay and insects. A maintained exterior coating serves a different purpose: it reduces moisture uptake and UV exposure.
Step-by-Step: How to Seal Exterior Plywood
Working time: varies by panel quantity and coating system Dry/recoat time: follow the coating manufacturer’s instructions Skill level: beginner Tools: 2.5″ sash brush, 3/8″ nap roller, foam brushes, sandpaper, moisture meter, caulk gun
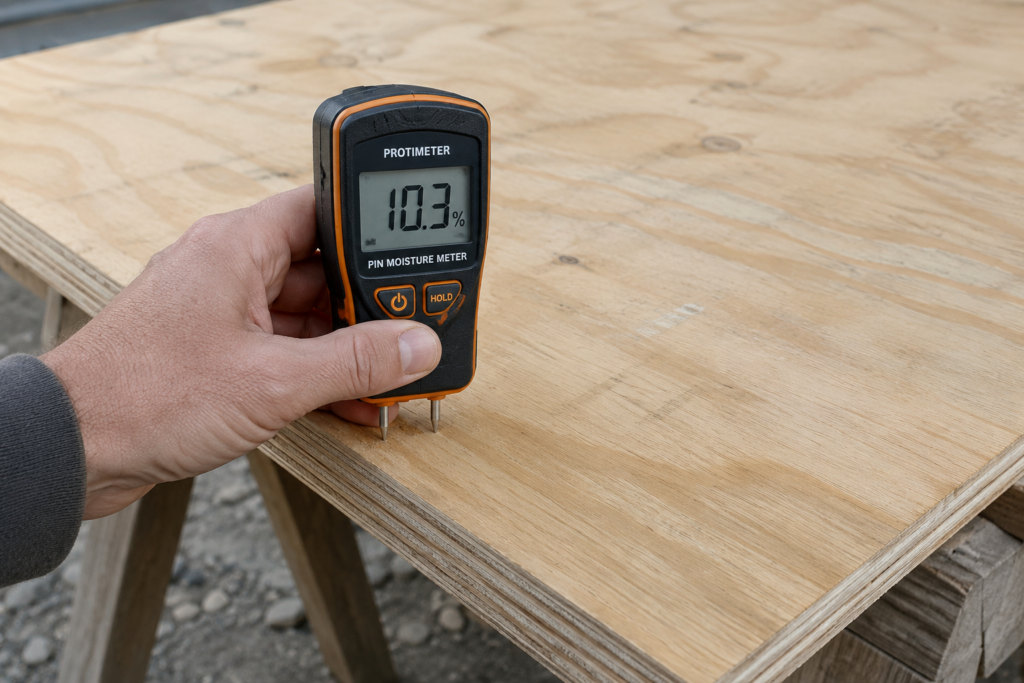
1. Make sure the panel is dry
If the plywood arrived wet or sat outside under a tarp, it has to dry before it gets coated. Sealing moisture into a panel is a slow-motion failure — the water can’t escape, the film blisters from behind, and the finish comes off in flakes with wood fiber stuck to the back.
A pin-type moisture meter settles the question quickly. You want the panel reading close to the conditions it will live in. Store panels flat, off the ground, and covered until you’re ready.
2. Clean and prepare the surface
Remove dirt, dust, loose fibers, and other contamination — APA’s guidance is to apply finish to a clean surface. On smooth plywood, lightly sand raised grain or rough areas if needed. Avoid sanding textured siding simply to make it smoother; on textured products the first coat should be worked into the surface rather than sanded flat.
Wipe with a dry cloth rather than a damp one. You just spent step 1 getting the panel dry.
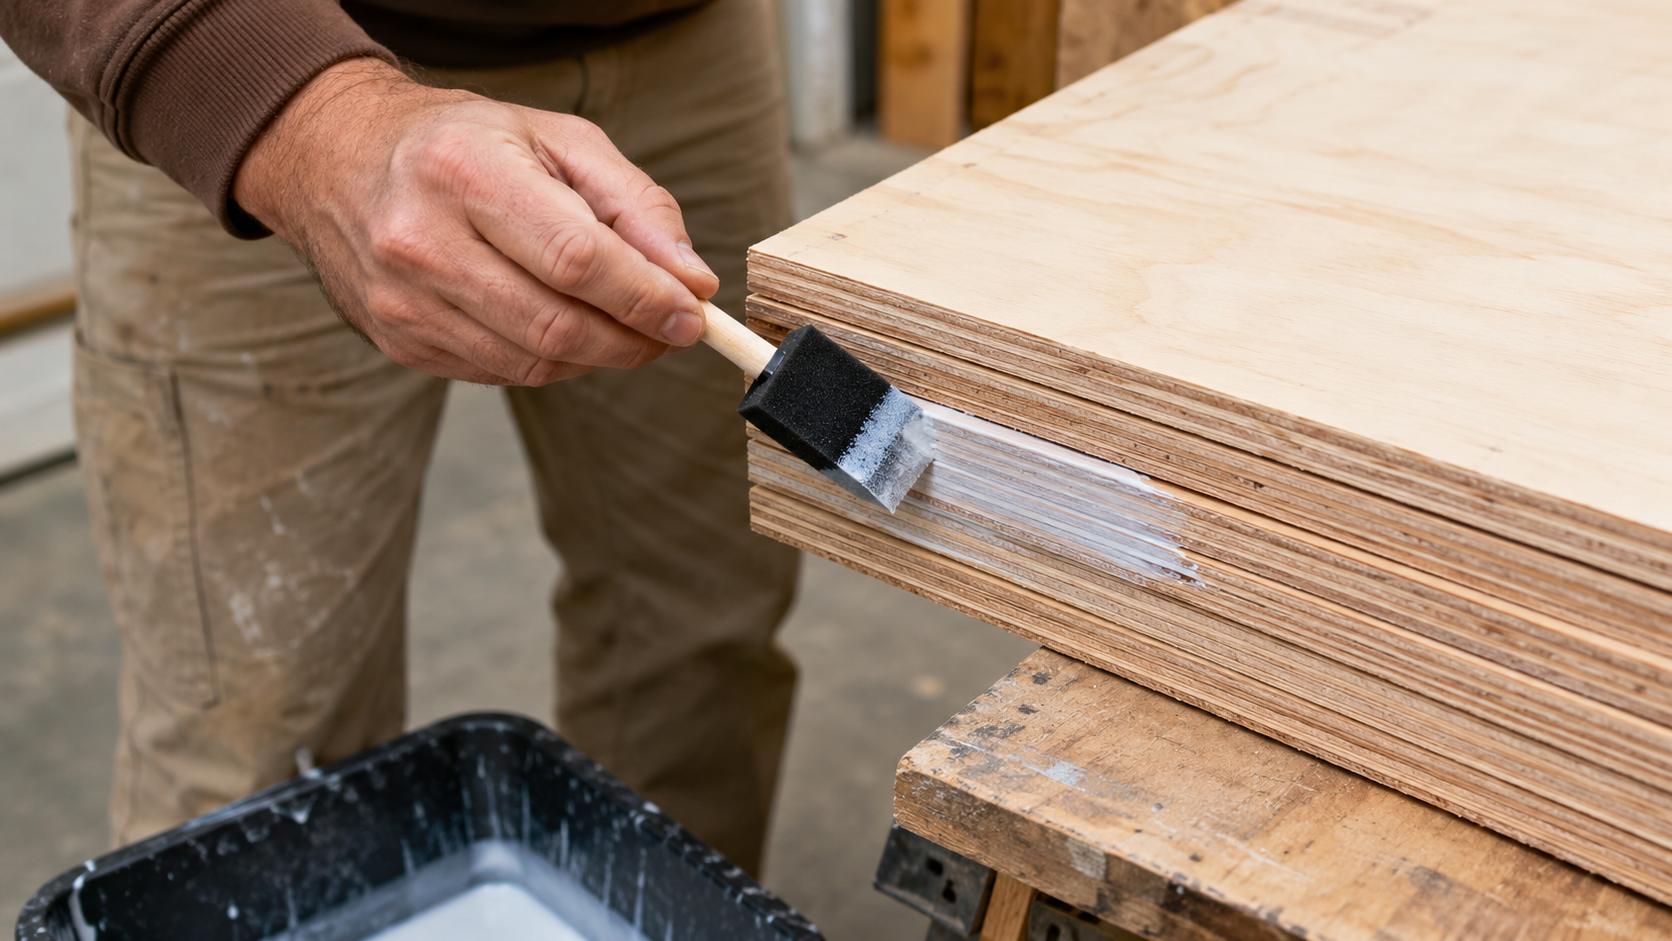
3. Seal all four edges — before installation
This is the step that decides the outcome, so do it while the panels are still in a stack and you can reach every edge.
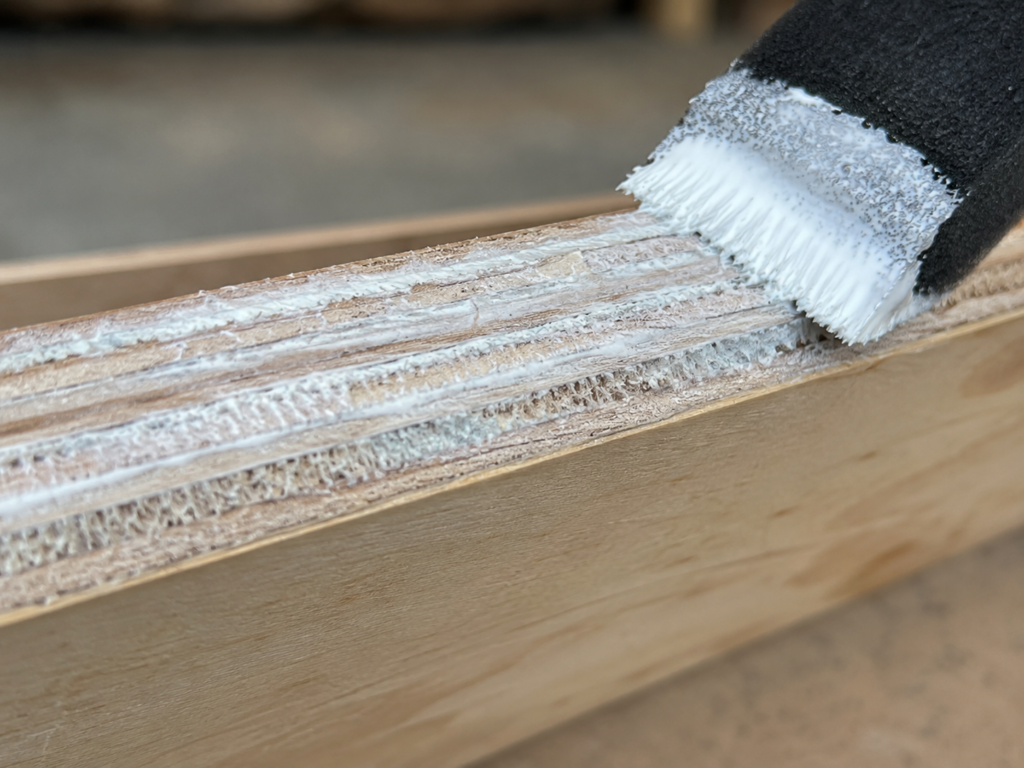
Flood the raw edge with primer or sealer. Don’t stroke it out thin — let it soak, then hit it again wherever it disappeared fastest. The edge will absorb most of the first coat, which is exactly the point.
APA’s guidance for APA Rated Siding is specific about this. In Builder Tips: Finishing APA Rated Siding (Form Q350), APA recommends sealing all siding edges prior to installation — primer if the siding will be painted, a paintable water-repellent preservative if it will be stained — and also sealing every edge cut during installation.
4. Back-prime if the back face can get damp
If both faces are exposed, prime both. If the back sits against framing or over a surface that may hold moisture, back-priming still helps — it evens out moisture uptake across the panel and reduces cupping.
5. Prime the faces
One full, even coat. No thin spots.
On knotty CDX or BCX, use a stain-blocking primer to reduce knot, resin, and extractive bleed-through. Our guide to painting plywood covers why primer changes the final appearance so noticeably on construction-grade panels.
6. Apply the exterior topcoat
Apply the number of coats specified by the coating manufacturer, maintaining full, even coverage. Recoat windows on the label assume moderate temperature and humidity — a can that says “recoat in 4 hours” doesn’t mean 4 hours at 52°F in October.
7. Caulk, fill, and reseal every field cut
Caulk vertical joints and trim intersections with a flexible elastomeric siding sealant rather than a rigid painter’s caulk. Fill overdriven fastener holes with exterior wood filler — a countersunk nail head is a funnel aimed straight into the core.
Any sheet you rip or trim gets its fresh edge sealed with a foam brush before it goes up.
Which sealer should you use?
The decision comes down to one question: is the panel going to be painted, stained, or left clear?
If the panel will be painted
Use the same exterior primer on the edges that you’re using on the faces, then an all-acrylic latex exterior paint system applied per the manufacturer’s instructions. APA’s position on rated siding is that an all-acrylic latex house paint system — primer plus topcoat — provides the best protection for wood siding.
The reason is mechanical, not marketing. Plywood moves with humidity and temperature, and acrylic latex stays flexible enough to move with it. A brittle film cracks at joints and fastener heads, water gets underneath, and the coating starts trapping moisture instead of shedding it.
If the panel is the finished exterior surface, spend on the face grade — our ACX and BCX plywood guides cover when the smoother face is worth the price jump.
If the panel will be stained
Seal the edges with a paintable water-repellent preservative that is compatible with the stain you plan to apply, then apply the stain. Solid-color stain carries more pigment than semi-transparent, and pigment is what blocks UV — APA describes solid-color stain as providing good protection and semitransparent stain as providing minimum protection on rated siding.
Textured panels are their own problem. On T1-11 and other grooved 303 siding, the grooves cut through the face veneer, and that’s where water enters first. Work the finish into every groove with a brush; a roller bridges the groove and leaves the bottom of it bare.
If the panel needs maximum protection at the edges
A penetrating epoxy system can provide additional moisture protection at exposed end grain and other vulnerable areas. It’s a common approach for dock hardware, boat components, and posts.
However, ordinary epoxy should not be left exposed to sunlight. Use a compatible UV-resistant topcoat when the epoxy will remain outdoors — both WEST SYSTEM and System Three specifically recommend protecting exterior epoxy with an appropriate finish. Treat epoxy as a base coat, not a finish coat.
Exterior acrylic latex primer + exterior topcoat system
Siding, sheds, soffits, any painted panel
$$
Easy — scuff and recoat
Yes (pigment)
Oil/alkyd stain-blocking primer + acrylic topcoats
Knotty CDX/BCX, tannin bleed, weathered panels
$$
Easy
Yes (topcoat does the work)
Solid-color exterior stain
T1-11 and textured 303 siding
$$
Easy
Yes (pigment)
Semi-transparent stain + water repellent
Rustic sheds and fences where grain shows
$
Easy
Partial — less pigment, less protection
Clear penetrating epoxy sealer
Edges, end grain, docks, rot-prone joints
$$$
Difficult
No — must be topcoated
Exterior spar/marine urethane
Small trim, doors, benches
$$
Sand and recoat regularly
Limited without UV-resistant formulation
Interior polyurethane or polycrylic
Nothing outdoors
—
—
No
Costs shown as relative tiers. Current pricing varies by region, brand, and species — see the Exterior Plywood Cost Guide for figures.
Pigmented finishes generally provide stronger UV shielding and are the lower-maintenance choice for large exposed plywood surfaces. Clear exterior systems can work, but they require UV-resistant products and more maintenance. APA does not recommend clear finishes for APA Rated Siding exposed outdoors.
Why edges matter more than faces
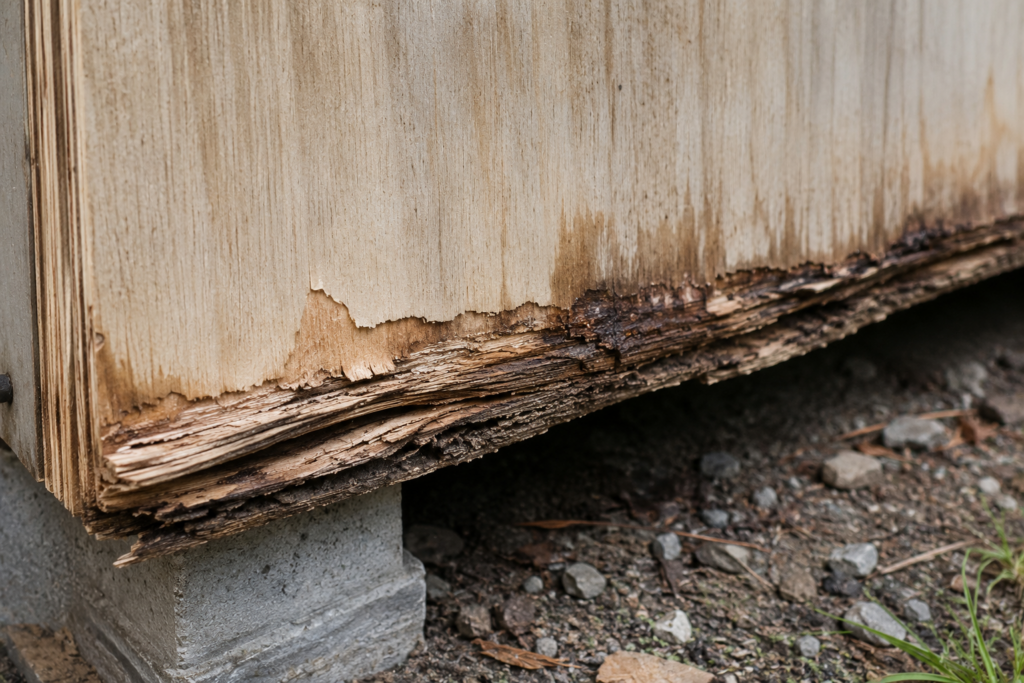
Water moves into wood along the grain much more readily than across it. A plywood edge exposes the ends and edges of multiple veneer layers along with their glue lines. Those exposed veneer layers can take up moisture readily, which is why unprotected panel edges are particularly vulnerable to swelling and coating failure.
Once a panel is installed, you permanently lose access to at least two of its six surfaces — the back and, on most installs, the bottom edge. The bottom edge is exactly where gravity delivers every drop of water that runs down the face, which makes lower drip edges the most vulnerable surfaces on the whole panel.
💸 The economics of edge sealing
Edge sealing is one of the cheapest steps in the job. Only the narrow band around each sheet gets coated, so the extra material is a small fraction of what the faces consume — and it’s usually primer you already bought. The alternative isn’t a repair. Swollen edges, delaminated corners, and decayed core mean replacing sheets, which means paying for the plywood a second time plus removal, disposal, and refinishing.
Where exterior plywood usually fails first
Failure follows the moisture, and the moisture follows a predictable order:
Bottom and drip edges. Water running down the face collects here and stays in contact longest.
Field-cut edges. Cuts around windows, doors, and openings expose fresh material, and they’re the edges most likely to get skipped at the end of a work day.
Fastener penetrations. Overdriven nail and screw heads break the coating film and create a small reservoir directly over exposed core.
Joints and trim intersections. Anywhere two materials meet, seasonal movement works on the sealant. Rigid caulk cracks; flexible sealant survives longer.
Grooves on textured siding. Grooving cuts through the protective face veneer, and a roller can’t reach the bottom of a groove.
Flat faces. These generally fail last.
One diagnostic worth knowing: coating failure from the outside looks like chalking and fading, which is normal wear. Blistering — bubbles that peel away in intact flakes with wood fiber on the back — means moisture is pushing out from inside the panel. Repainting doesn’t fix that. You have to find where water is getting in, often at a joint, flashing detail, fastener penetration, or unsealed edge hidden behind trim.
⚠️ Warning: bond classification is not decay resistance
Exterior — manufactured for long-term exposure to weather and moisture.
Exposure 1 — built to tolerate moisture during construction delays, then intended to be protected in service.
APA specifically warns that APA Rated Plywood Sheathing Exposure 1, commonly called “CDX” in the trade, is sometimes mistaken for Exterior plywood. Exposure 1 sheathing is intended to tolerate temporary moisture during construction and then be protected. For sheathing that will remain exposed long term, APA specifies Exterior-rated panels. Our CDX plywood guide covers the full picture.
Neither classification makes the wood decay-resistant. If the panel touches soil, sits in the splash zone, or lives somewhere it can’t dry out, no sealer solves that — you need preservative-treated plywood carrying the appropriate use category. The exterior plywood guide has the full decision tree.
❌ Mistakes that shorten the life of exterior plywood
Sealing after installation instead of before. The edges you can no longer reach are the edges that fail first.
Skipping field cuts. Every rip and trim creates raw edge. Seal it before the sheet goes up.
Coating a damp panel. Trapped moisture blisters the film from behind. Dry first, verify with a meter.
Applying too little finish. Follow the coating manufacturer’s required coverage and number of coats; thin or incomplete coverage leaves vulnerable areas exposed.
Rigid caulk at joints. Painter’s caulk cracks under seasonal movement. Use an elastomeric siding sealant.
Rolling over grooves and textures. The roller bridges; the groove stays bare; water finds it.
Waiting for the finish to peel before recoating. Recoat when the surface dulls and chalks, not after it cracks. Recoating a sound finish is a wash-and-roll afternoon; recoating a failed one is a scrape-sand-prime-paint week.
Using interior polyurethane outdoors. Interior-only polyurethane and polycrylic are not designed for sustained exterior exposure and can fail prematurely.
What to buy
Choose an exterior-rated product compatible with the finish system you’re using, and follow the manufacturer’s application and recoat instructions.
ThePlywood.com is a participant in the Amazon Services LLC Associates Program. We earn from qualifying purchases at no additional cost to you.
Frequently asked questions about sealing exterior plywood
Does exterior plywood need to be sealed? If exterior plywood will remain exposed to weather as a finished surface, it should receive an appropriate exterior finish. Plywood used behind roofing, siding, or another weather-resistant layer should instead be installed and protected according to the requirements of that assembly.
How do you seal the edges of exterior plywood? Brush a heavy coat of primer (for painted work) or a paintable water-repellent preservative (for stained work) directly onto the raw edge, let it absorb, and recoat where it soaked in fastest. Do this before installation, while the panels are still stacked.
How many coats of sealer does exterior plywood need? Prime the faces as required by the coating system, then apply the recommended exterior topcoats. Coat all raw edges thoroughly, adding an extra edge coat when the product instructions call for it or when the first coat absorbs heavily.
What is the best sealer for exterior plywood? For most painted applications, a compatible exterior primer followed by a high-quality all-acrylic latex exterior paint system, applied per the manufacturer’s instructions. APA identifies an all-acrylic latex primer and topcoat system as the best protection for wood siding.
Can you use polyurethane on exterior plywood? Only exterior-rated spar or marine urethane, and mainly on smaller components you’re willing to maintain. Interior polyurethane and polycrylic aren’t formulated for exterior exposure. APA doesn’t recommend clear finishes for rated siding exposed outdoors.
Should I seal both sides of exterior plywood? If both faces are exposed, yes. If one face sits against framing, back-priming is still worthwhile wherever the back can get damp.
Can I seal exterior plywood after it’s installed? You can coat the faces and accessible edges, and you should — but hidden edges are no longer reachable, and those are the ones most likely to fail. Concentrate on the bottom drip edge, joints, and fastener heads.
Do I need to seal pressure-treated plywood? Yes, for different reasons. Preservative treatment resists decay and insects but doesn’t prevent water absorption, swelling, checking, or UV graying. Let treated panels dry to the manufacturer’s recommended moisture level before coating.
How soon after installation should exterior plywood siding be finished? As soon as possible — APA recommends applying the first coat preferably within two weeks, notes that weather can cause surface damage to unprotected wood within about four weeks, and advises topcoating pre-primed products within 60 to 90 days. Always check the siding manufacturer’s recommendations.
Will sealing exterior plywood stop it from rotting? It slows moisture entry substantially, but a coating is a maintenance item rather than a permanent barrier. Panels in ground contact or permanently damp locations need preservative-treated material regardless of finish.
What’s the difference between sealing and waterproofing plywood? Sealing means creating a maintained barrier that slows moisture entry. Waterproofing implies a permanent, complete barrier, which exposed panels don’t get from a coating — even marine plywood needs a maintained finish. See the marine grade plywood guide and the best plywood for outdoor projects guide for matching the panel to the exposure.
Can I spray instead of brush? Spray the faces if you prefer, but back-brush the first coat so it’s worked into the surface rather than sitting on top of it. Edges and grooves should be brushed regardless — spray bridges recesses and leaves the spots that fail first uncoated.
Best Plywood for Exterior Siding: T1-11, ACX & BCX by Admin July 5, 2026 Repairs Choosing the best plywood for exterior siding comes down to one decision most people get backward: they shop by price first and exposure second. For…