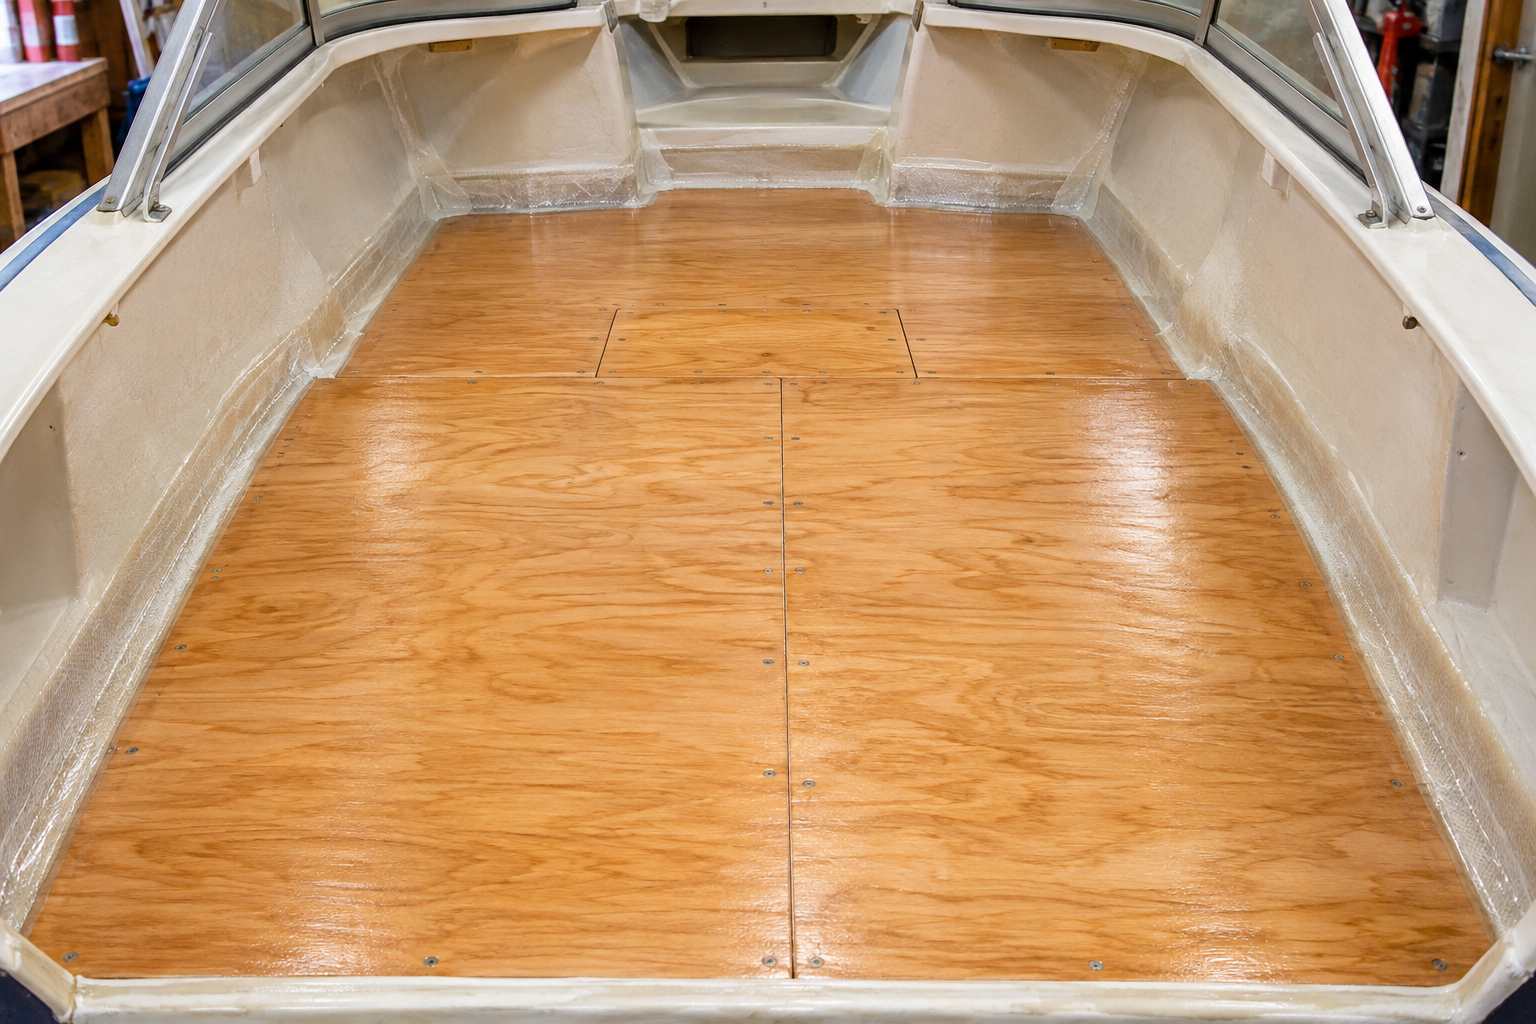
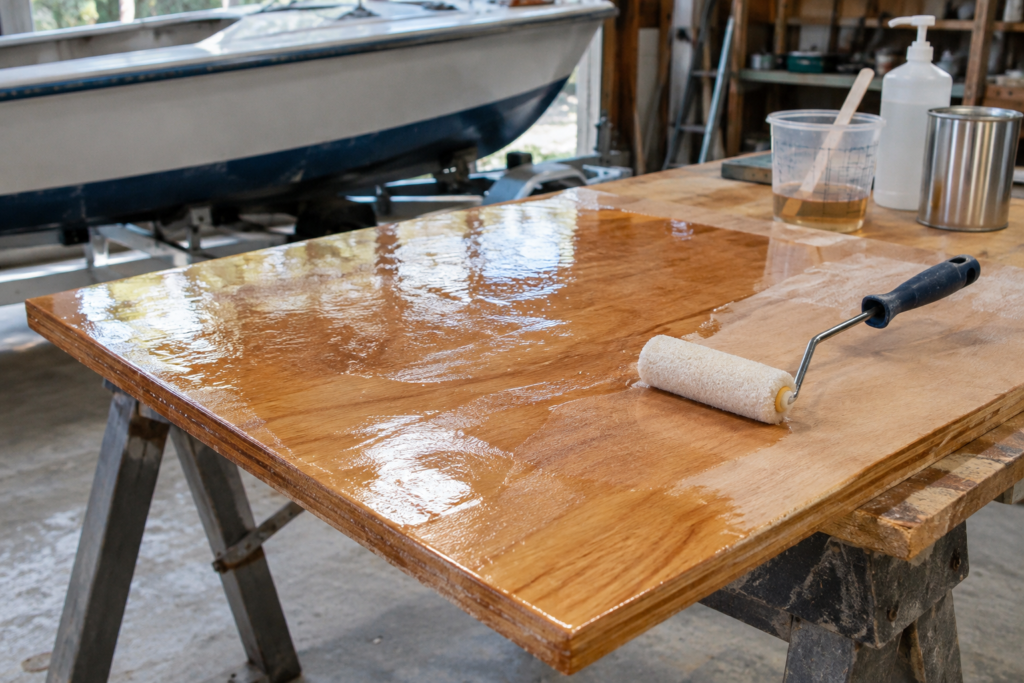
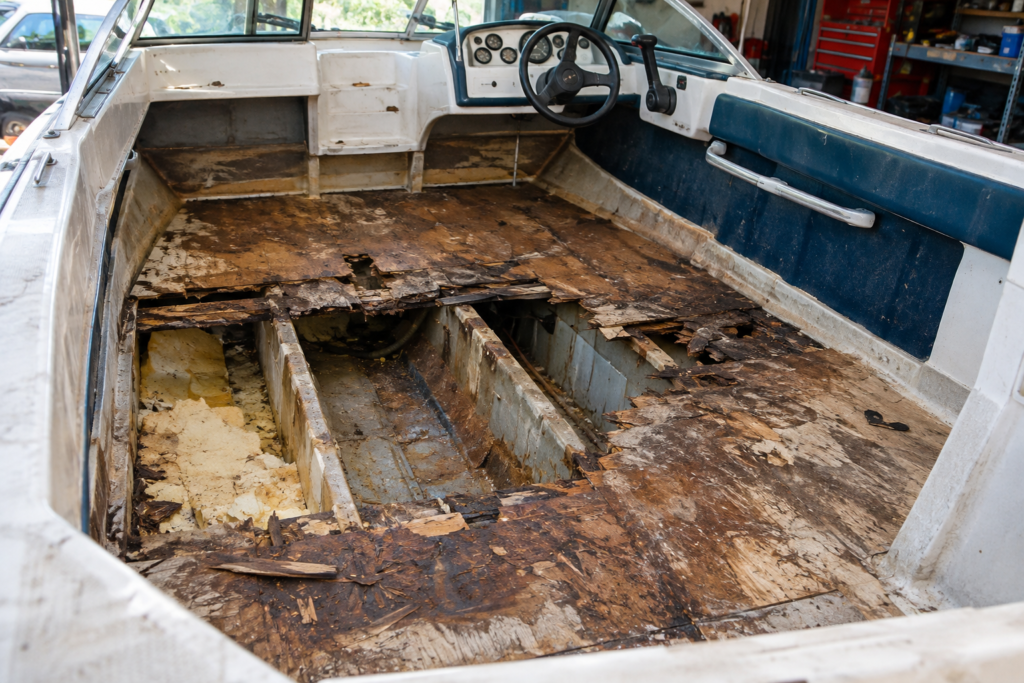
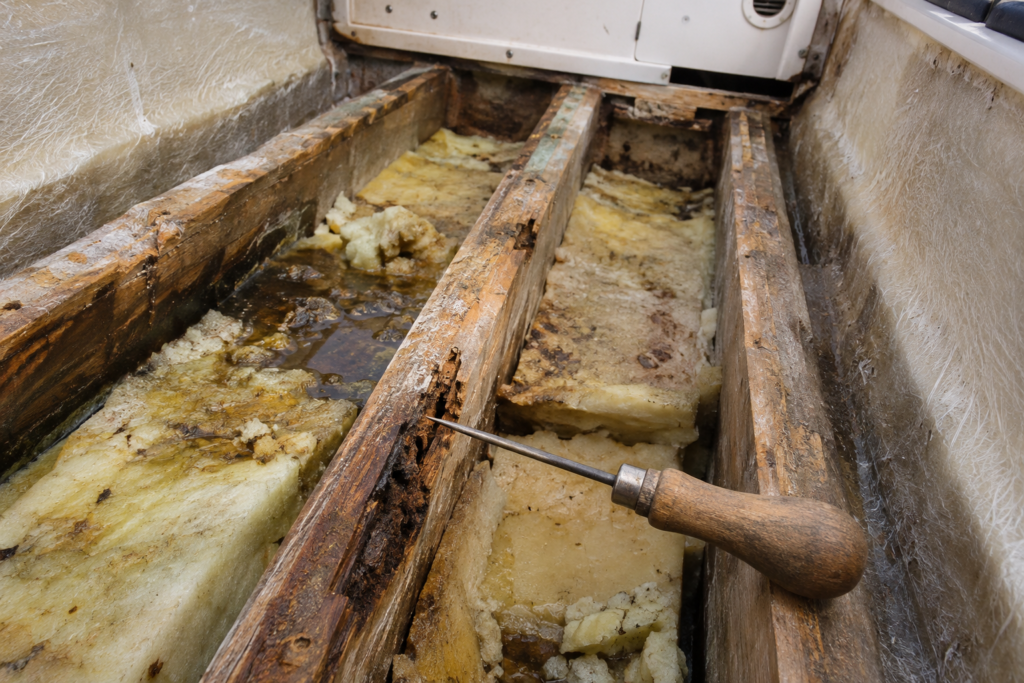
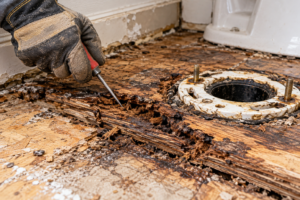
To replace a rotten plywood boat floor, cut the floor free, pull it out in pieces you can trace, and fix any soft stringers or wet foam underneath. Then cut new marine plywood at least as thick as the original (often 3/4 inch), seal every face, edge and screw hole with two to three coats of epoxy, and bed or screw it down. The part most people get wrong is underneath: if the stringers are soft, a new floor on top will still flex and fail.
Thickness: At least as thick as the original floor. Most runabout and pontoon floors are 3/4 inch. Check the thickness chart for marine plywood boat floors if you’re changing support spacing. Plywood: Marine-grade plywood (APA Marine PS 1 or BS 1088) remains the preferred choice. Exterior plywood may be suitable for nonstructural boat flooring when fully encapsulated in marine epoxy and permitted by the original boat design. Sealing: Two to three coats of epoxy on the underside, every edge sealed, and every screw hole sealed before the screw goes in. Before you buy plywood: Probe every stringer and the transom. Fix the structure first.
What You Find Under a Rotten Boat Floor: Decision Chart
Pull up one section first, look at what’s underneath, then decide how big the job is.
What you find
What it means
What to do
Floor soft, stringers hard when probed with an awl
Rot stayed in the floor
Replace the floor only
Stringers soft in short sections
Local rot in the structure
Cut out the bad sections and scarf in new wood (8:1 bevel minimum)
Stringers soft along most of their length
The structure has failed
Replace the full stringers before any floor goes in
Foam under the floor is wet or heavy
Water got trapped under the floor
Remove all wet foam and replace it with marine-grade closed-cell flotation foam that matches the original
Transom soft, or flexes when you push on the motor
⚠️ Warning: A new floor won’t stiffen rotten stringers. If you screw new plywood onto soft stringers, the floor will flex again. You’ll then be tearing out new plywood to fix what you skipped.
Not sure if the rot is structural or just surface damage? Use the probe-and-moisture method in how to check if wood rot is structural before you commit to a full tear-out.
Tools and Materials to Replace a Rotten Plywood Boat Floor
Marine plywood: APA Marine (PS 1, Douglas fir or western larch, B-grade or better veneers) or BS 1088 hardwood plywood. Buy it from a lumber yard or a marine plywood dealer. Compare grades in exterior plywood vs. marine plywood, and see marine plywood cost for what drives the price difference.
Safety gear:P100 respirator, eye protection and nitrile gloves. Fiberglass dust irritates your skin and lungs, and uncured epoxy can cause skin allergies with repeated contact.
Step 1: Strip the Floor and Brace the Hull
Remove everything screwed to the floor: seat bases, pedestals, cooler brackets, ladder brackets and console mounts. Pull up the carpet or vinyl to expose the screws or the fiberglass tabbing that holds the plywood down. If there’s trim around storage hatches, take it off carefully so you can reuse it.
Before you cut anything, support the hull so the sides can’t move. In many runabouts the floor holds the hull in shape. If the sides spread or pinch while the floor is out, the hull can stay out of shape once the new floor is bonded in.
Step 2: Cut the Old Floor Free
⚠️ Warning: Locate fuel tanks, fuel lines, electrical wiring and other concealed components before cutting into the old floor. Disconnect the battery and provide adequate ventilation.
On a pontoon boat, the floor is usually just screwed to cross members, so remove all the screws and lift the sheets.
On a fiberglass runabout, the plywood is usually bonded and tabbed to the hull. Cut through the tabbing at the hull-to-floor joint with an oscillating tool. That joint is rarely a clean 90 degrees, so keep the blade angled away from the hull side. Cutting into the hull turns a floor job into a hull repair.
Lift the plywood out in the largest pieces you can. Even rotten, those pieces are your patterns for the new floor. If only part of the floor is bad, cut out just that section. Wherever the new seam won’t land on a stringer or frame, bond a cleat under the edge of the old floor that stays.
Step 3: Inspect Stringers, Transom and Foam
The water that rotted your floor has usually been sitting on the stringers too. Probe every stringer top and side with an awl, especially near limber holes, screw holes and the transom. Sound wood resists the awl. Rotten wood lets it sink in or tears out in fibers.
Grind or chisel off any old glass and bedding left on the stringer tops so the new floor can sit flat and bond to clean wood.
⚠️ Warning: If extensive stringer, transom or hull damage is discovered, consult a qualified marine repair specialist before proceeding. Structural repairs must restore the original load-bearing capacity of the boat.
If the stringers are soft: fix them now. Replace short damaged sections with a scarf joint at a bevel of at least 8:1. Simple butt joints don’t carry the load in a structural member. Scarf and butt joints explained covers the difference.
If the foam is wet: dig it all out. Waterlogged foam doesn’t dry out in place, and it holds water against your new plywood. Many monohull boats under 20 feet were built to meet U.S. Coast Guard flotation requirements (33 CFR Part 183), and that foam is part of how the boat floats when swamped. Replace removed flotation foam with marine-grade closed-cell flotation foam that matches the original flotation capacity, density, volume and placement. Don’t leave the space empty.
💸 Cost difference: Fixing stringers while the floor is out costs you materials and time. Finding them soft after the new floor is bonded and tabbed in means paying for the floor twice: once to install it, and again to cut it out.
Let everything dry before you bond to it. Epoxy needs dry wood to grip. Check the wood with a moisture meter, and follow your epoxy maker’s guidance before you coat or bond.
Step 4: Cut and Dry-Fit the New Plywood
Lay the old pieces on the new sheets and trace them. If the old pieces are too broken to trace, make cardboard or thin-plywood templates in the boat. Use plywood at least as thick as the original floor. Going thinner to save weight or money makes the floor flex more between supports.
Dry-fit every piece in the boat. Mark and drill the screw holes and the cutouts for hatches and hardware, then take the pieces back out. Every hole you drill after sealing is a new way for water to get in, so drill everything now.
Step 5: Seal Every Surface Before Installation
This step decides how long the new floor lasts. Marine plywood has a waterproof glue bond, but the wood itself is not rot-proof. The glue rating says how well the layers stay stuck together when wet. It says nothing about whether the wood will rot. What keeps a boat floor from rotting again is keeping water out of the wood.
Underside: Roll on two to three coats of epoxy.
Edges: Coat every cut edge until it stops soaking in. Edges and end grain take up water far faster than faces.
Holes: Coat the inside of every screw hole. A common extra step is to drill each hole oversize, fill it with thickened epoxy, then drill a new pilot hole through the cured plug. That way the screw threads sit in epoxy, not raw wood.
Douglas fir plywood: Bond a light layer of 6 oz woven fiberglass cloth to both faces. Douglas fir faces tend to check (fine surface cracks) under epoxy, and the cloth prevents it.
Wet the stringer tops and the underside of the plywood with plain epoxy first. Dry wood soaks the resin out of thickened epoxy and leaves weak spots in the joint.
Mix epoxy with 406 filler into a thick putty and spread it on the stringer tops, cleats and hull contact points.
Press the plywood into the putty. Use weights or a few temporary screws to hold it down while it cures.
Where two sheets meet, grind a shallow bevel along the seam and lay fiberglass tape over it so the sheets act as one panel.
Pontoon deck:
Screw the plywood to the cross members with 316 stainless screws.
Coat each hole with epoxy right before the screw goes in.
Coat or fiberglass the top side once the deck is down.
Step 7: Tab the Floor to the Hull and Finish
On a runabout, the floor needs to be tabbed back to the hull:
Sand a 4- to 6-inch strip on the hull side above the floor with 80-grit paper.
Run a fillet of epoxy thickened to a peanut-butter consistency along the floor-to-hull joint. The fillet gives the tape a rounded corner to lie on instead of a sharp one.
Lay 4-inch biaxial tape over the fillet and wet it out with epoxy.
If the original tabbing had more layers, add them, staggered: first about 3 inches up the hull side, second about 3 inches out on the floor, third centered on the corner.
To finish, allow the epoxy to cure fully, remove any amine blush with water and an abrasive pad, sand the surface, and apply a compatible primer and UV-resistant marine paint. If the floor gets carpet or vinyl instead, reinstall it only after the epoxy has fully cured. Seal every seat and hardware screw hole with epoxy when you put the fittings back on.
When Replacing the Floor Isn’t the Right Fix
The hull itself is soft or cracked. That’s a structural hull repair, not a floor job.
The transom and all the stringers are gone. At that point you’re rebuilding the boat, so price it against the boat’s value before you start.
Your original floor was treated plywood. Some pontoon decks use it. Read marine plywood vs. pressure-treated before switching materials, because the two need different sealing and fastening.
The manufacturer specifies a different floor build. Some boats use cored panels or composite floors. Follow the original build or the manufacturer’s spec.
Common Mistakes When Replacing a Rotten Plywood Boat Floor
❌ Mistakes that ruin a new boat floor
Laying new plywood over the old floor. The rot underneath keeps spreading, you can’t see the stringers, and you add weight. Expect soft spots again, plus a bigger tear-out later.
Skipping the stringer check. A new floor on soft stringers flexes and cracks at the seams and tabbing. You’ll be cutting out new plywood.
Leaving edges or screw holes unsealed. Water gets in where the epoxy stopped. Rot usually starts at a screw hole or a cut edge, not in the middle of a coated face.
Putting the old wet foam back, or replacing it with the wrong foam. Wet foam keeps the new plywood damp. Foam that doesn’t match the original flotation capacity, density, volume and placement can change how the boat floats when swamped.
Going thinner than the original plywood. The floor flexes between supports and the seams crack.
Leaving epoxy exposed to sun. Bare epoxy chalks and breaks down in UV, which opens a path for water into the wood you just sealed.
FAQ
Can I use exterior plywood for a boat floor? Exterior plywood may be suitable for nonstructural boat flooring when fully encapsulated in marine epoxy and permitted by the original boat design. Marine-grade plywood remains the preferred choice. Exterior plywood allows larger gaps in the inner layers and lower-grade inner veneers, and water that gets into those gaps can sit there. Neither type is rot-resistant on its own.
How thick should plywood be for a boat floor? At least as thick as the original. Most runabout and pontoon floors are 3/4 inch. If you’re changing support spacing, use the marine plywood boat floor thickness chart.
Do I have to fiberglass the top of the new floor? Not always. Epoxy coating alone seals the wood. Fiberglass cloth adds abrasion resistance, and you need it on Douglas fir plywood to stop the face from checking. A pontoon deck that gets carpet or vinyl is often just epoxy-coated.
Is marine plywood rot-proof? No. Marine plywood has a waterproof glue bond and better inner veneers, but it is not preservative-treated. It rots if water gets into it and stays. Sealing is what protects it. More detail is in marine grade plywood explained.
Should I replace the foam under my boat floor? Replace it if it’s wet, heavy, or water squeezes out when you press on it. Dry, firm foam can stay. Replace removed flotation foam with marine-grade closed-cell flotation foam that matches the original flotation capacity, density, volume and placement.
Replacing a rotten plywood boat floor is mostly about what’s underneath it. Pull the old floor, fix soft stringers and wet foam before anything else, and use plywood at least as thick as the original. Then seal every face, edge and screw hole with epoxy before the floor goes in. The new floor will last as long as you keep water out of the wood. For more on choosing panels for the rest of the boat, see the marine plywood for boats guide.
theplywood.com is a participant in the Amazon Services LLC Associates Program, an affiliate advertising program designed to provide a means for sites to earn advertising fees by advertising and linking to amazon.com, amazon.co.uk, amazon.ca
DIY Jon Boat: How to Build a Plywood Fishing Boat by Admin January 5, 2026 DIY A jon boat is one of the few boats that actually makes sense to build at home. It’s simple by design—flat bottom. Straight sides. Mostly…