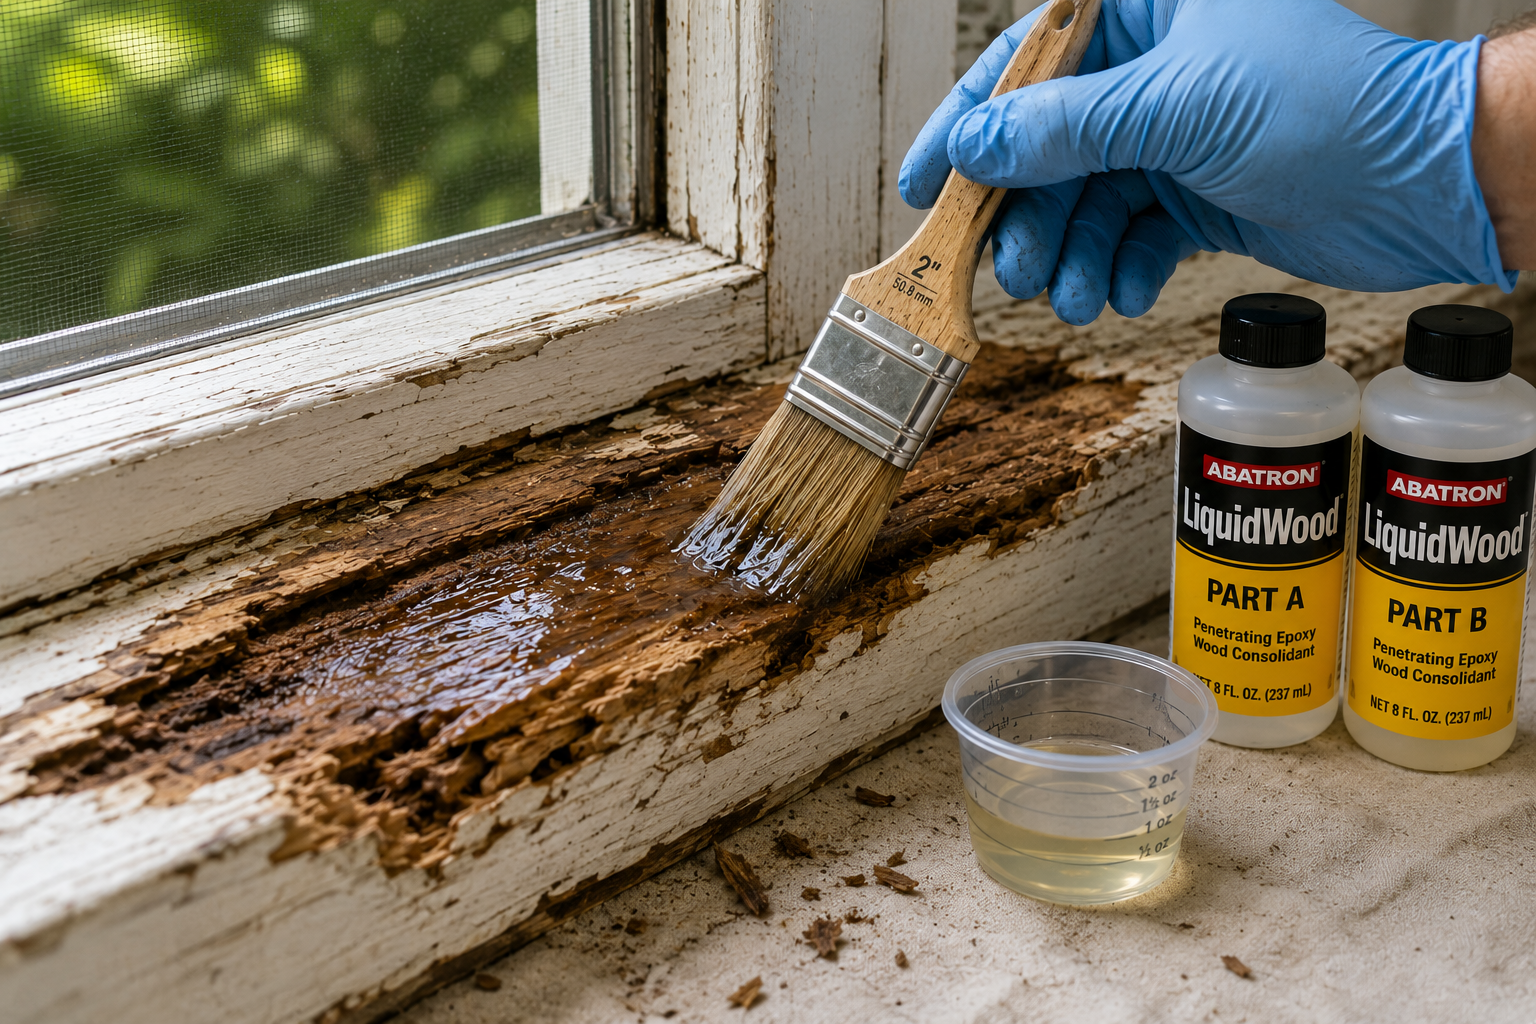
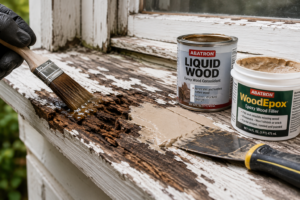
Liquid wood for rotted wood is a low-viscosity, two-part epoxy consolidant that penetrates softened wood fibers and hardens after curing. Abatron LiquidWood is one of the best-known products in this category. It’s used when deteriorated wood is still substantially present but needs stabilization before missing areas are rebuilt with an epoxy filler such as WoodEpox.
Quick answer: LiquidWood works best on dry, deteriorated wood that still has enough fibers to absorb the epoxy. It does not replace missing wood, correct a moisture problem, or make every damaged beam or post structurally safe. Fix the water source first, consolidate the remaining wood, then rebuild missing areas with a compatible epoxy filler.
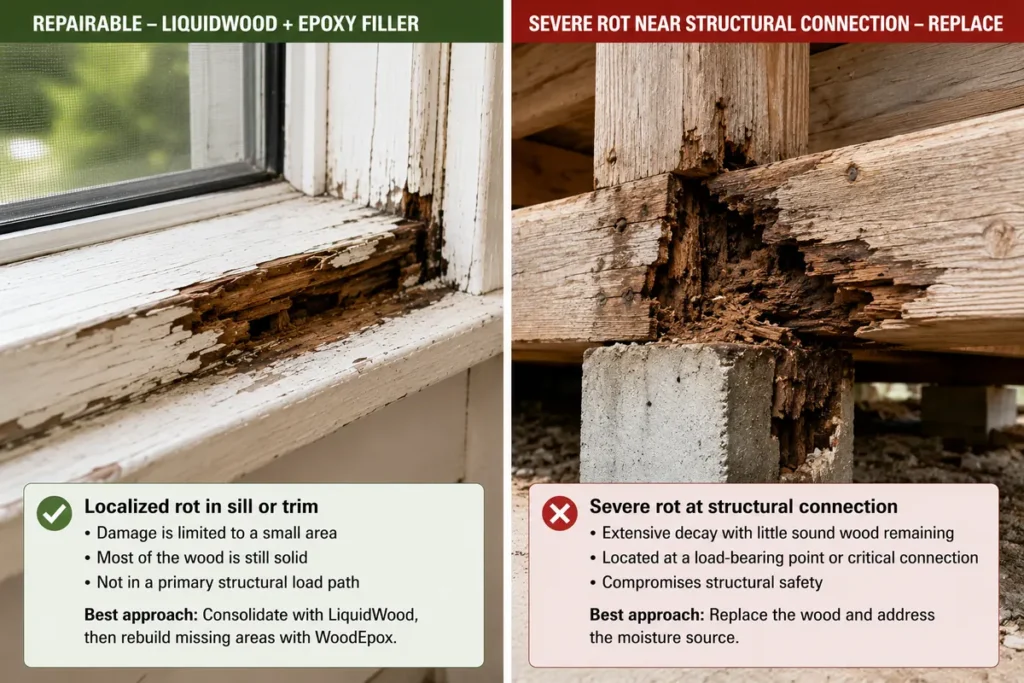
The important distinction is not simply whether LiquidWood can harden deteriorated wood. It is whether enough sound material remains for an epoxy repair to be appropriate. Localized sill and trim damage may be repairable, while deterioration near a structural bearing point can require replacement or engineered reinforcement. This guide covers where liquid wood epoxy earns its price — and where it’s the wrong answer.
Liquid Wood vs. Other Wood Repair Products
Feature
Liquid Wood (Epoxy Consolidant)
One-Part Wood Hardener
Epoxy Wood Filler (WoodEpox)
Wood Putty
Form
Two-part liquid (resin + hardener)
One-part solvent- or water-carried liquid
Two-part paste
Pre-mixed paste
Purpose
Penetrates and hardens deteriorated fibers
Surface hardening of soft wood
Rebuilds missing sections of wood
Cosmetic fill on finished wood
Penetration
Deep — low viscosity soaks into fibers
Varies by formulation and wood porosity
None — fills the void
None
Structural role
Can be part of a structural repair; suitability depends on remaining wood and damage
Limited
Can rebuild missing material, but doesn’t automatically make a damaged member safe
No
Shrinkage
None (100% solids, no solvents)
Carrier evaporates in many one-part formulas; volume change varies
For a full comparison of the one-part and two-part products in this category, see our guide to the best wood hardener for rotted wood. This page goes deep on just one of them.
What Is Liquid Wood Epoxy?
Liquid wood epoxy is a structural consolidant made of two clear liquids — a resin (Part A) and a hardener (Part B) — that you mix and apply to dry, deteriorated wood. The standard Abatron LiquidWood formulation mixes at a simple 1:1 ratio. The blend is thin, closer to syrup than paste, and that’s the entire point: instead of sitting on the surface, it wicks down into decayed, dried-out, or spongy fibers and cures there, binding what’s left of the wood into a rigid composite.
Because the formula contains no water or solvents, nothing evaporates during cure. That means no shrinkage and strong adhesion — the two weak points of cheaper one-part hardeners, where the carrier flashes off and takes some volume with it.
According to the manufacturer, properly saturated wood cures into a rigid, machinable, water-resistant composite that can be sawed, planed, drilled, sanded, nailed, and painted. Actual repair strength depends on penetration, how much sound wood remains, surface preparation, and the original structural condition — which is why the sections below spend as much time on limits as on technique.
(One quick terminology note: “liquid wood” also gets used for a lignin-based bioplastic. That’s a different material entirely — see the FAQ at the bottom.)
LiquidWood vs. WoodEpox: What’s the Difference?
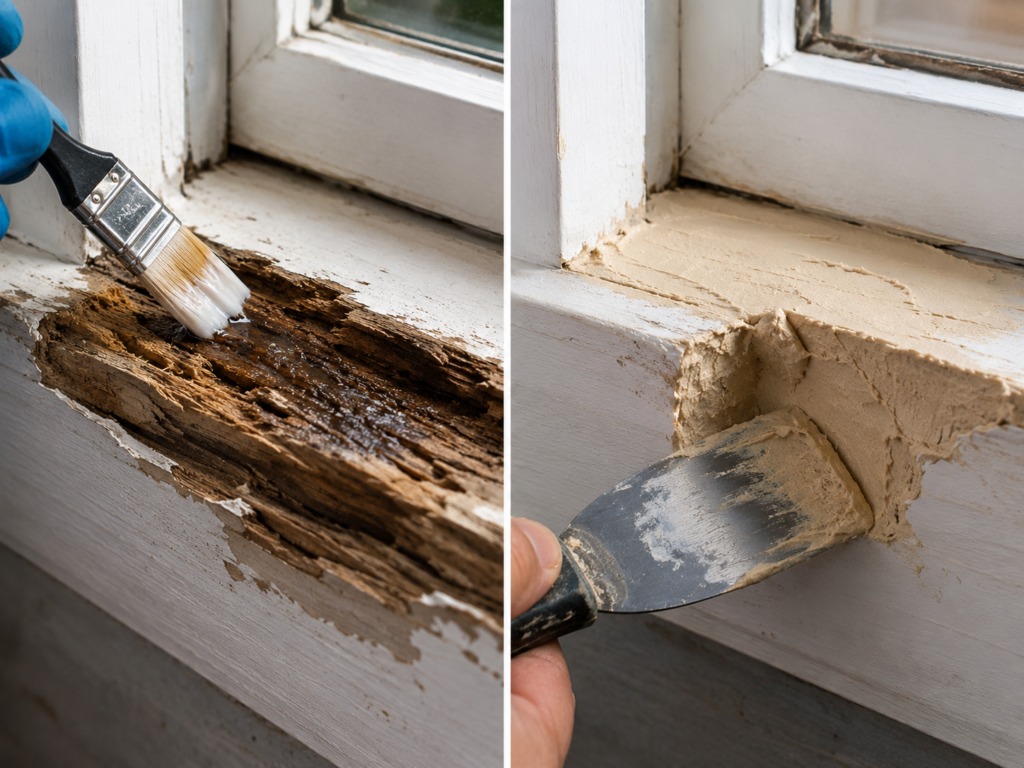
LiquidWood is the penetrating consolidant. WoodEpox is the paste used to rebuild missing material. LiquidWood stabilizes what remains; WoodEpox replaces what is gone. They are complementary products, not substitutes — the manufacturer positions LiquidWood as the consolidating first step and WoodEpox as the rebuilding compound applied over it.
This trips people up constantly, because both come in near-identical two-part kits. The simplest way to keep it straight: LiquidWood is for wood that’s still there but weak. WoodEpox is for wood that’s gone. Troweling filler straight onto punky, unconsolidated wood is a common reason epoxy repairs eventually separate — the filler may cure correctly, but it remains anchored to weak fibers. If you’re comparing paste-type products more broadly, our wood filler guide covers the whole category.
When Liquid Wood Works
LiquidWood is at its best where wood has rotted, dried out, or gone spongy but is still mostly present:
Exterior trim and millwork. Clapboards, brackets, balustrades, moldings — pieces that would be expensive or impossible to reproduce.
Furniture and carved details. Antique legs, feet, and carvings softened by moisture.
Decorative and non-load-bearing components. Fence rails, decorative porch trim, furniture components, and similar pieces where failure would not affect the building’s structural support.
If you’re still at the “is this even fixable?” stage, start with our article on whether rotting wood can be saved — it walks through how to probe the damage and judge what you’re working with before you spend money on epoxy.
A note on structural wood. LiquidWood may be appropriate for localized deterioration in structural wood when enough intact material remains. But rot in beams, joists, posts, trusses, ledger boards, or load-bearing connections should be evaluated by a qualified contractor or structural professional before repair. Note the distinction between decorative posts and load-bearing columns — they may look similar, but the stakes are entirely different. The National Park Service recognizes epoxy repair as a legitimate preservation technique, and also states plainly that deterioration can reach a point where replacement is the appropriate treatment.
When NOT to Use Liquid Wood
⚠️ Know the limits before you buy:
It doesn’t kill active fungus. Consolidation hardens fibers; it is not a preservative treatment. Hardening damaged fibers and preventing future fungal decay are separate jobs — see our guide to stopping wood rot permanently for moisture control, borate treatment, and long-term prevention.
It won’t bond to wet wood. Epoxy needs dry fibers. Applying epoxy before the wood is adequately dry can trap moisture, interfere with bonding, and allow deterioration to continue around or beneath the repair. If you’re not sure what kind of rot you’re dealing with, our dry rot vs. wet rot comparison explains how to tell them apart and why it matters for repair.
It can’t replace wood that’s gone. That’s WoodEpox’s job — and only after consolidation.
It’s not a substitute for structural judgment. There is no reliable percentage rule for deciding whether a structural member can be repaired. Replacement or engineered reinforcement may be required when decay affects a load-bearing connection, causes visible sagging or splitting, or leaves insufficient sound wood to transfer the original loads.
❌ A common mistake: applying liquid wood epoxy over wood that’s only surface-dry. The outside can feel fine after a sunny week while the core is still wet. Do not rely on surface feel alone. Allow adequate drying time and confirm moisture conditions with a pin-type moisture meter. Improve air circulation or use a dehumidifier when necessary, but avoid overheating the wood. Impatience here is how a repair seals rot inside instead of stopping it.
LiquidWood vs. One-Part Wood Hardeners
Both get called “wood hardener” on the shelf, but they behave differently. One-part hardeners (the small hardware-store can) carry a resin into the wood on a solvent or water base that then evaporates. They’re fast, cheap, and fine for cosmetic firming of a lightly softened corner. Penetration varies by formulation and wood porosity, and some volume change occurs as the carrier flashes off.
A two-part liquid wood epoxy is 100% solids — everything you apply stays in the wood and cures. For deeper deterioration, valuable millwork, or exterior repairs where greater penetration and minimal shrinkage matter, a two-part consolidant may justify its higher cost. For the full head-to-head across brands, the best wood hardener for rotted woodcomparison is the place to start.
😬 The regret scenario: a common failure pattern is applying a shallow one-part hardener and filler over deterioration that extends deeper into the wood. The surface may initially appear solid — and often gets painted and forgotten — but the repair can lift, crack, or bubble when weakened material remains underneath and moisture keeps working. Shallow fixes on real rot don’t fail immediately. They fail after you’ve stopped watching them, and the redo costs more than doing it right once.
⚠️ Warning — two formulations, two mix ratios. Do not use the standard 1:1 instructions for LiquidWood Cold. The cold-weather version (intended for roughly 35°F to 60°F) uses a different 2:1 mixing ratio and has different working and curing characteristics. Confirm which formulation you purchased before mixing anything.
How to Apply LiquidWood, Step by Step
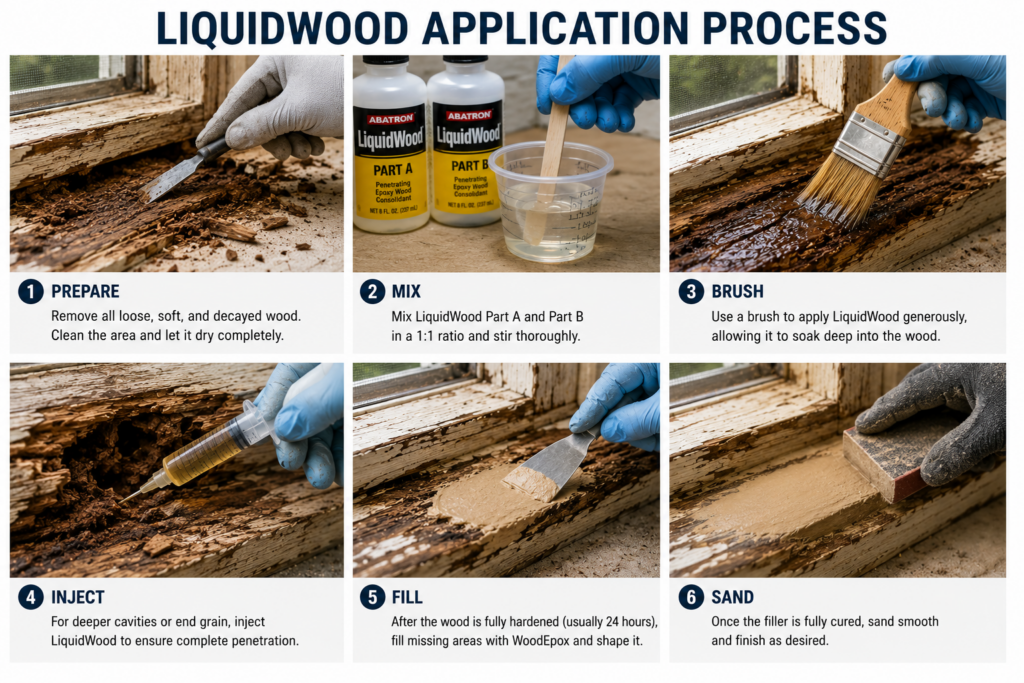
Step 1: Fix the moisture problem. Rot is a symptom. If a clogged gutter, failed caulk joint, or grade-level splash caused it, the repair fails unless the water source is fixed first. Our how to stop wood rot permanently guide covers this side of the job.
Step 2: Remove loose material. Scrape and brush away crumbling wood, failed paint, dirt, and debris — but keep as much semi-sound wood as possible. The consolidant needs fibers to bind; it can’t consolidate dust. Clean any oily surfaces with detergent and water.
Step 3: Let the wood dry fully. Not surface-dry. Fully dry. A pin-type moisture meter takes the guesswork out.
Step 4: Mix Part A and Part B. Equal parts for the standard formula (2:1 for the Cold version — check your label), stirred thoroughly. Standard LiquidWood has approximately 30 minutes of working time after mixing, so mix only what you’ll use in that window.
Step 5: Saturate the wood. Brush it on or pour it directly onto horizontal surfaces. Badly deteriorated wood is thirsty — keep applying until the fibers stop drinking. Multiple passes are normal on porous damage.
🧪 Deeper penetration technique (manufacturer-backed): For deep deterioration, the manufacturer’s application instructions show brushing, pouring, injecting, and drilling access holes so the consolidant can reach material below the surface — through side grain and across end grain, filled until the wood is saturated. Hole diameter, spacing, and orientation depend on the component and the manufacturer’s instructions. Do not drill structural members indiscriminately. Done correctly, this is the difference between a surface fix and consolidation that actually reaches the deteriorated core — a brush coat alone can’t get there.
Step 7: Let it harden. Treated wood begins hardening within several hours, but temperature, repair depth, and the amount absorbed affect the final cure. Follow the current label before sanding, painting, or loading the repair.
Step 8: Rebuild missing sections with WoodEpox. Applied over the consolidated surface, the paste bonds to hardened fibers instead of weak ones.
Step 9: Shape and finish. Sand, plane, or rout flush, then prime and paint. Don’t rush this — see the cure-time section below.
Temperature, Pot Life, and Cure Time
Three numbers to keep straight:
Working time (pot life): approximately 30 minutes for the standard formula after A and B are mixed. After that, it thickens in the cup whether you’ve used it or not.
Initial hardening: treated wood firms up within several hours under moderate conditions.
Full cure: this is the one people rush. Environmental conditions, repair depth, and absorbed volume all stretch the timeline. Initial hardening is not the same as readiness for sanding, painting, or structural loading — follow the product instructions for your actual conditions.
Cold weather is the biggest variable. At the bottom of the standard range, cure times stretch out substantially; below it, use the Cold formulation (and its 2:1 ratio) or wait for better weather.
How Much LiquidWood Do You Need?
Coverage is difficult to predict because it depends on the volume and porosity of the damaged wood. Deep, porous deterioration can absorb substantially more material than the visible surface damage suggests. Estimate the deteriorated volume conservatively and confirm that you have enough material to complete saturation without interruption — running out mid-saturation with a 30-minute pot life ticking is not a position you want to be in. For highly porous damage, allow additional material beyond the visible repair volume.
Kit sizes run from a 12-ounce trial kit up through 2-pint, 2-quart, 2-gallon, and 10-gallon sizes.
Cost vs. Replacement
💸 The cost math: at the time of writing, a 12-ounce LiquidWood kit runs around $28 and a 2-quart kit around $94 direct from the manufacturer’s distributor. Prices checked in July 2026; current prices may differ. Compare that to professionally replacing a rotted structural porch column or a custom-milled historic sill, which can run several hundred to well over a thousand dollars.
For localized, repairable deterioration — particularly in custom trim or historic millwork — epoxy repair can cost substantially less than reproducing and replacing the entire component. That comparison may not hold for ordinary dimensional lumber or damage requiring extensive labor. For a full breakdown of what pros charge for different rot scenarios, see our wood rot repair cost guide.
The honest caveat: epoxy is only cheaper when the repair is appropriate. Consolidating a member that needed replacement means paying twice — once for the epoxy, once for the replacement you should have done first.
LiquidWood Kit Sizes and Buying Options
Affiliate disclosure: As an Amazon Associate, we earn from qualifying purchases. This does not affect the price you pay. Prices and availability change frequently — always check the current listing.
Abatron LiquidWood 2-Quart Kit (Parts A & B) A practical size for several moderate window-sill, door-frame, or exterior-trim repairs. Check current price on Amazon
Abatron LiquidWood Consolidant Kit (smaller size) For a single contained repair — one sill, one furniture leg — where leftover epoxy would age on a shelf past its useful life. Check current price on Amazon
Common Application Mistakes
Mistake
Likely result
Applying to wet or surface-dry wood
Poor penetration, poor adhesion, sealed-in rot
Mixing the wrong ratio (or the Cold formula at 1:1)
Incomplete cure, permanently tacky repair
Mixing too much at once
Material hardens in the cup before use
Filling with WoodEpox before adequate consolidation
Filler bonds to weak fibers and pops out
Ignoring structural damage
Unsafe or temporary repair
Painting too soon
Finish failure over an uncured surface
Leaving the water source unresolved
New rot right beside the repair
Frequently Asked Questions
What is liquid wood? Liquid wood is a two-part penetrating epoxy consolidant — resin and hardener — that soaks into rotted or spongy wood fibers and cures into a rigid, water-resistant composite. Abatron LiquidWood is the best-known product in the category. It stabilizes deteriorated wood that is still substantially present; it does not replace missing wood.
Does liquid wood really work on rotted wood? Yes, on dry wood that is deteriorated but still has enough fibers to absorb the epoxy. Its low viscosity lets it saturate decayed fibers before hardening. It cannot replace missing wood, stop an active moisture problem, or substitute for structural evaluation of load-bearing members.
What is the difference between LiquidWood and WoodEpox? LiquidWood is the penetrating liquid consolidant that hardens remaining wood fibers. WoodEpox is the moldable paste that rebuilds missing sections. LiquidWood stabilizes what remains; WoodEpox replaces what is gone. They are designed to be used together, in that order.
Can LiquidWood repair a structural beam? Sometimes — when deterioration is localized and enough intact wood remains. But rot in beams, joists, posts, ledger boards, or load-bearing connections should be evaluated by a qualified contractor or structural professional before repair. Deterioration can reach a point where replacement or engineered reinforcement is the appropriate treatment.
Can LiquidWood be applied to damp wood? No. The wood must be fully dry, not just surface-dry. Epoxy will not bond properly to wet fibers, and sealing moisture inside allows rot to continue behind the repair.
What temperature can LiquidWood be used at? The standard formulation is intended for roughly 50°F to 90°F. The separate cold-weather formulation covers roughly 35°F to 60°F and uses a different 2:1 mixing ratio — do not apply the standard 1:1 instructions to the Cold version.
How long does LiquidWood take to harden? LiquidWood normally begins hardening within a few hours. Do not confuse initial hardening with full readiness for sanding, painting, or structural loading; follow the product instructions for the actual temperature, repair depth, and amount absorbed.
Does LiquidWood kill wood rot fungus? No. It hardens and stabilizes fibers but is not a fungicide or preservative treatment. If the moisture source isn’t fixed, decay can continue in untreated wood nearby. Solve the water problem first.
Can you screw into LiquidWood after it cures? Yes. Properly consolidated wood can be drilled, screwed, nailed, sawed, planed, sanded, and painted like sound lumber, according to the manufacturer. Holding strength depends on how thoroughly the wood was saturated.
Is LiquidWood waterproof? The manufacturer describes cured LiquidWood as waterproof. That claim applies to the cured epoxy-treated material, not to untreated wood surrounding the repair. Exterior repairs should still be properly primed, painted, flashed where applicable, and maintained to prevent water from reaching adjacent wood.
How much LiquidWood do I need? Coverage depends on the volume and porosity of the damaged wood, which makes it hard to predict. Estimate the deteriorated volume conservatively and confirm you have enough material to complete saturation; for highly porous damage, allow additional material beyond the visible repair volume.
Does “liquid wood” also mean bioplastic? Yes — the term is also used for Arboform, a thermoplastic made from lignin (a paper-industry byproduct) that can be injection-molded as a biodegradable plastic alternative. It’s a materials-science product with no role in wood repair.
Best Wood Hardener for Rotted Wood by Admin June 25, 2026 DIY The best wood hardener for rotted wood depends on the severity of the damage. For light surface rot, a single-part penetrating wood hardener is usually…