A French cleat is only as good as its numbers. Get the bevel, the thickness, and the screw length right and it will hold a loaded tool cabinet for years without a second thought. Get them wrong and the whole thing either won’t lock, sits crooked, or tears a screw out of the wall the first time you load it. This guide gives you the exact French cleat dimensions that work, plus the two or three spots where most people quietly get it wrong.
French cleat dimensions at a glance
A standard French cleat uses a 45-degree bevel cut into 3/4-inch plywood, with the wall cleat fastened into the studs using a structural or cabinet screw long enough to sink at least 1-1/2 inches into the framing — usually 2-1/2 to 3 inches. On a tool-storage wall, cleats are typically spaced 3 to 6 inches on center. Lighter-duty walls can drop to 1/2-inch stock.
That’s the short version. Here it is as a table you can print and tape to the wall.
Specification
Recommended size
Notes
Bevel angle
45°
Standard, easy-to-repeat angle
Plywood thickness
3/4 inch
Best default for loaded holders and cabinets
Cleat width
2-1/2 to 3-1/2 inches
Wider strips provide more fastening room
Tool-wall row spacing
3 to 6 inches on center
Closer rows provide more mounting positions
Wall screws
Usually 2-1/2 to 3 inches
Size for at least 1-1/2 inches of stud penetration
Lift clearance
Cleat thickness plus 1/8 to 1/4 inch
Confirm with the completed holder
Now the reasoning behind each number, because the table only helps if you understand which specs are flexible and which are not.
The 45-degree bevel angle
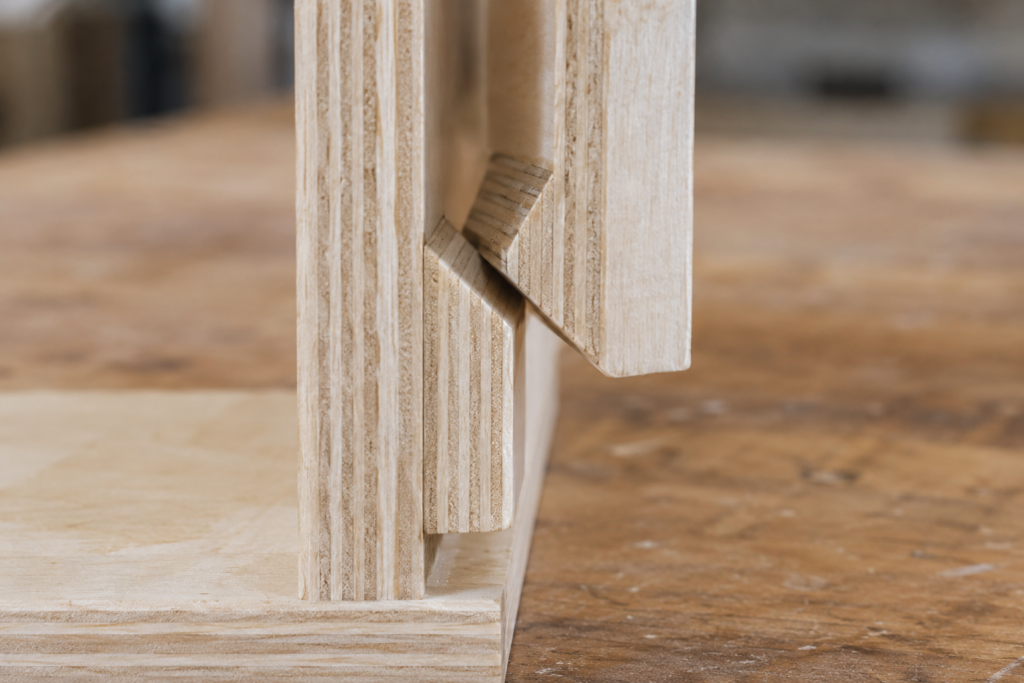
A 45-degree bevel is the standard and the best default because it is easy to reproduce and creates matching cleat halves. Other angles can work, but every wall cleat and mounting cleat must use the same angle.
Here’s why the matching-halves part matters in practice. When you rip a strip down the center at 45 degrees, both halves come out identical and interchangeable. Every cleat in your shop mates with every other cleat, so you never have to track which piece goes where. Cut at a different angle and the two halves are no longer interchangeable, which undercuts the main advantage of a modular cleat wall.
The plywood you cut this from matters as much as the angle. Cabinet-grade or Baltic birch plywood holds a crisp bevel edge and won’t crush under the screw; a rough construction sheet with voids in the core can splinter right at the point.
Thickness: 3/4-inch vs. 1/2-inch
Use 3/4-inch plywood for anything that holds real weight — power tools, loaded parts bins, a wall of hand tools, or cabinets. It gives you a thick enough bearing surface at the bevel and enough meat for screws without splitting.
Drop to 1/2-inch or 5/8-inch only for light-duty runs — a wall for hanging clamps and small hand tools in a home office or kitchen, where you also want the fixtures to sit closer to the wall for a leaner look.
The thickness also drives two other numbers you’ll care about:
How far the item stands off the wall. A cabinet hung on 3/4-inch cleats sits roughly 1-1/2 inches proud of the wall (two cleat thicknesses stacked). If that matters for your layout, either plan for it or recess the cleat into the cabinet back.
Your lift clearance. To unhook a cleat you have to lift it by at least the thickness of the material, plus a little. Thicker stock needs more room above the top row.
If you’re deciding between sheet goods for this and other shop projects, our plywood thickness guide for furniturecovers where each thickness actually earns its keep.
Cleat width: how tall to make each strip
Width is the one dimension that’s genuinely up to you. Most people land between 2-1/2 and 3-1/2 inches for the finished strip.
Here’s the efficient way to cut them: rip your plywood into straight strips at double your target width, then set the blade to 45 degrees and rip each strip down the middle. A 5-inch strip becomes two 2-1/2-inch cleats. A 7-inch strip becomes two 3-1/2-inch cleats. One cut, two matching pieces.
Wider cleats give you more room for a second row of screws and resist sagging over long spans. Narrower cleats let you pack rows closer together on a tool wall. For a general-purpose shop wall, 3 inches is a sensible middle.
Spacing: the number most people get wrong
❌ The mistake that shows up again and again: spacing cleat rows so far apart that half your tool holders have nowhere to hook. People build a beautiful wall with rows 12 inches apart, then discover a saw holder wants to land at the 8-inch mark — and there’s no cleat there. Now they’re re-cutting holders to fit the wall instead of the wall fitting the tools.
For a dedicated tool-storage wall, spacing is about mounting flexibility, not strength. Tighter rows mean more places to hang things. Common setups:
3 to 4 inches on center — maximum flexibility, near-continuous mounting. This is the “I want to hang anything anywhere” wall.
6 inches on center — a good balance of flexibility and material used.
12 to 18 inches — fine for shelves, too sparse for a busy tool wall.
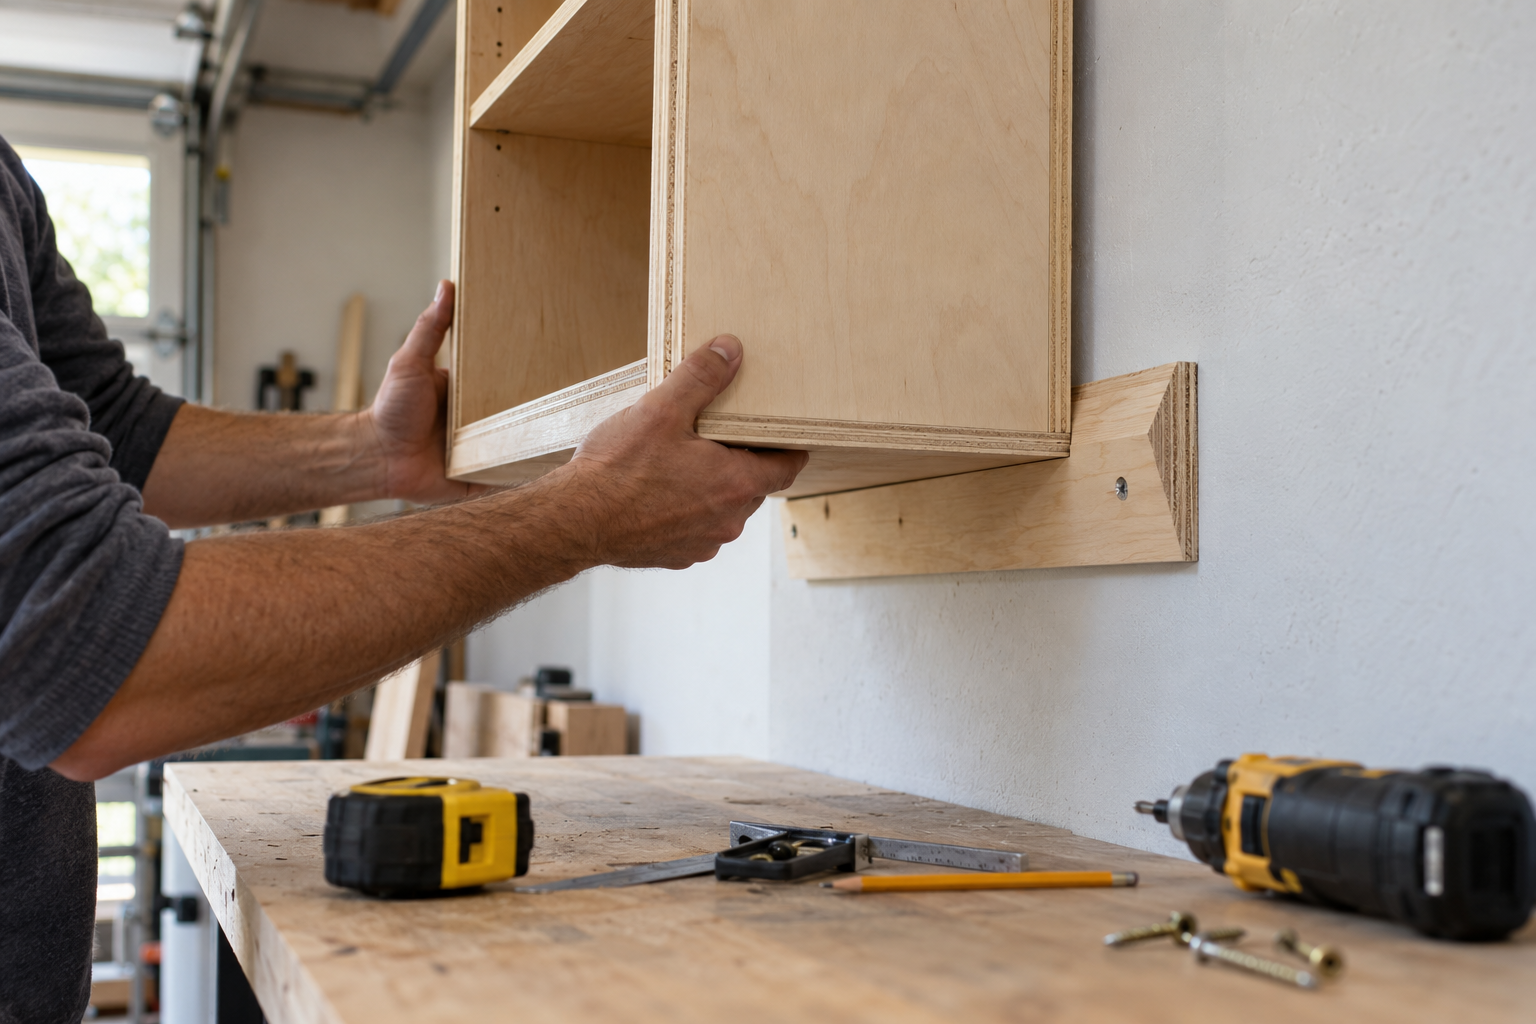
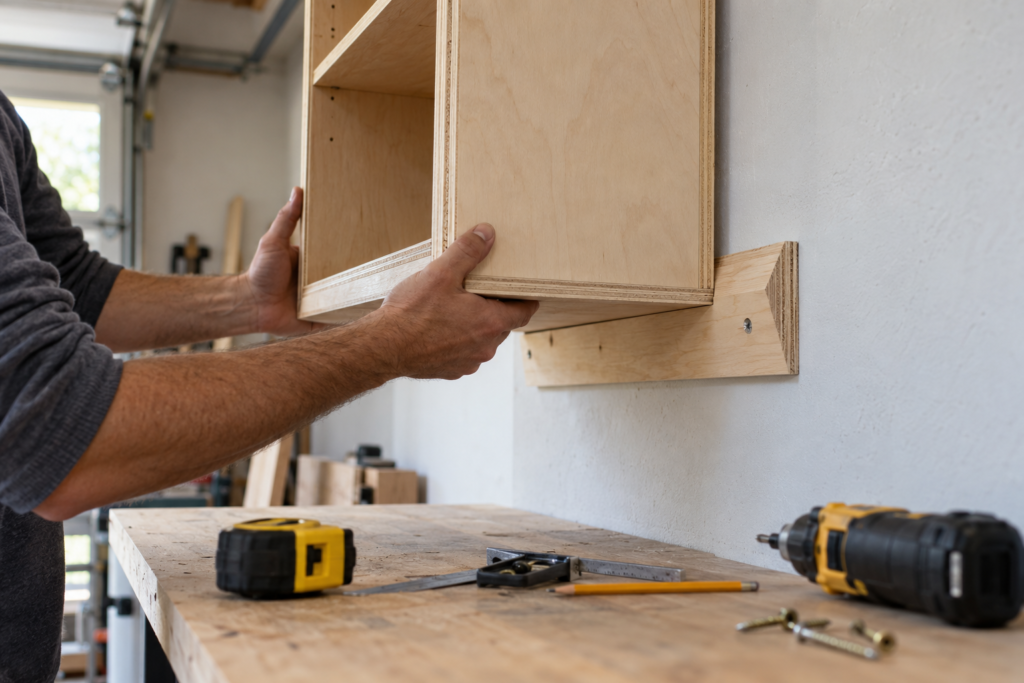
For cabinets, spacing works differently. A cabinet normally hangs from one continuous mating cleat pair near its upper structural rail. A matching lower spacer keeps the cabinet plumb. Large or unusually heavy cabinets may require an engineered fastening layout or an additional restraint.
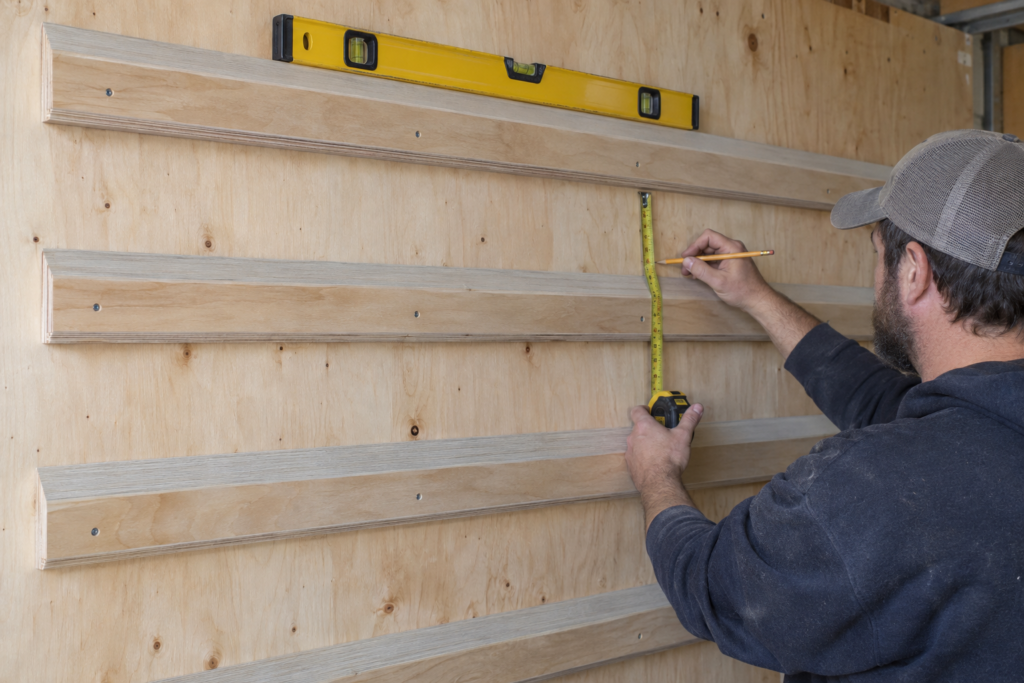
One planning tip that saves grief: start your top row a fixed distance down from the ceiling (people often use about 18 to 21 inches so there’s room for a shelf up top), then step down at your chosen interval. Snap a level line for each row before you drive a single screw. A long cleat installed even slightly out of level throws off everything hanging from it, and on plywood that reads as sloppy fast — the same reason clean edges matter, which is why we always recommend a tear-out-free cutting method for visible shop fixtures.
Screws: length and type
Two different screws do two different jobs here, and mixing them up causes real problems.
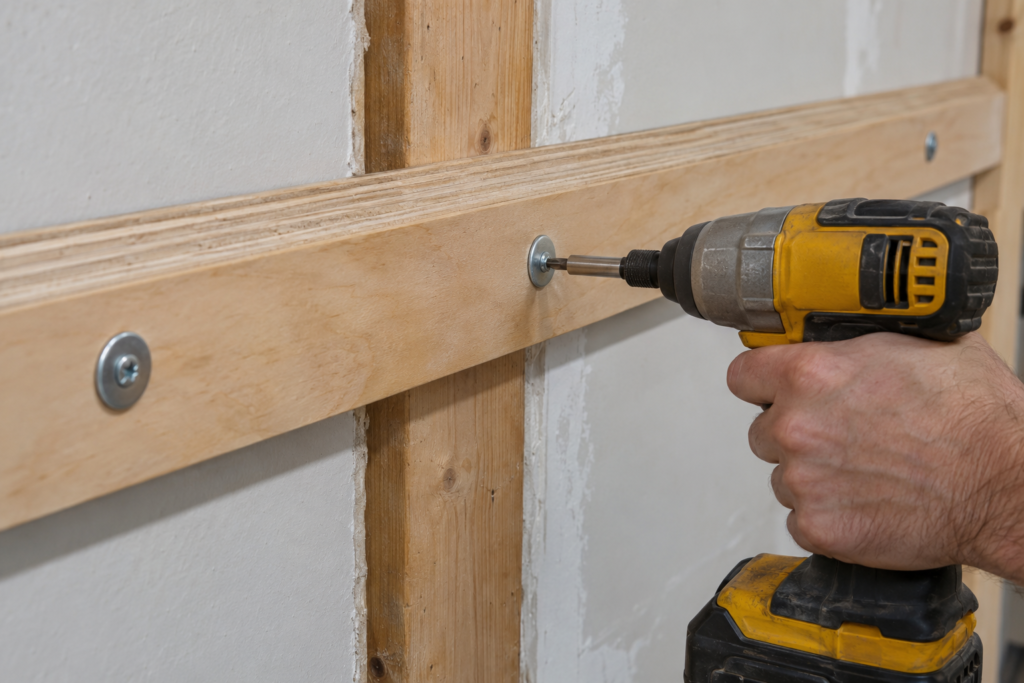
Wall cleat → studs. Choose a screw long enough to pass through the cleat and the drywall while penetrating the wall stud by at least 1-1/2 inches. For many installations, that means a 2-1/2- or 3-inch structural or cabinet screw with a pan head or washer head (a wide flat head that won’t pull through the plywood). Drive them into every stud the cleat crosses — this is the connection carrying all the weight, so it goes into framing.
Item cleat → the cabinet or holder. Size the mounting screws according to the combined thickness of the cleat and the cabinet rail or holder. The screw must get adequate penetration without entering the cabinet interior. Do not attach a heavily loaded cleat only to a thin cabinet back panel.
⚠️ Warning — the poke-through: reach for long wall screws to attach a cleat to a thinner holder or rail and the tips punch straight through the front face, leaving a row of sharp points inside the cabinet or across the face of the holder. Match screw length to the combined thickness you’re driving into so the tip stops short of the show face.
Use structural or cabinet screws whose manufacturer provides appropriate installation and load information. Do not use drywall screws for a load-bearing cleat — they’re brittle and can snap under shear.
Do this test before you trust the wall
🧪 The lift-and-tug test (30 seconds, before you load anything): hang an empty cleat-mounted holder, then try to lift it straight up and off. Note exactly how much vertical travel it takes to clear the bevel — that’s your real clearance number, and it should be a little more than the cleat thickness. Then, with it seated, pull outward firmly at the bottom. A properly cut 45-degree pair barely moves; the harder you pull down and out, the tighter it should wedge. If it rocks or wants to pop off, your bevel angle is off or the wall cleat isn’t seated flat — fix that now, not after you’ve loaded 40 pounds of tools onto it.
That outward-pull behavior is the whole reason the joint works: load pulls the wedges together rather than apart.
Tools & materials for cutting French cleats
Disclosure: This article contains affiliate links. If you purchase through these links, we may earn a commission at no additional cost to you.
You don’t need much, but a few of these make the difference between clean, repeatable cleats and a frustrating afternoon.
Cabinet-grade or Baltic birch plywood — browse 3/4″ Baltic birch on Amazon. Local pickup is usually cheaper for full sheets, but this is handy for smaller project panels.
A table saw or track saw — the clean way to rip a 45-degree bevel. Track saws on Amazon.
Digital angle gauge — set your blade to a true 45° instead of trusting the factory detent. Angle gauges.
Structural / cabinet screws, 2-1/2 to 3 inch, pan or washer head — for the wall connection. Cabinet & construction screws.
Stud finder — you’re driving into framing, so find it first. Stud finders.
A long level — for snapping straight row lines. Levels.
💸 The cost difference worth knowing: Baltic birch and cabinet-grade plywood generally cost more than construction-grade panels, but pricing varies considerably by panel size, thickness, and location. The upgrade is usually worth it here — good plywood gives you crisp bevels that lock cleanly, where a splintery edge can crush under the screw. On fasteners, use structural or cabinet screws with published installation and load information, and never use drywall screws for the load-bearing wall connection.
If you want the cleat wall to look finished rather than raw, a quick coat of finish also keeps the plywood from grabbing shop dust — see our notes on finishing plywood for the low-effort options.
How to cut French cleats, step by step
Rip strips at double your target width. For 3-inch finished cleats, rip 6-inch strips first with the blade square.
Set the blade to a true 45 degrees. Check it with an angle gauge, not the factory mark.
Rip each strip down the center at 45°. Each 6-inch strip yields two matching 3-inch cleats.
Cut cleats to length. Wall cleats can run the full wall; item cleats match the width of the holder or cabinet rail.
Mark your studs and snap level lines for each wall row.
Fasten wall cleats bevel-up, pointing toward the wall (the slope faces up and back so the item’s cleat drops into it).
Fasten the item cleat bevel-down so the two slopes mate.
Hang, then run the lift-and-tug test before loading.
That’s the entire process. A French cleat is one of the highest-payoff projects in a shop precisely because the dimensions are so forgiving everywhere except the bevel angle and the screw length.
Frequently asked questions
What angle should a French cleat be? 45 degrees is the standard and the best default. It’s easy to reproduce and it makes both halves of a ripped strip identical and interchangeable. Other angles can work, but every wall cleat and matching cleat must use the same one.
How thick should French cleat plywood be? 3/4-inch for anything holding real weight (power tools, loaded cabinets). 1/2-inch or 5/8-inch is fine for light-duty walls holding small hand tools.
How far apart should French cleats be spaced? On a tool-storage wall, 3 to 6 inches on center gives the most mounting flexibility. For cabinets, the item usually hangs from one continuous mating cleat pair near its upper structural rail, with a matching lower spacer to keep it plumb.
What size screws for a French cleat? For the wall cleat, use a structural or cabinet screw long enough to sink at least 1-1/2 inches into the stud — often 2-1/2 or 3 inches. For the item cleat, size the screw to the combined thickness of the cleat and the rail or holder so it gets solid penetration without breaking through the show face.
Can you use a French cleat on drywall without studs? For anything heavy, no — the load must go into framing. Fasten the wall cleat into studs. Only very light items should rely on drywall anchors, and even then it’s a compromise.
How much weight can a French cleat hold? More than most people expect, because the load is spread along the cleat and pulled into the wall. The real limit is usually the wall screws and the studs, not the plywood — which is why fastening into framing matters so much.
Related Posts:
How to Build a French Cleat Wall: Complete DIY Guide by Admin September 15, 2026 Installing A French cleat wall is one of the simplest ways to organize tools without locking yourself into a permanent layout. Instead of attaching every shelf, rack and…
DIY Wall Cabinet Guide: Building, Hanging & Dimensions by Admin September 26, 2025 Installing Wall Cabinets (or Upper Cabinets) are storage units mounted to wall studs above a countertop or work surface. Standard installation requires securing the cabinet through…