Sofa tables have grown in popularity, as home designs have shifted to more of an open floor concept. With such a home design, chances are increased that sofas will be set in the middle of a space, acting as a divider between different living areas, rather than being placed up against a wall. With the sofa back exposed, it has become a natural place to park a narrow table, usually adorned with plants and/or collectibles.
The sofa table is similar to the console table, with the exception of height. Whereas console tables are made to be 33” tall, sofa tables can be any height and are usually built to be just a bit shorter than the back of the sofa. They range from 10 to 15 inches deep, depending on the space available.
By and large, these tables are fairly simple, making them a great DIY project. Since they are mostly decorative, there’s not a lot of concern about them being extremely stable, as a dining table would have to be to keep from shaking when people are cutting their steak. This allows for designs and material choices as broad as the woodworker’s imagination.
A few design ideas that I’ve seen for sofa tables include:
- Using 2”x 4”s and 4”x 4”s to make the base
- Using reclaimed lumber
- Making the base out of driftwood
- Making a narrow “picnic table” style base
- A metal base of welded square tubing
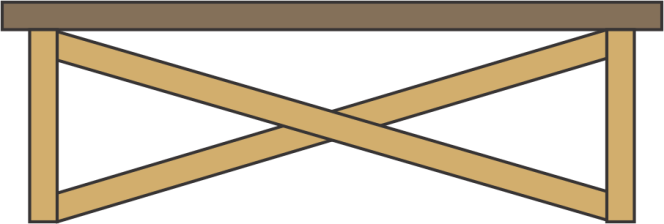
- Truss shaped base
- Making a wide shelving unit, used as a sofa table
- Single leg with a wide foot on each end
- Pallet wood sofa table
Design Concerns with Tables
By and large, tables are rectangles and squares. There is a problem with this though. structurally speaking, squares and rectangles aren’t very strong, especially when compared to triangles. So if a table is put together, only attaching the corner, it is extremely weak and subject to collapsing, especially if the hardware used to put it together works the hole it is installed into, making it larger.
What makes rectangles weak is that the rectangle can be collapsed into a parallelogram, without changing the length of any sides. Once the collapse starts, there’s really nothing to keep it from continuing. Therefore, something needs to be done, in order to make sure that there is at least one structural element in the construction of a table, which will keep it from collapsing.

Adding additional horizontal or vertical elements to that rectangular table doesn’t make it significantly stronger. While more fasteners would have to work through to turn the rectangle into a parallelogram, there really isn’t anything structural to prevent it from happening.
Then there’s the problem of attachment. woods tend to be difficult to attach to the bottom of the table leg in a way that is strong and lasting, because the fastener or adhesive is going into end grain on the leg. End grain doesn’t bond well with adhesives, and screws run into end grain merely cut up the wood fiber, which will eventually cause a hole that no longer holds the fastener. Nails work considerably better with end grain, as they depend on the compression of the wood against the fastener. But unless they are coated, ring shank or twisted nails, they will eventually work loose.
A better fastening job can be accomplished by using a mortise and tenon, insetting the top end of the table leg into the tabletop. This provides some side grain contact between the leg and tabletop, allowing it to be glued together. The mortise and tenon prevent the leg from wobbling, making a strong table. However, there are many designs this doesn’t work well with, because of the end of the tenon showing on the surface of the table.
A number of different solutions have been developed through the years, to deal with this problem, making the table strong. The most obvious one is to use a diagonal brace somewhere, as that divides the rectangle, making at least one triangle. As the triangle can’t collapse without changing the length of at least one side, it is extremely strong and stable.

The problem with this sort of design is that it is not particularly attractive, so a lot of people avoid using it. They prefer to have something other than a diagonal brace, which obviously looks like what it is, something to make the table stronger, rather than more attractive.
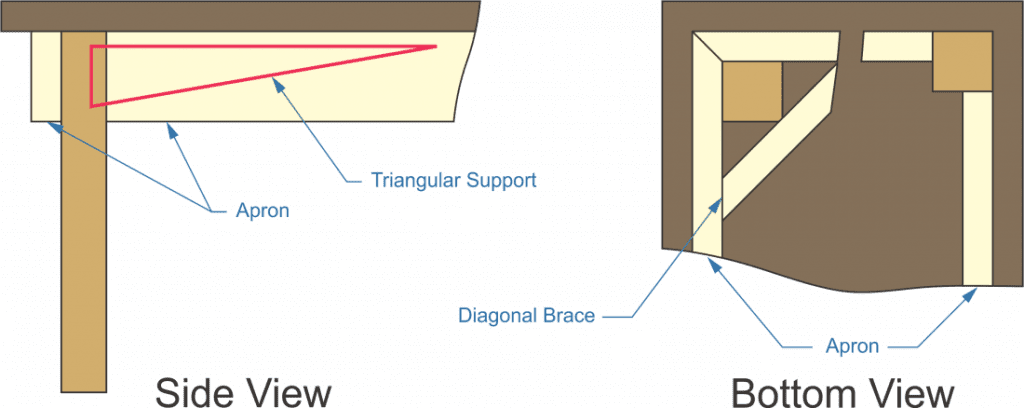
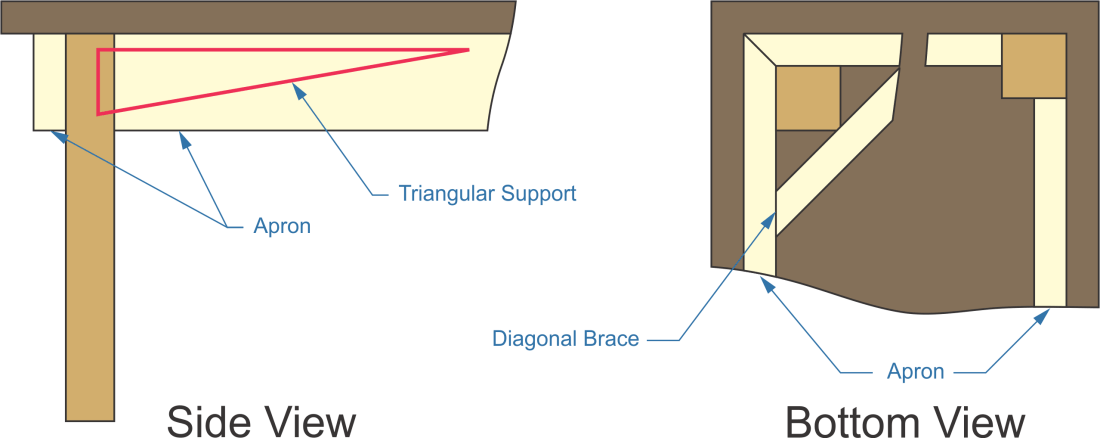
There is a way around this dilemma, which is actually very common. It’s to fake the angle by using a piece of wood to make an apron around the bottom of the table. The legs are then attached to that apron, which accomplishes the purpose of creating that triangular support, as shown by the red line in the diagram below.

The diagram on the right shows that the apron can either be placed outside the leg or the leg and apron can be made integral to each other, forming the perimeter. Of the two designs, it is easier to put the leg inside the apron, which allows gluing and nailing through the apron to the leg. An angled brace, placed across the corner of the leg can add additional strength.
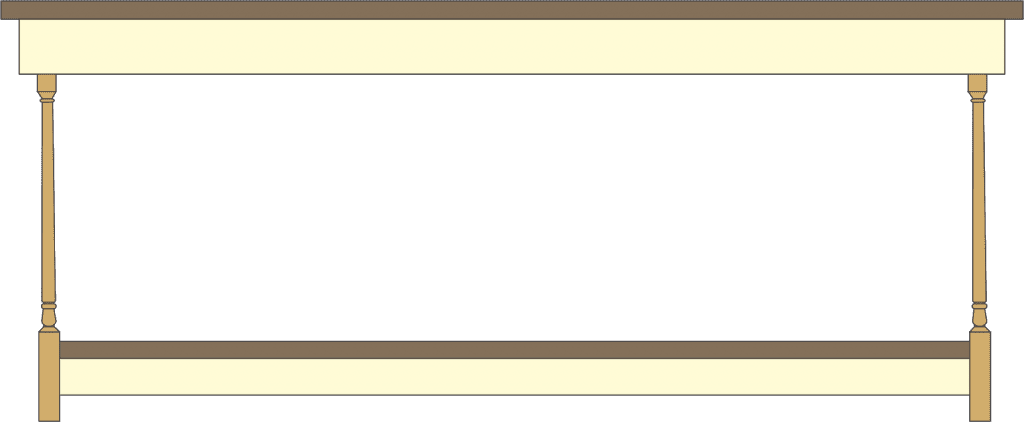
This still leaves the leg unsupported at the bottom, which really isn’t a problem, as long as the dimensions and material used for the leg are strong enough that it won’t wobble or move. However, additional strength can be added by installing a shelf near the bottom of the table, along with its own apron. This also helps in providing more storage or display space.
Making a Simple Sofa Table
A very simple sofa table can be made using turned wooden spindles. There are a wide variety of these already available on the market, some of which can be bought through the local home improvement warehouse. Spindles which are long enough fall into two categories: furniture legs and balusters for stair rails. Of the two, the balusters are considerably cheaper, yet still provide for nice turned spindles which can be used for legs. The only possible complaint is that they will be narrow legs, but that’s perfect for a sofa table.

To make the table, start with the table top. This can either be a laminated panel purchased from a home improvement center, a laminated table top made in the workshop, a simple piece of dimensional lumber or a laminate made of reclaimed wood. It all depends on the look desired. The edges can either be left square, rounded, or cut to a variety of different profiles with a router.
The next step is to attach the apron to the bottom of the tabletop. Aprons can vary considerably, but select grade 1”x 3” or 1”x 4” lumber works well. This is usually “relieved” from the edge, leaving an inch or two of tabletop extending past the edge of the apron frame.
Typically, the corner of the apron are mitered, so as to not leave any end grain exposed. There are a number of different ways to attach it to the bottom of the tabletop, including hardware specially made for that purpose. But probably the best way of attaching the apron to the bottom of the tabletop is with screw set into pocket hole. Take care when doing this to not allow the screw to come through the top surface of the table.
If a pocket hole jig is not available, then there are other options, such as nailing through the table into the apron with finish nails. Since the apron can be glued to the tabletop, only a few nails are needed, to clamp the pieces together while the glue is drying.
Another option to consider for a hidden connection is doweling the two together. Dowling can be tricky, as it can be difficult to properly align the hole. However, doweling also is done with the dowel ends left visible in the tabletop for a more rustic look. This looks especially nice when a contrasting hardwood dowel is used for pinning the pieces together. In this case, a single hole can be drilled for each dowel, going through the tabletop and into the apron.
With the apron attached, it is a simple manner to cut the balusters off to length, and attach it to the insides of the corner. Since this joint can be glued together, heavy fastening is not required; all that’s needed is enough nails or screw to hold it together while the glue dries.
Since it is hard to attach the legs and apron together effectively, a diagonal brace is often installed across the leg, attached to the apron, as shown in the diagram of the apron above. This brace ensures that there is still support for the leg, once the glue ages and becomes brittle. It is a common technique used by furniture manufacturers.
While strength may not be a concern for the table, sitting there in the home, it becomes a real issue when moving from one home to another. More furniture breaks while moving it, than it does in use.

It is easy to add a shelf to this table design, if square top balusters are used. The shelf is essentially another tabletop with an apron, with the exception that the tabletop is made to fit between the legs, as shown in the diagram above. This apron can either be the same size as the one for the tabletop, or smaller. The apron is also flush with the edges of the tabletop; at least on the ends. It can overhand to match the apron supporting the tabletop in the front and back.
To attach this shelf to the legs, screw are run through from the inside, through the apron and into the legs. This is done in conjunction with glue, making for a very strong joint. As the screw heads will not be visible, there is no concern with their appearance.
All that’s left is sanding and finishing the table to match the room’s décor. Since all the materials used are natural wood, they can be stained and varnished to match other furniture or painted if that is preferred. It is even possible to do a combination, painting the legs and apron, while staining and varnishing the tabletop.


