For the last four decades, the use of barn wood in furniture and interior decorating has gained wide appeal. Starting out on the trendy west coast, the idea spread gradually eastwards. Now, people of all walks of life have found the beauty of using “reclaimed wood” in a wide variety of circumstances.
While barn wood was the original reclaimed wood, the concept has broadened since then. It basically had to, as the available supply of old barns that the siding could be stripped off of was being used up. Many farmers still use those barns and don’t want to part with them just to provide decorations for some city dweller’s apartment.
Today, the most common sources of reclaimed wood are cedar privacy fences and wood shipping pallets, both of which are usually fairly easy to find. While barn wood and wood from other old structures is still in use, the problem is finding it in the first place.
It’s not always possible to find the reclaimed wood that’s needed for a project, without resorting to one of these two sources. Reclaimed wood is sometimes available from the major home improvement centers, but then it’s either pallet wood or wood that has been milled for use as either wood flooring or tongue & groove wall paneling.
The best bet, when looking for reclaimed wood is to search online. Reclaimed wood planks can sometimes be found on Craig’s List, eBay or Etsy. Just be sure to check the product description carefully and ask questions of the seller if their description isn’t specific enough. There are also some online vendors who specialize in salvaging and reselling reclaimed wood. While more expensive than local sources, these vendors are great when large quantities are needed or larger dimension pieces, such as beams.
Is Reclaimed Wood Safe to Use?
Using reclaimed wood of any sort doesn’t come without some risk. Wood is naturally grown and porous. It can be damaged by chemicals, which leave residue in the wood, as well as having insects and bacteria living in it. Some insects merely nest in the wood, while others eat it.
Before using any reclaimed wood, it should be treated to ensure that it is safe to be brought into the house. About the best way to do this is to have it kiln-dried, if facilities for kiln drying are available. Sixty minutes at a core temperature of 60°C (140°F) is enough to kill most insects. Twenty minutes at a core temperature of 70°C (158°F) will kill all bacteria and other microscopic organisms.
If kiln drying services are unavailable, the wood can be disinfected through the use of Borax (borates), which are a naturally- occurring salt-like acid. It is possible to use the laundry additive “20 Mule Team Borax for this” rather than hunting for borate powder. This clothes whitener is less expensive than borates sold for preserving wood, but is essentially the same thing.
To treat wood in this manner, mix the Borax or borate with water. Spray a heavy coat onto the wood and allow it to dry thoroughly before use. It is a good idea to stack the boards, with spacers between them, so that air can flow through, just like stacking it to kiln dry. This will help prevent warping.
A Word About Reclaimed Wood Style
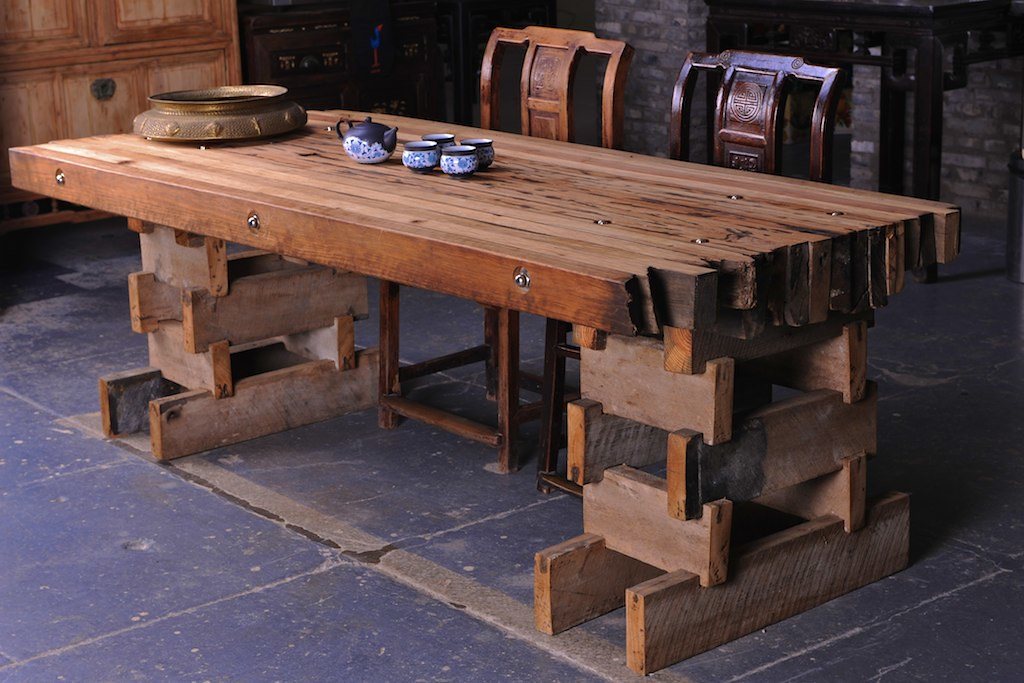
The whole purpose of using reclaimed wood is to enjoy the discoloration that age has caused in the wood. Most reclaimed wood projects will have a wide range of wood colors, either due to different types of wood being used or from the differences that the aging process can cause. Selecting pieces of wood which are different colors and placing them side-by-side is common in reclaimed wood work.
In addition to the difference in appearance of different pieces of wood, the aging process tends to accentuate the grain in the wood, as the softer grain will change more than the harder. This is part of the natural beauty of reclaimed wood.
Most reclaimed wood is rough-cut, meaning that it was not planed or sanded after sawing it into boards. This is obvious in both new and old fence pickets and pallets. While it is possible to find reclaimed wood that is S4S (sanding four sides), it is rare. Even then, the exposed surface will usually have been roughened through the weathering process.
This rough finish is fine for outside furniture, such as patio furniture, but is probably not ideal for a dining room table. In that case, it is common to smooth the surface somewhat, trimming a thin layer of wood off with a planer. This must be done carefully though, as it is easy to shave off too much material, removing the patina of age in the process. Properly done, the aging will still be visible in the wood, while the roughness is removed.
Another option is to coat the tabletop with a high-build clear coating, such as a bar coating. This allows the option of leaving the wood totally natural, while still having a smooth surface.
Building a Reclaimed Wood Top
There are two basic ways of building a reclaimed wood table top, depending on the thickness of the reclaimed boards being used. While it is theoretically possible to use thin boards to make a tabletop, without providing them with any underlying support, that would make for a weak table top that flexes when pressure or weight is placed upon it.
Regardless of the construction method to be used, it is important to clean the wood before doing anything. Reclaimed wood is usually dirty, as well as having the aforementioned possibility of being infested with bacteria and insects. Cleaning the surface of the wood with a wire brush will remove dirt, as well as loose splinters that would otherwise be a problem. Take care to not overdo the cleaning, as the wire brush can dig into the wood’s surface, gouging it.
For the purpose of this discussion, thick boards refer to those with a starting thickness of one inch or more. Anything less than one inch is a thin board. We need this distinction because planning the boards to a workable thickness will make them somewhat thinner. Just how much thinner depends on the condition of the material. Both fence pickets and pallet wood qualify as thin wood.
Thick Board Table
In cases where boards thick enough to build a tabletop are found, the table top can be built without an underlying base. This is much like building any other tabletop, edge-joining a bunch of boards together to reach the desired thickness. However, there are a few special considerations to take into account.
Reclaimed wood is probably going to be damaged on all four sides, even though there will be one side which is weathered the most. This side is usually used as the face side in any project. Even so, the other three sides need to be planed to smooth them and provide a clean surface to work with.
The first step is to plane the back side of the boards on a thickness planer, smoothing out the surface and bringing all the boards to a uniform flat thickness. It is doubtful that any stock of reclaimed lumber will be a uniform thickness and flatten the back side of the boards will probably require removing more material thickness than would be removed with new kiln dried lumber.
If a thickness planer is not available for use, the same thing can be accomplished with a plane or belt sander. However, it is considerably more difficult to achieve a consistent thickness with either of those methods.
Once planed, the back edge becomes the square edge that everything else is compared to. The next step is to make the edges of the boards perpendicular to the back, either by ripping both edges on a table saw or running the boards through a jointer. If a table saw is used, the edges may need to be planed or sanded to remove blade marks and provide a smooth, consistent surface for gluing.
One design consideration during this process is to select the board which will form the edges of the tabletop and preserve those edges rough, without planning them. Rough edges, just as long as there are no sharp points or splinters to get embedded in guests’ arms, can add to the overall effect of the table being old and weathered.
If the top surface of the boards are to be planed to smooth them, it should be done after the back side is. This allows a very thin shaving of material to be removed, so that the patina of age is not lost.
From this point, gluing up the tabletop is much like working with newly cut wood, with the exception of keeping track of the face side of the wood. However, most woodworkers select a face side for their board anyway, either due to defects in the wood or favorable grain patterns. It is a good idea to dowel the boards together, as there may still be some deterioration of the wood which has reduced its strength. The dowels will make a stronger joint.
Be sure to use cauls when clamping the tabletop, so as to ensure that the surface stays level and smooth. Having to plane or sand down the surface of the table, because a board or two is sticking up too high after gluing, will ruin the effect of using repurposed wood for the project.
Thin Board Table Top – with Frame
Making a tabletop out of thin reclaimed boards is much like making it out of thick boards. Extra care must be taken in the glue-up, so as to ensure that the tabletop cannot be twisted or warped in the process. Using cauls when gluing will help prevent this from happening.
In order to make a thin tabletop strong enough for use, many furniture manufacturers attach a frame to the underside, called a “box apron.” This provides strength to the tabletop, helping it to stay rigid, even when heavy weights are loaded on the table. It also provides something to attach the table legs to, giving them some support, so that they do not disconnect from the tabletop or wobble.
Thin Board Table Top – with Base
In cases where the appearance of a thick tabletop is desired, but no thick reclaimed wood is available, it is still possible to make a reclaimed tabletop which looks like it is made out of thick boards, even though it isn’t. In this case, the reclaimed wood pieces are attached to a substrate or base material, usually plywood, which adds thickness.
This also provides the opportunity to retain the rough edges of the reclaimed boards, as smooth edges will not be needed for gluing. The major gluing of the tabletop will be gluing the reclaimed boards to the plywood underneath. In that case, the plywood should be cut to size and stained with a dark wood stain, so that it is not highly visible if there are any cracks between the boards. Those cracks can be filled with clear epoxy or a high-build finish, once the tabletop is assembled.
In this instance, the backs of the reclaimed boards still need to be planed to thickness and the face surface may need to be as well, per our earlier discussion. Whether or not the edges of the boards are planed is an artistic decision that must be made by the woodworker.
The clamp-up is a bit more complicated in this case, than in a normal tabletop, because the boards making up the tabletop not only need to be clamped to each other, but also to the plywood underneath. This is most easily accomplished by using several pairs of cauls to provide the clamping force between the boards and the plywood substrate.
Once the tabletop is clamped together and the edges are trimmed, it is necessary to hide the edges of the plywood. This is accomplished by attaching a frame with mitered corner, made out of the same repurposed wood, to the edges of the tabletop.
Making Artificially Aged Wood
If the right wood is not available for the tabletop to be created, it is possible to artificially age wood so that it looks like repurposed wood. There are several techniques available for this, depending on the final look desired.
Damage the Wood
One of the more obvious visual differences between new lumber and reclaimed lumber is the physical damage that the reclaimed wood has suffered. This can readily be reproduced by damaging new lumber. With a little practice, it’s possible to make wood that is quite believable.
Beat on the wood with different kinds of hammers or other heavy metal objects to make dents in it
Make a “nail strip” by pounding a bunch of small nails through a thin piece of wood in an uneven pattern. This can then be used to make fake worm holes in the wood, by placing it on the wood and hitting the back with a hammer
Sand the edges roughly and unevenly
Rub a wire brush over it to roughen up the wood’s surface. A wire brush on a drill will provide even more damage
Keep in mind when doing this that it is necessary for the damage to be totally random. Any pattern in how frequently a particular type of damage is applied will be immediately obvious.
Stain can be used to make wood look older; not the oil-based wood stain that you buy at the lumberyard, but homemade stains that provide a more uneven, worn look to the boards.
Another simple homemade stain which works well to age wood is tea. Brew up a batch of extra-strong tea and use it just like any other stain. It can also be used in conjunction with the vinegar and steel wool stain mentioned above.
Distressed Paint
Paint is often used to distress wood; so much so, that there are even paints specially developed for this purpose. But those paints aren’t necessary to get an excellent distressed wood look. All it takes is three or four different colors of flat (don’t use semi-gloss) leftover paint, one of which should be white.
Apply each of the colors sloppily to the boards, using a very dry brush. Don’t allow the paint to dry between colors. The wet paint will mix somewhat, making the end result look all that much more like old boards that have been repainted several times. The idea isn’t to cover the boards fully with any color, but to have patches of colors that are intermixed. It’s even better to have some bare spots show through.
Once the paint has had time to dry, sand lightly with a medium-grit sandpaper to distress the paint even further, creating spots where the wood is visible through the paint, especially on the edges.
Related Posts:
DIY Tree Slice Table by Admin June 2, 2021 DIY Tree slices and slabs have been used as crude tables for centuries. While there are examples of elegant wood tables, such as those used by…
Study Table with Chair by Admin August 11, 2021 DIY Any student does better when they have a specific place set aside to study. This has been proven by scientific study. It doesn’t take a…
Making a Table with a Floating Top by Admin August 31, 2021 DIY Tables have taken on an extensive variety of different shapes and styles through the ages. Functionally, the shape and style aren’t the important part; what’s…