Walk into almost any modern home store and you’ll see it: the rustic, weathered wood aesthetic. Think farmhouse tables, reclaimed shelves, or those moody gray barn doors. They look like they’ve seen a century of weather… but the truth? Most of them haven’t.
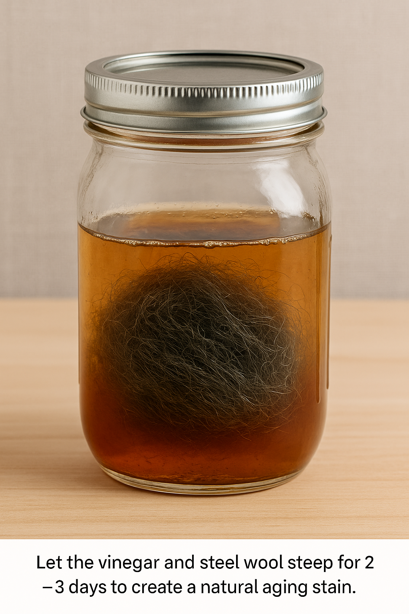
One of the easiest ways to mimic that timeworn charm is with a vinegar and steel wool stain. It’s a DIY wood stain method that uses a chemical reaction to age wood naturally, and it costs just a few dollars to make at home.
I’ve personally used this stain on everything from pine planks to plywood cabinets, and I keep coming back to it. Here’s how to make it, apply it, and tweak it for any wood project you’ve got.
🧪 How to Make Vinegar and Steel Wool Stain at Home
Applying the stain is where the magic happens—watching the transformation is exciting.
✍️ Application Steps
Prep the wood: Sand lightly with 120–220 grit and remove all dust.
Apply with a brush or rag: Coat the wood generously.
Do not wipe off: Let it soak and dry.
Watch it change: The color transformation happens as it dries.
⚠️ Important: The final tone may not appear until it’s fully dry (2–6 hours).
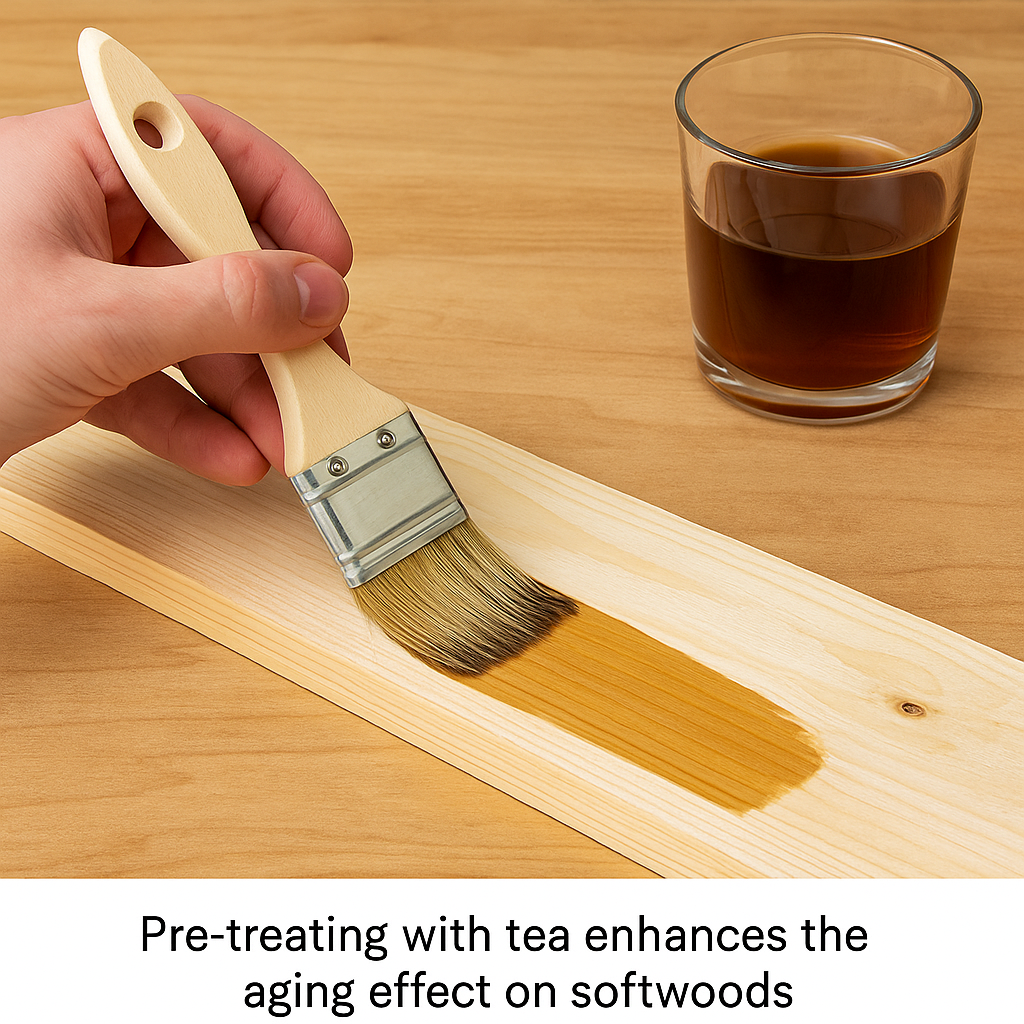
☕ Bonus Tip: Use Tea for Low-Tannin Woods
Some woods (like pine or maple) don’t have enough tannins to fully react with the vinegar solution.
✅ Fix: Brush on strong black tea (steep 3–4 bags in hot water) before staining. The tannins in the tea help boost the reaction.
🎛️ How to Adjust the Color and Intensity
Want something lighter or more subtle? You can dilute the stain before applying:
Mix 1 part stain with 3 parts white vinegar for a lighter shade
Or reduce the soak time of the steel wool for less oxidation
✅ Layering doesn’t always help. This isn’t a dye—it’s a chemical reaction. More coats don’t always mean more color.
🧱 Common Mistakes When Using Vinegar and Steel Wool Stain (And How to Avoid Them)
While the vinegar and steel wool method is simple, it’s not foolproof. Like any DIY finish, a few missteps can affect your final look. Having used this stain on dozens of projects, I’ve learned the hard way what not to do—and how to fix things if they go sideways.
Mistake #1: Applying to Wood That Isn’t Fully Sanded
One of the biggest issues I see is applying the stain to wood that hasn’t been prepped properly. If the surface still has mill glaze or factory finish, the stain won’t absorb evenly. This leads to patchy results or almost no visible aging at all. Always sand the wood first with 120–220 grit sandpaper and remove the dust completely using a tack cloth or a damp rag.
Mistake #2: Letting the Steel Wool Sit Too Long
Some DIYers think the longer the wool sits in vinegar, the better the stain. But if you go past a week, the liquid turns overly rusty and can create orange undertones rather than that aged gray you’re aiming for. If your mixture starts to smell off or develops a thick layer of sludge, it’s probably time to toss it and start fresh.
Mistake #3: Sealing Before the Stain is Fully Dry
It’s tempting to rush through a project, but sealing before the wood has dried completely can trap moisture or disrupt the chemical reaction. That leads to cloudy finishes or streaking. I always recommend waiting at least 24 hours before applying any type of topcoat. In dry environments, 6–8 hours may be enough—but if in doubt, wait.
No matter how confident you are, always keep scrap pieces from the same wood species and test the stain first. I’ve had plywood veneer stain dramatically differently than solid pine boards, just because of the glue layer underneath. Testing helps you understand how the mixture will behave and lets you tweak the reaction time or tea pre-treatment before going all in.
Mistake #5: Applying Multiple Coats to “Darken” the Stain
Unlike a paint or pigmented stain, vinegar and steel wool work through oxidation. Applying a second coat often just reactivates the same chemical change—it doesn’t layer color like a dye. If your first coat didn’t achieve the darkness you want, consider letting your mixture steep longer before application, or applying tea first to increase tannins.
Mistake #6: Not Stirring Before Reuse
After a few days or weeks of sitting, the steel wool stain tends to separate. All the good reactive bits can sink to the bottom, while the top becomes a weak vinegar solution. Before using an old batch, give it a good stir or shake (with the lid tightly on) to redistribute the particles and bring back its effectiveness.
🧼 Storing and Reusing the Stain
Once mixed, your DIY stain keeps for months.
🫙 Storage Tips
Pour into a sealed glass jar or bottle.
Label with the date made and type of wood tested.
Shake well before reuse (the rust settles!).
I’ve used batches over 6 months old with no problem.
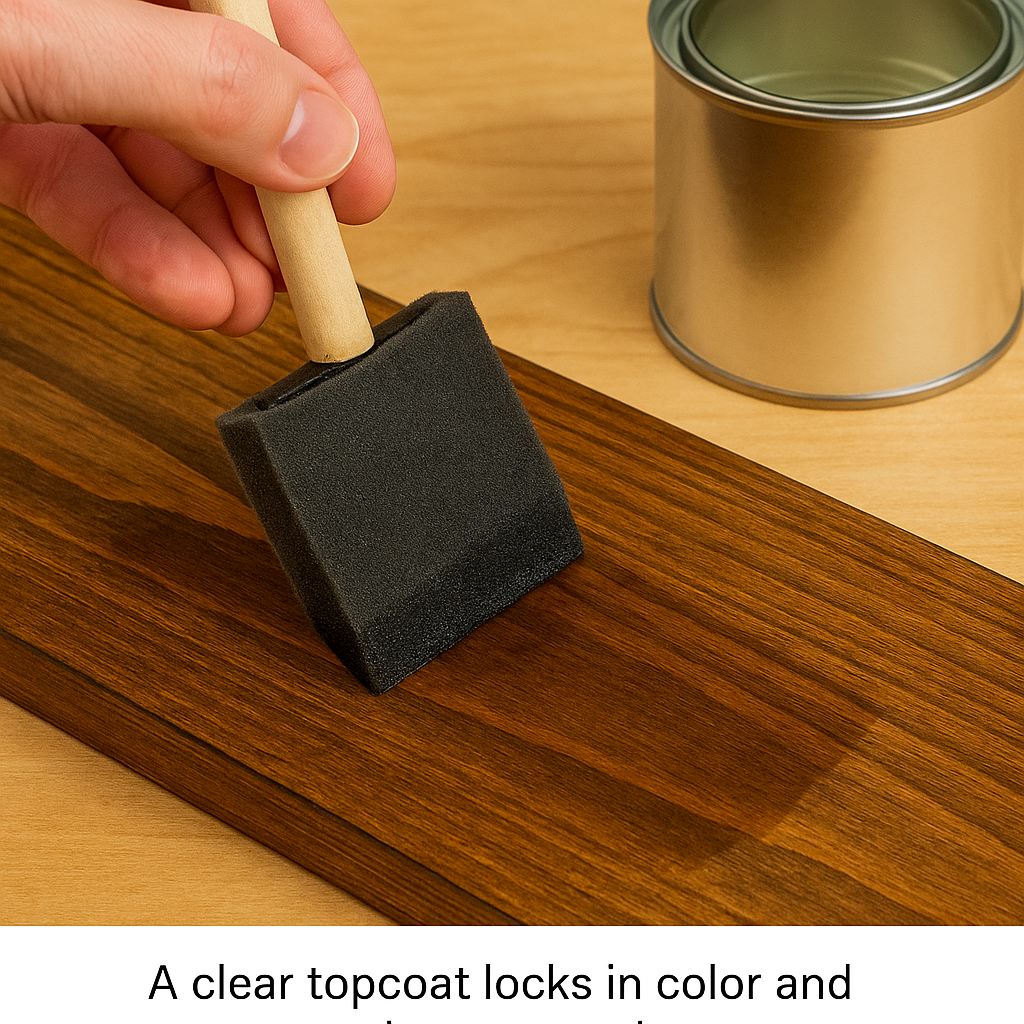
🛡️ Should You Seal It?
Absolutely. This stain doesn’t protect your wood—it only colors it. Once dry, apply a clear finish like:
🔍 Each topcoat changes tone slightly—some warm it up, others cool it down. Always test!
🪵 Final Thoughts: A Timeless Look, Made Simple
The vinegar and steel wool stain method has become one of my go-to techniques because it’s natural, inexpensive, and full of character. Every time I apply it, I’m blown away by how different each wood looks. That’s the beauty of it—no two results are the same.
Whether you’re updating a shelf, building a table, or refinishing crates, give this DIY stain a try. Test on scrap wood, tweak the formula, and watch your project age beautifully, naturally.
❓ FAQ: Common Questions About Vinegar and Steel Wool Stain
Does this work on all woods? Mostly, yes. High-tannin woods like oak work best. For low-tannin woods like pine, you can brush them with strong black tea first to help the stain react better.
Can I use other types of vinegar? You can, but plain white vinegar gives the most consistent results.
Can I apply more coats to darken it? Not really. The stain reacts chemically, so more coats don’t always mean more color. To go darker, let the steel wool soak longer or use less dilution.
How to Fix Wood Stain Mistakes: 4 Easy Methods by Amy Reed December 6, 2022 DIY Mistakes happen all the time, especially when applying wood stains. Some of the most common wood stain mistakes include blotchiness, unwanted streaks, or simply the…