The guitar is a favorite amongst both folk instruments and amongst stringed instruments. While the lute is probably the number one folk string instrument worldwide, the guitar beats it out in the United States. It is a fretted string instrument, unlike violins and cellos which have no frets. It is also played directly by hand, rather than with a bow, as are all the other string folk instruments.
People who make and repair string instruments professionally are called “luthiers;” but not all luthiers work on guitars. Generally speaking, luthiers who work on violins and other non-fretted string instruments don’t work on guitars and guitar luthiers don’t work on violins. Amongst woodworkers, guitar luthiers are a class all to themselves, because the skills it takes to make a guitar, while woodworking tools, are different from furniture making.
Making a guitar can be an enjoyable project for those who like fine detail work. A first guitar will typically take about 200 hours to build, much of it with hand tools. While many of the same tools used in other types of woodworking are used for building guitars as well, there are a number of specialized tools needed just for building guitars.
For a first guitar, it would probably be a good idea to work with someone who already builds them. That would give access to the special tools, without having to buy them, as well as the expertise of someone to ask questions about techniques and problems encountered along the way. They will also have a workshop which is set up for building guitars, including being at the right humidity, which is typically about 40 to 50 percent.
What to Build?
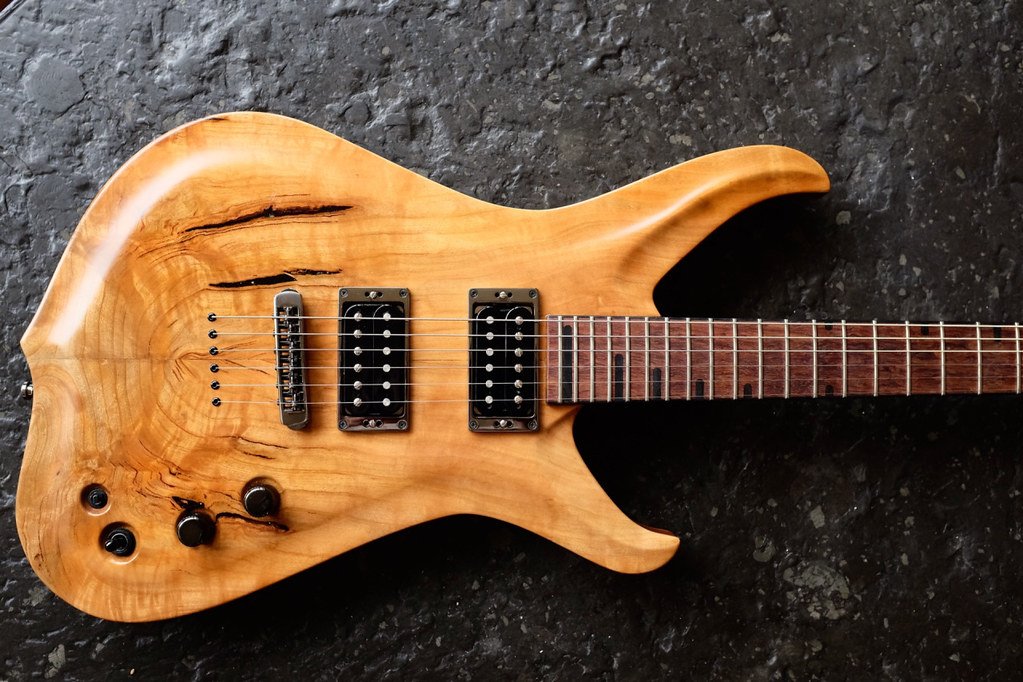
The first question that needs to be asked is what sort of guitar the woodworker wants to build. Guitars can be broken down into two general categories: acoustic and electric. While making the neck of both is pretty much the same, making the bodies is completely different. Electric guitars are cut from a solid piece of hardwood, with areas routed out for the electronics to sit into. Acoustic guitars, on the other hand, are hollow, so that the guitar body can resonate, amplifying the volume of the vibrating strings. They are made of thin wood, some of which must be bent to make the traditional guitar body shape. The body is reinforced on the inside with ribs, so that the guitar can handle the stress of the tight strings.
The second question to consider is whether to build a guitar from a kit or from scratch. Guitar kits range from about $100 to a little shy of $400, depending on the style, quality of materials and level of completion. Most will give the hobbyist no more than the experience of assembling the guitar, as the forming of the pieces will already have been done. The finished guitar will be the equivalent of an entry-level finished guitar.
If the woodworker already has a workshop or especially if they have access to the workshop of someone who already has the tools to build a guitar, making a guitar from a kit doesn’t make much sense. However, if someone is just trying to get their feet wet with building guitars, this would give them some sense of at least the assembly and finish parts of the process.
Shaping the Guitar Neck
Guitar necks are either made of two or three different types of wood, depending on the design of the guitar. The most common material for the neck is maple, with the fingerboard usually being made of rosewood or ebony.
There can be several different ways of designing the neck, depending on the specific guitar style being made and whether it is an electric or acoustic guitar. The body of an electric guitar is much thinner than that of an acoustic guitar, so the heel of the acoustic guitar neck is considerably longer than that of the electric guitar.
Another thing that can greatly change the design of the guitar’s neck is whether the headstock is flat or angled back. Angling the head back creates more string pressure against the nut, helping to ensure that the stings do not pop out of the slots cut into the nut for the strings. However, making a guitar like this is more expensive, as it either requires using a thicker piece of stock or using a scarf joint to attach headstock to the neck.
Finally, the headstock itself might be designed to have all the tuning pegs on one side of the headstock or to have them installed on both sides. Generally speaking, guitars with a fixed bridge will have the tuning pegs on both sides of the headstock, while guitars with a floating bridge will have them on one side. There are also different types of tuning pegs and the headstock must be designed with the style of tuning peg in mind.
Another important, but hidden, part of a guitar neck is the truss rod. This is a metal rod that sits in a channel cut at the centerline of the neck, beneath the fingerboard. Truss rods are purchased pre-stressed and must be purchased before cutting the channel, so that the channel will be cut to the right width, depth and length. Once the guitar is completed, the stress rod can be turned to take out any bow in the neck of the guitar and ensure that the strings maintain a consistent depth from the deck. As the guitar ages, this may have to be adjusted from time to time.
Truss rod access is always at the head end of the neck and can be either on the face side or the back side. In cases where the headstock is bent back, the truss rod access must be on the front of the headstock; but in the case of headstocks which are flat to the neck, access can be made on either side.
Most guitars are made with a flat headstock, which is integral to the neck, simplifying the build. A template is used to lay out the neck and headstock together and then the groove for the truss rod is laid out. Traditionally the groove is cut with a chisel the width of the channel, but it can be cut easier with a straight bit in a router.
Before cutting the groove for the truss rod, draw a centerline on the blank and then use a pattern to draw the outline of the neck and headstock onto the wood. Both the neck and the truss rod must be exactly on-center, which is difficult to accomplish if they are not laid out before cutting begins.
Cut out the outline of the neck and headstock with a band saw, scroll saw or handsaws. In most cases, it is best to cut slightly outside the line and then use a plane or power sanders to remove the last little bit. The risk of going inside the line while cutting is high enough that it is best to avoid trying to cut right up to the line with a saw. Unlike many other projects, it is not possible to recover from the error of going over the line.
Making the Fretboard
Fretboard blanks can be purchased from companies that provide guitar making parts and tools. The blank will be ¼” thick, a bit over 2” wide and should be at least 18.5” long. Some companies provide fretboards which are already radiused and/or which are pre-slotted for the insertion of the frets. The fretboard material may or may not already be tapered. It’s actually easier to work with if it is not tapered.
A pattern will be needed for the fretboard, just like for the neck itself. print a second copy of the same pattern for this purpose. Besides giving the outline of the fretboard, the pattern will also show where to cut the slots for the frets. These need to be cut 1.5 to 2mm deep and should be cut in a hand miter box which has clamps to hold the stock in place. Accuracy is critical when doing this step. For the nut (at the headstock end of the fretboard) there will need to be two slots cut, so that the material between them can be removed to create a groove for the nut to be inset into.
With the grooves cut, the fretboard can be tapered, clamp the fretboard to a shooting board and using a plane to do the tapering. As with the neck, it is extremely important to go right up to the line, without going over.
The top surface of the fretboard is actually radiused, not flat. This is probably accomplished by a special machine in a factory, but for a home built guitar, it is done by hand-sanding the top of the fretboard. Special sanding blocks are available, which have a sole that is cut to the right radius for the fretboard. There are also gauges made for checking that it is properly sanded to the right radius.
The last step in making the fretboard itself is to radius the corner at the heel end. This can be done with a chisel or rasp. Take care not to overdo it. With that done, the frets or fret wire can be cut and pressed into the slots cut for them. They can either be pressed in or hammered in; but if they are hammered in, take care not to ding or bend the frets. Hammer in the ends first and then the middle. In a factory, a press is used, but if that is not available, use the sanding block and a clamp as a makeshift press. Once the frets are in, cut off the excess material with a fret cutter, which is a special type of end wire cutter. The cut off ends will need to be cleaned up with a file and then the ends of the tops of the frets need to be chamfered.
Shaping the Headstock
The outline of the headstock should have been cut while the outline of the neck was. But the headstock will still need to be thinned out on the top side and the neck thinned out slightly on the backside, as per the dimensions given on the guitar’s pattern. Once thinned, the headstock will typically be about 15mm thick. This is important, as it has to match up with the tuning pegs. Thinning the headstock is most easily accomplished with a router, but can also be cut with a band saw and then smoothed out.
Shaping the Neck
Anyone who has played a guitar knows that the back side of the neck needs to be nicely curved to allow the guitar to fit easily into the hand. A guitar with too wide a neck or too deep a neck is extremely difficult to play, unless the musician playing it has very large hands.
Curving the back of the neck is intimidating to a lot of people, but it is not all that hard. To start, radius behind where the 1st and 12th frets are, carving and then filing them, using a template to verify the curve. Then the rest of the neck can be cut with a spokeshave, blending it into those two carved sections.
What makes this a bit tricky is that the neck becomes both thinner and narrower as we move from the bottom of the neck up to the headstock. So the actual profile is constantly changing, even though we are making a consistent curve. At the same time, it should be possible to lay a straight edge on the finished neck, going from end to end, without any gaps showing below it at any point. Gaps or the opposite, high points, will make it difficult for the guitarist to slide their hand up and down the neck and can be a distraction while playing the guitar.
As the neck is connected to the headstock at one end and the heel at the other, neither one of which is shaped like the back of the neck, it will be necessary to carve transitions at both ends. This is somewhat freehand carving, removing excess material so as to blend into the curve of the back of the neck at one end and into the rectangular profile of the headstock and heel at the other end (for an acoustic guitar, the heel end is a bit more complicated).
Before carving, transfer the patter for the back of the headstock to the neck and the heel. The carving should never enter into these areas, but should end right at the pattern line, after filing and sanding. The ultimate test of how well the neck and these transitions is carved is to try fingering a number of chords on it, sliding the hand up and down the neck.
Attach the Fretboard
With the neck carved to shape (but not finish sanded) it’s time to attach the fretboard to it. Set the truss rod into the groove cut for it and cover it with painter’s tape, trimming the tape about 1/8” from the edges of the groove. This tape is to protect the truss rod from glue getting into it. Spread glue over the remaining surface and glue the fretboard into place, clamping it and then rechecking to ensure that the sides of the fretboard and the neck are in alignment. Allow to dry.
The problem here is that the fretboard is only ¼” thick. As the pressure cone from a clamp goes out at about 45 degrees, that means it would be necessary to clamp the fretboard down its entire length and width to ensure good clamping. Professionals have cauls that they use for this, allowing constant pressure. Rather than having to carve cauls to match the guitar neck, a rubber therapeutic band can be used to wrap the fretboard. This will provide constant pressure and will conform to the shape of the neck quite easily.
To finish out the headstock, drill the holes for the tuning pegs.
For a first guitar, it might be advisable to start with an electric, as that’s easier to build. The body is made of two pieces of hardwood, laminated together. As with any other laminated project, true up the pieces, making sure they don’t have any warping, cupping or twisting and that the edges meet up without any gaps. Then glue and clamp them together, leaving them for the glue to cure overnight.
Most guitars are made from existing patterns, many of which can be found on the internet. This is actually more critical for an acoustic guitar than for an electric, as the guitar body has to resonate. On electric guitars, the body is merely something to hold the electronics and for the neck to mount to; so it can be literally any shape.
The pattern for the guitar body is then glued to the surface of the blank, taking care to align the centerline of the pattern with the glued joint between the boards. Cut out the outline of the guitar body with whatever saws are available, taking care to ensure that there is no undercut. It is advisable to cut outside the line 1/16” to 1/8” and then use a belt sander and drum sander to bring the contour of the guitar’s body right up to the line. Before using the belt sander on the guitar body, check that the blade is perpendicular to the table.
The edges of the body need to be perfectly perpendicular with the face, so check them with a square. They also need to be radiused, which can be easily accomplished with a router and a roundover bit. Take care to avoid the step for the neck pocket when radiusing, as that one short side isn’t radiused.
Attaching the Neck
With the body roughly shaped, it is time to cut the neck pocket, as well as the various pockets for the electronics. While the location of these will be on the pattern, it is best to use the neck itself to lay out the size and location of the neck pocket, so that we can ensure that they will fit together precisely. The trick is to align the two parts in a way that the centerline of the body and neck will create one continuous line, without bending at the connection point.
There are several ways of doing this, but the best is to clamp a couple of straight edges to the sides of the neck and then make a mark on the body, at the centerline, for how far the neck pocket extends into the body. Set the neck on the body, supporting it as needed and aligning it to the mark made for the depth. With it in this position, it will be easy to see if the neck is aligned straight or not by comparing the two straight edges to the centerline on the body. If they are not both the same distance from the center, the neck is not properly aligned. Align it, then clamp the neck in place. Remove the clamps holding the straight edges and mark the pocket.
Cut out the pocket to match the profile of the neck, to the depth that the pattern indicates. It should not sit flush, but rather, should protrude above the surface of the body by about 9mm, depending on the pattern used. The easiest way to accomplish this is with a straight bit in a router. Make a template and use a bearing on the bit to ensure that the edges of the pocket come out straight. It is important that the bottom of the neck pocket be exactly flat, both so that the neck will sit at the right angle and so that there will be solid contact between the neck and the body when connected together.
To ensure that the neck is attached straight, it would be a good idea to reattach the straight edges to the sides of the neck, while clamping it to the guitar body. Then, using the neck plate as a template, drill four hole through the back of the guitar body, into the back of the heel end of the neck and screw the guitar together.
Installing the Bridge & Pickups
The location of the bridge should not come from the pattern, but rather be measured from the guitar itself. Start by measuring the length from the front or head side of the nut to the middle of the 12th fret. Double that distance and then measure that distance from the same point on the nut, down to the body; that’s the location for the bridge, specifically the point where the sting touches the saddle. Using that as a guide point, attach the bridge to the guitar body.
The strings on most electric guitars are installed from the back of the guitar body, so it will be necessary to holes through the body, in alignment with the holes in the bridge. The ferrule will be attached to the back side of the guitar at this point, for the loops in the ends of the strings to be attached to.
There are a number of pockets that need to be cut into the face of the guitar for the bridge, pickups and other electronics. The location of the bridge pickup (if there is one) should be taken directly from the bridge itself. But the locations of the rest should come from the pattern. While these pockets can be traced directly onto the body of the guitar, it is best to make a template, so that they can be cut with a straight bit and bearing in a router. That will provide cleaner pockets. If the pockets are a bit off it’s not a problem, as the pick guard will cover up any errors made in alignment or shaping of these pockets.
The other thing that is needed is channels for wiring between the various electronic components, including the ¼” Phono connector in the end of the guitar body. Other than the one for this connector, the channels can be routed, although some guitar luthiers drill those as hole through the sides of the pockets, angling them from both sides, so that they meet in the middle. The one channel that has to be drilled is the one for that connector, drilling it through from the end into the pocket for the pickup.
I’m not going to get into the wiring of the actual electronics here, as that varies from guitar to guitar. I will mention that it is a good idea to line these pockets with aluminum tape, so as to provide some shielding from radio interference.
Finishing the Guitar
Now it’s time for a lot of sanding. We had not done any finish sanding up to this point, other than to the fretboard, so the guitar will need a lot of sanding, smoothing out all the surfaces, with special attention to the transitions and the back of the neck.
There are also a few spots where it is good to cut off sharp edges with a chisel, such as the corner of the neck pocket and the contour of the body where it meets up with the sides of the neck heel. Rounding these will make the guitar more comfortable to hold, as well as preventing them from breaking off later.
There’s also a need to install the dots on the face and edge of the fretboard. There are various materials used for these, ranging from plastic to pearl. All that’s needed to install them is to lay out the locations and holes for them to match the sizes of the dots. Then the dots are glued in, the excess is cut off and the ends filed and/or sanded flush.
Keep in mind that the guitar can be disassembled and reassembled as many times as needed, in order to accomplish the various steps. sanding of the body and neck is easier when they are apart. Likewise, it will be necessary to install the electronics to ensure they fit, then remove them for applying wood finish to the guitar.
A variety of different finishes are used for guitars. Electric guitar bodies are often painted, but can be stained and varnished as well. Some people, who prefer natural wood, use either polyurethane or tung oil. I’ve even seen cyanoacrylate adhesives used as guitar finishes.
The frets need to be filed or sanded to make them level from head to heel. The idea is to ensure that if any three frets are bridged, whatever is bridging them (like a business card) can’t rock. If that can be done from end to end at the center and both sides of the fret, then they are all even.
Related Posts:
How to Make Barn Quilts by Admin June 3, 2025 DIY Walk through rural America and you’ll start noticing a charming trend on barns, sheds, and even garages—large, colorful quilt block patterns painted right onto the…
How to Make Cornhole Boards by Admin March 25, 2025 DIY I’ve built a few cornhole boards over the years — mostly for family barbecues and neighborhood game nights. It’s one of those backyard projects that’s…
How to Make a Bucket Toilet by Admin August 2, 2023 DIY Anyone who enjoys hunting or fishing has probably seen a bucket toilet sometimes. More and more campers are using them as well. Instead of buying…