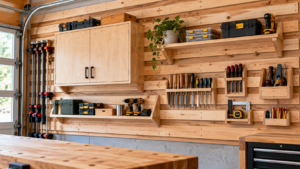
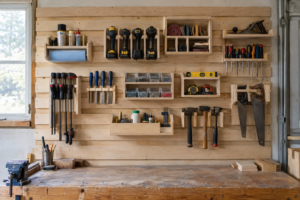
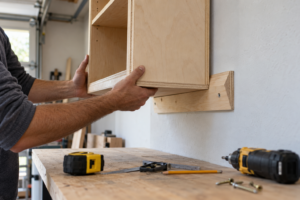
French cleat storage cabinets hang on a pair of 3/4-inch plywood strips cut at 45 degrees. One strip is screwed into the wall studs and the other is glued and screwed to a solid hanging rail across the top of the cabinet back. Make cabinet cleats about 3 to 3-1/2 inches wide, fasten the wall cleat with 3-inch cabinet-hanging or structural screws, and add a 3/4-inch spacer at the bottom of the cabinet so it hangs plumb.
Cleat: 3/4-inch plywood, 45° bevel, about 3 to 3-1/2 inches wide for cabinets. Full sizing is in the French cleat dimensions chart. Cabinet side: Screw the cleat to a 3/4-inch hanging rail inside the top of the cabinet, never to a thin back panel alone. Wall side: Secure the wall cleat to every available stud using rated cabinet-hanging or structural screws. For a typical install through 3/4-inch plywood and 1/2-inch drywall, use 3-inch screws, subject to the fastener manufacturer’s specifications. Base the number of screws on the fully loaded cabinet weight and the fastener specs. Bottom: A spacer the same thickness as the cleat, so the cabinet hangs plumb. Depth and weight: Both raise the pull on the wall screws. Keep heavy items close to the back of the cabinet.
French Cleat Storage Cabinet Size Chart
Cabinet type
Box material
Back and rail
Cleat width
What to watch
Shallow tool cabinet (4–8 in. deep)
3/4-in. plywood (1/2-in. OK for light loads)
1/4-in. back plus a 3/4-in. top hanging rail
2-1/2 to 3 in.
Fits most tool-wall layouts. Leave lift room above it.
Standard storage cabinet (about 12 in. deep)
3/4-in. plywood
1/2-in. back, or 1/4-in. back plus a 3/4-in. top rail
3 to 3-1/2 in.
Add a bottom spacer. Keep heavy items toward the back.
Deep or tall cabinet (16 in. or deeper, or over 36 in. tall)
3/4-in. plywood
1/2- to 3/4-in. back, top rail and bottom rail
3-1/2 in.
Outward pull goes up with depth. Add a screw through the bottom rail into a stud to stop it tipping.
Narrow cabinet (under about 16 in. wide)
3/4-in. plywood
1/4-in. back plus a 3/4-in. top rail
2-1/2 to 3 in.
May sit over only one stud at 16-in. spacing. Keep the load light.
🧪 Test before you load it: Hang the empty cabinet, then pull down hard on the front edge and push up from underneath. If the cleat shifts, the cabinet lifts off, or the wall cleat flexes between studs, fix it now. Don’t wait until the shelves are full.
Why Cabinet Depth and Weight Both Matter
A French cleat holds the cabinet up, but the weight also tries to tip the top of the cabinet away from the wall. That outward pull goes up with how heavy the load is and with how far it sits from the wall.
The French cleat weight capacity guide uses this rough formula: outward pull ≈ weight × how far the weight sits from the wall ÷ the height between the cleat and the bottom spacer.
This is a simplified estimate of the outward force on the wall screws, not a verified weight capacity for your cabinet. It doesn’t account for the screws’ rated loads, the condition of the studs, how the cabinet is built, or bumps and shock loads. Use it to compare setups, not to decide how much a cabinet can safely hold.
Always calculate using the combined weight of the cabinet, shelves, doors, hardware and stored contents.
💸 Depth difference (illustrative): Take 60 pounds of combined weight (cabinet plus contents), with the cleat 24 inches above the bottom spacer. In a 12-inch-deep cabinet, the weight sits about 6 inches out: 60 × 6 ÷ 24 = about 15 pounds of outward pull. In a 24-inch-deep cabinet, the same weight sits about 12 inches out: 60 × 12 ÷ 24 = about 30 pounds, twice the pull on the same screws.
Moving heavy items to a lower shelf doesn’t lower that pull if they stay the same distance from the wall. What lowers it:
Keep heavy items close to the back of the cabinet.
Use less weight overall.
Leave more height between the cleat and the spacer, which a taller cabinet gives you.
How a French Cleat Holds a Cabinet
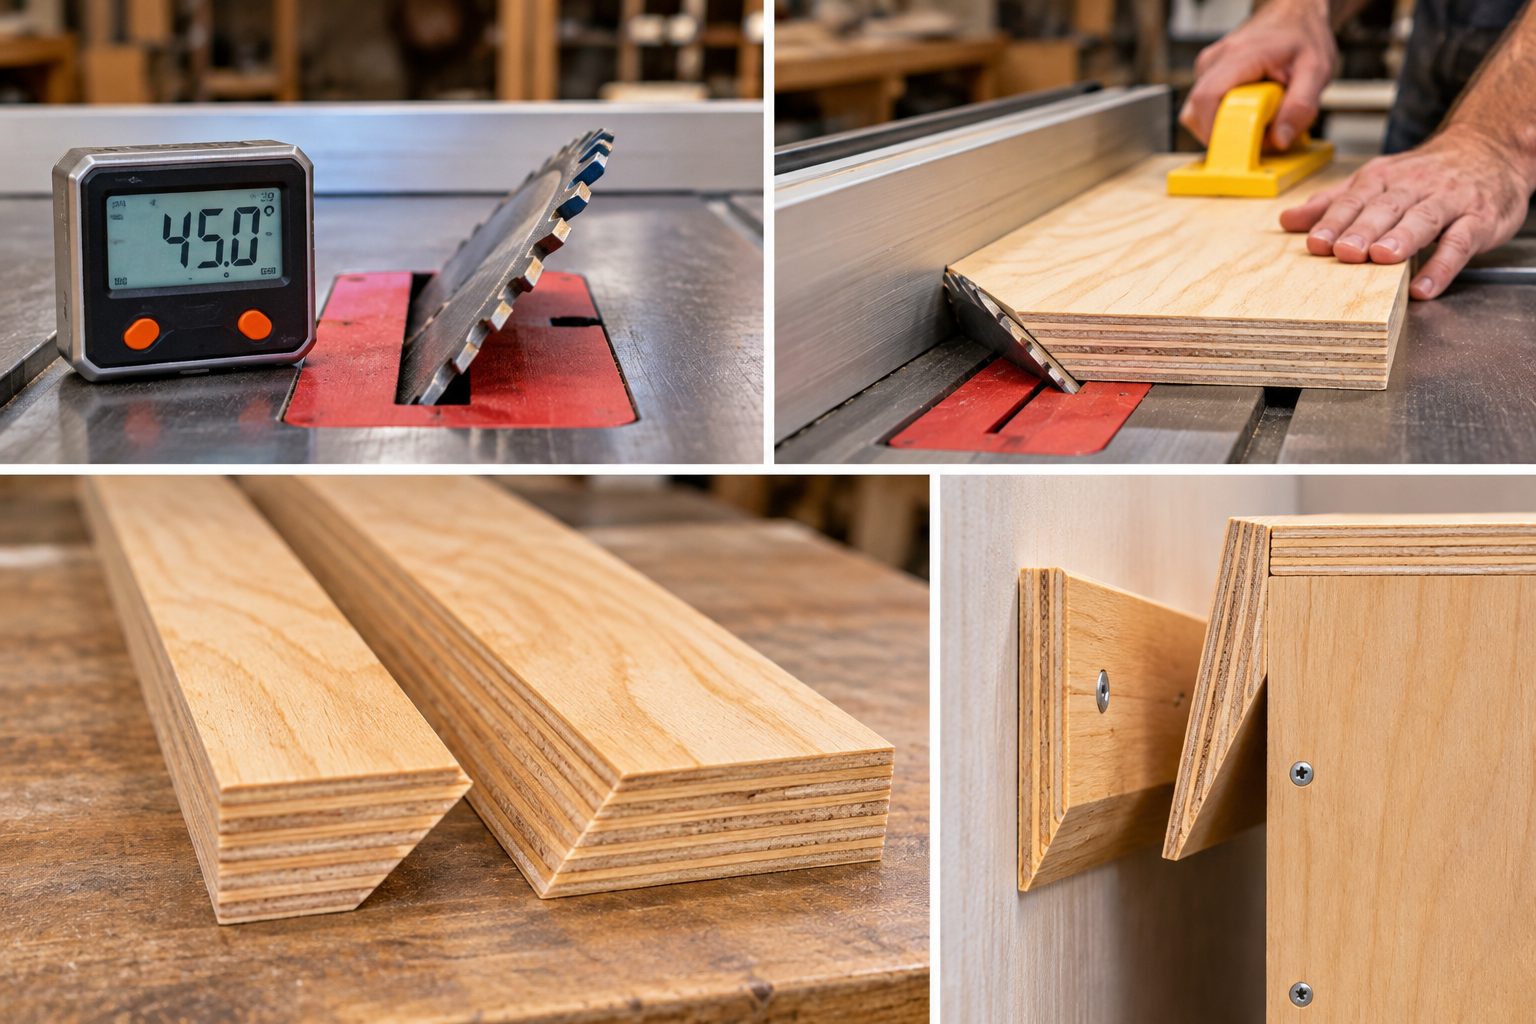
The two strips come from one board ripped at 45 degrees.
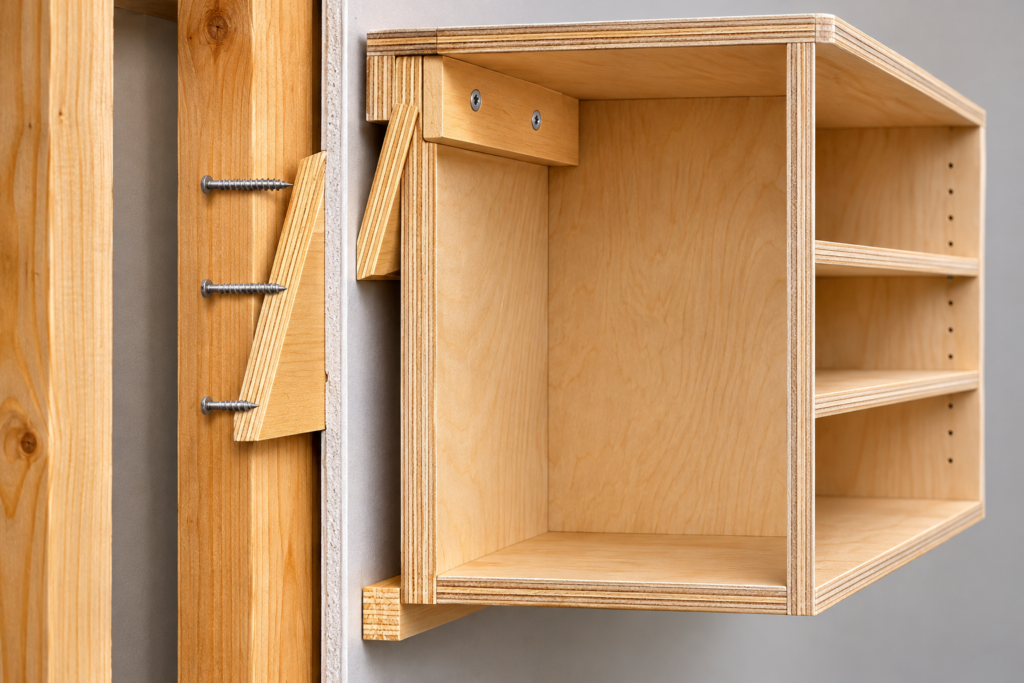
Wall cleat: The long face goes flat against the wall and the bevel points up. This makes a pocket that opens upward.
Cabinet cleat: The long face goes flat against the cabinet back and the bevel points down. It hooks into the wall cleat’s pocket.
When the cabinet’s weight pushes down, the two bevels pull the cabinet toward the wall. Because the cleats nest into each other, together they take up only one cleat’s thickness behind the cabinet. That’s why the bottom spacer is the same thickness as the cleat.
Tools and Materials for French Cleat Storage Cabinets
Wall screws:3-inch cabinet-hanging screws or rated structural wood screws. Check the manufacturer’s specs for length and load. Large heads don’t sink into the cleat.
Saw and angle gauge: a table saw or track saw for ripping the bevel, plus a digital angle gauge to set an exact 45°.
How to Build French Cleat Storage Cabinets
Step 1: Find the studs and plan the height
Mark every stud along the wall. Studs are usually 16 inches on center, but some walls use 24 inches, so check your own wall. Decide where the top of the cabinet goes, then mark the wall cleat line just below it.
Leave enough space above the cabinet to lift it completely clear of the wall cleat. Test the required clearance before installing the wall cleat. With the two cleat halves hooked together on a bench, lift the cabinet half until it comes free and measure how far it had to rise.
Step 2: Build the box with a hanging rail
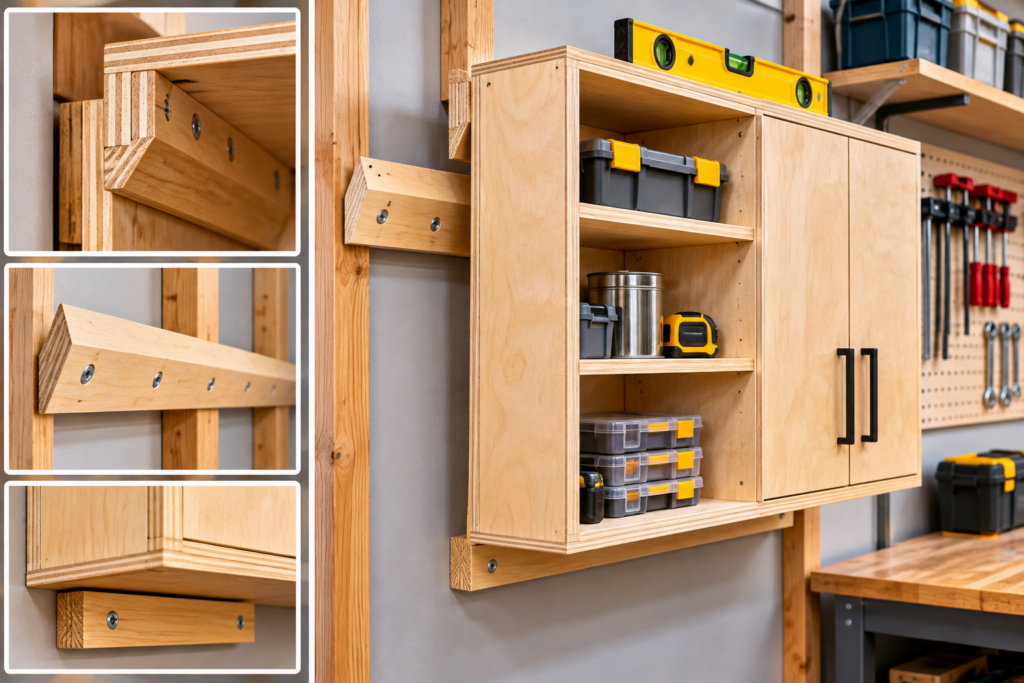
Build the box from 3/4-inch plywood. Set the back into a rabbet or dado. Then glue and screw a 3/4-inch hanging rail inside the top of the box, against the back and fastened into both sides. The cabinet cleat screws into this rail, so the full weight goes through solid plywood and the box sides, not through a thin back panel. Basic cabinet construction covers the box joints.
For a deep or tall cabinet, add a matching rail at the bottom of the back. That’s where the spacer goes, and where an anti-tip screw can go in Step 6.
Rip a strip of 3/4-inch plywood about 7 inches wide, then split it down the middle with the blade at 45°. You get a matching pair, each about 3 to 3-1/2 inches wide. Cut the wall cleat as long as you want. It can run past the cabinet to cross more studs, and leaves room for more cabinets or French cleat tool holders later. Cut the cabinet cleat about 1/2 inch shorter than the cabinet’s inside width.
Step 4: Attach the cabinet cleat
Glue the cabinet cleat to the hanging rail with the long face against the cabinet and the bevel pointing down toward the wall. Screw it to the rail every 6 to 8 inches. Choose screws no longer than the cleat and rail together, minus about 1/4 inch, so the tips don’t come through inside the cabinet.
If you want the cabinet tight to the wall, recess the cleat into a notch in the cabinet back instead. You won’t need a bottom spacer, but the notch has to be cut accurately.
Step 5: Install the wall cleat into studs
Hold the wall cleat on your line with the long face against the wall and the bevel pointing up, and level it. Secure the wall cleat to every available stud using rated cabinet-hanging or structural screws. Determine the number of screws based on the fully loaded cabinet weight and fastener specifications.
Count only the part of the screw that’s in the stud. A 2-1/2-inch screw through 3/4-inch plywood and 1/2-inch drywall leaves only 1-1/4 inches in the stud. That’s why 3-inch screws are the typical choice, subject to the fastener manufacturer’s specifications. Put the screws in the thick lower part of the cleat, not near the thin bevel edge. For how plywood holds screws, see plywood screw holding strength.
⚠️ Warning: Look at the bevel before you drive a single screw. A wall cleat put on upside down sheds the cabinet instead of locking it in. It’s the most common way French cleat cabinets fall.
Step 6: Add the spacer, hang it and lock it down
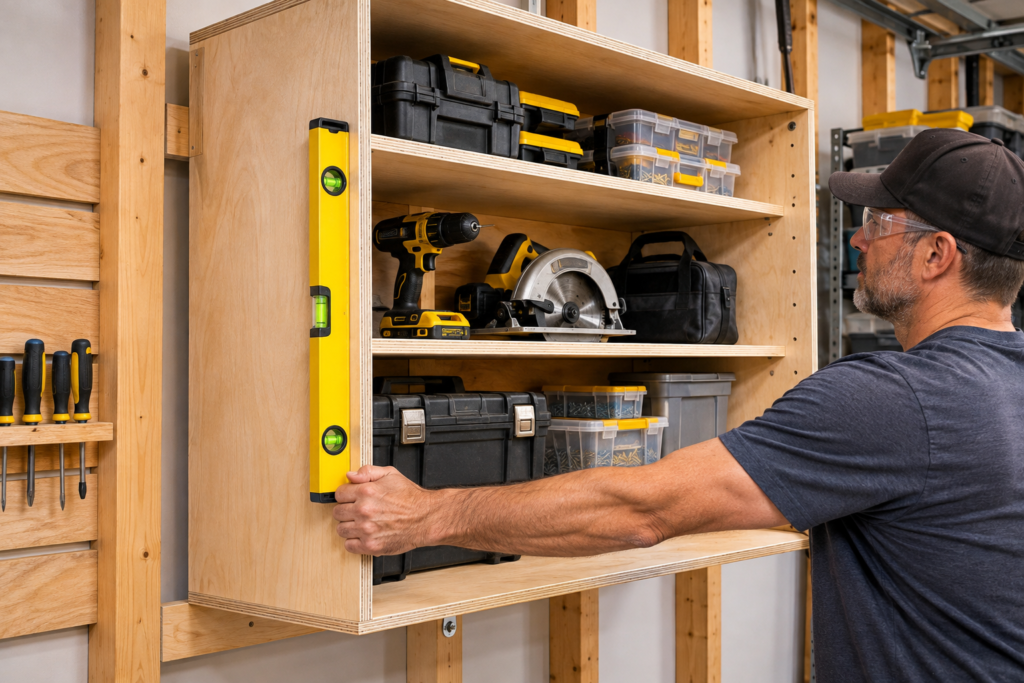
Glue a 3/4-inch spacer strip across the bottom of the cabinet back, the same thickness as the cleat. Lift the cabinet, drop it onto the wall cleat and check that it’s plumb.
Then stop it from lifting off. Drive one screw down through the top of the hanging rail into the wall cleat, or one screw through the bottom spacer into a stud. A bump from below, a ladder or a kid climbing can otherwise lift a cleat-hung cabinet straight off the wall.
When a French Cleat Is the Wrong Choice for a Cabinet
Very heavy or overhead cabinets. Large cabinets full of hardware, paint or tools may need a planned fastening layout or extra restraint. One cleat may not be enough.
Walls without studs where the cabinet goes. Add blocking or a secured structural backer board first. Don’t rely on drywall anchors alone for loaded cabinets.
Cabinets you’ll never move. If the cabinet will stay in one spot, screwing it straight into studs is simpler. A cleat mostly makes hanging easier and lets you move the cabinet later.
Choosing between a cleat wall and pegboard. See French cleat vs. pegboard before you build the whole wall.
Common Mistakes With French Cleat Storage Cabinets
❌ Mistakes that bring cabinets down
Screwing the cleat only to a 1/4-inch back. The back tears away from the box under load and the cabinet drops. Always screw into a solid hanging rail.
Using drywall anchors instead of studs. Anchors can pull out of the drywall as the cabinet pulls outward, especially on deep cabinets.
Using wall screws that are too short. Once you subtract the cleat and drywall, a 2-1/2-inch screw has only about 1-1/4 inches in the stud. The cleat can pull away from the wall.
Installing the wall cleat upside down. The cabinet slides off instead of locking into the cleat.
Skipping the bottom spacer. The cabinet tilts in at the bottom, the bevels don’t sit fully together, and the top pulls harder on the wall screws.
Loading heavy items at the front of a deep cabinet. Weight far from the wall raises the outward pull on the same screws. Keep heavy items toward the back.
FAQ
How wide should a French cleat be for a cabinet? About 3 to 3-1/2 inches of 3/4-inch plywood. A wider strip gives you more room for screws away from the thin bevel edge. All sizes are in the French cleat dimensions guide.
How much weight can a French cleat cabinet hold? There’s no single rating. It depends on the screws, the studs, the cabinet’s hanging rail, the total weight and how deep the load sits. The formula in the French cleat weight capacity guide gives a simplified estimate of the outward force, not a verified capacity. Use the combined weight of the cabinet and its contents, check your screws’ rated loads, and leave plenty of margin.
Can I hang a French cleat cabinet on drywall without studs? French cleat storage cabinets should be mounted directly into wall studs, structural blocking or a properly secured structural backer board. Avoid relying on drywall anchors alone for loaded cabinets. See wall cabinets without studs.
Do I need a bottom spacer on a French cleat cabinet? Yes, unless the cleat is recessed into the cabinet back. Without one, the cabinet tilts in at the bottom and the cleat doesn’t seat fully.
Can I use 1/2-inch plywood for French cleats on a cabinet? For small, light cabinets, yes. For loaded storage cabinets, 3/4-inch plywood gives the bevel more material and the screws more to grip.
Sources
American Wood Council, National Design Specification (NDS) for Wood Construction, for screw connection design values
McFeely’s, Cabinet Hanging Screws, for screw head and length choices when hanging cabinets on studs
Bottom Line
French cleat storage cabinets are only as strong as the two things the cleat is screwed into: a solid hanging rail in the cabinet and the studs in the wall. Use 3/4-inch plywood cut at 45° and fasten the wall cleat to every available stud with rated 3-inch screws. Base the number of screws on the fully loaded cabinet weight, add a bottom spacer, and lock the cabinet so it can’t lift off. For the full wall system, start with how to build a French cleat wall.
theplywood.com is a participant in the Amazon Services LLC Associates Program, an affiliate advertising program designed to provide a means for sites to earn advertising fees by advertising and linking to amazon.com, amazon.co.uk, amazon.ca
How to Build a French Cleat Wall: Complete DIY Guide by Admin September 15, 2026 Installing A French cleat wall is one of the simplest ways to organize tools without locking yourself into a permanent layout. Instead of attaching every shelf, rack and…