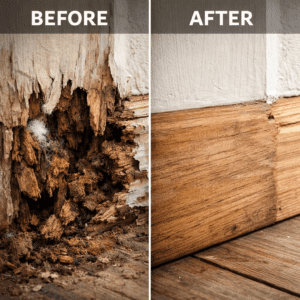
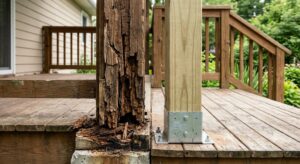
If your T1-11 siding is soft at the bottom, cracked along a groove, or peppered with woodpecker holes, the fix may well be within DIY range. You can often repair localized T1-11 damage yourself, provided the framing and weather barrier behind it remain sound. But many T1-11 siding repairs fail prematurely — not because the patch was bad, but because the person never fixed the reason the wood rotted in the first place.
This guide walks through the actual repairs (holes, cracks, rotted edges, pest damage), the materials that hold up outdoors, and the one moisture rule that decides whether your fix lasts a season or a decade.
What T1-11 Siding Actually Is (and Why It Changes the Repair)
T1-11 (also written “Texture 1-11”) is a grooved exterior siding pattern — vertical channels cut into the face, usually 4 or 8 inches apart, to mimic board-and-batten. Strictly speaking, T1-11 is a plywood product: APA’s 303 siding specification classifies it as plywood siding. That distinction matters for repair, because grooved siding sold at the lumberyard isn’t always genuine T1-11.
Here’s the part to check before you buy a single tube of filler:
Genuine plywood T1-11 — real veneer plies, made to the APA 303 plywood-siding spec. It tends to rot at the edges while the face stays relatively firm, and it takes filler and epoxy well.
Grooved OSB or engineered-wood panels sold as “T1-11” — these look similar and are commonly called T1-11 in stores, but they’re a different product made of compressed wood strands. When this type gets wet it swells, crumbles, and holds filler poorly. Once the strands break down, patching is a stopgap, not a fix.
Scratch a hidden spot (behind a downspout, low on the wall). Layered edges = plywood. A grainy, chip-like edge = an OSB-type panel. That single check tells you whether you’re repairing genuine T1-11 or a lookalike — and whether repair is even worth it.
The #1 Mistake in T1-11 Siding Repair (Fixing the Symptom, Not the Cause)
The most common — and most expensive — mistake is patching visibly damaged siding while ignoring where the water is coming from. You fill the rot, prime it, paint it, and it looks perfect. Six months later the wood behind your patch is soft again, because the leaking gutter, missing Z-flashing, or siding buried in mulch never got addressed.
A close second: caulking the vertical grooves. The grooves are decorative — they create the board-and-batten look, not a drainage system. Do not fill intact decorative grooves. Caulk only joints and the locations specified by the siding manufacturer — typically panel edges, around windows and penetrations, and trim.
Do this first: find and stop the water source before you touch a putty knife. If the wood is rotting, water is winning. A patch over a wet wall is money set on fire.
Tools and Materials for T1-11 Siding Repair
The product links in this section are Amazon affiliate links; theplywood.com may earn a commission at no extra cost to you.
You don’t need much, but the right products matter — interior fillers and cheap caulk will not survive weather cycles on an exterior wall.
For holes and cracks – Two-part, exterior-rated epoxy wood filler for structural holes and rebuilding edges — a quality exterior epoxy resists moisture and outlasts spackle outdoors, though performance varies by product. PC-Woody / Abatron-type epoxy wood filler – Exterior-grade wood filler for shallow surface dings. Exterior wood filler – Wood hardener to firm up punky, soft-but-salvageable wood before filling.
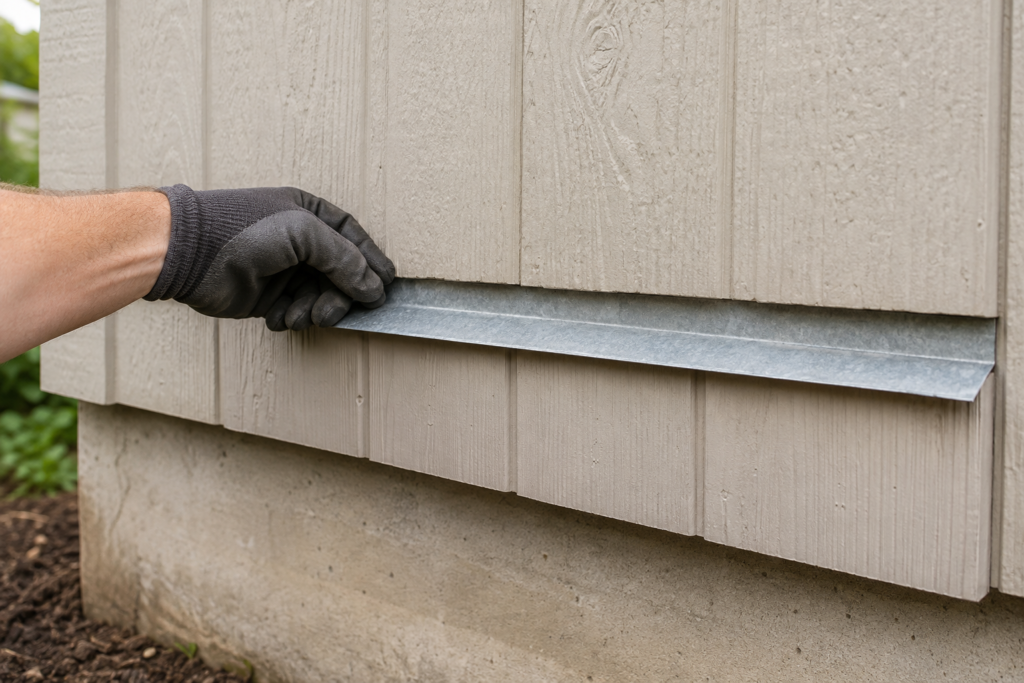
For sealing and joints – Paintable exterior siding caulk (polyurethane or high-grade acrylic) for joints and penetrations only. Exterior siding caulk – Z-flashing for any horizontal panel joint you open up. Z-flashing
For cutting out and replacing – Oscillating multi-tool or circular saw to remove damaged sections cleanly. Oscillating multi-tool – Stainless or hot-dipped galvanized ring-shank siding nails (cheap nails rust and bleed streaks). Galvanized siding nails
For finishing – A quality exterior primer and topcoat — the finish is what keeps the repair sealed, so don’t cut corners here.
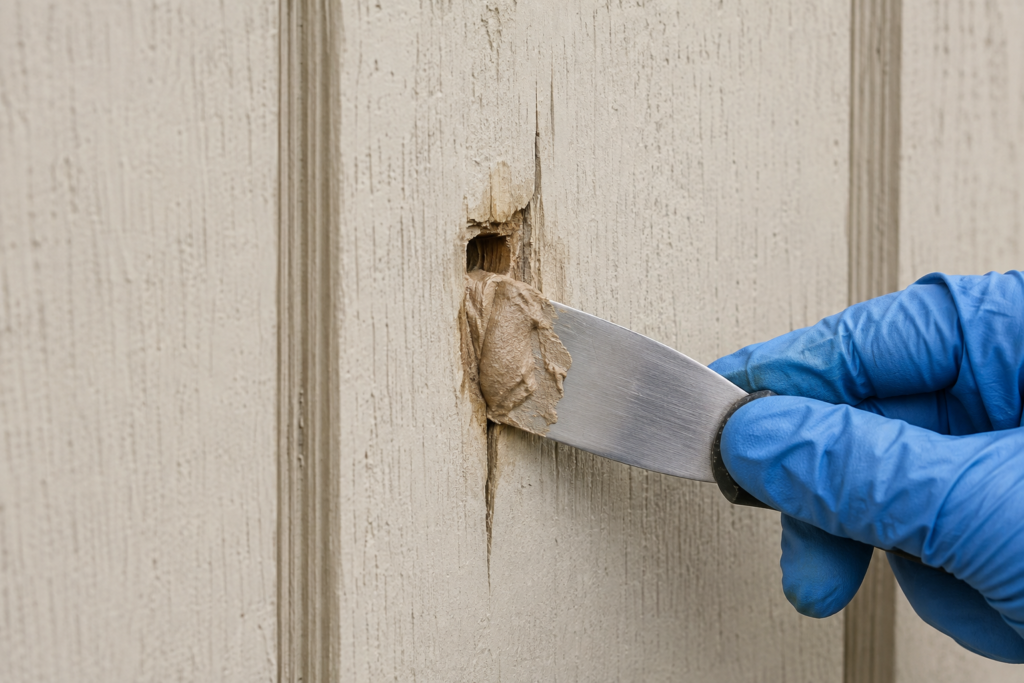
This is the most common T1-11 siding repair, and it’s genuinely beginner-friendly. Work on a dry day with a couple of dry days behind it, so the wood isn’t holding moisture you’re about to seal in.
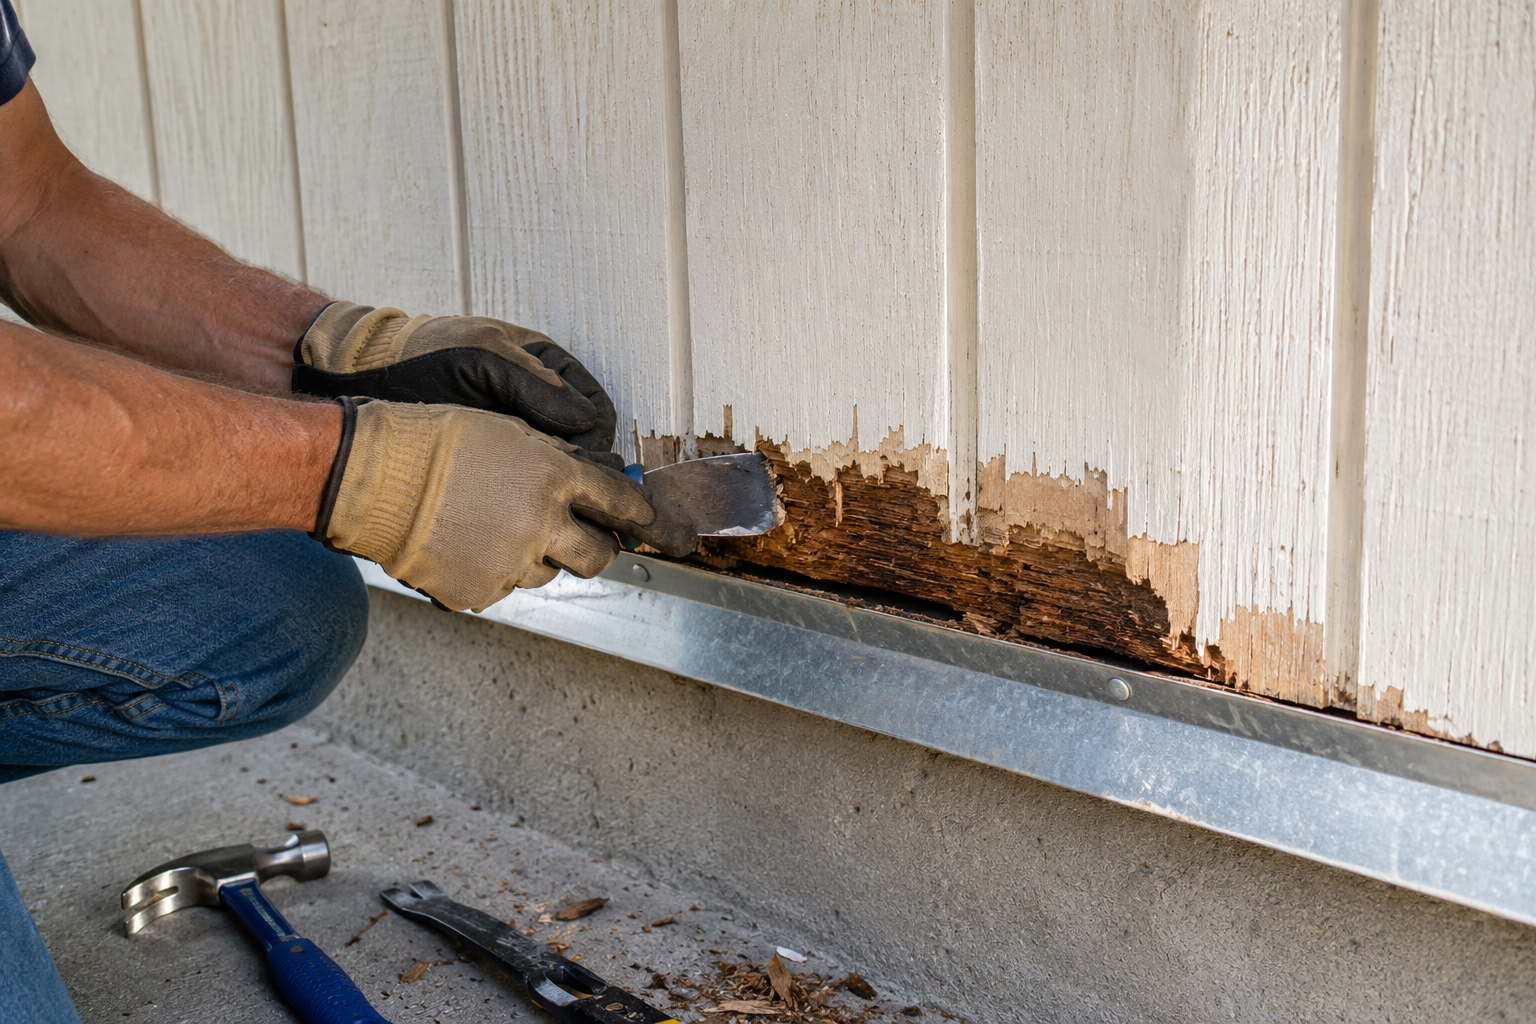
Dig out the bad material. Scrape or chisel away all loose, soft, or crumbling wood until you hit firm material. Filling over rot just spreads it.
Dry it fully. Damp wood will reject filler and rot underneath the patch. If it’s damp, wait.
Harden soft edges (if needed). Brush wood hardener into any spongy-but-intact wood and let it cure per the label.
Mix and pack the epoxy filler. For anything deeper than surface-level, use two-part epoxy. Overfill slightly so you can sand flush.
Shape it. Once tacky, press the profile back in — including re-cutting a groove line if the damage crossed one — so the patch disappears.
Sand flush after full cure, working up to a finer grit.
Prime and paint the repair and a few inches around it (more on why below).
Featured-snippet answer — What’s the best filler for T1-11 siding? A two-part, exterior-rated epoxy wood filler is a strong choice for exterior T1-11 repairs. A quality exterior epoxy resists moisture, bonds to plywood, and can be shaped to restore the panel’s grooves. Performance depends on the specific product, so choose one rated for exterior use and follow the manufacturer’s directions. Interior spackle and lightweight fillers don’t hold up outdoors.
How to Fix Rotted T1-11 Siding (Bottom Edges and Panels)
Rot almost always shows up at the bottom edge of the panel first, because that’s where end grain sits closest to splashback, mulch, and grade. Your options depend on how far it’s spread.
Repairing a rotted bottom edge
Before you cut: set the blade only deep enough to cut the siding, and avoid cutting the weather barrier, wiring, plumbing, or framing behind it.
If the rot is confined to the lower few inches: – Cut a clean horizontal line above the damage with a circular saw set to panel depth. – Remove the rotted strip, check the framing and sheathing behind it for moisture, and let everything dry. – Fit a new strip of matching-thickness siding, back-prime it (prime the hidden face before install), and install Z-flashing at the new horizontal joint so water sheds over the seam instead of into it.
Replacing a full panel
If rot has climbed past a foot, or the panel is delaminating, cut it out at the stud lines and replace the whole sheet. It’s more work but a sound panel beats chasing rot up a wall you’ll be repatching next year.
Not sure how fast the damage is actually moving? Our breakdown of how long wood rot takes to spread helps you decide between a quick patch and a full replacement — and if the rot has reached trim or fascia, rotted fascia repair covers that adjacent fix.
How to Fix Woodpecker and Pest Damage in T1-11
Woodpeckers love hollow-sounding siding, and their holes open a direct path for water. The repair is the same epoxy process above, with two additions:
Screen or fill the cavity behind the hole if it goes clear through, so filler has backing and pests can’t re-nest.
Address the why — birds often drum on siding that already has insects behind it. A hollow, papery sound when you tap can mean carpenter bees, ants, or existing rot. Fixing the food source is what stops the holes from coming back.
Sealing, Priming, and Painting (Get This Wrong and the Repair Fails)
A T1-11 siding repair isn’t finished when it’s sanded flush — it’s finished when it’s sealed. Bare filler and bare wood both wick water.
Prime every repair, including edges and any freshly cut end grain, which is the thirstiest part of the panel.
Back-prime replacement pieces before you nail them up.
Topcoat with a quality exterior paint or solid stain, then plan to recoat on schedule — the finish is your siding’s real weatherproofing.
How long you get between repaints ties directly to the panel’s overall condition; see exterior plywood lifespan for realistic timelines and what shortens them.
When to Repair vs. Replace
T1-11 siding repair is a good bet when the damage is early and localized, and a poor one when rot is widespread. Judge by the panel’s condition, not the calendar.
Situation
Typical DIY approach
Relative material cost
A few holes or cracks
Epoxy fill, sand, and paint
Low—one filler kit plus paint
Rotted bottom edge, one bay
Cut out, flash, and patch
Low to moderate—partial sheet plus flashing
One failed panel
Replace the full panel
Moderate—one panel plus fasteners and finish
Multiple rotted panels or deteriorated OSB
Re-side the wall
High—larger replacement project
Material cost only; it varies by region, panel thickness, and current pricing, and excludes labor. For more information on stopping deterioration before making repairs, see our wood rot prevention and treatment guide.
The regret people report most often: patching a wall that was already mostly gone. They spend a weekend and a stack of filler, and a year later they’re re-siding anyway — having paid twice. If more than a couple of panels are soft, price the residing job before you commit to patching.
Warning: The Moisture Rule Behind Most T1-11 Failures
This is the single most important line in the guide.
Wood siding held too close to the ground stays damp and rots — no filler survives that. Under the International Residential Code (IRC Section R317.1), untreated or non-durable wood siding within 6 inches of the earth — or within 2 inches of a paved/concrete surface exposed to weather — must be protected against decay, for example by using naturally durable or preservative-treated wood. In plain terms: below those thresholds, ordinary T1-11 is in the danger zone for rot unless it’s protected, which is exactly why bottom edges near grade fail first.
If your T1-11 is buried in mulch, sitting on a patio, or splashing off a walkway, that’s why it keeps rotting. Restore the clearance, fix the drainage, and your repair actually lasts.
The real test you can run in five minutes: 1. Probe test — press a screwdriver into suspect areas, especially low corners and around fasteners. If it sinks in with light pressure, that’s active rot, not just a stain. 2. Moisture test — a cheap pin-type moisture meter reading well above the surrounding dry siding means water is still getting in. Sealing over a wet reading traps the problem.
Do both before you fill anything. A dry, firm reading means you’re repairing. A soft, wet reading means you’re fixing a leak first.
Frequently Asked Questions
Can you repair T1-11 siding instead of replacing it? Yes — holes, cracks, and localized bottom-edge rot are very repairable with epoxy filler or a partial panel patch, as long as you stop the moisture source first and the framing behind the siding is sound. Replacement makes more sense once multiple panels are soft or an OSB-type panel has started breaking down.
What is the best filler for T1-11 siding? A two-part, exterior-rated epoxy wood filler. A quality exterior epoxy resists moisture and bonds well to plywood, and it can be shaped to restore the panel’s grooves. Interior spackle and lightweight fillers don’t hold up outdoors. Performance varies by product, so check that it’s rated for exterior use.
Should you caulk the grooves in T1-11 siding? No. The vertical grooves are decorative — they create the board-and-batten appearance, not a drainage channel. Do not fill intact decorative grooves; caulk only joints and the locations your siding manufacturer specifies, such as panel edges, trim, windows, and penetrations.
Why does T1-11 keep rotting at the bottom? Because the bottom edge is end grain sitting closest to splashback and grade. Below about 6 inches from the earth (or 2 inches from pavement), the IRC treats untreated wood as needing decay protection — those thresholds mark where ordinary siding is most at risk, which is why bottom edges near grade rot first.
Do you have to prime T1-11 after repairing it? Yes. Bare filler and bare wood both absorb water. Prime every repair — including cut edges and end grain — and topcoat with a quality exterior paint or solid stain to seal it.
Is T1-11 plywood or OSB? Strictly speaking, T1-11 is a plywood siding pattern — APA’s 303 specification classifies it as plywood siding. Grooved OSB and engineered-wood panels are widely sold and described as “T1-11,” but they’re a different product. Scratch a hidden edge — layered plies mean plywood, a chip-like grainy edge means an OSB-type panel, which is far harder to repair once wet.
How to Stop Wood Rot Permanently (7-Step Fix) by Admin June 24, 2026 DIY I'll be honest with you. The first time I tried to permanently stop wood rot, I didn't actually stop it. I painted over it. Eighteen…