Selecting an incorrect roof sheathing thickness is an expensive, high-risk error. Thin sheathing sags under heavy structural loads, violates local building codes, and strips out fasteners during windstorms. Conversely, over-specifying thickness adds unnecessary expense to your lumber budget.
Whether you are dealing with traditional asphalt shingles, heavy concrete clay tiles, or wide rafter spacing, matching the appropriate plywood sheet gauge to your home’s structural framework helps prevent sagging and code violations.
Roof Sheathing Selection Summary
The tables below provide a quick-reference guide to standard wood panel thicknesses for framing dimensions and specific roofing materials.
Span and Framing Requirements
Roof Framing Spacing / Condition
Minimum Code Thickness
Recommended Thickness
Primary Application
16″ O.C. Framing
7/16 inch
1/2 inch
Standard residential shingles
24″ O.C. Framing
15/32 inch
5/8 inch
Modern truss systems & architectural shingles
Heavy Tile / Slate Roofs
5/8 inch
3/4 inch
Clay, concrete, or heavy natural slate tiles
High Snow Load Areas
5/8 inch
3/4 inch
Mountain regions & high-alpine climates
Material Specific Recommendations
Roof Type
Recommended Thickness
Asphalt Shingles
1/2″
Metal Roofing
1/2″–5/8″
Architectural Shingles
5/8″
Clay Tile
5/8″–3/4″
Slate
3/4″
High Snow Areas
5/8″–3/4″
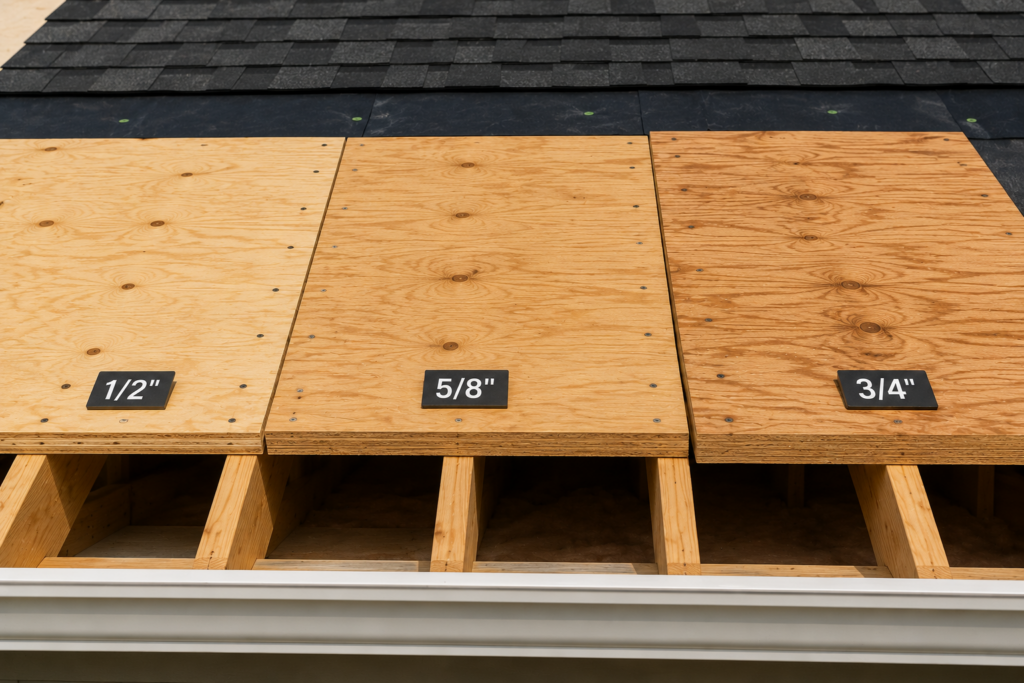
What Thickness Plywood Is Used on Most Houses?
The vast majority of modern homes use 15/32-inch (commonly called 1/2-inch) plywood or 7/16-inch OSB. Homes built with 24-inch truss spacing, situated in heavy snow load zones, or finished with premium heavyweight roofing systems routinely upgrade to 5/8-inch sheathing to ensure structural integrity.
To see how these structural requirements compare to other areas of residential construction, read our comprehensive plywood thickness guide.
Why Getting Your Roof Sheathing Thickness Right Matters
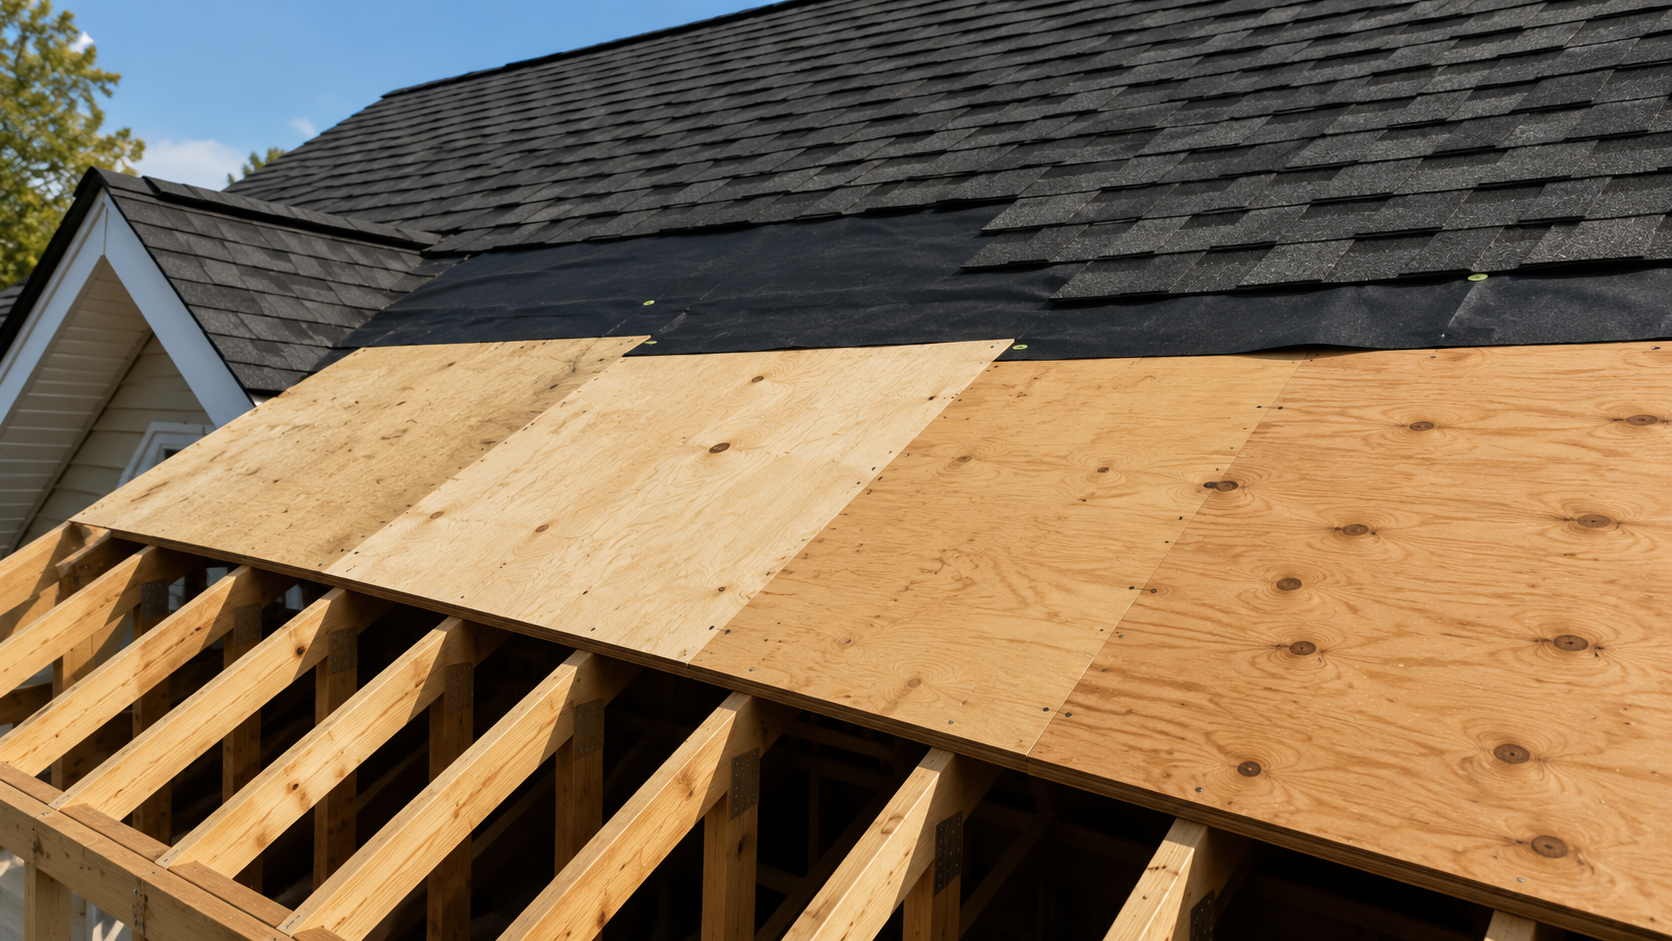
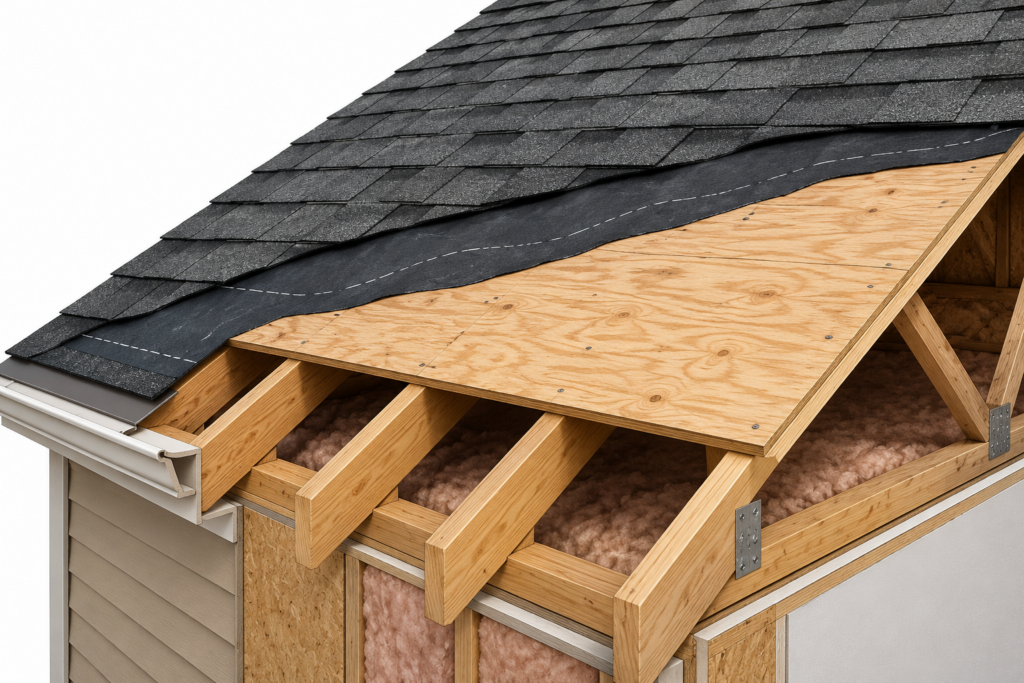
Your roof deck functions as the structural bridge between your home’s framing rafters and the exterior weatherproofing. If the deck is weak, the entire roof assembly fails.
1. Structural Load Deflection
Every roof experiences structural strain from dead loads (the permanent weight of the roofing materials) and live loads (temporary environmental loads such as snow, ice, workers, and tools). If you use a thin panel over a wide 24-inch rafter span, the wood bends under its own weight between the trusses. This deflection ruins the flat profile of your roof line, warps shingles, and creates pockets where water pools. You can check the specific limits of various panel sizes in our guide on plywood weight capacity.
2. Fastener Holding Power and Wind Uplift Resistance
Roofing nails must fully penetrate the sheathing to properly grip the structure. Thicker panels provide greater wood-fiber contact for the nail shafts. In high-wind areas or coastal storm zones, inadequate deck thickness allows wind pressure to pull the shingles—or the entire plywood panel—off the rafters.
3. Long-Term Moisture Resilience
Minor attic condensation or small exterior leaks weaken wood fibers over time. A thicker sheet of exterior plywood can absorb small amounts of ambient moisture and dry out completely without immediately losing its structural shape. Thin panels warp and delaminate much faster when exposed to moisture.
International Residential Code (IRC) & Roofing Standards
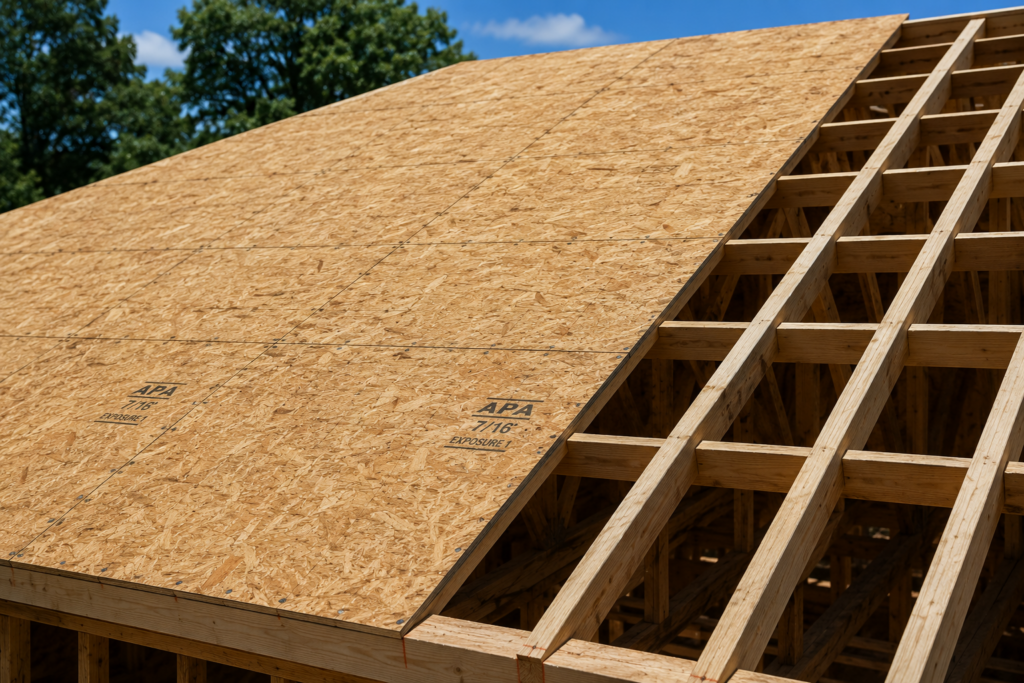
Under the International Residential Code (IRC), roof sheathing requirements depend on span, loading conditions, and local amendments. The IRC mandates that any wood structural panels used for roofing must carry an APA (Engineered Wood Association) trademark stamp, which establishes their span rating.
For example, a panel stamped with a 24/16 span rating means it can safely span up to 24 inches when used as roof sheathing, or 16 inches when used as subflooring. The IRC sets strict limits on how much a panel can flex under a standard live load. Skipping these guidelines means your project will fail the building inspection, forcing an expensive teardown. If your roofline includes exposed eaves or unique overhangs, you should also verify whether building codes require pressure-treated plywood.
Is 7/16 OSB Thick Enough for Roofing?
Under standard building codes, 7/16-inch OSB is commonly used as the minimum roof sheathing thickness in many jurisdictions for roofs framed up to 24 inches on-center, though local code requirements may differ. However, minimum code compliance does not always equate to optimal long-term performance.
The Problem with 7/16 OSB over 24″ Spans
When stepping onto a roof decked with 7/16-inch OSB over wide 24-inch rafter gaps, workers often notice structural flexing or “bounce” underfoot. This thin profile is highly susceptible to edge-swelling if moisture gets past the underlayment.
Over multiple seasons of fluctuating humidity, a minimal 7/16-inch thickness can cause visible dipping between rafters. Upgrading to 1/2-inch plywood or 5/8-inch OSB adds significant rigidity and prevents future sagging.
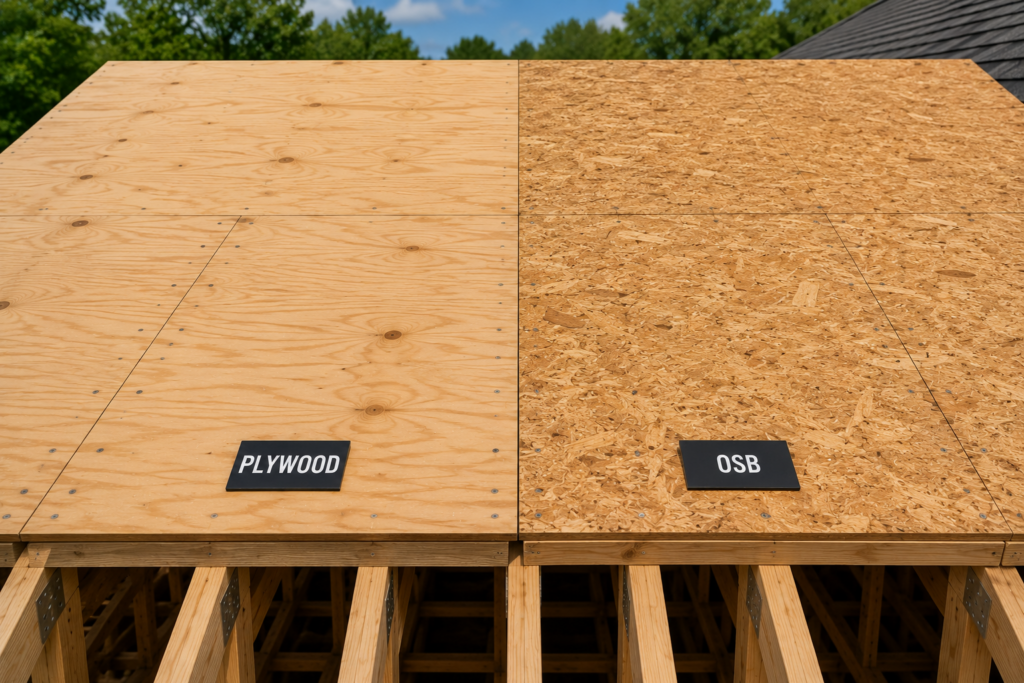
Comparing Plywood and OSB for Roof Decks
When choosing between plywood and OSB, see our complete OSB vs Plywood guide to understand how they differ in manufacturing and performance. Both options are approved by the APA, but they perform differently in real-world roofing environments.
CDX Exterior Plywood
CDX panels are constructed by layering real wood veneers in alternating cross-grain directions and bonding them with waterproof exterior resins. To better understand how these face veneers are categorized, review our article on plywood grades.
Pros: Excellent cross-directional strength, high nail retention values, and fast drying capability. If it gets wet during a storm, it swells slightly but dries back down to its original thickness without losing structural integrity. For a deeper look at veneer classifications and glue ratings, read our guide on CDX plywood.
Cons: More expensive than composite alternatives; sheets can occasionally contain hidden inner core voids.
Oriented Strand Board (OSB)
OSB is manufactured by packing small, flat rectangular wood strands in cross-directional layers, then saturating them with wax and synthetic adhesive matrices under intense hydraulic heat and pressure.
Pros: Extremely flat, completely solid with no knots or interior voids, and less expensive per sheet than plywood.
Cons: If moisture reaches the raw OSB, the edges absorb water like sponges. This causes permanent swelling and edge delamination that does not shrink back down when dried, which can ruin smooth shingle profiles.
Step-by-Step Selection Guide
Follow this logical path to find the right panel specification for your project.
Step 1: Check Local Codes First
Always contact your local building department or check your local code books before starting work. Local codes establish the binding minimum requirements for your specific climate zone.
Step 2: Measure Structural Rafter Centerlines
Determine the exact distance from the center of one roof rafter to the center of the next.
If the span measures 16 inches, you are clear to use standard 1/2-inch plywood panels.
If the span measures 24 inches, buy 5/8-inch panels to maintain structural rigidity.
To compare these roofing layouts with floor joist requirements, read our analysis of subfloor thickness.
Step 3: Match Material Weights
Review the manufacturer’s weight ratings for your chosen outer roof layer. If you are switching from lightweight asphalt to premium concrete tile, you must upgrade your deck to 5/8-inch or 3/4-inch plywood to prevent structural failure.
Step 4: Add Environmental Upgrades
If your area experiences high winds or regular heavy winter storms, upgrade your deck thickness by 1/8 inch past the absolute bare minimum code requirements. This small investment provides lasting protection for your home.
Real-World Construction Field Examples
Reviewing actual projects helps illustrate how these rules apply in the field. Here are three project examples that show how proper thickness choices keep homes safe.
Project 1: Standard Suburban Roof Overhaul
Structure: Single-family home with an attached two-car garage. Rafters spaced 16 inches O.C.
Material Goal: Standard architectural laminated asphalt shingles.
The Plan: The team used standard 15/32-inch CDX plywood sheets. Because the framing was spaced tight at 16 inches, these standard sheets provided a strong foundation. The installation remained flat, easily handled workers’ foot traffic, and kept material costs low.
Project 2: High Alpine Peak Mountain Build
Structure: High-slope mountain home with custom timber framing. Trusses spaced 24 inches O.C.
Material Goal: Heavy designer synthetic composite slate tiles.
The Plan: To handle the wide 24-inch truss spacing and heavy winter snow loads, the engineer specified 19/32-inch (5/8-inch) CDX plywood panels paired with specialized H-clips centered between each truss. The added thickness prevents the panels from dipping under heavy snow packs, ensuring the roof remains stable through rough winters.
Project 3: Low-Slope Coastal Home Extension
Structure: Modern home extension featuring a flat, low-slope backyard roof deck. Rafters spaced 16 inches O.C.
Material Goal: Multi-ply modified bitumen membrane system.
The Plan: Because low-slope sections shed water slowly and are vulnerable to intense coastal wind uplift, the builders avoided standard thin panels. Instead, they installed thick 23/32-inch (3/4-inch) tongue-and-groove exterior plywood panels. This created an exceptionally rigid deck that eliminates structural bounce, withstands heavy downpours, and provides maximum resistance against high winds. If your project faces extreme marine-level humidity, consider reading when to use marine-grade plywood.
Proper Roof Sheathing Installation Practices
Even the highest-grade plywood will warp or fail if installed incorrectly. Ensure your crew follows these essential structural guidelines.
The 1/8-Inch Expansion Gap
Never butt plywood panels tightly against one another. Wood expands and contracts as ambient humidity levels change. Leave a mandatory 1/8-inch gap at all panel edge junctions and end seams. If you push sheets tight against each other, the wood will buckle along the seams as it absorbs moisture, creating distinct ridges across your roofline. Proper spacing is equally critical when addressing the home’s exterior walls; see our guide on siding types for more on envelope integration.
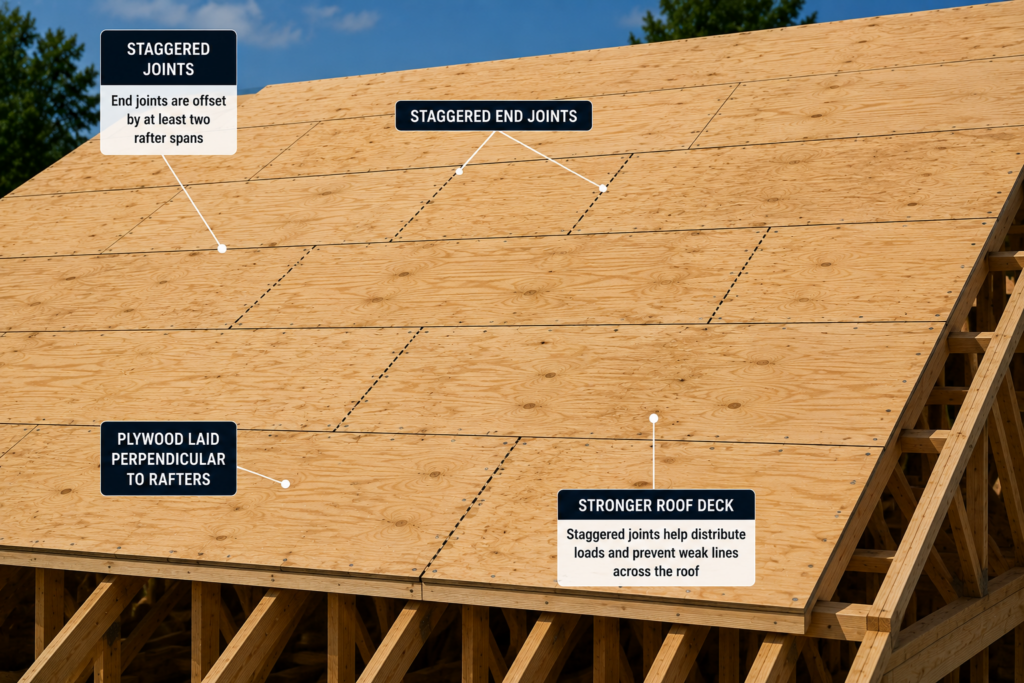
Staggered Joint Configurations
Always lay plywood panels horizontally across the rafters in a brick-lay or offset grid pattern. Your vertical end-seam joints must be staggered by at least two rafter spans from the previous row. Staggering prevents long, continuous weak lines and helps distribute structural loads evenly across the framing.
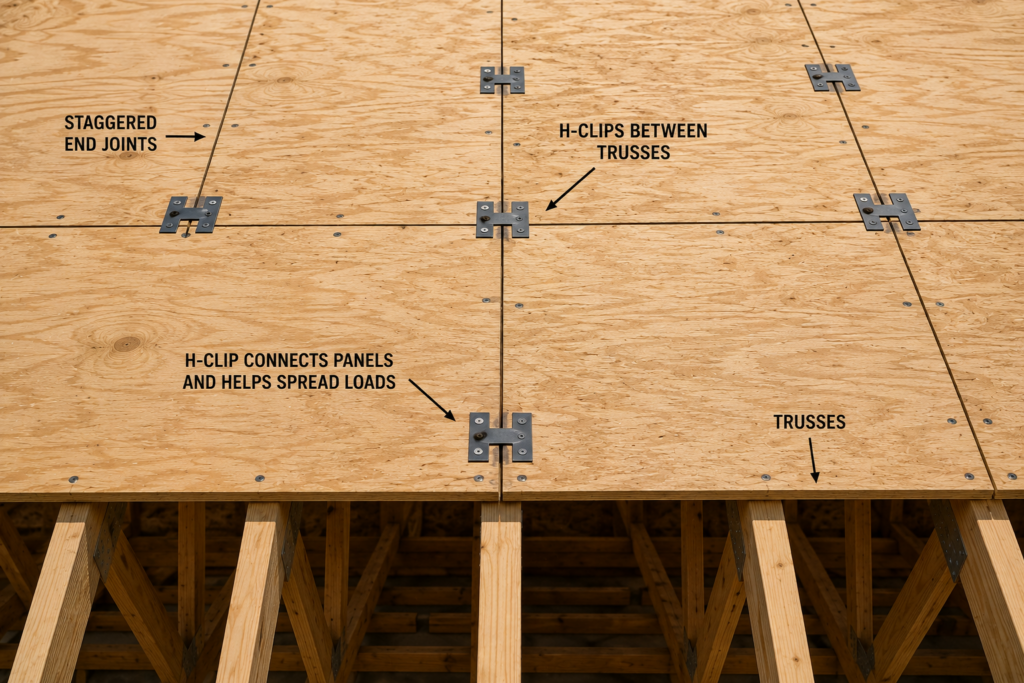
Structural H-Clip Deployment
When using 1/2-inch or 5/8-inch panels over wider spans, insert metal H-clips between the panels at the midpoint between rafters. These small clips mechanically lock the edges of adjacent sheets together, allowing them to share weight loads and eliminating uneven flexing between panels. For more on this configuration, read our breakdown of H-clips spacing.
Project Cost Estimates and Financial Planning
Plywood and OSB costs vary widely by region, season, and general lumber market conditions. Because commodity pricing changes quickly, it is most reliable to evaluate costs relative to panel grading.
Upgrading from a code-minimum 1/2-inch panel to a premium 5/8-inch CDX sheet typically increases your raw material sheet cost by 15% to 30%. Moving up further to heavy-duty 3/4-inch tongue-and-groove exterior panels generally runs 40% to 60% more than standard 1/2-inch stock.
While thicker wood raises initial material costs, it offers excellent long-term financial value by preventing panel warping, extending shingle life, and reducing structural maintenance costs over the roof’s lifespan.
Recommended Tools for Roof Sheathing Installation
Investing in professional-grade tools ensures safety, speed, and clean cuts when working with thick structural sheathing panels.
Framing Nailer: For securing heavy panels quickly and flush with the framing, a reliable DeWalt Framing Nailer speeds up installation and ensures code-compliant nail depth.
Circular Saw: To make clean, accurate cuts across thick panels, use a high-torque Makita Cordless Circular Saw equipped with a construction-grade carbide blade.
Safety Harness: Working on roof pitches poses a high risk of falls. Always use an OSHA-compliant Roof King Safety Harness Kit anchor setup before hauling sheathing onto the roof deck.
Plywood Carrier: Manually lifting heavy 5/8-inch or 3/4-inch sheets can cause muscle strain. A specialized Gorilla Gripper Panel Carrier allows a single worker to safely lift and balance full panels.
Frequently Asked Questions
Can I use 3/8-inch plywood for a residential house roof?
No. Modern residential building codes do not allow 3/8-inch plywood for living spaces because it flexes easily and cannot safely support heavy loads or foot traffic. Limit 3/8-inch panels to small tool sheds or non-residential outbuildings with tight 12-inch rafter spacing.
What happens if a contractor uses roof sheathing that is too thin?
If the sheathing is too thin, the panels will sag between the rafters over time. This structural sagging damages the shingle layer, creates low spots where water pools, and increases the risk of leaks, leading to an expensive full roof replacement down the road.
Are H-clips required for all residential roof installations?
H-clips are typically required by building codes when panels span the maximum distance allowed by their APA rating (such as 1/2-inch plywood over 24-inch rafter spacing). Even when not strictly mandated by code, using H-clips is an excellent best practice that keeps panel edges aligned and prevents uneven flexing.
How do I read the APA stamps printed on roofing plywood?
The structural stamp includes a fraction like 32/16. The first number indicates the maximum allowed span in inches when the panel is used for roof sheathing (32 inches). The second number indicates the maximum allowed span when used as a subfloor deck (16 inches).
Can I mix plywood and OSB sheets on the same roof deck?
While it is structurally possible if both materials share identical nominal thicknesses, it is generally not recommended. OSB and plywood expand and contract at different rates when exposed to temperature and moisture fluctuations, which can cause minor ridges along your roofline.
Does a metal roof require a thicker plywood base than asphalt shingles?
Standard lightweight metal panels can be installed over code-minimum 1/2-inch plywood. However, heavy standing-seam metal systems or structural tile-look panels perform best over 5/8-inch or 3/4-inch sheathing to ensure maximum fastener holding power and long-term wind resistance.
Final Thoughts
For most homes, 1/2-inch plywood or 7/16-inch OSB is sufficient for roofs framed 16 inches on center. Homes with 24-inch truss spacing, heavy roofing materials, or high snow loads benefit from upgrading to 5/8-inch sheathing. When in doubt, always verify local code requirements and choose the thickest panel your budget reasonably allows.
Related Posts:
Triple 2 x 10 Beam Span by Admin August 5, 2023 Installing Wood-framed buildings use standard dimensional lumber as the load-carrying members, divided into two categories: posts, which are vertical elements holding up the structure's weight and…