The attic knee wall is a great addition to any home with an attic. The real question is whether or not that attic space is usable. Today’s homes are mostly made with trusses, as that’s a more cost-effective way of adding roof insulation and providing the roof with the support it needs.
Trusses also allow for large open spaces on the attic floor and in the rooms below, as the truss can be designed so that it doesn’t need any supporting walls other than the home’s perimeter wall.
But those trusses make it hard to use conditioned air flow in space in the attic for much more, as their webbing gets in the way of building a room in the attic or even using conditioned space for storage space. That’s not to say it’s impossible to use conditioned air flow in an attic ceiling for space, as many people have successfully converted a truss attic to storage.
On the roof deck of a house, on the other hand, turning a truss and attic space into another living space is nearly impossible without remaking the trusses into rafters.
Structurally, that can be problematic for several reasons, most especially because the material for the truss members that would have to form the rafter sloped ceiling and the ceilingjoist for the floor below usually isn’t made of material with a significant enough cross-section to support the weight. Attempting to shortcut the building code and use that material will result in sagging roofs and ceilings.
Older homes don’t typically have this problem; they are built with rafters rather than trusses. This leaves a lot of open space, readily converted to living space or storage.
It takes a fair amount of work to make that conversion, adding flooring, knee walls, insulation, partitions, a staircase, and possibly even a bathroom, but it can be worth it, increasing the home’s value.
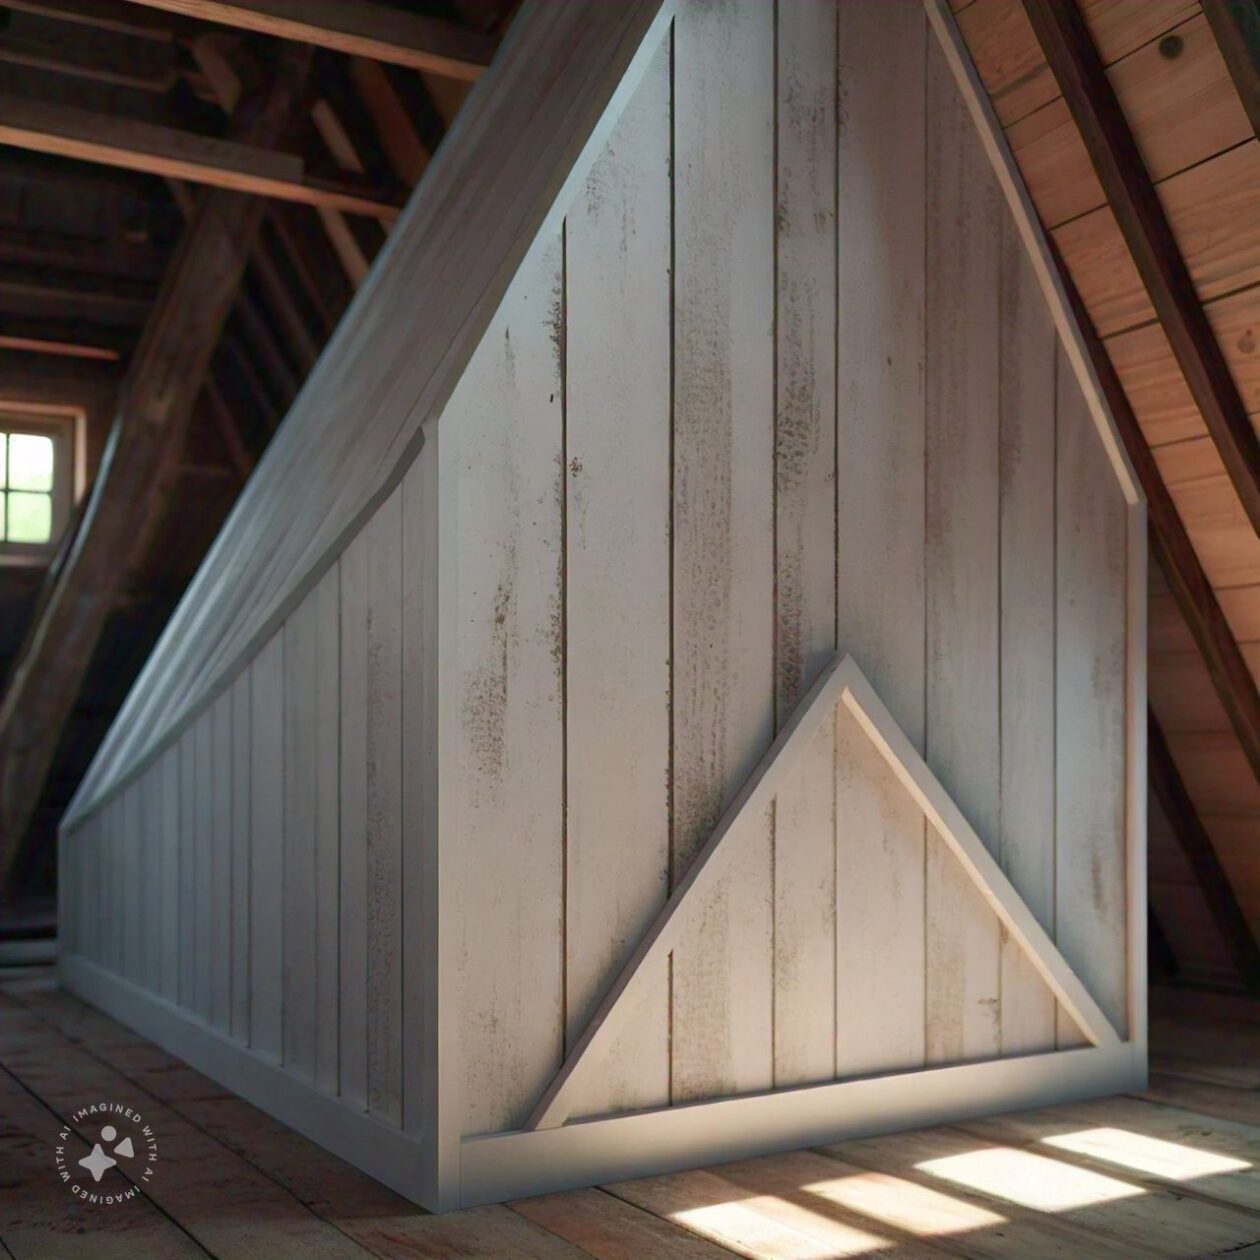
One of the first steps in that process is to install some knee wall insulation and walls to hide the insulation levels and eaves of the home. Since the ceiling (roof) of the house wraps the attic is sloping, the entire attic area can’t be used as living space.
Building code requires at least half the attic floor space with a ceiling height of 7 feet or more. Trying to finish the attic area to the eaves doesn’t make sense. It is better to block off some of the areas with the knee wall insulation and walls and have more usable space. If desired, the attic area blocked off with insulation can be used for storage.
While it makes sense that some people use the terms “pony attic knee wall” and “cripple attic knee wall” interchangeably with “knew wall,” there are differences. A pony wall is a short exterior wall, much like a knee wall, but it doesn’t extend to the roof or ceiling, whereas a knee wall does.
Cripple and knee walls are a special kind of short exterior wall built on top of an existing wall or foundation to support a house and create a crawl space.
Removing Knee Walls
Before building the new attic drywall knee walls, removing existing ones and adding insulation throughout may be necessary to get enough insulation to make the attic living space.
It’s not uncommon for people to start out finishing an attic knee wall but never finish the whole drywall project. If that’s the case, removing the attic drywall knee walls that are not installed correctly and adding insulation throughout might be advisable.
The number one way knee walls are installed incorrectly is to build them without an entire floor joist to the top plate. People do this without understanding the purpose of those floor joist plates.
They incorrectly think they must scab 2″ x 4″ from the bottom plate and ceiling joists to the rafters and cover them with sheetrock to make a wall. But without the two-floor joists and top plates, there’s nothing to attach the drywall to at the top and bottom of the wall, leaving the wall susceptible to cracking at the joints.
Before removing any knee wall, verify that it is not load-bearing. The easiest way to determine this is to see if a wall is directly below the knee wall in the floor below. If there is, that wall is probably load-bearing, making the knee wall load-bearing.
It should not be removed unless it is done so to replace it. In that case, temporary support for the rafters should be installed before removing the knee wall.
Some Design Considerations to Consider
While knee walls and insulation material are necessary for constructing an attic living space, the empty air space behind that wall-blown insulation material doesn’t have to be wasted.
Even though it can’t be used as living space, it is still valuable for storage. All that’s needed is access through all the insulation and knee wall material into that empty air space in the eaves.
Considering that the wall studs will probably be 16″ apart, it’s easy to add indoors between any two pairs of studs, creating a cabinet.
For long walls, this should be done every 4 to 5 studs apart, with the end ones about two studs away from the end of a short vertical wall of the room. Any further than that, it becomes difficult to access the things stored farther from the doors.
The doors can be made of plywood or can be ordered from any company that makes cabinet walls. Finish out the door opening with 1″ x 4″ s over the sheetrock, and seal it with either more 1″ x 4″ s or casing on the drywall face to seal air leakage from the frame and the air in the opening.
It’s also a good idea to make a “plug” out of several layers of rigid foam insulation and place it in the opening before the door is closed.
Otherwise, air leakage from the air leaks, and that doorway becomes a place for heat to escape in the wintertime and heat to get into the attic room in the summer.
Building a Knee Wall
Knee walls can be built at any height, but they are usually 36 to 42 inches high. This provides enough height for knee walls to make the space against the wall usable for furniture and the placement of other items, even if it is not high enough to stand there.
While attic knee walls aren’t customarily considered structural, adding them to an older home’s attic can help support the rafters and keep them from sagging. However, if the knee wall will be used for that purpose, it is essential to ensure adequate support for the knee wall itself.
The roof’s weight, especially with a snow load, can push down on the knee wall, transferring that weight to the room’s ceiling below and causing that ceiling to sag. The knee wall can be built in place, but that requires toe-nailing the roof studs to the house and exterior walls, which is considerably harder unless one has a pneumatic framing nailer to use. Without that, it is best to do what most carpenters do for any wall: build it flat on the floor and then whip it up into place.
It’s easier to finish the whole attic space if the plans are laid out on the floor using a tape measure, pencil, and chalk line. Seeing it laid out can often reveal potential problems that weren’t obvious when the plans were made. The layout also makes it easier to set the walls in place when the time comes.
Before building anything, it’s best to cut a template board. This will accurately measure the roof pitch angle, allowing the studs and top plate to be cut to fit correctly together. To make this template board, start with a 2″ x 4″ section, just a few inches longer than the desired knee wall and ceiling height.
Set it in place, with one end on the floor at the line where the knee wall will be located, and allow the top end to sit alongside one of the rafters. Plumb the 2″ x 4″ and then mark the edge of the rafter on the side of the board, double-checking to ensure the board is plump at least twice.
For an older home, it’s a good idea to take that template board and plumb it up next to several other rafters along that same wall, with the base of the template at the marked line for that wall. Rafters can sag over time, and it is essential to know if there is any sag in the roof before building the wall.
If there is a sag, it’s a good idea to measure how much change is at each rafter, noting them down for the necessary adjustment to the cut lengths of each stud.
To finish the pattern board, lay a framing square or a 2″ x 4″ scrap block against the line scribed on the board and make another line to indicate the thickness of the top and bottom plates. Do the same at the top floor, bottom plate, and end of the template.
Then, cut the template at both of these new lines, creating a board the exact length of the studs used to build the knee wall.
When building an attic insulation knee wall, it’s a good idea to match the studs in the attic insulation knee wall up with the existing attic rafter. That will make it easier to hang insulation and finish sheetrock. However, older homes may not have attic rafters every 16″ in the roof and center, so be sure to measure the rafters in the attic.
Cut the roof studs to length based on the template. If the roof is sagging and different-length studs will be needed, cut them individually to length, marking them to identify what order they are installed in. Then, use the template to set up a circular or table saw to rip the top plate.
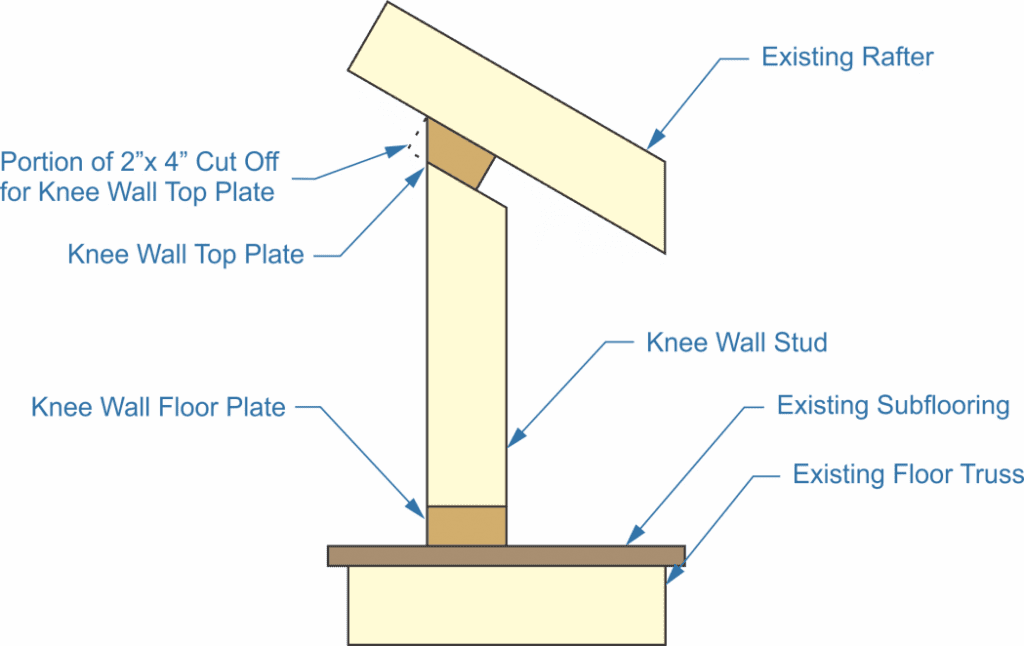
It needs the same angle cut on it so that when the wall is built, the edge of the top plate will line up with the studs, providing a flat surface for the sheetrock to mount to, as shown in the diagram below.
Attic knee wall
Assemble the wall on the floor and nail it together, just like any other wall. Note in the diagram above that the top plate does not go to the full depth of the studs once it has been cut off at an angle. This is typical, so don’t be concerned about it. Even so, two nails should be used to join the holes in the top plate to the holes in the studs.
With the wall’s framing built, it must only be tilted up and set in place. Nail it to the floor joists and the rafters, which will now serve as the ceiling and floor joists. I’d recommend nailing the floor plate first, then the top of the attic floor plate. Be sure to nail through the existing subfloor and into the floor joists from below, not just into the flooring.
Since the drywall studs are aligned with the rafters, toe-nail them will probably be necessary. With the floor joist and bottom of the second-floor plate being nailed in place first, toe-nailing the attic knee-top plate will be easy, as it will be possible to go through the cut face of the 2″ x 4″, and the hammer blows will not push the wall out of place.
Finishing Out the Knee Wall
With the knee walls installed and any other framing completed, the next step is installing the electrical outlet wiring. According to the US National Electrical Code, electrical outlets must be installed every six feet in the home’s living areas.
They should be 18″ off the floor. At this time, mount electrical boxes to the studs of the exterior wall and run the wire between them, trailing off to where it will connect the house to the rest of the house and its wiring.
All attic and rafter walls must be insulated, as they typically aren’t protected. Usually, only the first floor of the attic is insulated, helping heat the air and keep heat in the living area.
Since this is a new living area, it must also be insulated and protected. Fiberglass batts, a rigid foam board, spray foam insulation panels, or spray-in foam can be used for insulation.
Install drywall on the interior side of the roof and walls, starting at the highest point of the ceiling and working down from there. By starting from the top, drywall pieces installed lower down can support and seal the edges of the ceiling pieces, helping to keep them in place.
Tape, finish, texture, and paint the knee walls and drywall, as well as the insulation levels and the rest of the attic room’s exterior walls.
Related Posts:
How to Tell If a Wall is Load Bearing by Amy Reed February 28, 2023 DIY Structural walls hold buildings upright and prevent the walls, flooring, and roof from collapsing in on themselves. Determining which walls in your property are load…
Installing Garage Wall Cabinets: A Complete Guide by Amy Reed February 28, 2023 Installing Installing garage wall cabinets is a great way to free up floor space, create extra storage, and boost the aesthetics of your garage. In some…
How to Frame a Basement Wall by Admin June 17, 2023 Installing Average home ownership today is a mere eight years. That's up, as in the decade from 2000 to 2009, it was only four years. According…