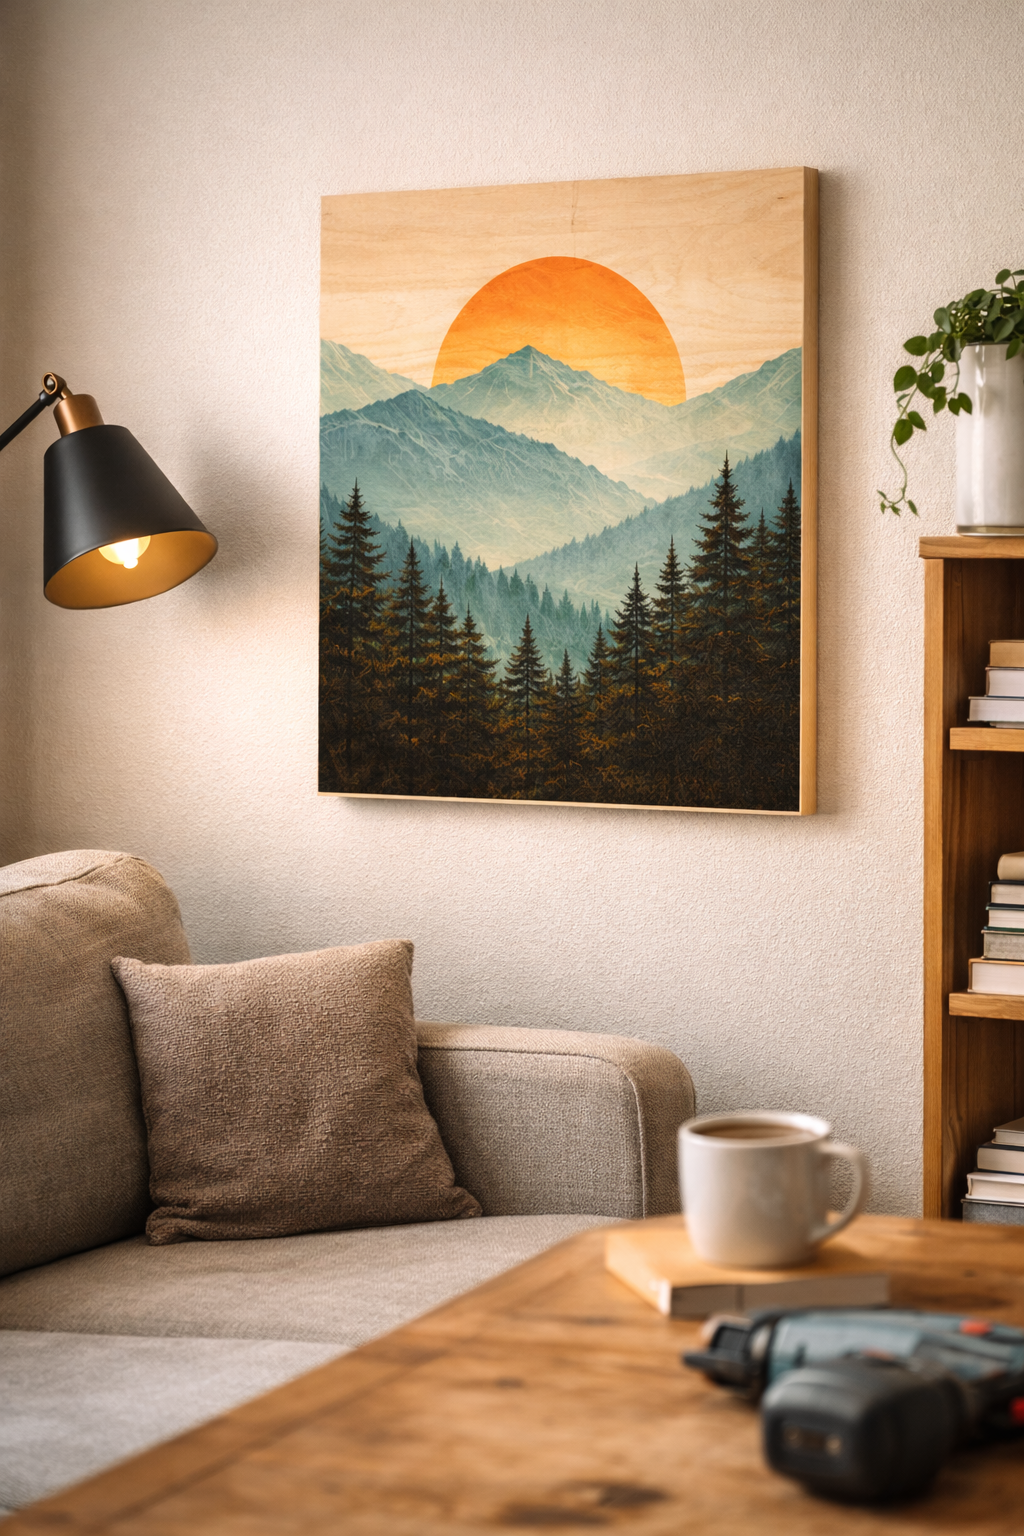
A wooden poster is one of those upgrades that seems small, but once you do it, you don’t go back. It turns regular artwork into something that feels solid — like it belongs there — instead of looking like a temporary sheet of paper taped to a wall. Paper posters bend, curl at the corners, fade, and somehow always look messy unless they’re behind an expensive frame. Mounting the art to wood skips all of that and just looks clean from day one.
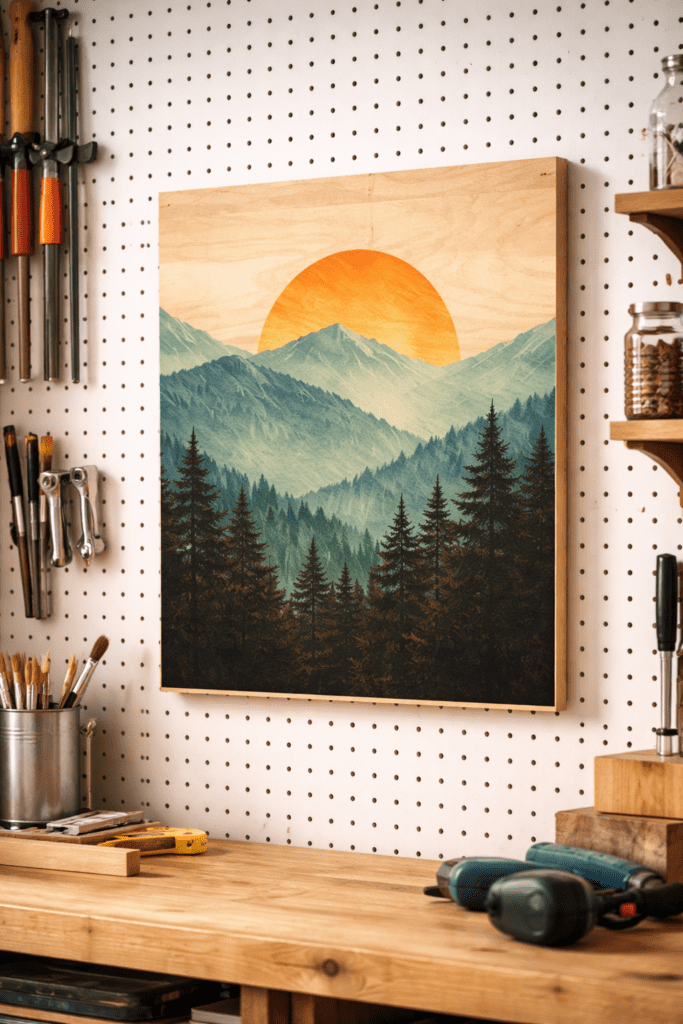
I didn’t start making wooden posters because I was trying to be crafty. I started because my workshop kept destroying normal prints. The air gets humid, dust is always floating around, and at some point, a board or tool bumps into the wall. Every time I put up a paper poster, it would look rough after a while — edges lifting, little dents, wrinkles. I got tired of replacing the same artwork over and over.
So I tried sticking one to a scrap piece of plywood.
That was it. Problem solved.
The print stayed flat, didn’t tear, and handled the humidity well, and I didn’t need to mess with frames or glass. It looked more like real décor and less like something I pinned up in a hurry.
In this guide, I’ll walk you through how to make a wooden poster step by step — choosing the right wood, mounting the artwork without bubbles or wrinkles, sealing it so it holds up, and hanging it in a way that doesn’t wreck your walls.
You don’t need specialty gear.
You don’t need resin or fancy finishes.
You definitely don’t need a CNC.
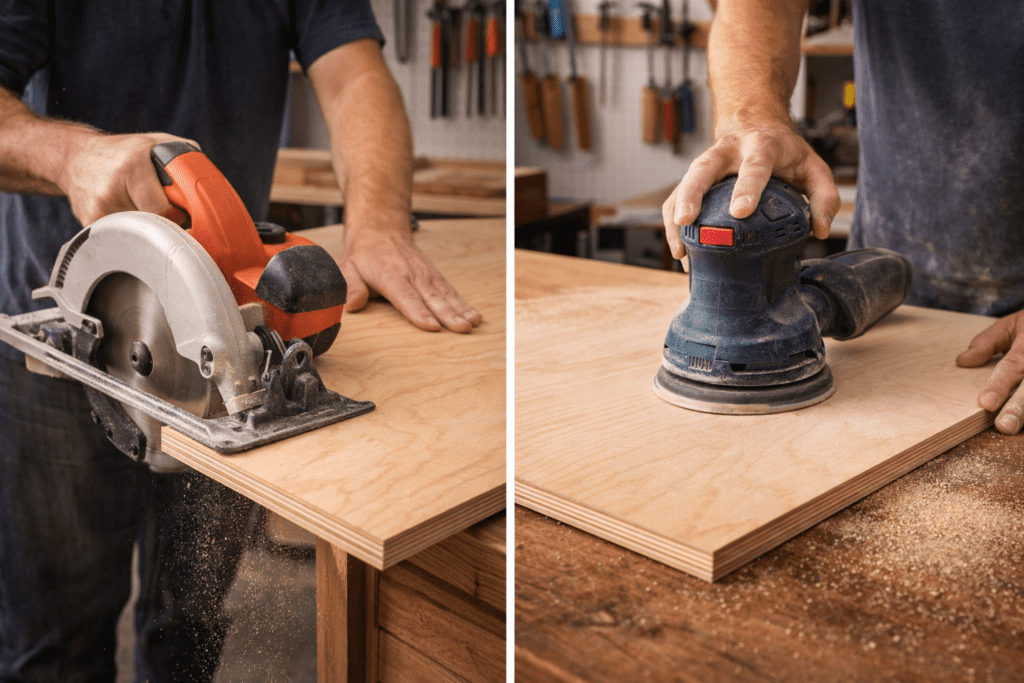
Just basic tools, affordable materials, and a method that actually works.
What Is a Wooden Poster?
A wooden poster is exactly what it sounds like: a print mounted directly onto a solid wooden board, making it one sturdy piece. Instead of a thin sheet of paper hanging on its own, the artwork is backed with a rigid support that gives it real structure and weight.
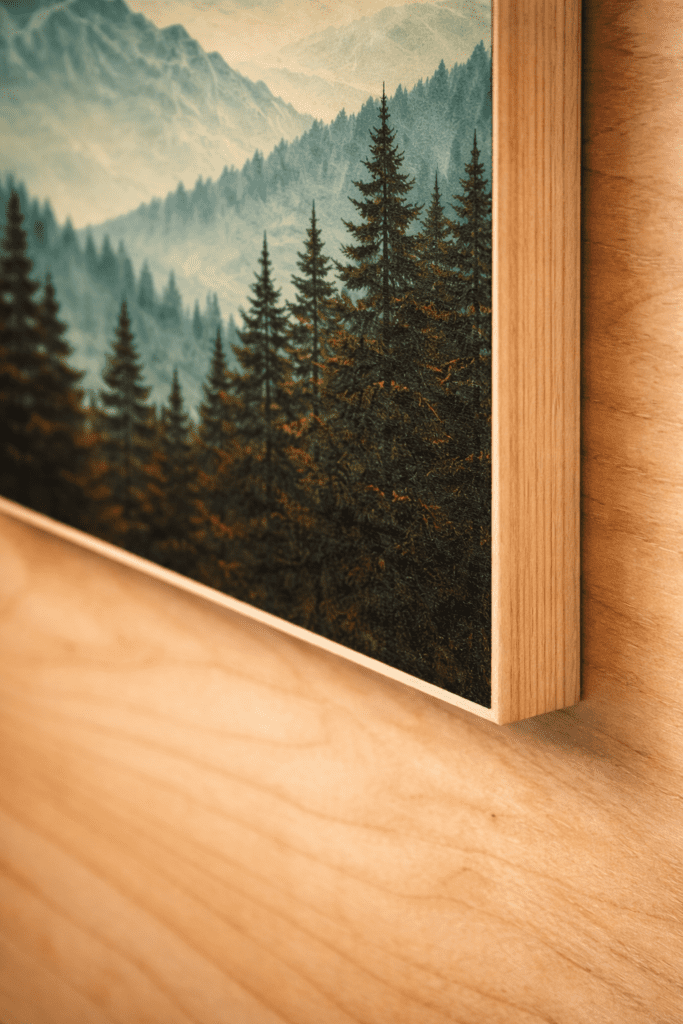
The wood isn’t something you hide, either — it’s part of the finished look. Sometimes you see clean edges around the print. Other times, a bit of grain shows through. Either way, it feels intentional, like the art belongs there, not like it was taped up as a last-minute decision.
Where wooden posters really pull ahead is over time. Paper by itself bends, ripples, and gets beat up fast. Once it’s bonded to wood, it stays flat and holds up to real life — bumps, humidity, kids running past, tools leaning against the wall, all of it.
Compared to framed posters, wooden ones are refreshingly simple:
No glass to crack
No backing board sliding around
No paper slowly sagging inside a frame
No “temporary” or unfinished look
That’s why wooden posters show up in places where regular prints struggle — workshops, garages, home offices, gyms, kids’ rooms, and small shops. They look good, but they’re also tough, which is a rare combination when it comes to wall décor.
Why Make a DIY Wooden Poster Instead of Buying One?
I’ve tried store-bought wooden posters. Most of them look fine online and disappointing in person.
Common problems:
Thin MDF backing that warps Because MDF reacts to moisture and temperature changes, thinner boards lack the strength to remain flat over time.
Peeling vinyl prints Vinyl relies on surface adhesive, and when rooms get warm, humid, or dusty, that bond weakens, and edges start lifting.
Overpriced for what you get You’re often paying for branding and marketing photos, not for thicker materials or longer-lasting construction.
Limited sizing options Mass production uses standard dimensions that rarely match the exact wall space you’re trying to fill.
Making your own wooden poster solves all of that. You control the size, material, finish, and quality. It also costs significantly less.
Best Wood for a Wooden Poster
Choosing the right wood matters more than people expect.
1. Birch Plywood (Best Overall)
Birch plywood is my go-to for wooden posters because it’s flat, smooth, and stable, so it stays looking the same months later as it did the day you hung it.
Why it works:
Clean surface for prints
Minimal voids
Lightweight but strong
Seals evenly
👉 Amazon pick: 1/4″ or 1/2″ birch plywood panels (pre-cut sizes save time and waste)
2. Maple Plywood (Premium Look)
Maple plywood has a tighter grain and slightly brighter tone. It costs more but works well for minimalist or modern wooden posters, especially when you want the artwork to stand out without the wood itself stealing too much attention.
3. Pine Panels (Budget Option)
Pine is affordable and easy to cut, but it moves more with humidity. If you use pine, sealing both sides is not optional; you’ll notice it starts to cup or twist when the seasons change.
Wood to Avoid
MDF (heavy and moisture-sensitive): It’s dense and heavy for its thickness, and even a little humidity can cause the edges to swell and turn fuzzy, which permanently ruins the look of a wooden poster.
OSB (rough edges): The exposed strands chip easily and never really sand smoothly, so the edges always look unfinished, no matter how much time you spend on them.
Construction-grade plywood (voids ruin edges): Hidden gaps inside the layers show up when you cut or sand the edges, leaving holes and weak spots that are hard to hide on a visible wall piece.
How Thick Should a Wooden Poster Be?
Thickness affects how flat and solid the poster feels.
Small posters (under 18×24): 1/4″
Medium posters: 1/2″
Large wall posters: 3/4″
If you’re unsure, 1/2″ is the safest all-around choice.
Step 3: Seal the Wood Before Mounting (Critical Step)
This is where most DIY wooden posters fail.
Bare wood absorbs adhesive unevenly, which causes dark spots, bubbles, and permanent glue marks.
Apply one thin coat of clear sealer before attaching artwork. Let it dry completely, then lightly sand with 220-grit paper.
This single step dramatically improves the final result.
Step 4: Mounting the Poster Artwork
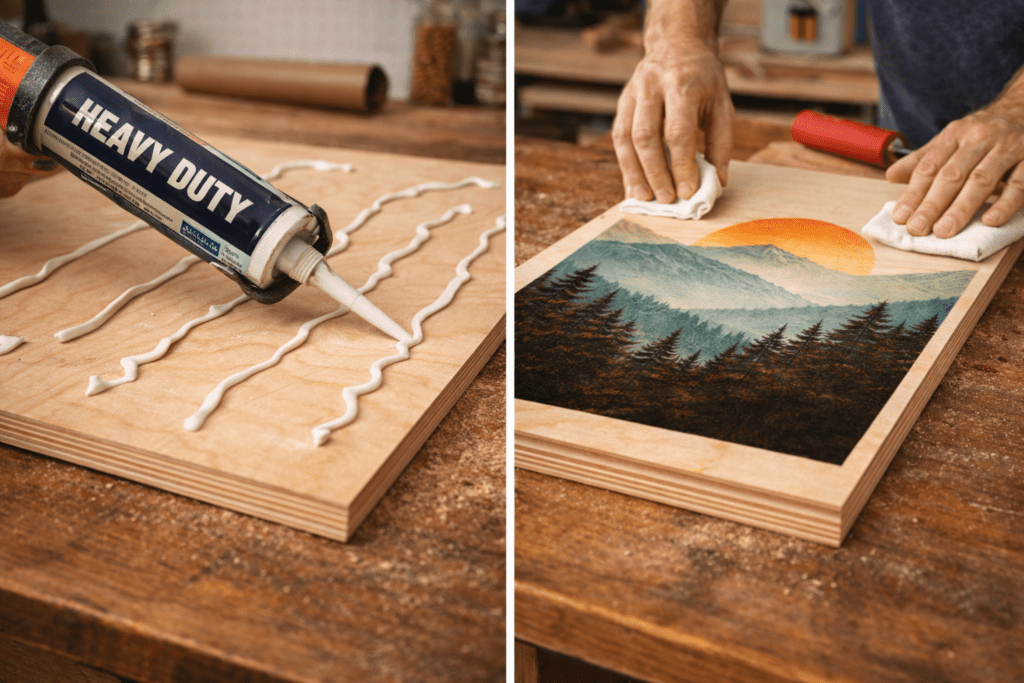
Spray Adhesive (Best Method)
Spray adhesive gives even coverage and allows repositioning.
Spray the back of the poster lightly
Spray the sealed wood surface
Wait 20–30 seconds
Align carefully and press from the center outward
Use a brayer or credit card to remove air bubbles.
👉 Why this converts: Spray adhesive reduces failure rates, which keeps readers happy and builds trust.
Wood Glue (Budget Method)
This works but requires precision:
Apply a thin, even coat
Use a roller
Clamp flat for several hours
Mistakes are harder to fix with glue than with spray adhesive.
Safety & Ventilation
This is usually the part where I realize I should’ve opened a window earlier. Even the stuff that barely smells at first seems to linger longer than expected, and working through that gets annoying fast. I’ve gotten into the habit of cracking a window or running a fan without really thinking about it anymore, mostly because it makes the whole process more comfortable. I also stopped trusting myself to keep glue off my hands — gloves save cleanup time later — and sanding anything that’s already sealed without a mask is one of those mistakes you only make once.
Step 5: Seal the Finished Wooden Poster
Once the artwork is fully bonded and dry:
Apply 2–3 thin coats of clear sealer I’ve tried rushing this with one heavier coat before, and it never ends well — thin layers dry more evenly and are way easier to control.
Lightly sand between coats You’re not trying to sand the finish off, just knocking down the tiny bumps that show up once everything dries, especially if there’s dust in the air.
Choose matte for modern looks, satin for warmth Matte tends to disappear visually, which works well in clean spaces, while satin adds just enough sheen to make colors feel slightly richer.
Sealing protects the wooden poster from moisture, UV fading, and edge lifting This is the part that keeps the poster looking the same a year from now instead of slowly curling at the edges or dulling out over time.
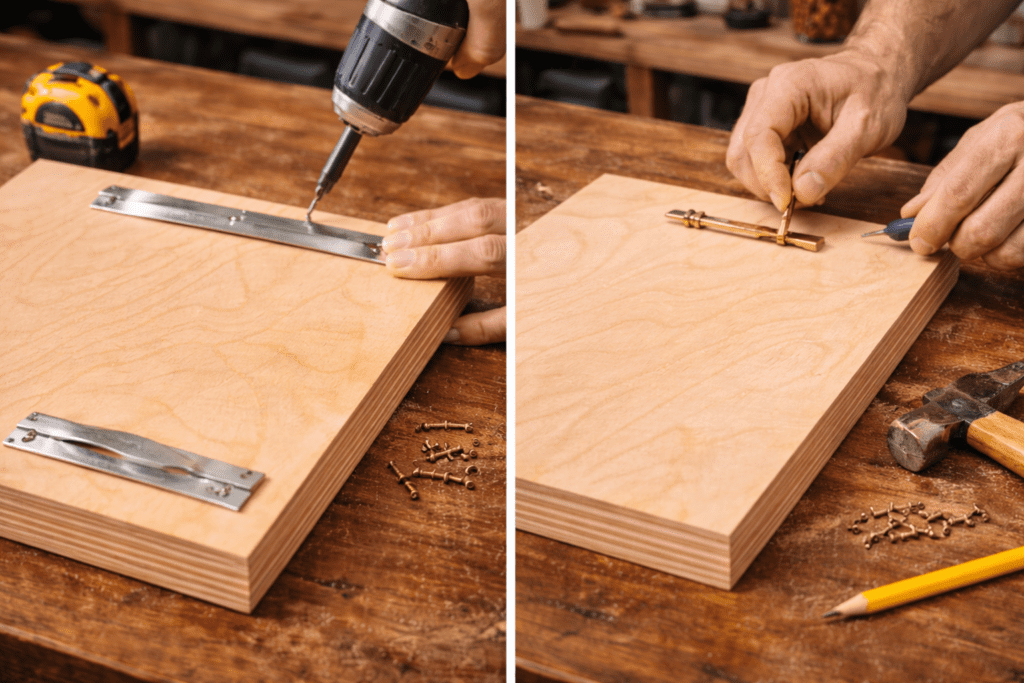
How to Hang a Wooden Poster
Avoid nails through the front.
Best options:
Sawtooth hangers (small to medium posters) They’re quick to install and make it easy to nudge the poster left or right if it’s slightly crooked.
Keyhole hangers (clean look) Once it’s on the wall, all the hardware disappears, keeping the focus on the poster rather than on its mounting.
French cleat (large or heavy posters) This spreads the weight across the wall, making it feel much more secure when you don’t want the poster shifting or sagging.
Command strips (lightweight only) They work fine for smaller pieces, but only if the surface is clean and you’re okay with checking them occasionally.
For larger wooden posters, a French cleat keeps everything level and secure.
Wooden Poster Design Ideas
Some designs work better on wood than paper:
Black-and-white typography
Workshop rules or quotes
Minimalist maps
Kids’ name signs
Gym motivation posters
Vintage ads
Simple designs let the wood texture do the work.
Common Wooden Poster Mistakes to Avoid
Skipping pre-sealing
Using too much glue
Rushing alignment
Hanging before full cure
Using low-quality prints
Every failed wooden poster I’ve seen can be traced back to one of these.
How Long Does a Wooden Poster Last?
Indoors, a properly sealed wooden poster can last many years without peeling or warping. I have shop posters that are still flat after five years.
Cost Breakdown
Typical DIY wooden poster:
Wood: $10–25
Adhesive: $5–8
Sealer: $8–12
Print: $5–10
Total: $25–40 Store-bought versions often cost $80–150.
Frequently Asked Questions About Wooden Posters
What is the best wood for a wooden poster?
Birch plywood is the best overall choice because it’s flat, smooth, and stable.
Yes, as long as you seal the wood first and apply a protective topcoat after mounting.
Do wooden posters need a frame?
No. That’s one of their biggest advantages. The wood itself replaces the frame.
Can I hang a wooden poster without drilling?
Lightweight wooden posters can be hung with heavy-duty Command strips, but larger ones should be mounted with mechanical fasteners.
Are wooden posters safe indoors?
Yes, when sealed properly and installed securely, they’re safe for indoor use.
Final Thoughts
This is one of those projects that doesn’t feel especially important while you’re doing it, but you notice the difference afterward. The poster just sits better on the wall. It doesn’t curl, doesn’t feel temporary, and doesn’t need explaining.
After that, it’s hard not to spot places where another one would work — a blank stretch of wall in the shop, something sturdier for a kid’s room, or a sign that won’t look worn out in a few months. It kind of sneaks up on you.
Related Posts:
Mastering the Art of Finishing Plywood for Stunning Results by Admin March 18, 2025 Finish Applying a finish to a woodworking project can be intimidating. A well-executed finish enhances the wood’s natural beauty, highlights craftsmanship, and gives the piece a…
How to Make a Wooden Bowl: A Step-by-Step Guide by Admin March 8, 2025 DIY Crafting a handmade wooden bowl is a fun and rewarding project. Whether you're a beginner or an experienced woodworker, this guide will help you easily…


")
