When I first built a staircase for my home, I thought the hard part was cutting all those precise steps. I was wrong. The real finishing touch—the detail that makes a staircase safe and beautiful—is the stair handrail. It’s one of those projects that looks intimidating but, with the right approach, can completely transform both the look and function of your stairs.
Whether you’re installing one on a new set of steps or upgrading an existing staircase, this guide walks through everything you need to know—from materials and safety standards to installation tips and creative design ideas that look great on Pinterest boards.
Why Stair Handrails Matter
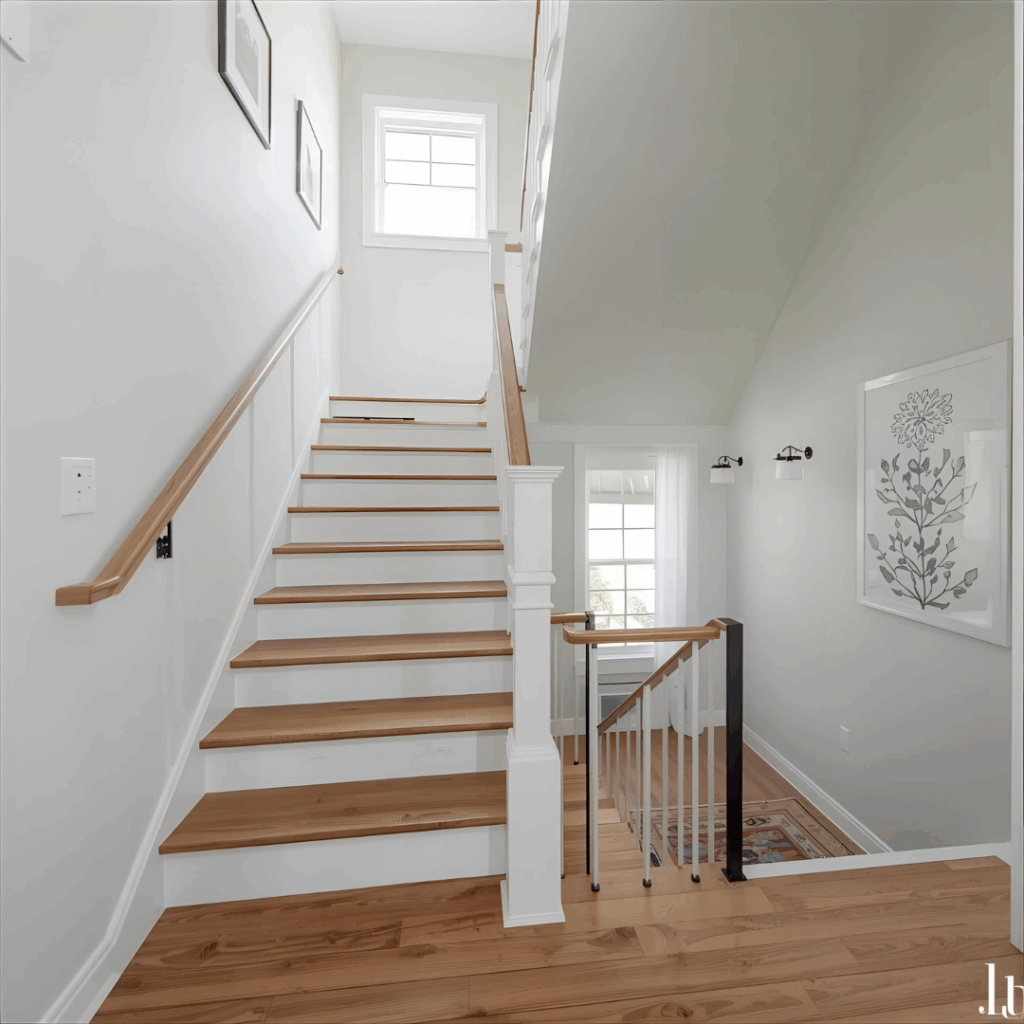
A stair handrail does far more than meet building code—it’s what keeps you, your family, and guests safe on every trip up or down the stairs. Even a few steps can cause an accident if there’s nothing to hold onto. Indoors, it’s part of the architecture. Outdoors, it’s protection against slick weather and uneven footing.
Beyond function, a well-made handrail adds style and polish. The difference between a plain staircase and one with a carefully chosen wood or metal rail is night and day. Done right, a stair handrail becomes both a safety feature and a design statement.
🪵 Popular Stair Handrail Materials
When I redid my staircase a few years back, I figured picking the handrail would be the easy part. I was wrong. I must’ve stood in the lumber aisle for half an hour, running my hand along different materials. Some felt too cold, some too shiny, and some just… perfect. That’s when I realized—this tiny detail can completely change the feel of your home.
Here’s what I learned along the way.
1. Wood Handrails
Wood has that warmth you can’t fake. The grain, the smell when you sand it, even the way it catches the light—it just feels alive. Every species tells its own story.
Oak: Heavy, strong, and classic. It’s the kind of wood that never goes out of style. Stain it dark, like Varathane Dark Walnut, and it immediately looks expensive.
Maple: Lighter in tone, with a soft, even grain that’s great for modern or painted staircases.
Pine: Budget-friendly and easy to shape. If you’re new to woodworking, pine is forgiving.
Walnut or Cherry: These two are showstoppers. Deep, rich, and smooth to the touch—more like fine furniture than a handrail.
2. Metal Handrails
Metal feels different—cool to the touch, sharp in appearance, and unshakably solid. When paired with wood treads, it gives a staircase that modern, confident edge.
Steel: Industrial and tough. It looks great in homes with clean lines or open spaces.
Wrought Iron: More decorative and traditional, with curves that soften its strength.
Powder-Coated Finishes: Matte black or bronze rails can blend into nearly any design, and they hardly ever need maintenance.
One thing I love about metal rails—they age gracefully. A little wear only adds character.
3. Cable and Glass Systems
If you’ve ever stepped into a home with glass or cable railings, you probably noticed how open the space felt. These aren’t just handrails—they’re part of the architecture.
Cable: Stainless-steel lines that almost disappear when you look from a distance.
Glass: Tempered panels that keep sightlines clear, reflecting light in beautiful ways.
They’re more work to install and cost more than wood, but the finished look feels clean, light, and modern. It’s worth it if you like that open, airy vibe.
When it comes to decks and porches, weather is the real test. I’ve seen wooden rails twist and crack after a few seasons, so I switched to more durable materials outside.
Composite: Feels like wood but doesn’t rot or fade. Great if you want a natural look without the upkeep.
PVC (Vinyl): Bright, clean, and super low-maintenance. Just hose it off once in a while.
Aluminum: My favorite for outdoor stairs—light, rust-proof, and strong.
If you’re planning to install one yourself, Vevor’s Adjustable Outdoor Handrail Kit on Amazon comes with everything you need: anchors, bolts, and clear instructions.
Choosing the Right Handrail Shape and Height
According to the International Residential Code (IRC), the top of your stair handrail should sit 34 to 38 inches above the stair tread nosing. Outdoor rails often match this same range.
Common profiles:
Round handrails (2 to 2½ inches) — comfortable for smaller hands.
Oval or rectangular profiles — modern, clean look.
Wall-mounted vs. baluster-mounted — wall rails attach directly with brackets, while baluster rails rest on spindles or newel posts.
If you’re renovating an older home, you might find handrails that are too low or too thick for code. Fixing that now avoids safety issues later.
Tools and Materials Checklist
Before you start, gather your supplies. Here’s what I used for my last indoor wood stair handrail build:
If you’re building an outdoor stair handrail, swap wood screws for galvanized deck screws and use exterior-grade stain or sealer to resist moisture.
Step-by-Step: How to Install a Stair Handrail
When I built my first set of stairs, I thought hanging the handrail would be simple—until I tried aligning it perfectly across the steps. Here’s the process that finally worked.
Step 1: Mark the Height
Use a level and pencil to mark 34–38 inches above each tread. Connect these marks diagonally up the staircase with painter’s tape or chalk. This becomes your guideline.
Step 2: Locate Wall Studs
Handrails must anchor securely. Use a stud finder to mark each stud along the wall where you’ll attach brackets.
Step 3: Attach the Brackets
Pre-drill pilot holes and screw in the lower bracket halves along your guideline. For standard walls, space brackets every 4 feet for stability.
Measure the full run of your staircase, adding a few inches for mitered returns (the short ends that curve back toward the wall). Cut carefully using a miter saw set to your stair’s angle.
Step 5: Mount the Rail
Rest the handrail on the brackets and check alignment. Once it’s level and comfortable to grip, secure it with screws through each bracket.
If you’re joining two rail sections, apply wood glue and clamp them until dry.
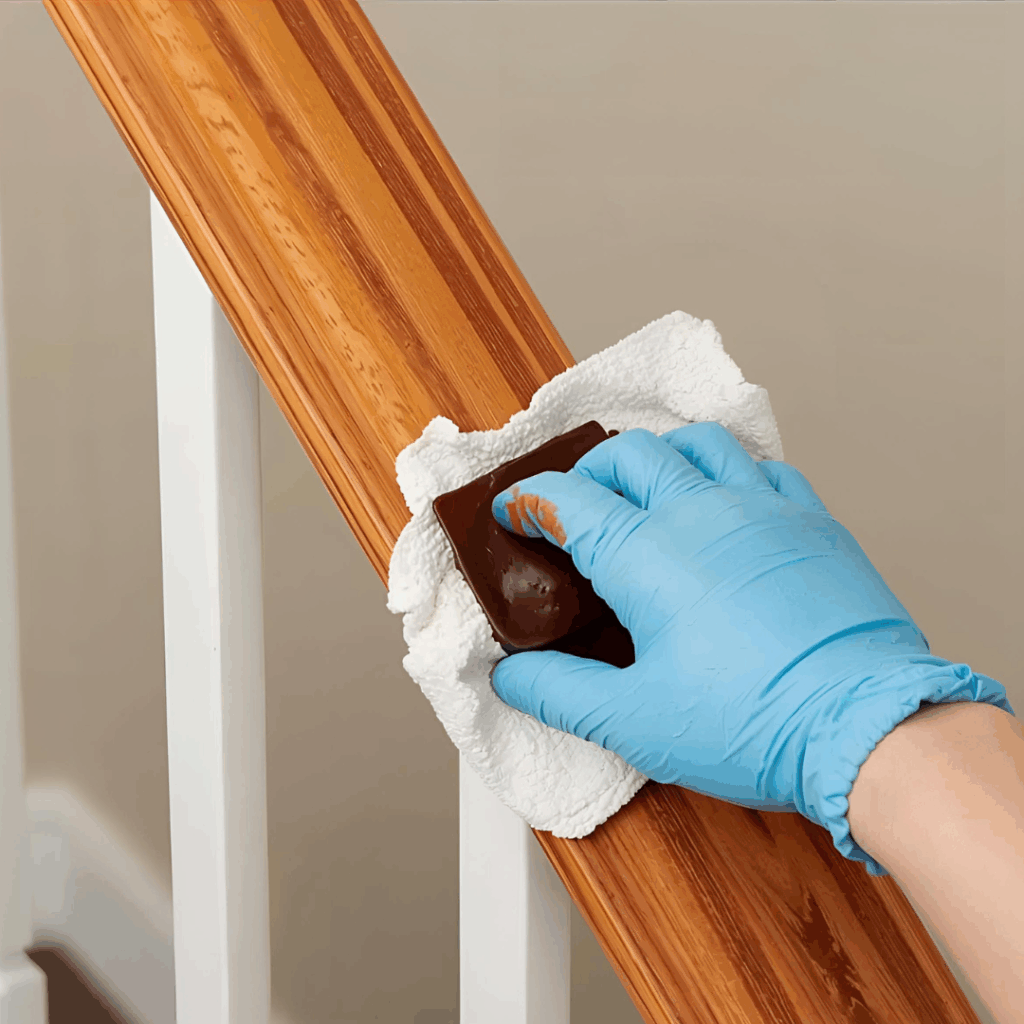
Step 6: Sand, Stain, and Finish
Sand all edges smooth. Wipe off dust and apply your chosen stain—something durable like Minwax PolyShades gives both color and protection. Finish with polyurethane for shine and longevity.
Outdoor Stair Handrail Installation Tips
Outdoor rails deal with weather extremes, so build for durability.
Use pressure-treated lumber or rot-resistant wood like cedar.
Elevate posts on metal post bases to keep them off wet surfaces.
Seal every joint with waterproof exterior adhesive.
Cap the top of posts with a metal plate to prevent water seepage.
If you prefer metal, powder-coated aluminum handrail kits are an excellent DIY solution and require minimal tools.
Finishing Touches: Paint, Stain, and Detail Work
A stair handrail doesn’t have to be plain. Once you’ve installed it, add your personal touch.
Natural look: Use clear polyurethane to highlight wood grain.
Dark elegance: Stain with walnut or espresso tones for contrast.
Painted style: A crisp white or matte black rail pairs well with modern décor.
If your stairs rise more than 30 inches, most local codes require a handrail on at least one side. For wider stairways (over 44 inches), two rails may be required.
Additional safety rules:
Rail ends must return to the wall or newel post (to avoid clothing snags).
Graspable handrails should have a diameter between 1¼” and 2″.
Keep 1½ inches of clearance between the wall and the handrail.
These standards aren’t just red tape—they’re based on research about fall prevention and accessibility. Meeting them means your DIY build looks professional and keeps everyone safe.
Creative Stair Handrail Design Ideas
Pinterest loves stairways that combine creativity and craftsmanship. Here are some design ideas that stand out:
Farmhouse Charm: Use a distressed oak handrail paired with black metal brackets. Add shiplap walls for texture.
Modern Minimalist: A slim rectangular maple handrail mounted on brushed stainless brackets.
Rustic Lodge: Combine live-edge wood with wrought-iron spindles.
Industrial Loft: Matte black steel tubing with cable infill for a rugged urban look.
Outdoor Cottage: White painted wood rails over cedar posts, sealed with exterior polyurethane.
Each style can be easily adapted to suit your budget or space.
🧰 Maintenance and Upkeep
Handrails don’t ask for much, but a little attention now and then goes a long way. I try to give mine a quick check twice a year—usually when I’m doing other seasonal chores.
Here’s what helps keep them solid and looking good:
Tighten the fittings: Give every screw and bracket a quick twist with a screwdriver. A loose rail can sneak up on you.
Wipe it down: For wood, use a soft cloth and a gentle cleaner—avoid harsh chemicals. It keeps the finish smooth and pleasant to the touch.
Protect from weather: If your handrail is outdoors, brush on a fresh coat of sealer or clear exterior finish every couple of years. It takes maybe twenty minutes and saves you from dealing with cracks or gray weathering later.
Inspect for trouble: Run your hand along the rail—feel for splinters, chips, or any sharp spots. For metal, check corners and joints for small rust patches and spot-treat them before they spread.
A few minutes of care twice a year will keep your railing sturdy, smooth, and something you actually enjoy grabbing on your way up the stairs.
Final Thoughtson Building Your Own Stair Handrail
I didn’t expect a handrail to change how my staircase felt, but it did. The first time I ran my hand along the finished rail, it hit me—this simple thing I built had turned those steps into something solid and complete. It’s funny how a small project can make the space feel more like home.
If you’re building your own, don’t rush it. Measure twice, take your time with the sanding, and enjoy the process. Every mark and curve you shape will be something you notice later, even if no one else does.
Best Attic Stair Insulation by Admin July 9, 2023 Installing Attic stairs are a great convenience, making it easy to go up into the attic at any time and utilize the space up there for…