Thin plywood panels and shapes are used for many different sorts of crafts projects. Walk into any crafts store today, and you’ll find whole aisles dedicated to providing crafters with precut plywood squares for their crafting projects. Typically, squares are available in a variety of sizes, appropriate for a variety of different crafting projects.
In most cases, plywood squares are provided with clean, sanded edges and sharp corners. However, it is also possible to find these craft squares with rounded corners, ideal for coasters and other projects which are based on the cut size of the plywood square, without any further cutting.
Most of these squares are 1/8” to 1/4” thick, although it is also possible to find 1/2” and 3/4” squares in a more limited number of sizes. Thicker pieces are needed for cases where strength is required. However, strength is not a requirement in most crafts projects, so the thinner squares are sufficient for most crafters needs.
The projects which are made out of these squares are not the sort of thing that you and I, as woodworkers, are likely to do, unless you are into scrolling as a form of woodworking. But that doesn’t mean that a crafting spouse won’t ask for some plywood squares to use for a project.
Making Plywood Craft Squares
Cutting up scrap plywood into squares is a great way of making use of otherwise unused material, assuming you’ve got the right kind of plywood to work with. While not the best choice, I have used Lauan plywood in a number of craft projects, due to its low cost and ready availability. However, just what sorts of plywood would be appropriate depends a lot on the crafts projects your spouse is going to be making, just like the kind of plywood you use depends on the projects that you are trying to make.
Construction grade – Not normally considered usable for crafts projects, because of the rough surface. However, if the surface is skimmed with drywall mud and sanded, it can work quite well.
Lauan plywood – Surface veneer is extremely thin, with a tendency to splinter along the edges. Must use extreme caution when cutting. Because of the splintering, not the best choice; but can still be used.
Birch plywood – Most popular plywood for making plywood craft squares. Provides a nice finish and good core, so that you don’t end up with rough edges from cutting.
Applewood plywood – Excellent plywood, although expensive for this application. One of the distinct things about applewood plywood is that it is made with a lot of core layers. So if the appearance of the edges is important, it is a good choice.
MDF – While not normally used for craft projects, MDF provides a very stable product, not prone to warping, a smooth surface and a low cost.
Regardless of the type of plywood you choose to use to make plywood craft squares, careful cutting is important. Typically, these pieces are not used in such a way that sanding blade marks or puttying chips in the corners happen. So the squares need to be cut perfectly, in order to prevent those minor problems from occurring.
Some Tips on Cutting Those Squares
To start with, only cut plywood squares with a sharp blade. A combination blade on a table saw is best, rather than a ripping blade. The additional teeth on the combination blade reduce the amount of wood cut out by each tooth, helping to make a smoother cut, with less saw blade marks.
Whenever crosscutting plywood on a table saw, defined as across the face grain, it’s a good idea to tape across the cut line with masking tape. This will help prevent chips and rip out caused by the blade during the cut. Once the cut is completed, the masking tape will remove easily, revealing a nice clean cut, without any chips.
Even more important is the fence on the table saw, the defining feature that determines how well any table saw cuts. Many lower-cost table saws have fences which don’t sit exactly perpendicular to the table or may only lock perpendicular sometimes. This can make it so that the workpiece being cut is pinched slightly, when cutting, making it difficult to run the entire cut smoothly, resulting in binding and blade marks in the side of the piece.
This problem is easily rectified by using a framing square when setting your fence. Just as many woodworkers use a tape measure to check the rip dimension, after setting it with the gauge built into the table saw, you can check the setting of your fence with a square, making adjustments if necessary.
If you are cutting small plywood squares or have a lot of material to cut at the same time, it can be useful to rip all the material to the desired width, then use the miter gauge, in conjunction with the fence, to cut it off to length, making the squares.
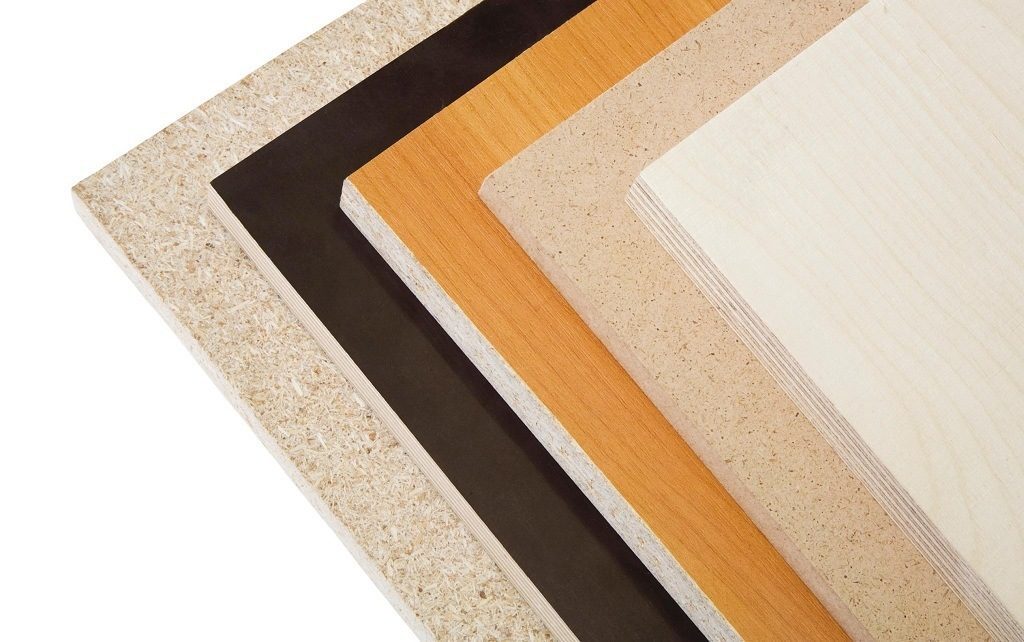
Different plywood types stacked together
Use a Table Saw Sled
One problem with this, is that the average table saw miter gauge has a very short face, making it hard to hold a long board square to the fence. This is easily resolved by screwing a straight piece of wood or aluminum to the front of the miter gauge, which is longer than the miter gauge is wide. Most already have screw holes in them to allow for this.
The other option, if your miter gauge isn’t good enough to guarantee accuracy, is to build a sled to go onto your table saw, which replaces the miter gauge. These have the advantage in that they usually have inserts going into both tracks, rather than just one, making them more stable and easier to maintain square to the table. Sleds can be built any size you want, even extending beyond the left of your table, essentially making the table larger, so that you have additional support for material you are miter cutting.
The sled always has a vertical lip on the back edge, giving you something to but the material you are cutting up against. Some people make their sleds with a higher lip on the back edge, so that they can clamp material being cut to it, instead of just holding it with their hands.
You can either cut your own inserts to go into the tracks or buy extruded aluminum ones from a woodworking supply or Amazon.
Finishing Plywood Squares
It isn’t necessary to finish plywood craft squares in any way, as they will be finished as part of whatever craft project they are used for. However, it is a good idea to sand the edges, ensuring that they are smooth and that there are no splinters sticking out from them.
Related Posts:
Rhino Lining Plywood: A DIY Way to Make Plywood Last by Admin January 25, 2026 Grades I didn’t start using Rhino lining plywood because I wanted something extreme or clever. I ended up there because I got tired of replacing plywood…
28 Types of Plywood and Their Applications by Admin April 30, 2023 More About Originally, “plywood” referred only to wood panels made of multi-layered veneer, laid with the grain perpendicular to adjacent layers, and bonded together with glue. While…
MDO/HDO Plywood by Admin May 4, 2023 Hardwood MDO and HDO Plywood Medium-density overlay (MDO) and High-Density Overlay (HDO) Plywood (also called signboard) are engineered wood panels originally designed for sign makers. However,…