One of the many signs of a properly constructed home is a flat, level floor. But not all homes’ floors stay flat and level, even if a home is well-built. Settling of the foundation, as well as shifting of the ground beneath the home, can cause a number of structural problems, including floors becoming unleveled, even to the point of what seems like undulating floors.
This problem can be even more pronounced on homes which are built on pier and beam, than other types of foundations. It’s not uncommon for pier and beam homes to have leveling issues. While they can be repaired; having the repairs done can be quite expensive.
Walking on floors that aren’t level can be extremely uncomfortable. But worse than that, it can be dangerous. People can trip or lose their balance much easier, if they don’t have a level surface to walk on. On top of that, some floor coverings really need a flat surface to be mounted to. Ceramic tile is especially susceptible to variations in the substrate, which can cause cracking and loosening of the tiles, if not properly taken care of.
There are a number of floor levelers on the market, some which mix with water and others which mix with latex. It’s important to make sure that the latex comes with the floor leveling compound or that it is purchased with it, if it doesn’t come packaged together. Check the label to ensure that it can be used on wood. Floor leveling compounds are actually made to go over concrete. Most will work on wood as well, but it’s important to verify that the compound purchased will. Always buy more than needed, as the pour must be done completely to ensure that it levels. Going back to the store for more isn’t an option.
Proper Preparation is Critical
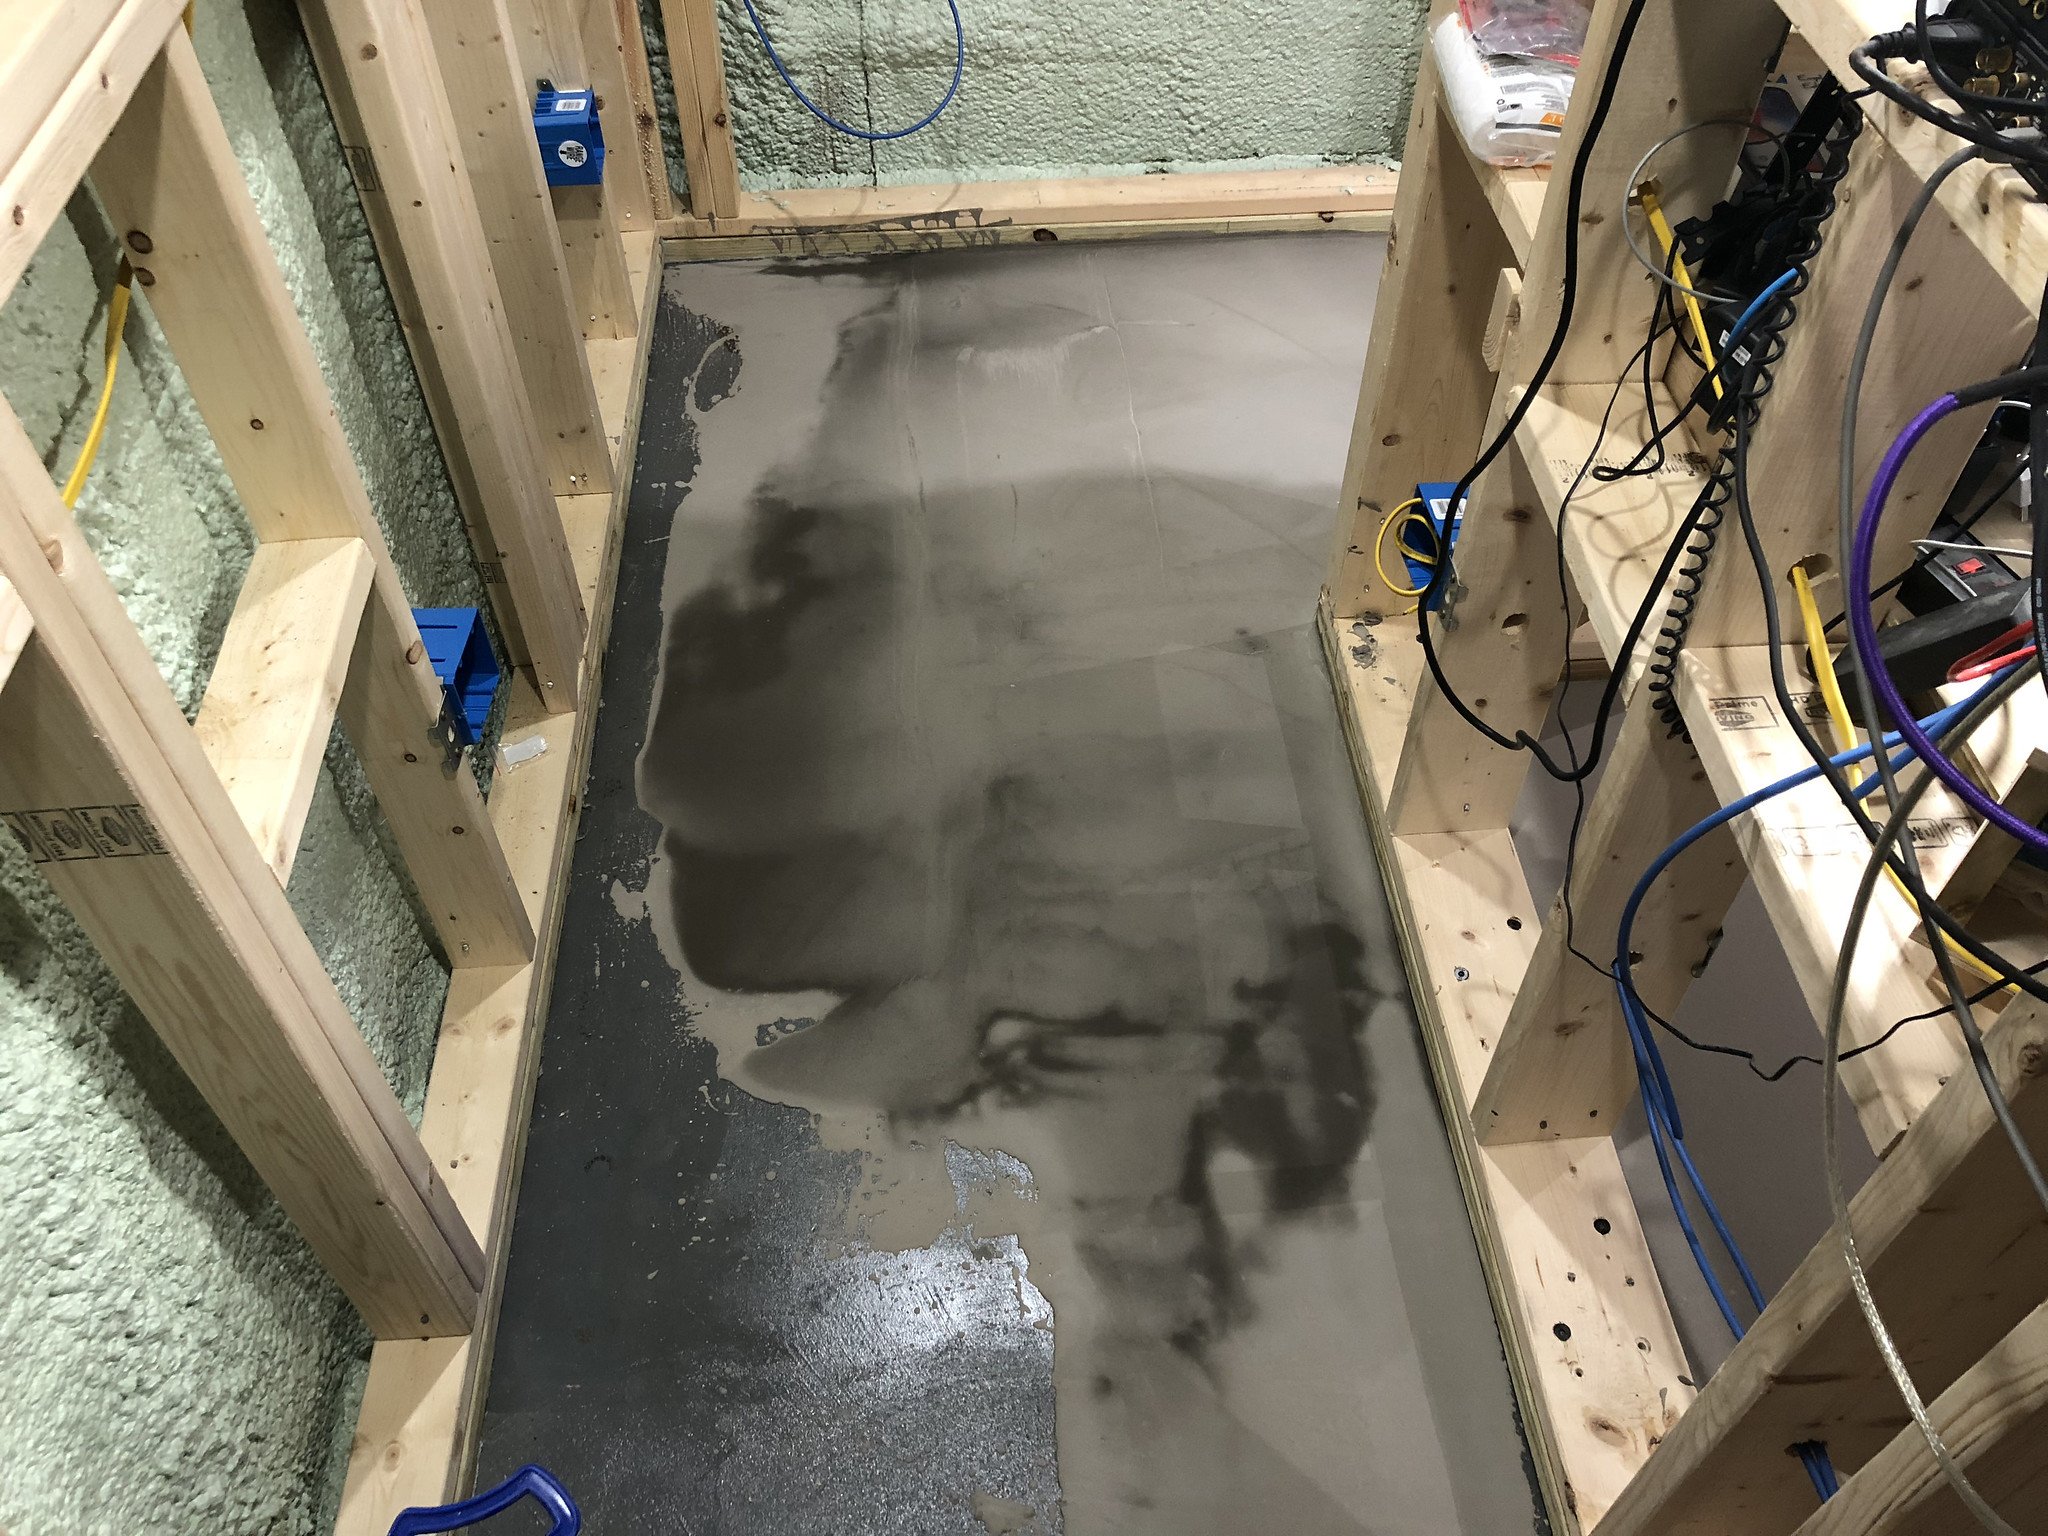
As with many other operations, proper surface preparation is critical to the successful application of self-leveling floor compound. There are many things which can go wrong in the process, most of which are associated with the surface preparation. This is applying a slurry to wood, which would allow the liquid in the slurry to be absorbed into the wood fibers, causing expansion. Later, when the wood dried out again and shrunk back to its normal size, gaps would form between the wood and the leveling compound.
The first requirement is a clean work area. All dust and debris must be swept up or vacuumed off the plywood floor, as they would interfere with adhesion. Once the dust is removed, the floor should be cleaned with a damp sponge and alLowed to dry.
Gaps in the plywood floor, such as those between sheets of plywood need to be sealed with a normal painter’s caulk. Water could go down in those cracks to be absorbed by the end grain in the plywood. Likewise, the edges of the plywood need to be sealed, keeping moisture from getting to those edges or from flowing under the plywood. Leveling compound that gets into the space between the plywood and the wall can leak into other rooms or into the floor below.
A sill sealer can be used around the perimeter of the room, sealing the plywood subflooring to the wall. This can be installed with a staple gun and then caulked to the floor, so as to ensure a good water-tight seal.
Other areas need to be sealed off too, if they exist. Drains should have a dam put around them, so that the leveling compound doesn’t go down them. This can be made out of corrugated cardboard, taped together to form a ring. But it should be caulked to the floor to keep the compound from leaking underneath.
Likewise, doors need to be blocked off, with a piece of wood nailed or screwed into place, to form a straight line. It may be necessary to put in a sill plate later to level, but that’s better than having the compound flowing into the next room.
With all that done; seal the plywood with a heavy coat of latex primer to prevent water from soaking into the plywood. It’s best to roll this on, rather than brushing it, as that tends to leave a thicker, more even coat. Even so, some brushing around corners and fixtures may be necessary.
In the case of thicker applications of self-leveling floor compound, it may be advisable to use metal lath. Lath performs the same function for self-leveling floor compound, that rebar does for concrete, helping to keep it from cracking. Even so, it is not necessary on thin applications of ¼” or less. Be sure to check the instructions for the compound being used, as some may recommend it more than others.
The whole idea of leveling the floor is to fill in low spots; so it’s a good idea to find them before starting. This is easily done with a long straight edge, like a 4’ level or a piece of aluminum channel. Lay it across the floor and look for the places where there’s a larger gap between the floor and the straight edge. Marking those areas will make it easier to know where to make sure to apply a bit more leveling compound.
Once the pour is started, the idea is to get it all done as quickly and seamlessly as possible. The compound sets rather quickly and can’t be re-wetted to make it flow better. So, it’s a good idea to open all the packages and stage everything in sets for easy pouring and mixing. If enough buckets are available, pre-measure the water, so that it doesn’t have to be measured at the time of mixing.
The actual mixing is done with a ½” electric drill and a paddle, of the same kind that is used for thinset or for mixing drywall compound. Since the leveling compound is mixed one bucket at a time, it helps to fill an extra bucket with water, as a place to park the drill and paddle, between mixes. This will help prevent the compound from hardening on the mixing paddle, making it necessary to clean it off.
Add the powdered compound to the mixing bucket first, folLowed by water or the acrylic mixing solution. Use the drill and mixing paddle to thoroughly mix the compound, scraping the sides and bottom of the bucket so as to ensure that no dry material stays there. But only mix for two or three minutes, as the compound is fast setting. Ideal consistency is about like that of pancake batter.
Start the pour from as far away from the door as possible, working back towards the doorway. As each bucket is poured, it needs to be spread as well. This is first accomplished by moving the bucket around, while pouring, and then by use of a gage rake, which is something like a metal squeegee with two adjustable depth guides. A trowel is useful around the edges, to ensure that the compound goes all the way to the wall and is smooth.
It is inevitable that some of the compound will get on the walls, while the pour is going on. While there is a great temptation to clean it up immediately, there really isn’t time to do so. Better to allow it to dry, then scrape the dried up compound off the wall later.
Finally, wash the buckets, mixer, gage rake and other tools as soon as the job is done, so as to keep the compound from drying on them. Don’t dump the dirty water down the drain, but rather in a hidden corner of the yard, where it can dry.
How to Prepare Subfloor for Tile (Step-by-Step DIY Guide) by Admin February 19, 2026 DIY To prepare a subfloor for tile installation, inspect the surface for damage, secure loose panels, test for moisture, level uneven areas, install cement board or…


")
")
")
")
