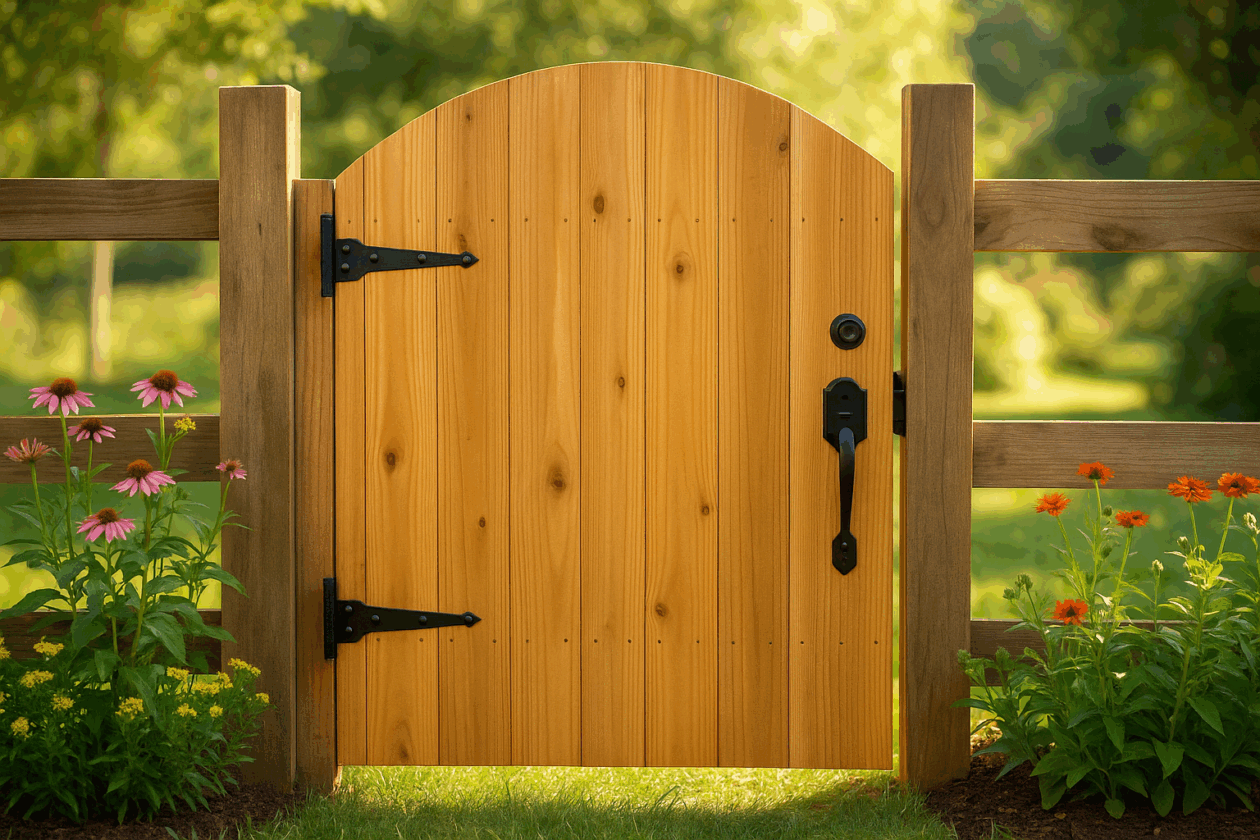
A garden gate does more than open and close — it sets the mood for everything beyond it. It’s that quiet detail that says, “Welcome in.” When it swings smoothly on its hinges and fits just right between two sturdy posts, it feels like craftsmanship you can be proud of.
I’ve built a few over the years, and each one ends up being its own statement piece. Some were simple cedar frames, others dressed up with a curved top or a coat of deep walnut stain. But the satisfaction is always the same — it’s a weekend’s worth of work that changes how your garden feels the moment you walk outside.
In this guide, I’ll show you how to build your own wooden garden gate from start to finish. We’ll plan the size, choose the right wood, assemble the frame, and finish it so it lasts for seasons to come — all with basic tools you probably already own or can grab at your local hardware store.
Why Build Your Own Garden Gate?
Buying a ready-made gate can be quick, but building your own lets you match the style of your fence, control the dimensions, and choose materials that last. With basic woodworking skills and a few tools, you can build something sturdier and better-looking than most store-bought options — often for less money.
A handmade garden gate also gives you creative freedom: rustic cedar slats for a cottage feel, smooth birch plywood for a modern look, or decorative iron accents for elegance.
Planning Your Garden Gate Project
Before picking up a saw, sketch your idea. A garden gate that looks perfect in your head can turn into a headache if you skip measurements or forget hardware placement.
Measure the Opening
Measure the width between your fence posts. Subtract ½ inch from the total — this small gap prevents your gate from binding when humidity changes.
For height, most garden gates fall between 36 and 48 inches, but you can go taller if you’re aiming for privacy.
Check Post Stability
No matter how beautiful your gate is, it won’t swing correctly if your fence posts are loose. Tug them side to side — if they move, reinforce with quick-set concrete before hanging the gate.
Selecting the right materials will decide whether your garden gate lasts a single season or a full decade. It’s tempting to grab whatever lumber is on sale, but the right wood and hardware make all the difference once the rain and sun start taking turns on it.
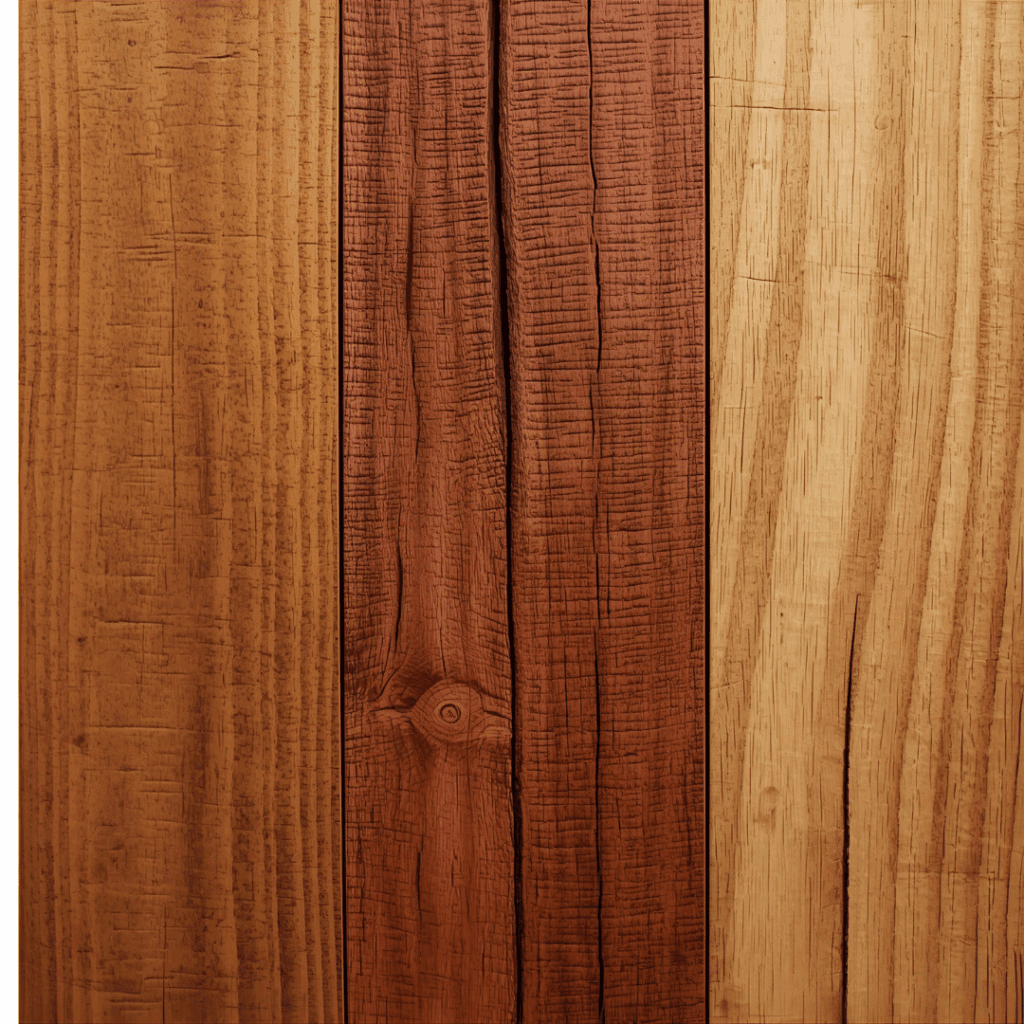
1. Choosing the Wood
Over the years, I’ve learned that outdoor projects live or die by the wood you start with.
Cedar – This is my go-to. It smells great, resists rot naturally, and holds up beautifully against the weather. It’s lightweight too, which helps keep the gate from sagging over time.
Redwood – When you want something that looks high-end right out of the saw, redwood delivers. It’s rich in color and has natural oils that stand up to insects and moisture.
Pressure-Treated Pine – Great for tight budgets and tough conditions. It’s strong and inexpensive, but you’ll need to seal it properly to protect it from the elements.
Exterior-Grade Plywood – Perfect for adding design flair. I’ve used ACX and marine plywood for decorative inserts and backing panels — they’re smooth, strong, and easy to stain or paint.
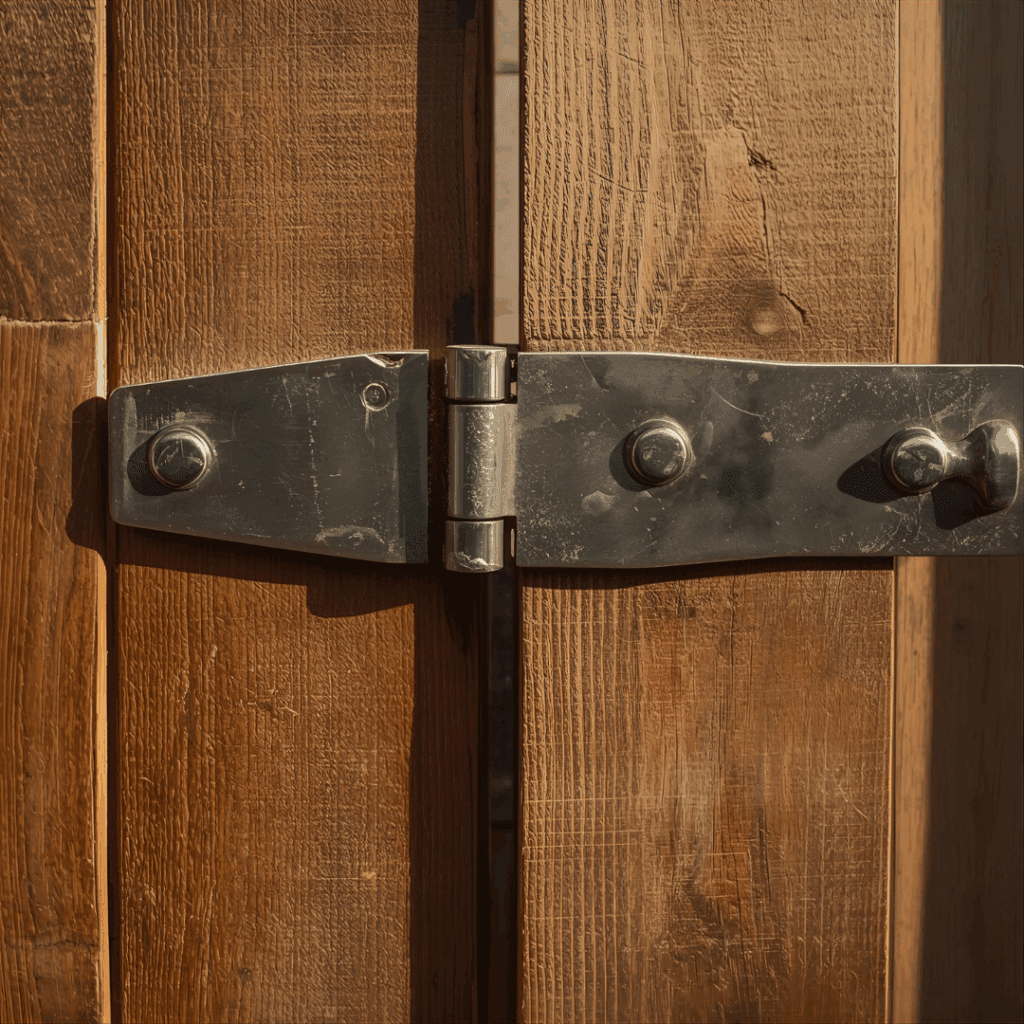
Good wood needs good hardware. I’ve seen beautifully built gates fail early because someone used indoor screws or cheap hinges. Always pick galvanized or stainless steel — they’ll shrug off rain and humidity instead of rusting out.
You’ll need heavy-duty hinges and a reliable latch. These are a few I’ve had the best luck with:
No matter what wood you choose, you’ll want to protect it from the sun and rain. I always finish outdoor gates with a UV-blocking stain or a marine-grade varnish.
When you build a garden gate, you’re not just following instructions — you’re shaping how your yard feels every time someone walks through. Take it slow, measure twice, and treat each step like part of the craft, not just the checklist.
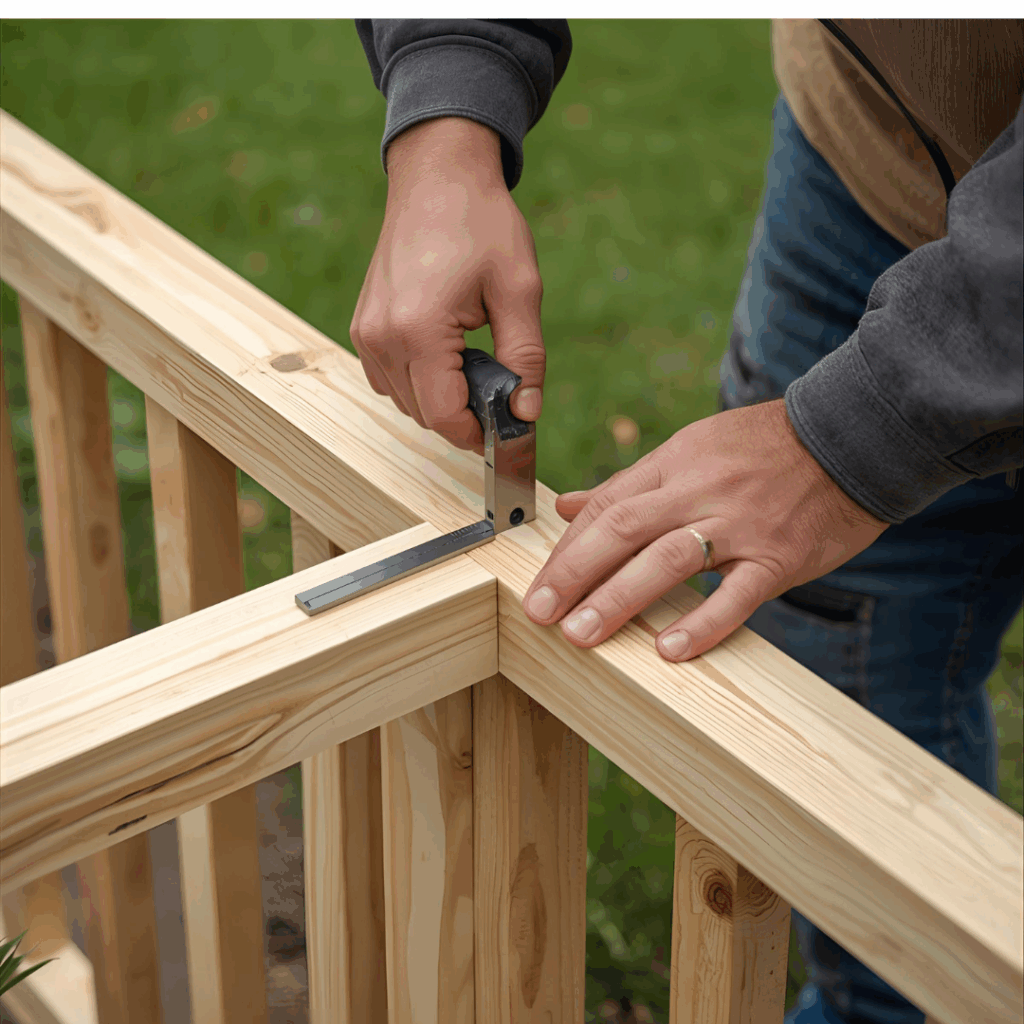
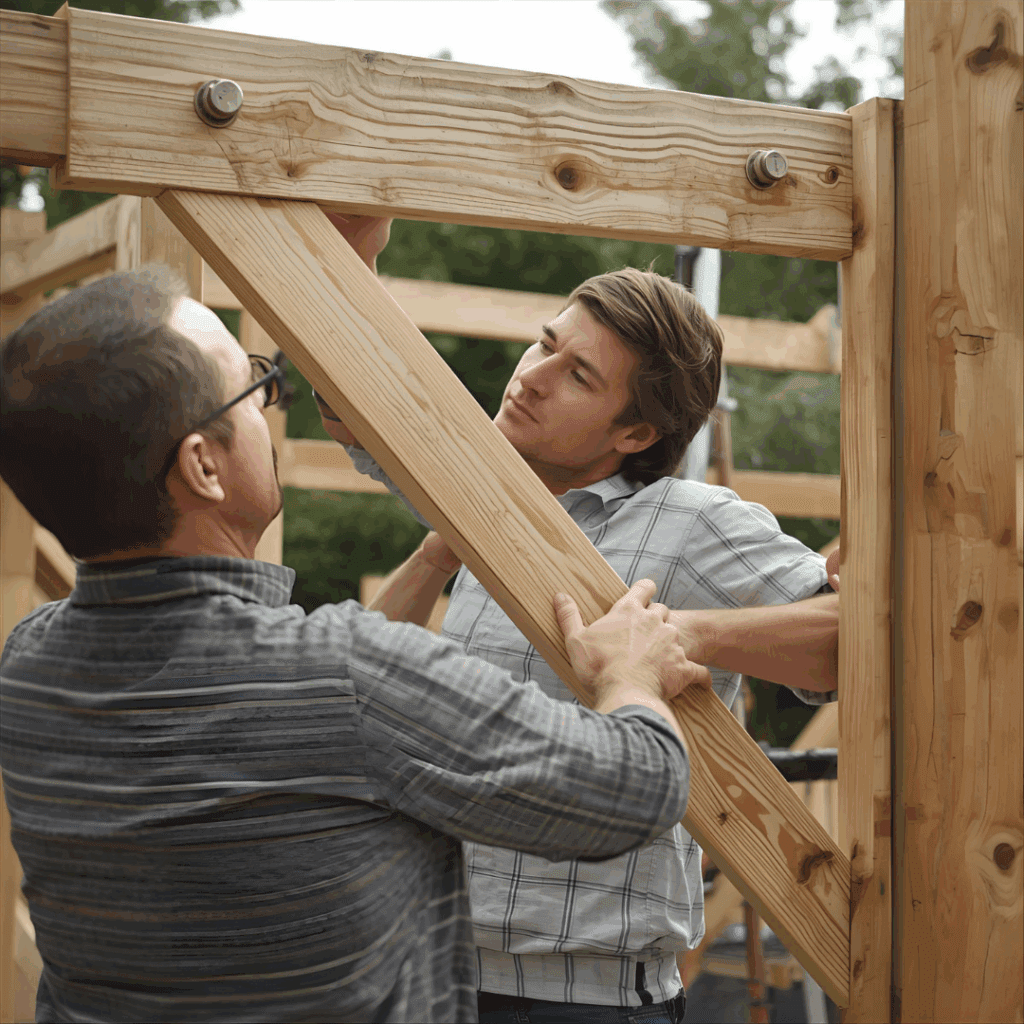
Step 1: Build the Frame
Begin with two vertical rails and two horizontal pieces. These four boards create the outline of your gate. Set them on a flat surface and check that everything lines up evenly.
Once you’re happy with the fit, brush a bit of exterior wood glue onto the ends and fasten the corners with screws. Keep a carpenter’s square beside you; even a slight twist now can cause the gate to sag later.
Pro tip: If you want a frame that feels rock-solid, cut half-lap joints instead of simple butt joints. They take a little longer but hold up better against weight and weather.
Every strong gate hides one secret — the diagonal brace. It keeps everything square. Cut a board to run from the lower hinge corner to the upper opposite corner. Make sure it tilts toward the hinges so it can carry the gate’s weight. Glue it, screw it, and feel the frame stiffen the moment you tighten the last screw.
Step 3: Install the Slats or Panels
Now it starts looking like a real gate. Space your slats about a quarter inch apart so air and rain can pass through. Don’t rush the spacing — small gaps make a big difference in appearance.
Prefer a cleaner style? Use a plywood panel instead of individual slats. Fasten it from the back and sand the edges until they feel smooth to the touch.
Ideas to personalize it:
Cut a small decorative shape with a jigsaw — maybe a heart or a leaf.
Try contrasting stains; dark frame, light center looks great on cedar.
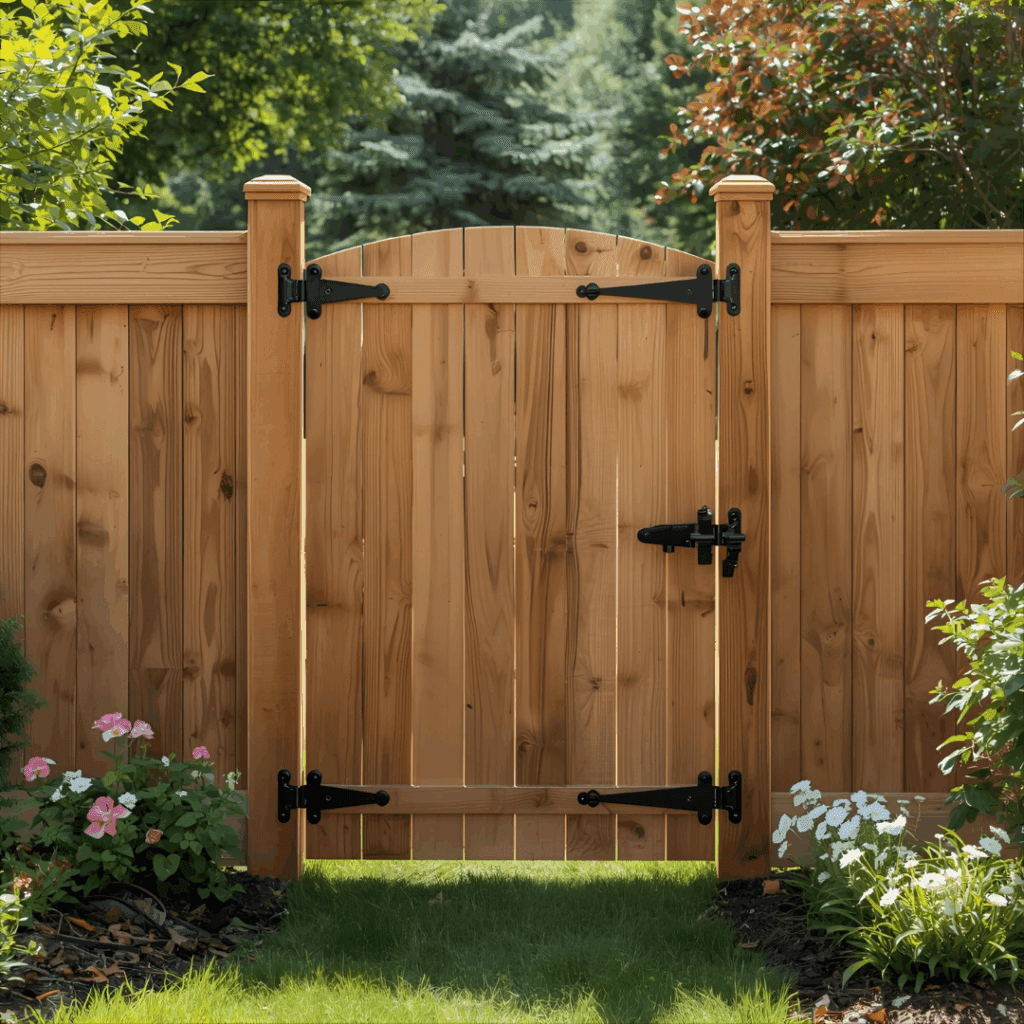
Step 4: Attach the Hinges
Clamp the gate in position between your fence posts and mark where the hinges will sit. Usually, one goes about 8 inches from the top, the other 8 inches from the bottom.
Drill pilot holes first — splitting a post at this stage is heartbreaking. Then fasten the hinges and swing the gate a few times to test the motion. Adjust until it feels smooth and balanced.
Step 5: Install Latch and Handle
Set the latch on the side opposite the hinges. Line it up so it clicks shut cleanly without forcing it. Swing the gate a few times and fine-tune the alignment.
If you want the gate to close itself, add a spring hinge or a magnetic catch — simple upgrades that save a lot of trips back to shut it.
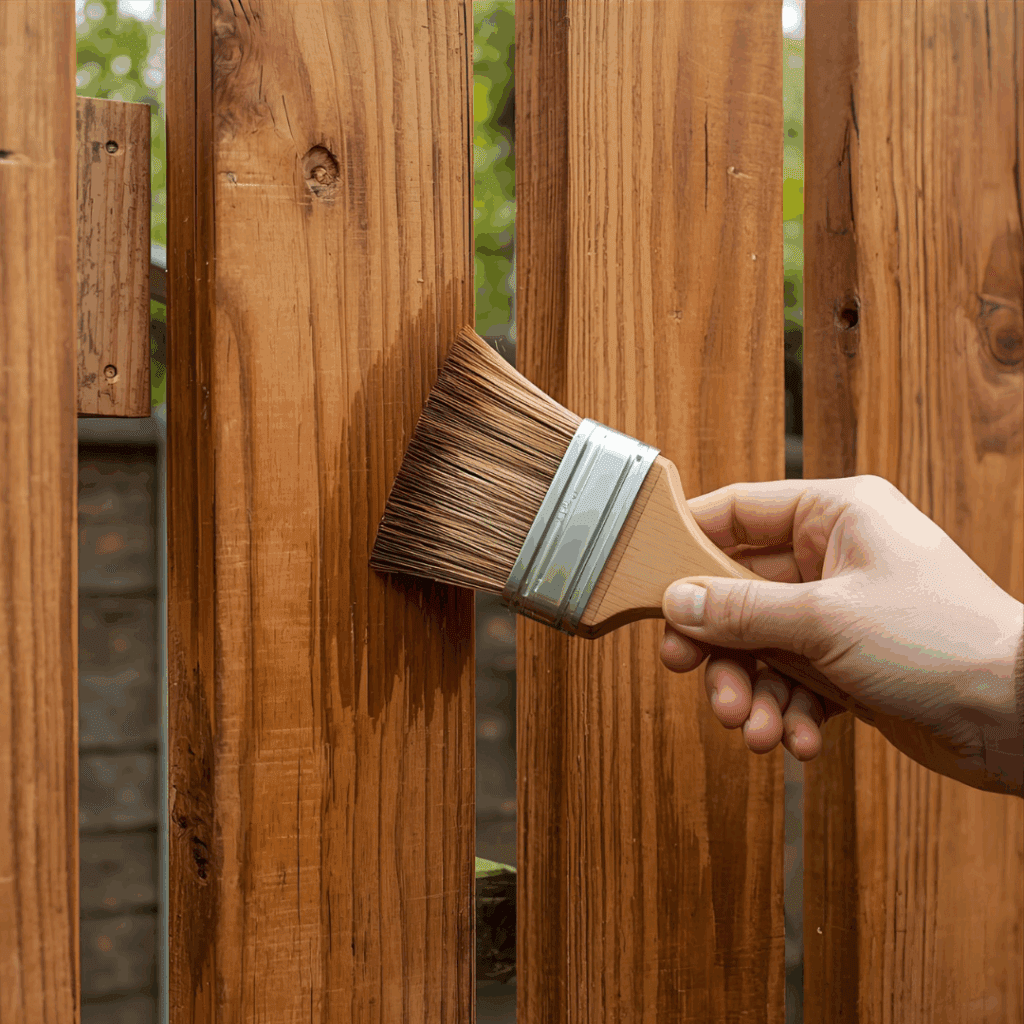
Step 6: Sand and Finish
Run your hand along the boards; if you feel rough spots, grab 120-grit sandpaper, then 220-grit to smooth it out. Wipe away the dust before finishing.
Apply a thin coat of exterior-grade stain or sealer, let it dry, then brush on a second coat. Two light layers protect better than one heavy one. When the finish catches the sunlight, you’ll know the job was worth the effort.
Step 7: Hang the Gate
Now for the moment of truth. Lift the gate onto its hinges and check that it clears the ground by about an inch. Open and close it a few times — it should swing freely and latch without sticking.
Tighten every screw once more, step back, and take a look. You just built a custom garden gate that fits your yard better than anything you could’ve bought.
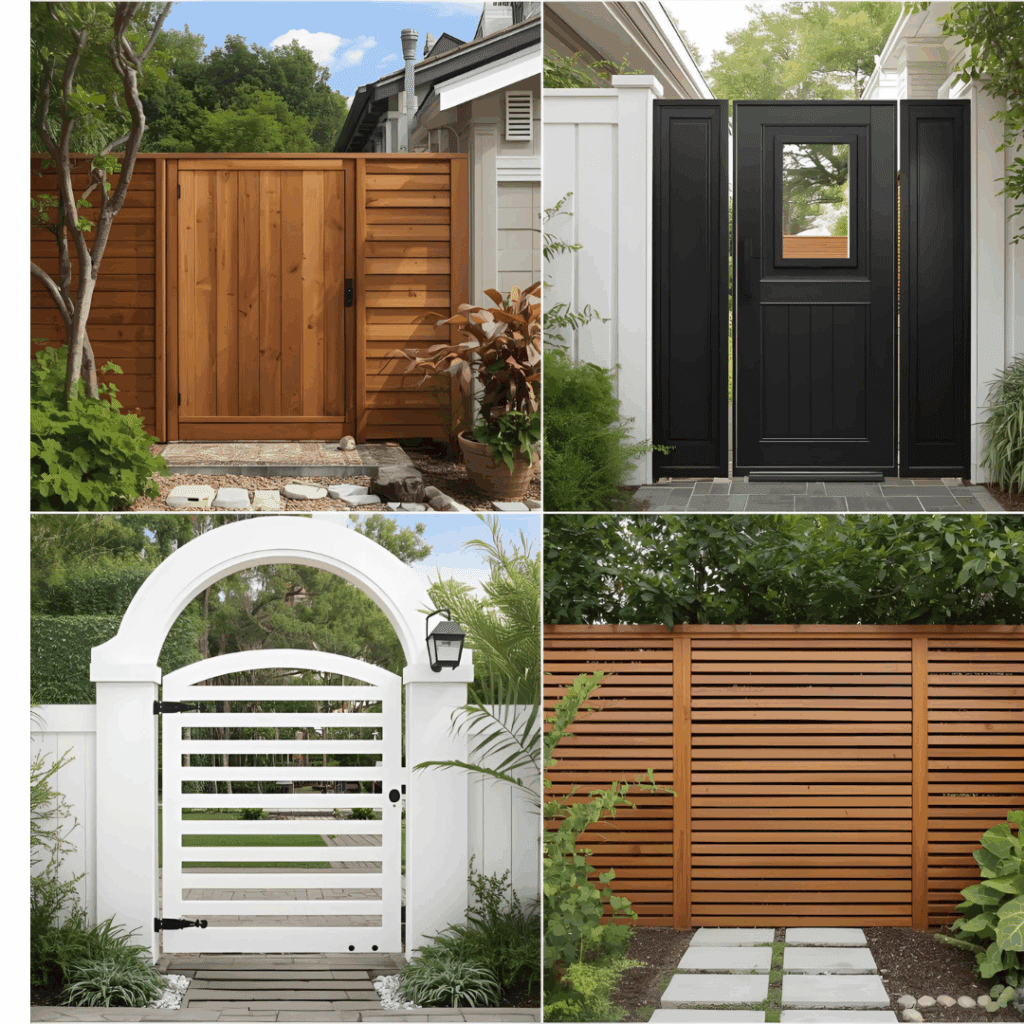
Design Inspiration and Style Options
Your garden gate can say a lot about your home’s personality. Here are a few popular looks to inspire your next project:
Every garden gate tells a story. Some look like they’ve been standing there for a hundred years. Others are crisp and clean, part of a modern fence line. I’ve built a few of each over the years, and no two have ever felt the same.
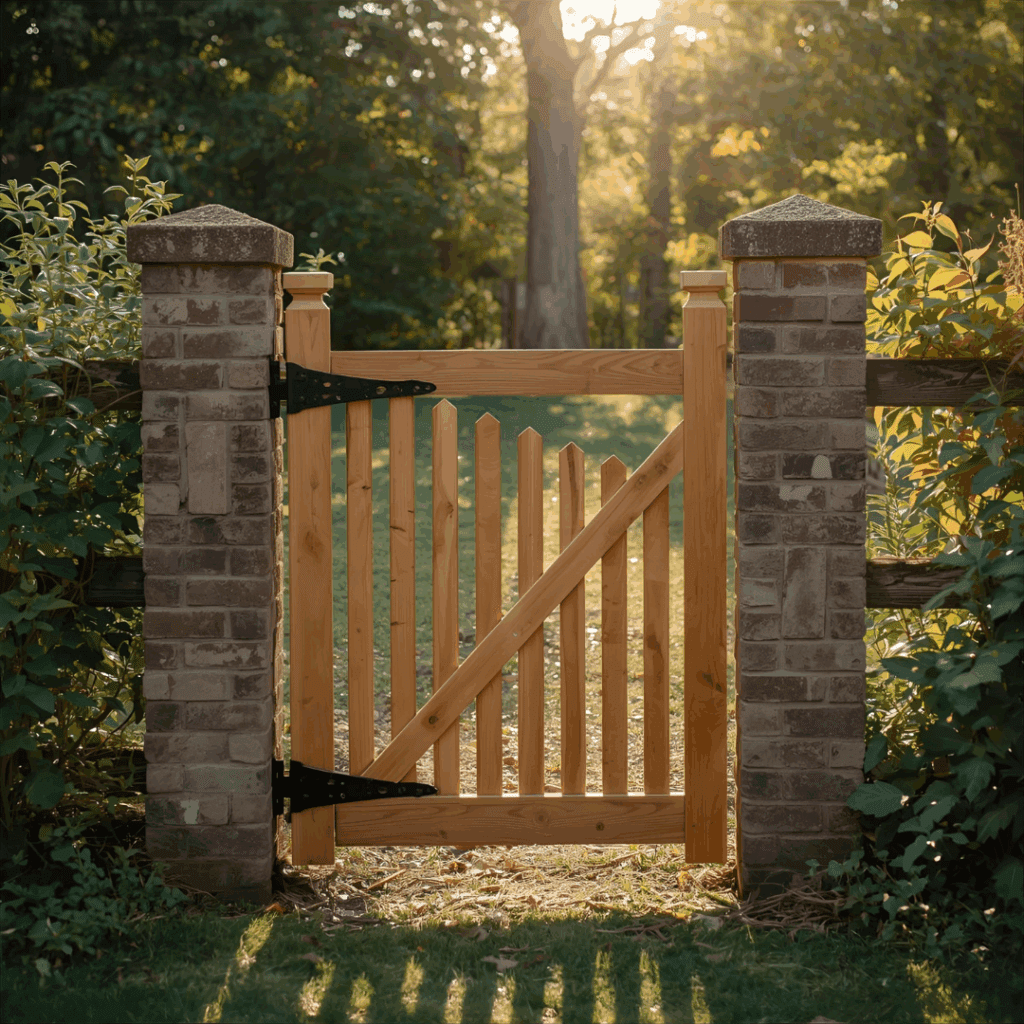
Rustic Farmhouse Gate
If you prefer things with a bit of grit and history, opt for a rustic style. I use rough cedar boards that still smell like the sawmill. Don’t sand out every imperfection — the texture is what gives it life. A pair of heavy black iron hinges and a light gray wash finish it off nicely. Let the rain hit it once or twice, and it’ll start to look like it’s been there forever.
Modern Minimalist Gate
This one’s all about restraint: smooth plywood or composite panels, tight seams, hidden hinges. Keep the lines straight, the edges sharp. A dark stain works great, especially against concrete or steel fencing. When it’s done right, it doesn’t shout — it just belongs.
Cottage Garden Gate
This design always makes me think of spring mornings and coffee on the porch. A soft arch on top, maybe a few floral or heart-shaped cutouts, and a coat of bright white paint. It’s cheerful without being fussy. Once the climbing roses find it, you’ll never want to close it all the way.
Japanese Zen Gate
Quiet, balanced, simple. That’s the goal here. I go with horizontal slats, evenly spaced, stained in warm amber or honey tones. It works best near stone paths or bamboo — places that already have calm built in. When the light hits it at sunset, you’ll understand why the design is all about balance.
Maintenance and Longevity Tips
Outdoor wood moves with humidity, so plan for small seasonal adjustments.
Reapply sealant every two years.
Check screws and hinges annually.
Oil the latch mechanism to prevent rust.
Keep the bottom edge of the gate about 1 inch off the ground to avoid rot.
Safety and Code Considerations
If your gate forms part of a pool or security enclosure, check your local building codes. Many require self-closing hinges and specific latch heights for child safety.
Much cheaper than pre-made garden gates that often cost over $250 at retail stores.
Get Building — Your Garden Deserves a Proper Entrance
Building a garden gate combines form, function, and creativity. With the right materials and a free afternoon, you can turn a simple fence opening into something that reflects your style and craftsmanship.
So pick your wood, grab your tools, and start today — your garden’s waiting.
How to Build a Lean-To Shed (Step-by-Step DIY Guide) by Admin June 17, 2025 DIY If you’ve ever run out of space for your lawn tools, garden gear, or even firewood, you’re not alone. Many homeowners eventually find themselves needing…


")


")