I didn’t set out to become a “floating mirror person.” It happened by accident the day I took down the clunky framed mirror in my downstairs bathroom, and I couldn’t stand the blank wall staring back at me. A week later, I was at the hardware store, holding a frameless mirror that claimed it would “float” once mounted. I wasn’t sure what that meant, but the price was right.
An hour after getting it on the wall, the whole room felt different — brighter, lighter, like I’d snuck in a window while nobody was looking. Since then, I’ve put them in places I never expected: the narrow hallway by the back door, over a beat-up dresser I rescued from a yard sale, even in my mom’s kitchen (she was skeptical until she saw it).
What I like most is how simple they are. No heavy wood frame taking over the wall, no ugly brackets in plain sight. Just clean glass sitting flush and catching the light. In this guide, I’ll show you my way of installing a floating mirror — not just the “right” way, but the way that saves you from cracked drywall, crooked lines, and spending the rest of the week wishing you’d called someone else to do it.
Why Choose a Floating Mirror?
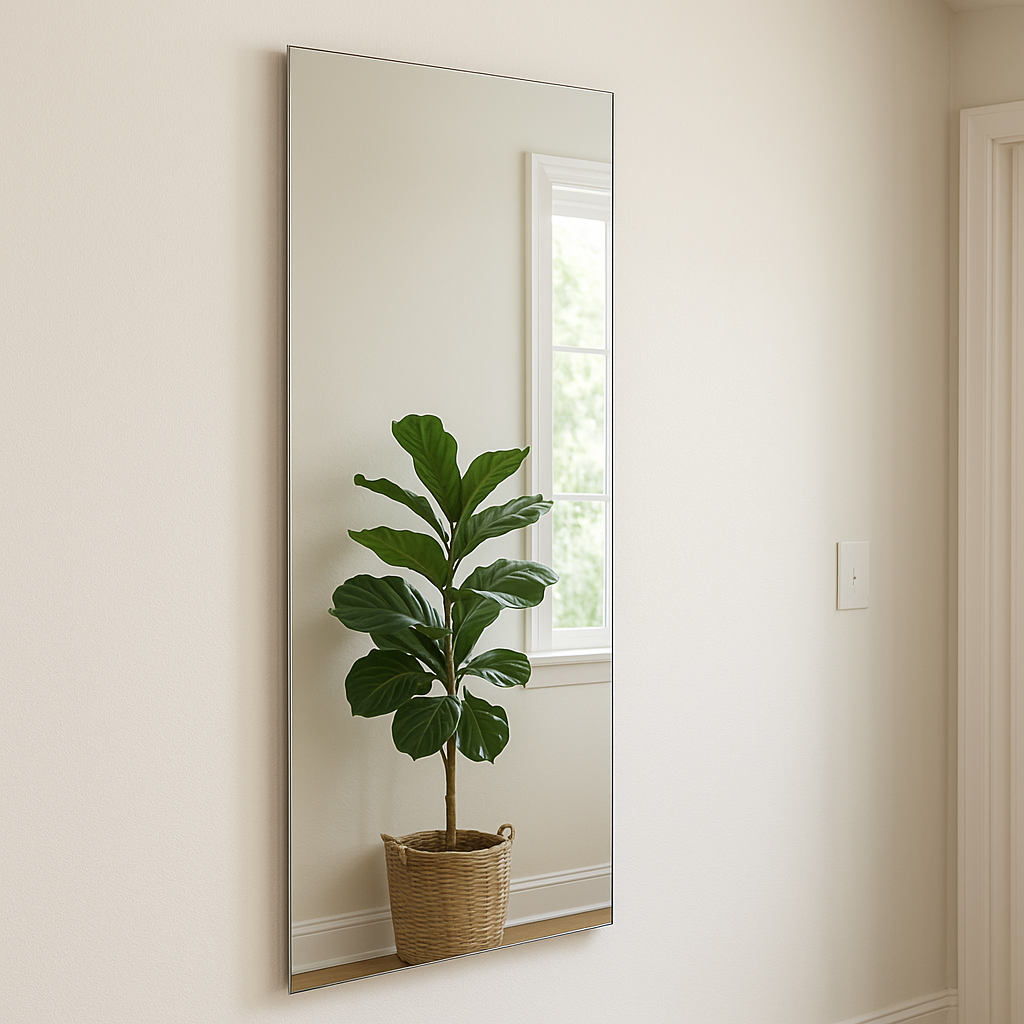
Floating mirrors differ from framed or standard wall mirrors because they appear to “float” without visible brackets or bulky frames. This effect works in both modern and traditional interiors, but it especially shines in minimalistic or contemporary rooms.
Benefits of a floating mirror:
Illusion of space: Perfect for small bathrooms or narrow hallways.
Clean lines: No visible hardware means your eye goes straight to the reflection.
Customizable placement: Works equally well at eye level, over furniture, or as a design focal point.
Versatility: Available in round, rectangular, oval, or even geometric shapes.
Tools & Materials You’ll Need for a Floating Mirror Installation
Essential Tools:
Cordless Drill — For pilot holes and hardware installation.
Step 1: Choosing the Right Floating Mirror for Your Space
Before you even think about picking up a drill, spend a little time finding a mirror that works for your space. This isn’t just about looks — the wrong size or weight can turn a quick project into a frustrating mess.
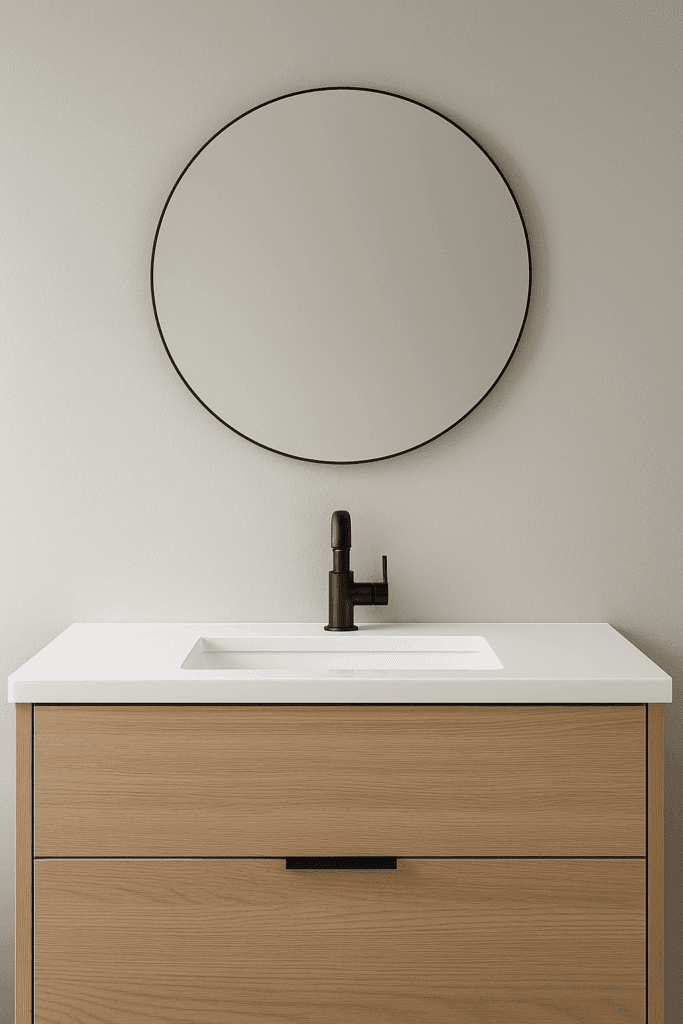
From my trial and error, proportion is the first thing I look at. In a bathroom, for example, your floating mirror should be just a touch narrower than the vanity. Go too wide and it swallows the space; too small and it looks like an afterthought. Shape matters too. Round mirrors add a softer, almost relaxed feel, while rectangular ones bring more structure and symmetry.
Weight is another big deal. I once bought a gorgeous oversized mirror for above a dresser, only to realize halfway through installation that it weighed more than the anchors I had on hand could safely hold. Lesson learned — always check the manufacturer’s specs before you buy.
Lastly, look at the edges. A polished or beveled finish catches the light in a way that sells the “floating” effect. And if you’re putting it in a bathroom, make sure it’s rated for damp environments so you don’t end up with fogging or hidden frame damage later. Spending a few extra minutes on the right choice here makes the installation itself go much smoother.
Before grabbing your drill, figure out exactly where your floating mirror will go. It sounds simple, but rushing this part is how you end up with a mirror that’s off-center or at the wrong height — something you’ll notice every single time you walk past it.
In a bathroom, I usually center the mirror directly above the vanity or sink. A good rule of thumb is to leave about 5–10 inches between the bottom edge of the mirror and the countertop. That keeps it functional for grooming while still looking balanced. For living rooms or entryways, I like to hang the mirror so the center sits around eye level, which is typically between 57–65 inches from the floor.
One trick I’ve learned is to tape a piece of cardboard to the wall in the shape of the mirror before committing. Stand back, walk around, and see how it feels from different angles. This little test can reveal if the mirror will reflect a beautiful view — or, awkwardly, the laundry pile in the corner. Taking the extra time now saves you from extra holes in the wall later.
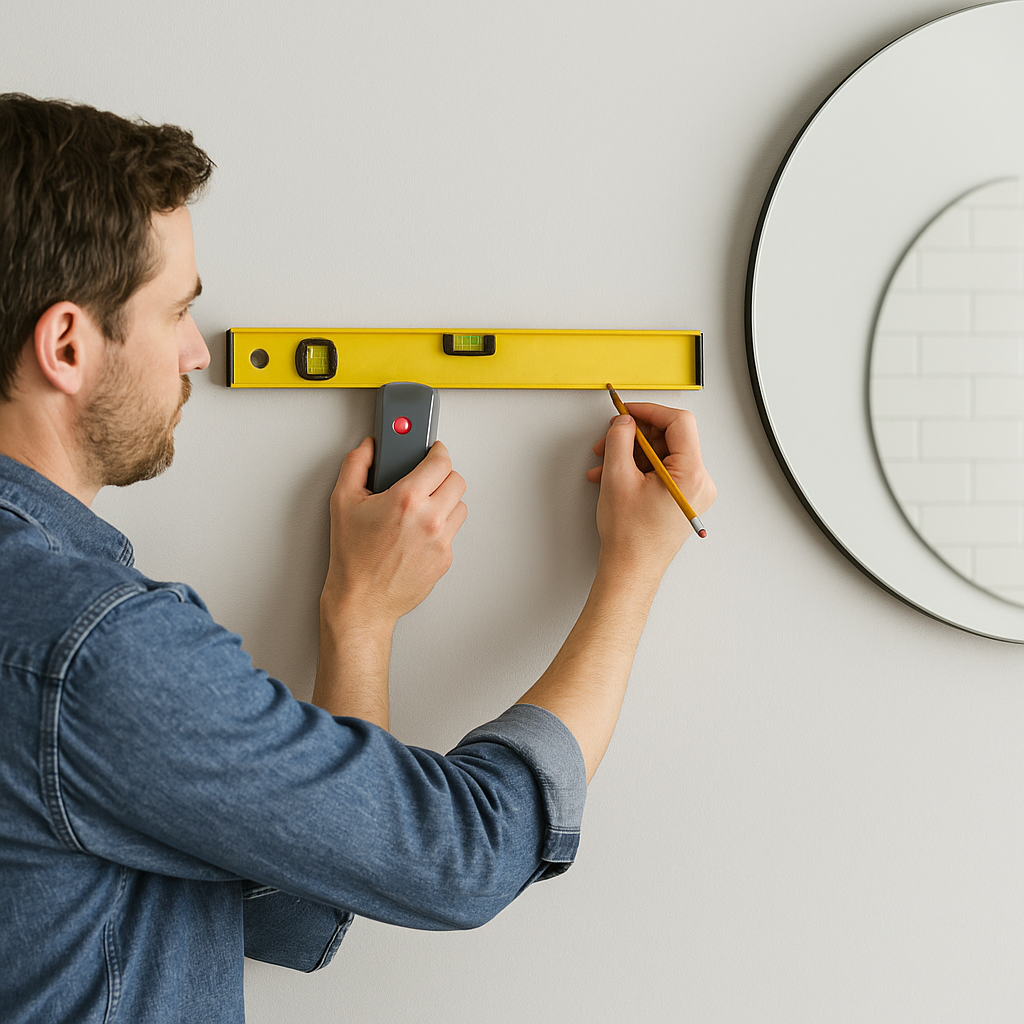
Step 3: Find the Studs and Mark Drill Points
This is the part where patience really pays off. Once you’ve decided on placement, grab your stud finder and run it across the wall slowly — rushing can cause you to miss the stud entirely. I like to mark each stud with a small piece of painter’s tape rather than just a pencil dot so it’s easier to see when I’m lining things up.
After that, measure carefully from multiple reference points. Don’t just trust one measurement from the counter or floor — check from each side and the ceiling if possible. This helps catch walls or floors that aren’t perfectly level, which is more common than most people realize.
Once your drill points are marked, double-check them with a level. I’ve skipped that step before, thinking my eyes were “good enough” — big mistake. A slightly crooked mirror might not seem bad now, but once it’s up, every visitor will notice. This is your last chance to get it perfect before making holes you can’t hide.
Step 4: Choose Your Mounting Method
This is where you decide how the mirror is going to stay on the wall — and trust me, it’s worth thinking about before you bring that glass anywhere near a drill. I’ve had great luck with two systems: French cleats and hidden brackets.
French cleats are my safety blanket for heavier mirrors. I used one in my hallway where the mirror was so heavy I almost pulled my shoulder lifting it. Once the cleats were locked together, I could breathe again — the thing wasn’t going anywhere.
Hidden brackets give you that perfectly flush, almost “is it glued on?” look. They’re gorgeous, but they’re not forgiving. I once had to redrill because I was off by less than half an inch, and that was enough to ruin the fit.
Whatever you choose, go heavier on the hardware than you think you need. Wall repairs are easier than sweeping up shattered glass.
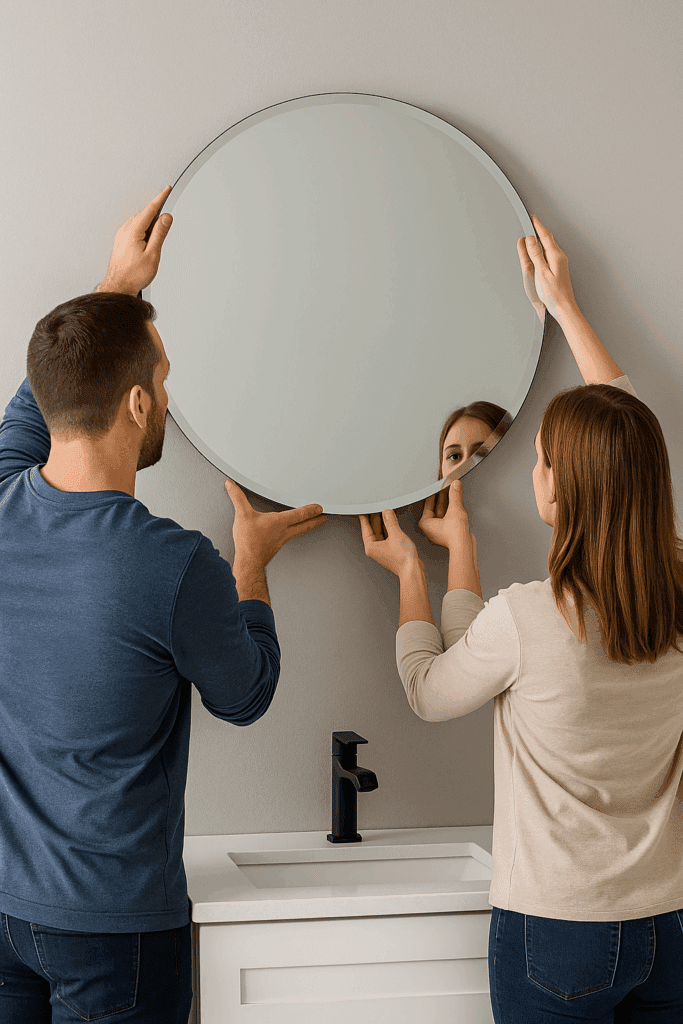
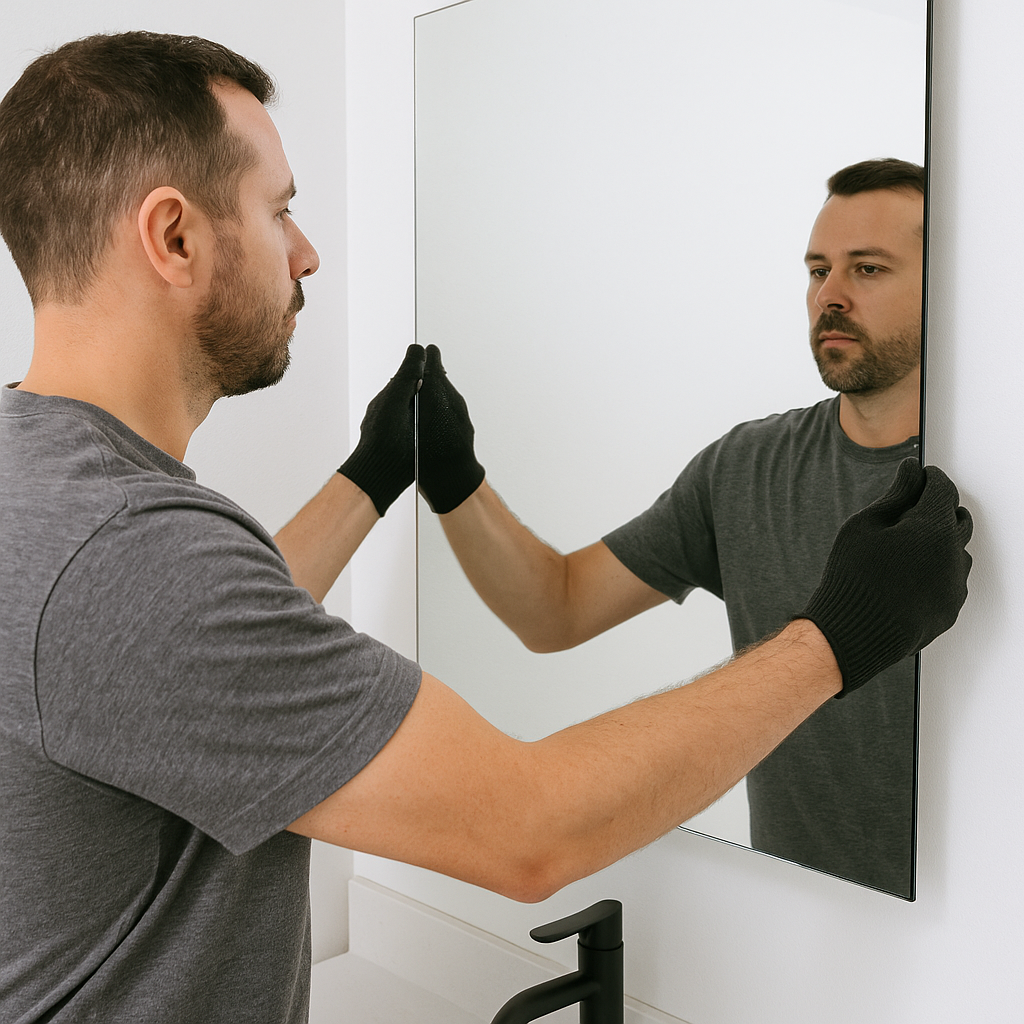
This is the part where all that measuring and prep finally pays off. Grab a friend or family member to help — floating mirrors aren’t just heavy, they’re awkward to maneuver, and one slip can chip an edge or worse. I usually have one person steadying the bottom while the other guides the top into place.
If you’re using a French cleat, you’ll feel it “catch” when it’s locked in. With hidden brackets, you might have to ease it down slowly until it slots into the hardware. Once it’s up, step back and check it with a level. Adjust right away — it’s a lot easier to fix alignment now than after you’ve declared the job done and put your tools away.
I like to do a little “shake test” (just a gentle nudge) to make sure everything’s secure. If it wobbles, don’t ignore it — fix it before calling the project finished.
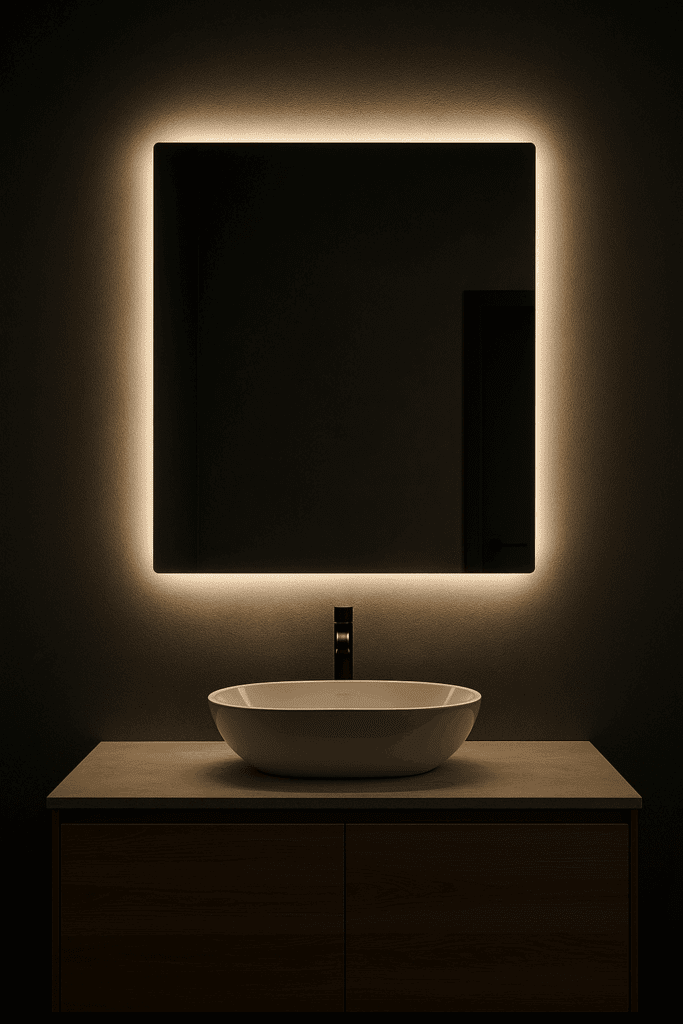
💡 Pro Tip: If you want to add an LED backlight, now’s the time before the mirror is fully flush against the wall.
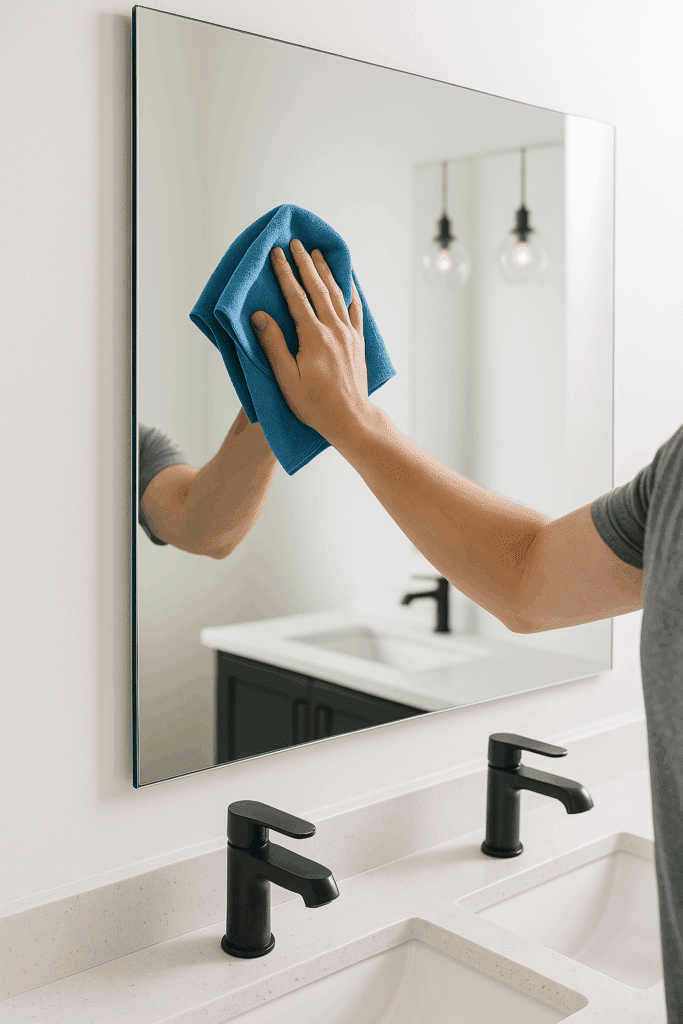
Step 6: Clean and Finish
Once the mirror is up and secure, grab a clean microfiber cloth and give it a quick wipe-down. You’ll be surprised how many fingerprints, smudges, or bits of dust end up on the surface during installation — especially if you were adjusting it multiple times. I like to work from top to bottom in slow, even passes so I don’t leave streaks.
After cleaning, take a few steps back and look at the mirror from different spots in the room. I’ll even crouch down or move to one side to see if it still looks perfectly straight. Sometimes a mirror can appear level from directly in front, but from the corner of the room, it tells a different story.
If anything looks off, now’s the time to fix it. Once the furniture or vanity items are back in place, making adjustments will be more work than it needs to be.
Safety Tips When Installing a Floating Mirror
Always have a second person help lift heavy mirrors.
Wear gloves to avoid cuts from sharp edges.
Confirm your hardware weight rating exceeds your mirror’s weight.
For tiled walls, use a diamond drill bit to avoid cracking.
Smart Mirror Conversion: Add a Smart Mirror Kit for weather updates and news display.
Troubleshooting Common Issues
Mirror not level: Loosen the mounting screws, adjust as needed, and retighten.
Mirror wobbles: Upgrade to heavier-duty wall anchors or mount into studs.
Visible hardware: Use chrome or matching caps for a cleaner look.
Conclusion
When I think about the home projects that have made the biggest difference for the least money, the floating mirror is right up there. The last one I put up was in the hallway, and I still catch myself slowing down when I pass it. It throws light into a dark corner and somehow makes the whole space feel less cramped.
The trick isn’t some secret tool — it’s slowing down enough to get the little stuff right. Mark your holes carefully. Double-check the height. Make sure your hardware is better than “good enough.” I’ve skipped those steps before and ended up taking the whole thing down to fix a tilt I couldn’t unsee.
Once it’s hanging straight, take a minute to just stand there. Notice how it changes the room. That’s the payoff — not just a mirror on the wall, but a space that feels different every time you walk in.
Floating Shelves: Stylish Storage & Easy DIY Guide by Admin September 8, 2025 DIY I still remember the first time I put up floating shelves. It wasn’t some big renovation—just a Saturday project in my living room. Instead of…
DIY Floating Desk by Admin July 26, 2023 DIY Building a floating, wall-mounted desk for modern office furniture requires a different style and special techniques. You can’t make a “floating” desk like any other…