This post contains affiliate links. As an Amazon Associate, theplywood.com earns from qualifying purchases.
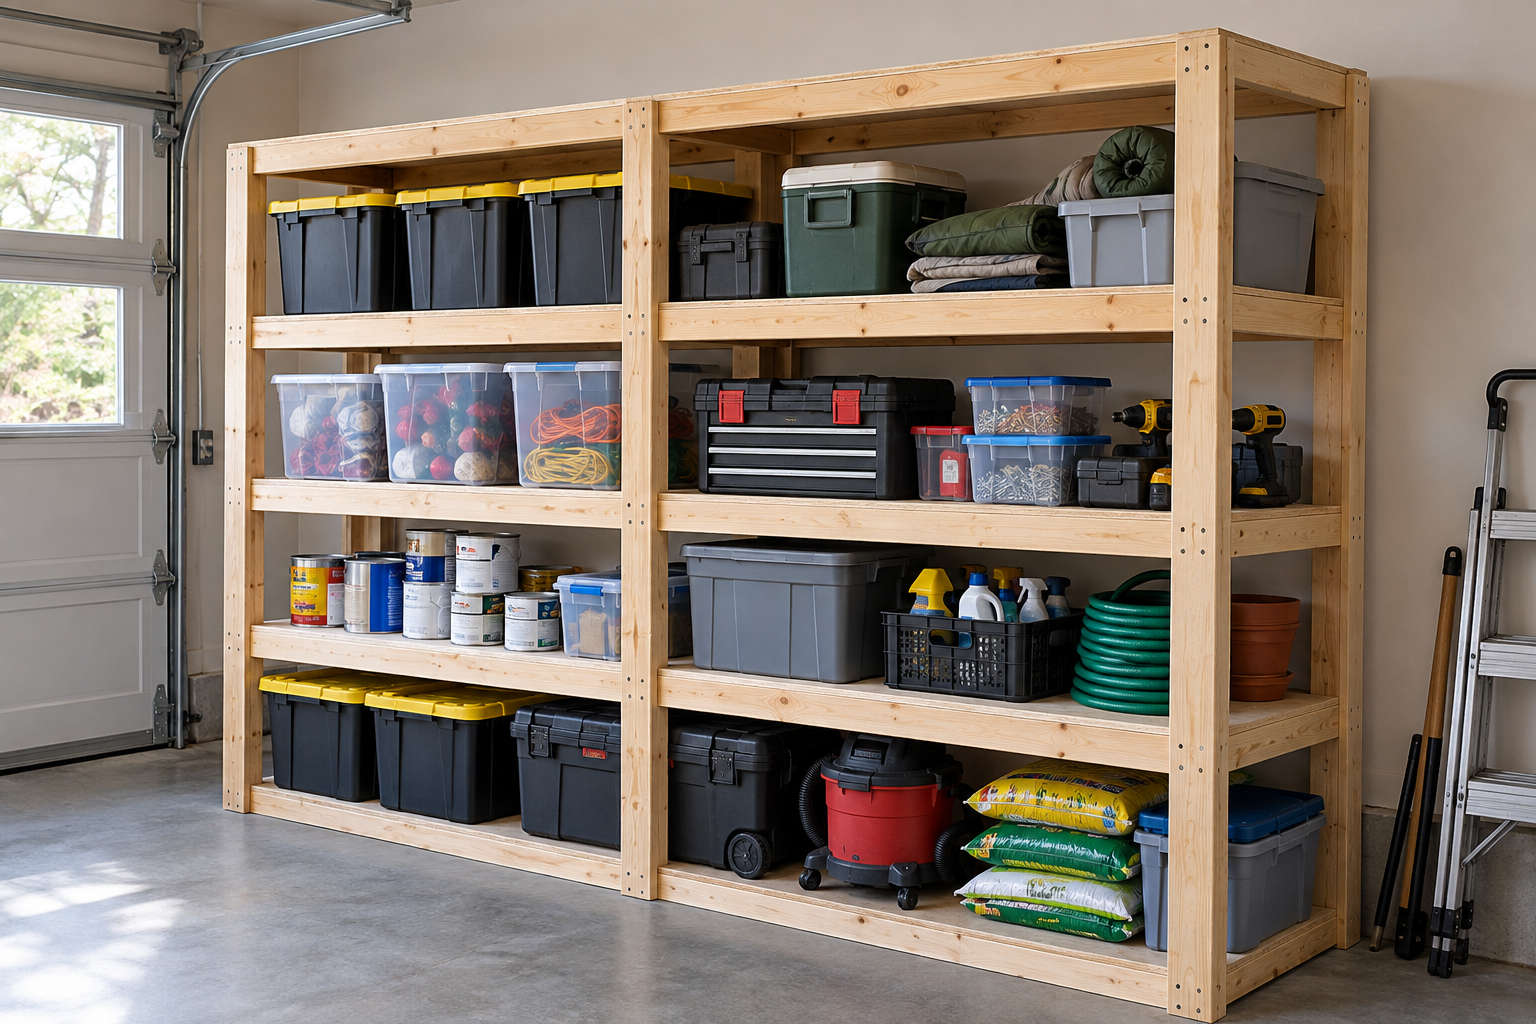
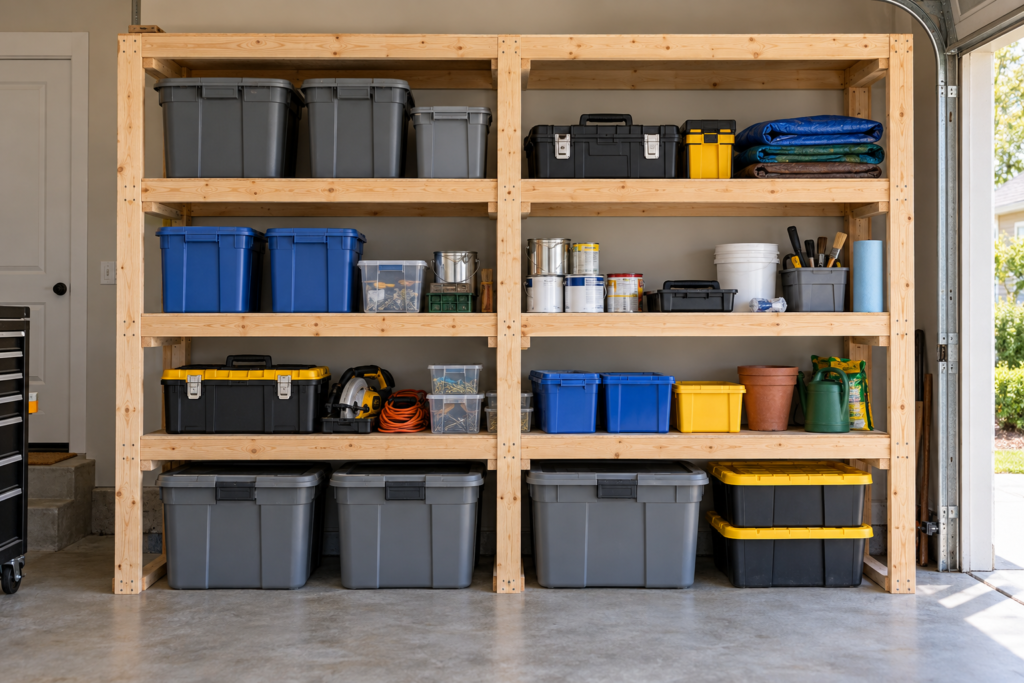
A freestanding 2×4 frame with plywood decks is often the lowest-cost way to get sturdy garage shelving. This plan uses 22 eight-foot 2x4s and two 4×8 sheets of 3/4-inch plywood. It makes a four-shelf unit 96 inches wide, 72 inches tall and about 27 inches deep, with 17 inches of clear height between shelves. Each shelf sits on solid support blocks that stack down to the floor, so the weight doesn’t hang on screws.
Quick answer
Finished size: 96″ wide × 26-15/16″ deep × 72″ tall (the legs attach to the front and back rails, so they add depth, not width)
Shelves: four decks, each about 23-15/16″ × 96″, with 17″ of clear height between them
Option A (3/4″ plywood): 2 sheets + 22 eight-foot 2x4s, cross supports every 24 inches
Option B (1/2″ plywood): 2 sheets + 24 eight-foot 2x4s, cross supports every 16 inches
Waste: each sheet rips cleanly in half, so you use all of the plywood
Whether building saves money depends on your local lumber prices and on the store unit you’re comparing against. This table compares how they’re built, not their prices.
Option
Cost
Sag resistance
Custom sizing
Damp garage
DIY 2×4 + plywood
Often lowest per square foot of shelf; depends on lumber prices
High at the support spacing in this plan
Any size
Good if the wood is kept off bare concrete
Steel boltless rack
Varies widely by size and rating
Check the per-shelf rating on the label
Fixed sizes
Good; particleboard decks are the weak spot
Plastic resin unit
Varies
Usually lighter-duty; check the label
Fixed sizes
Very good
Wall brackets + boards
Low for a single shelf
Depends on the brackets and stud spacing
Any length
Good
Cost test before you buy: add up your lumber and screw receipt and divide by 64, the square feet of shelf this unit gives you. For a store unit, divide its price by (number of shelves × width in feet × depth in feet). Compare the two numbers. When the DIY version wins, it’s usually because you’re buying plain construction lumber and wasting none of the plywood.
Same sag check, not the same strength. Both options keep the open span under the sag limit for their thickness, and that’s all the comparison shows. It doesn’t make them equal. Thicker plywood dents less, holds screws better, and copes better with one heavy item set in the middle of a span. Load capacity also depends on the panel grade, which way the panel runs, and how the load is spread. If your shelves will carry heavy, concentrated loads, choose Option A.
Which one costs less: Option B costs two more 2x4s and saves you the price difference on two sheets of plywood. If 3/4″ costs more than one 2×4 extra per sheet at your store, Option B costs less. Otherwise, Option A costs the same or less and is the stiffer shelf.
If you buy sheathing. The sag-chart numbers above are for sanded plywood. Sheathing grades like CDX plywood are common for garage shelves, but their stiffness varies by grade and how the panel is made. For sheathing, use the chart as a rough guide, not a rating. To keep a safety margin, use the closer support spacing (16 inches) and keep the heaviest items on the bottom shelf. 7/16″ OSB is often the cheapest panel on the rack, but its cut edges swell if they get wet, and the plywood numbers here don’t apply to it. If you use OSB, use 16-inch supports and keep the loads light to medium.
Cut List
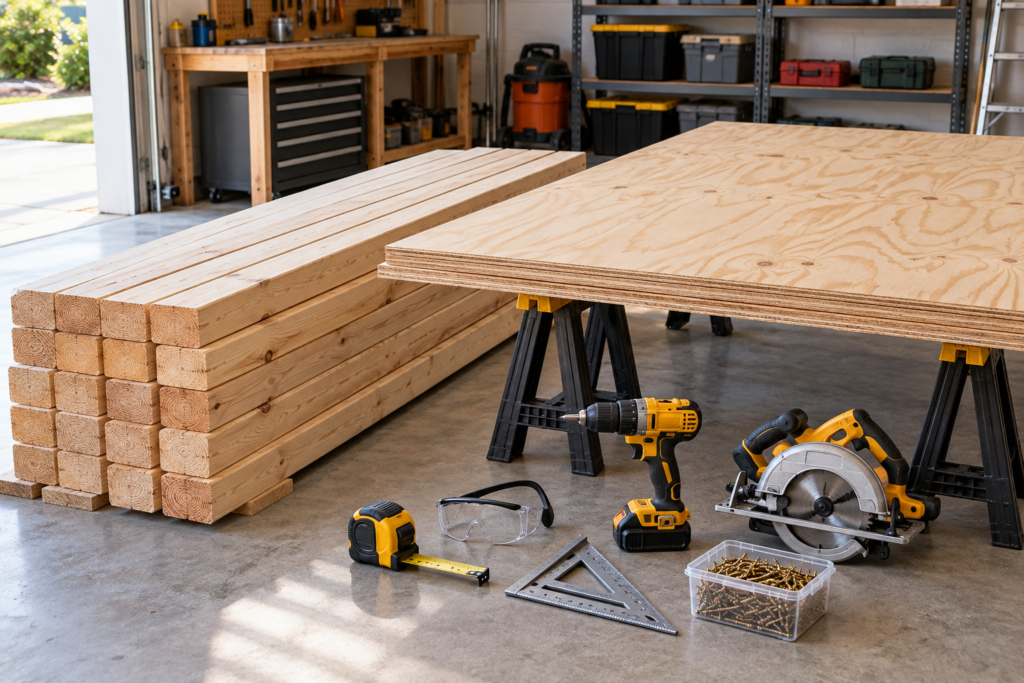
Plywood (both options): rip each 4×8 sheet lengthwise down the middle. You get 4 shelf decks, each about 23-15/16″ × 96″.
Rip it lengthwise, not across. A lengthwise rip keeps the panel’s stronger direction running along the 8-foot shelf, across the cross supports. Many big-box stores will make a few straight cuts for you if you ask.
2x4s, Option A (22 boards):
Part
Qty
Length
Cut from
Legs
6
72″
6 boards; the offcut from each becomes one cross support
Long rails
8
96″
8 boards, no cutting
Cross supports
20
Ripped deck width minus 3″ (about 20-15/16″)
6 leg offcuts + 4 boards cut into 4 pieces each (2 spare)
Support blocks, tall
18
17″
4 boards cut into five 17″ and two 4″ pieces each (2 spare)
Support blocks, short
6
4″
Same 4 boards (2 spare)
2x4s, Option B (24 boards): the legs, rails and support blocks are the same. You need 28 cross supports: 6 from the leg offcuts plus 6 boards cut into 4 pieces each, which leaves 2 spare.
Measure before you cut the cross supports. Saw blades differ, so your ripped deck may not be exactly 23-15/16″. Measure the actual deck width and subtract 3 inches (two 1-1/2″ rails).
Fasteners:
3″ construction screws: about 180 for Option A, about 210 for Option B (2 per rail-to-leg joint, 2 per support block, 2 through the rail into each end of every cross support)
1-1/4″ to 1-5/8″ wood screws: about 120 to 130 to attach the plywood decks
Shelf Heights (Set by the Support Blocks)
You don’t measure or mark heights on the legs. A 4″ block under the bottom shelf and 17″ blocks between the others set every height.
Shelf
Option A: frame bottom / deck top
Option B: frame bottom / deck top
1 (bottom)
4″ / 8-7/32″
4″ / 7-31/32″
2
25-7/32″ / 29-7/16″
24-31/32″ / 28-15/16″
3
46-7/16″ / 50-21/32″
45-15/16″ / 49-29/32″
4 (top)
67-21/32″ / 71-7/8″
66-29/32″ / 70-7/8″
Clear height between each deck and the underside of the shelf above is 17 inches (shelves 1 to 3). The top shelf is open above.
The heights assume plywood that is exactly 23/32″ and 15/32″ thick. Real sheets vary a little. The blocks adjust for that automatically, so the heights can be off by a fraction of an inch and the shelves will still be level.
The 72″ legs end about 1/8″ above the top deck in Option A and about 1-1/8″ above it in Option B. Trimming them is optional.
For taller totes: make the tall blocks your tote height plus 1 inch. The leg length becomes 4″ + (4 × frame thickness) + (3 × block length), where frame thickness is 3-1/2″ plus the plywood thickness.
How to Build DIY Garage Shelves
1. Rip the plywood and cut the 2x4s
Rip both sheets lengthwise. Cut the legs, then cut a cross support from each leg offcut. Cut the rest of the cross supports, then cut the 17″ and 4″ support blocks.
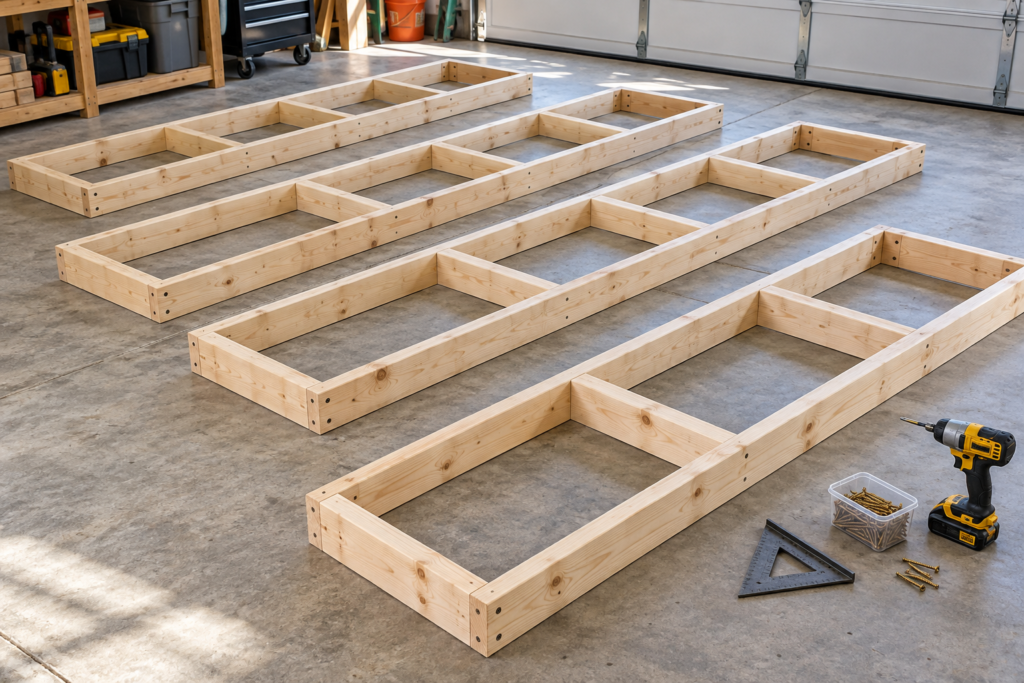
2. Build four shelf frames
For each frame, lay two 96″ rails on edge. Put cross supports at both ends, then every 24″ on center for Option A or every 16″ for Option B. Drive two 3″ screws through the rail into the end of each cross support.
3. Screw the plywood to each frame
Set a deck on each frame with its edges flush, and screw it down about every 12 inches along the rails and into every cross support. The plywood squares up the frame.
4. Assemble the back half on the floor
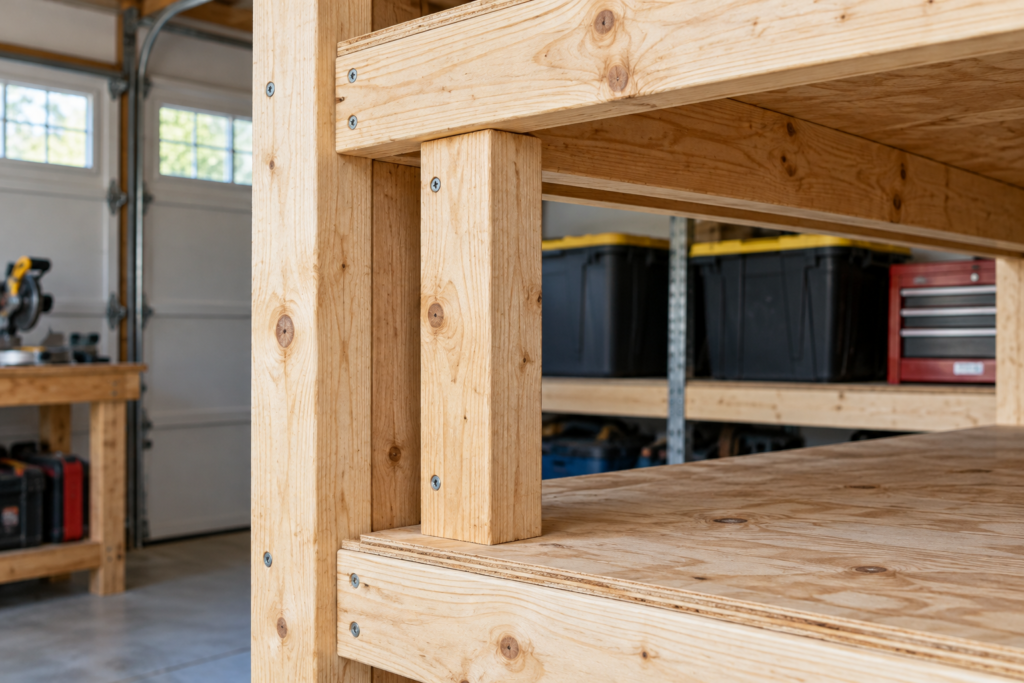
Lay three legs flat: one flush with each end of the 96″ rail and one centered at 48″. Each frame’s back rail and the support blocks all screw to the same face of these legs, stacked one after another:
Screw a 4″ block flush with the bottom end of each leg (2 screws).
Set the first frame’s back rail tight against the blocks and screw it to each leg (2 screws per leg).
Set a 17″ block tight against the first frame’s deck at each leg, then screw it in place.
Repeat with frames 2, 3 and 4.
Every block lines up directly under a rail. When the unit stands up, each shelf rests on a column of wood that runs to the floor.
5. Attach the front legs and blocks
Screw the other three legs to the front rails at the same positions, adding a 4″ block at the bottom and 17″ blocks between the frames, the same way as the back.
6. Stand it up, level it, and secure it to the wall
Stand the unit up and set each leg and bottom block on a composite shim or a scrap of pressure-treated wood, then level it. Secure the unit to the wall framing with anti-tip hardware and fasteners rated for the job, and follow the hardware maker’s installation instructions. If the unit stands away from a wall, screw a diagonal 1×4 across the back so it can’t rack side to side.
How the weight travels: each shelf frame bears down on a block, which bears on the frame below, and so on down to the floor. The screws hold the parts in line; they don’t carry the shelf weight. We haven’t load-tested this unit, so we don’t give a pounds-per-shelf rating.
Warning: a loaded 6-foot unit that isn’t anchored can tip forward when someone pulls a heavy tote off the top shelf. Secure it to the wall even if it feels solid when empty.
Mistakes That Cost You
1. Hanging the shelves on screws alone. If two screws per leg are all that hold a shelf up, the screws carry the full load sideways. Over time they can bend or pull out, and one failed joint can drop a corner. The stacked blocks in this plan carry the weight instead.
2. Buying precut studs for the rails. Many stores stack 92-5/8″ precut studs right next to true 8-foot 2x4s. Rails 3-3/8″ too short leave the plywood hanging past the frame with nothing under it. Check the length on the tag.
3. Cutting the sheet across instead of ripping it lengthwise. Cutting the 4×8 into 24″ × 48″ pieces turns the panel’s strong direction front-to-back, parallel to the cross supports, and the shelf sags sooner.
4. Using 1/2″ plywood on 24″ supports for heavy items. That open span is past the heavy-load limit for 1/2″ on our sag chart, and paint cans or toolboxes will leave a permanent dip. If one has already formed, see how to fix a sagging plywood shelf.
5. Using particle board or MDF as the decks. They sag faster than plywood and swell when a garage gets damp. Our particle board guide covers where it does work.
6. Building with drywall screws or standing the wood on bare concrete. Drywall screws are hard and brittle and can snap at a joint; use construction screws, and see our guide to plywood screw holding strength. End grain sitting on a slab soaks up moisture, so put a shim under every leg and bottom block.
1-1/4″ exterior wood screws – for attaching the decks, and coated to resist garage moisture. Check price on Amazon
Circular saw rip guide – makes the two long plywood rips straight without a table saw. Check price on Amazon
Heavy-duty anti-tip hardware – for securing the unit to the wall framing. Choose a kit rated for the weight of a loaded shelf unit and follow the maker’s instructions. Check price on Amazon
Composite shims – level the unit and keep the wood off the slab. Check price on Amazon
When This Build Isn’t the Right Pick
Very damp or unheated garages where water sits on the floor: use plastic resin units or galvanized steel, or at least seal every plywood edge.
Engine parts, bagged concrete or other very heavy items: use a steel rack with a published per-shelf rating.
Renting or moving soon: a boltless steel rack comes apart, and this unit doesn’t come apart easily.
No floor space left: look up instead. Overhead racks and a garage loft use space this unit can’t reach, and leftover plywood from other projects (see our scrap plywood ideas) can become small wall shelves.
What is the cheapest way to build garage shelves? A 2×4 frame with plywood decks often has the lowest material cost per square foot of shelf, because two 4×8 sheets ripped in half make four 2-by-8-foot shelves with no waste. Whether it beats a store-bought unit depends on local lumber prices, so compare cost per square foot before you buy.
Is 1/2-inch plywood strong enough for garage shelves? For most garage storage, yes, with supports no more than 16 inches apart on center. That keeps the open span under the heavy-load sag limit for 1/2″ plywood. It still dents more easily and holds screws less well than 3/4″, so use 3/4″ for heavy, concentrated loads.
How much weight can DIY 2×4 garage shelves hold? This plan isn’t load-tested, so we don’t give a number. The support spacing keeps the decks within the sag limits on our chart, and the stacked support blocks carry each shelf’s weight to the floor through solid wood. Spread the load evenly and keep the heaviest items on the bottom shelf.
Should garage shelves be 16 or 24 inches deep? 24 inches fits large totes and uses a 4×8 sheet with no waste. If your garage is tight, rip each sheet into three strips about 15-7/8″ wide and cut the cross supports to the ripped width minus 3″.
Can I use OSB instead of plywood for garage shelves? Yes, for light to medium loads with supports every 16 inches. Its cut edges swell if they get wet, and the plywood span numbers in this article don’t apply to it.
Do I need to anchor DIY garage shelves to the wall? Yes. A 6-foot unit loaded at the top can tip when you pull a tote toward you. Secure the unit to wall framing using appropriately rated anti-tip hardware and fasteners. Follow the hardware manufacturer’s installation instructions.
Bottom Line
Rip two sheets of plywood in half, build four 2×4 frames, and stack them on support blocks that run to the floor. That gives you about 64 square feet of shelving 96 inches wide. Choose 3/4″ plywood with 24-inch supports or 1/2″ with 16-inch supports based on your local prices and how heavy your loads are, and secure the unit to the wall framing with rated anti-tip hardware before you load it.
Related Posts:
Cheap Basement Ceiling Ideas That Don’t Look Cheap by Admin October 23, 2026 DIY The cheapest basement ceiling that still looks finished is usually painting the exposed joists, ducts and pipes one solid color. It costs the least, loses…