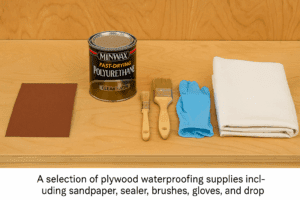
Most plywood doesn’t fail because someone picked the wrong sealer. It fails because they sealed the flat faces, admired the shine, and left the edges bare. Water finds those edges, wicks into the core, and the panel starts to swell, delaminate, or gray out.
So before we compare products, understand this: the sealer you choose matters, but where and how you apply it matters just as much. This guide covers the best plywood sealer for both indoor and outdoor projects — and treats those as two different jobs, because they are. You’ll get quick recommendations by project type up top, category-by-category options, and a realistic look at what cutting corners actually costs.
Some links below are affiliate links; theplywood.com may earn a commission at no extra cost to you.
Best Plywood Sealer by Project (Quick Answers)
If you just want to know what to reach for, start here. The rest of the article explains the trade-offs behind each pick.
Indoor furniture and shelving: a water-based polyurethane. It stays nearly clear, has low odor, and is easy to apply. For high-wear indoor surfaces like a workbench or tabletop, step up to oil-based polyurethane for a harder film.
Outdoor painted plywood: exterior primer plus exterior paint. Pigment blocks the UV that destroys clear finishes, so paint is usually the most durable outdoor option when you don’t need the grain to show.
Outdoor plywood with a clear finish (grain visible): a spar urethane formulated for exterior use, with the understanding that clear finishes in sun are a maintenance item you’ll refresh over time.
Edges and end grain (any project, critical outdoors): a penetrating epoxy, or extra coats of whatever sealer you’ve chosen. This is the step people skip.
Sealing, Bond Rating, and Rot Resistance Are Three Different Things
This is the most misunderstood part of the topic, and getting it straight will save you money.
Bond classification describes the glue holding the veneers together. Under the U.S. product standard PS 1-22, “Exposure 1” plywood uses exterior-grade adhesive and can handle moisture during construction delays, while “Exterior” plywood uses a fully waterproof bond meant for permanent exposure. You can read the full breakdown in our guide to reading plywood grade stamps. (plywood grade stamps)
Rot resistance is a separate property. It comes from preservative treatment (pressure-treated panels under AWPA standards) or from naturally durable veneer species — not from the glue bond. An Exterior-rated panel can still rot if it stays wet, because the wood isn’t protected, only the glue line is.
Sealing is the surface job you’re doing today. A sealer or finish keeps liquid water and UV off the wood so it resists checking, swelling, graying, and decay. Even Exterior-bond plywood needs a finish for outdoor life.
In plain terms: the grade stamp tells you about the glue, treatment tells you about rot, and the sealer is the coat you add on top.
The Mistake That Ruins More Plywood Than Any Sealer Choice
Here it is, because it’s worth its own heading: unsealed edges and end grain.
Plywood is a stack of veneers, and the exposed edges act like a bundle of straws pointing into the core. Water tends to climb into those straws faster than it soaks through a finished face. That’s why panels often fail from the edges inward — swollen corners, dark stains creeping in, delamination that starts at a cut line.
If you take one thing from this article: seal every cut edge, and seal it well. Cut edges tend to drink up finish, so they usually benefit from extra coats compared with the faces. On outdoor projects, working a penetrating epoxy or a thinned first coat into the end grain often does more for longevity than an extra coat on the face.
⚠️ Warning: Sealing plywood before you cut it does little for the fresh cut edges. Seal after cutting, or at minimum go back and hit every new edge before assembly.
Best Plywood Sealers for Indoor Projects
Indoors, you’re mainly fighting spills, humidity, hand oils, and wear — not weather or UV. That opens up finishes that would struggle outside.
Water-Based Polyurethane (Polycrylic)
The easy default for indoor plywood: shelving, furniture, cabinets, toy boxes. It dries fast, cleans up with water, stays nearly clear (so birch and maple ply keep their pale look), and has low odor. It’s generally not as tough as oil-based poly for heavy-wear surfaces, but for most indoor plywood it’s the sweet spot. Shop water-based polyurethane on Amazon
Oil-Based Polyurethane
When the surface takes abuse — a workbench top, a tabletop, a floor — oil-based poly builds a harder, more scuff- and moisture-resistant film. Trade-offs: stronger smell, longer dry time, and a warm amber tone that can yellow light woods over time. Strong durability; just know it will shift the color. Shop oil-based polyurethane on Amazon
Danish Oil and Penetrating Oils
If you want the wood to look and feel like wood rather than sit under a plastic-looking film, a penetrating oil soaks in and leaves a soft, natural sheen. It’s easy to apply and repair, but it generally offers less protection against standing water and needs periodic re-oiling. Best for decorative indoor pieces, not high-splash zones. Shop Danish oil on Amazon
Shellac
Shellac is a beautiful, fast-drying finish and a useful sealer/primer coat — but there’s a catch.
⚠️ Warning: Shellac has poor water and alcohol resistance and isn’t suitable for outdoor use or surfaces that meet water or spills regularly. Keep it to decorative indoor work, or use it as a first-coat sealer under something tougher.Shop shellac on Amazon
Best Plywood Sealers for Outdoor Projects
Outdoors, two enemies join the water: UV light, which breaks down both wood and many clear finishes, and moisture cycling, the wet-dry-wet swing that pumps water in and out until edges and joints give up. Your outdoor sealer has to handle both.
Spar urethane is formulated for exterior use. It’s generally more flexible than standard interior poly, so it can move with the wood through temperature and humidity swings, and quality spar products include UV absorbers to slow graying. This is the most accessible “clear-ish” choice for sheds, planters, outdoor furniture, and trim. Plan to recoat over time — clear finishes in full sun are a maintenance item rather than one-and-done. Shop spar urethane on Amazon
Penetrating Epoxy Sealer (strong choice for edges)
Penetrating epoxy soaks into the wood fibers and hardens inside them, which makes it well suited to the vulnerable end grain and edges. Many builders use it as the first step on outdoor plywood — treat the edges, let it cure, then topcoat with paint or spar urethane. It’s more work and more cost, but for anything that will get seriously wet, it earns its place.Shop penetrating epoxy on Amazon
Epoxy Coating Plus a UV Topcoat (marine-level jobs)
For boat parts, docks, or anything that lives in or over water, a full epoxy coating gives a hard, waterproof shell. One caveat:
⚠️ Warning: Cured epoxy generally has poor UV resistance and can chalk or break down in sunlight, so outdoors it’s typically used as a base beneath a UV-stable topcoat (paint or spar varnish) rather than left bare — follow the product’s directions. If you’re weighing the panel itself rather than the finish, marine and exterior plywood aren’t the same product; see our comparison of marine and exterior plywood. (Marine plywood made to BS 1088 uses a waterproof bond and higher-grade veneers with limits on core gaps, but “marine” doesn’t automatically mean void-free, and it still needs sealing.) Shop marine epoxy on Amazon
Water-Repellent Sealers
Clear or lightly tinted water repellents are the low-effort option for things like shed floors, utility panels, or rough exterior plywood where looks aren’t critical. They shed water and reapply easily, but they generally offer less long-term protection and a shorter recoat interval than the options above. Fine for low-stakes projects; less so for a piece you want to last many years. Shop water-repellent wood sealer on Amazon
Paint (a sealer people forget is a sealer)
A quality exterior primer plus exterior paint is one of the more durable and UV-resistant “sealers” available — the pigment blocks the sunlight that destroys clear finishes. If you don’t need the grain to show, paint often outlasts a clear coat outdoors. We cover product choices in our guide to the best paint for exterior plywood.
Indoor vs. Outdoor Plywood Sealer: Quick Comparison
Sealer
Best for
Water resistance
UV resistance
Ease of use
Recoat needs
Water-based poly
Indoor furniture, shelving
Moderate
Low
Easy
Rare indoors
Oil-based poly
Indoor high-wear tops, floors
Good
Low
Moderate
Rare indoors
Shellac
Indoor decorative only
Poor
Low
Easy
As needed
Danish / penetrating oil
Indoor natural look
Fair
Low
Very easy
Periodic
Spar urethane
Outdoor furniture, sheds, trim
Good
Good (with UV blockers)
Moderate
Periodic
Penetrating epoxy
Outdoor edges / end grain
Excellent
Needs topcoat
Harder
Rare once sealed
Epoxy + topcoat
Marine, docks, submersion
Excellent
Only with topcoat
Hardest
Topcoat periodically
Water repellent
Low-stakes exterior
Fair
Low–fair
Very easy
More frequent
Exterior paint
Any outdoor, grain hidden
Excellent
Excellent
Moderate
Least frequent (clear vs. paint)
General guidance — always follow the manufacturer’s directions for the specific product and surface.
The Cost of Cutting Corners
The cheapest finish is rarely the cheapest project. A basic water repellent goes on fast and costs little, but on a sun-and-rain-exposed piece it typically needs redoing more often than a spar-urethane or paint system. Meanwhile the material is seldom the expensive part — the expensive part is the time to strip a failed finish, re-prep, and recoat.
😬 The regret usually isn’t the small amount you saved on the can. It’s the weekend spent redoing a project that could have been finished properly once. Match the sealer to how much sun and water the piece will actually see, and lean toward the more durable option when the exposure is harsh — it tends to save a redo.
How to Seal Plywood the Right Way (Step by Step)
Coat counts vary by product and exposure, so treat these as the sequence, and follow your finish’s label for specifics.
Cut first, then seal. Do all cutting before finishing so no raw edges get left bare.
Sand lightly. A pass with medium then fine grit helps the sealer grip; knock down fuzz on the edges.
Clean off dust. Wipe with a tack cloth or barely damp rag and let it dry.
Seal the edges first, and generously. Edges and end grain usually need more coats than the faces — this is the step people skip and regret.
Coat the faces. Thin, even coats generally beat thick, gloppy ones.
Let each coat cure and scuff-sand between coats as the product directs.
Topcoat if the product calls for it. Epoxy and some primers are meant to be topcoated outdoors — check the directions rather than leaving them bare in the sun.
How Many Coats and How Often to Reseal
Coat counts and recoat intervals depend heavily on the product, the surface, and the exposure, so the manufacturer’s directions are the real answer. As general guidance: edges usually need more coats than faces; clear finishes in strong sun tend to need refreshing more often than paint; and it’s better to recoat before bare or graying wood appears than after. Inspect exterior pieces periodically rather than relying on a fixed calendar.
Frequently Asked Questions
Do you seal both sides of plywood? Outdoors, yes — seal both faces and every edge. Sealing only one side can let moisture enter the unsealed side and get trapped, which may cause the panel to cup or warp. Balanced sealing keeps moisture movement more even.
Is exterior plywood already sealed? No. “Exterior” refers to a waterproof glue bond between the veneers, not a protective coating on the wood itself. The wood surface and edges still need a sealer or finish to hold up to weather and UV.
What’s the best sealer for plywood edges? A penetrating epoxy is a strong choice for edges and end grain because it hardens inside the fibers. If you’re not using epoxy, apply extra coats of whatever sealer you’ve chosen to the edges — they generally need more than the faces.
Can you use interior polyurethane on outdoor plywood? It’s not recommended. Standard interior poly typically lacks UV protection and the flexibility to handle outdoor temperature and humidity swings, so it’s prone to cracking, peeling, and graying. Use a spar urethane or an exterior-rated system instead.
How long does plywood sealer last outdoors? It varies widely with the product, the amount of sun and water, and how well the edges were sealed. Follow the manufacturer’s guidance and inspect regularly rather than relying on a fixed interval. For how the panel itself holds up, see our guide to exterior plywood lifespan.
Should I seal plywood before or after cutting? After. Cutting exposes fresh raw edges, so sealing beforehand leaves the most vulnerable part of the panel bare. Cut everything first, then seal — edges included.
What sealer should I use on a plywood shed? For a shed, exterior paint or a spar-urethane system over well-sealed edges is a practical, long-lasting choice. See our full breakdown of exterior plywood for sheds for panel and finish pairings.
Always follow the finish manufacturer’s instructions for your specific product and surface.