Yes, rotting wood can often be saved if the damage is limited, the moisture source is eliminated, and the remaining wood is treated with a wood hardener and structural epoxy. Structural members with extensive decay should usually be replaced instead.
Wood rot feels like a quiet, expensive cancer eating away at your home. Your immediate thought is probably panic: Do I have to tear this entire thing down? How many thousands of dollars is this going to cost me?
Here is the fast, honest answer: Yes, rotting wood can often be saved—but only if you catch it before the structural integrity hits the point of no return. To accurately assess the damage, we highly recommend using a digital pin-type moisture meter to determine whether the wood fibers are retaining enough moisture to sustain fungal growth. In this comprehensive guide, we’re going to look at the exact science of wood rot, run through real-world cost comparisons, call out the critical mistakes most DIYers make, and give you a step-by-step blueprint to salvage what you can.
The “Save It vs. Scrap It” At-A-Glance Comparison
Before we dive into the step-by-step fixes, use this quick-reference table to determine whether your wood is a candidate for a rescue mission or if it’s heading straight to the dumpster.
Feature / Scenario
When You Can Save It (Repair)
When You MUST Scrap It (Replace)
Structural Role
Non-structural (trim, windowsills, decorative molding, fascia boards).
Structural load-bearing components (deck joists, main sills, roof rafters, studs).
Extent of Damage
As a practical guideline, less than 15–20% of the total wood volume is soft or crumbling.
More than 20% of the wood is compromised; the piece flexes or sags under pressure.
The “Screwdriver Test”
Tool penetrates slightly but hits solid, dense wood immediately underneath.
The tool plunges completely through the wood with minimal resistance.
Moisture Source
The leak or water source has been found and permanently stopped.
The moisture source cannot be resolved, or wood is constantly submerged.
Estimated Lifespan
It can last for many years when the moisture problem is permanently eliminated, and the repair is maintained.
Highly prone to immediate failure; risk of structural collapse.
🧪 The Real Test: Is Your Wood Dead or Just Sleeping?
You cannot fix wood rot by guessing. If you try to treat wood that is structurally dead, you are quite literally painting over a disaster.
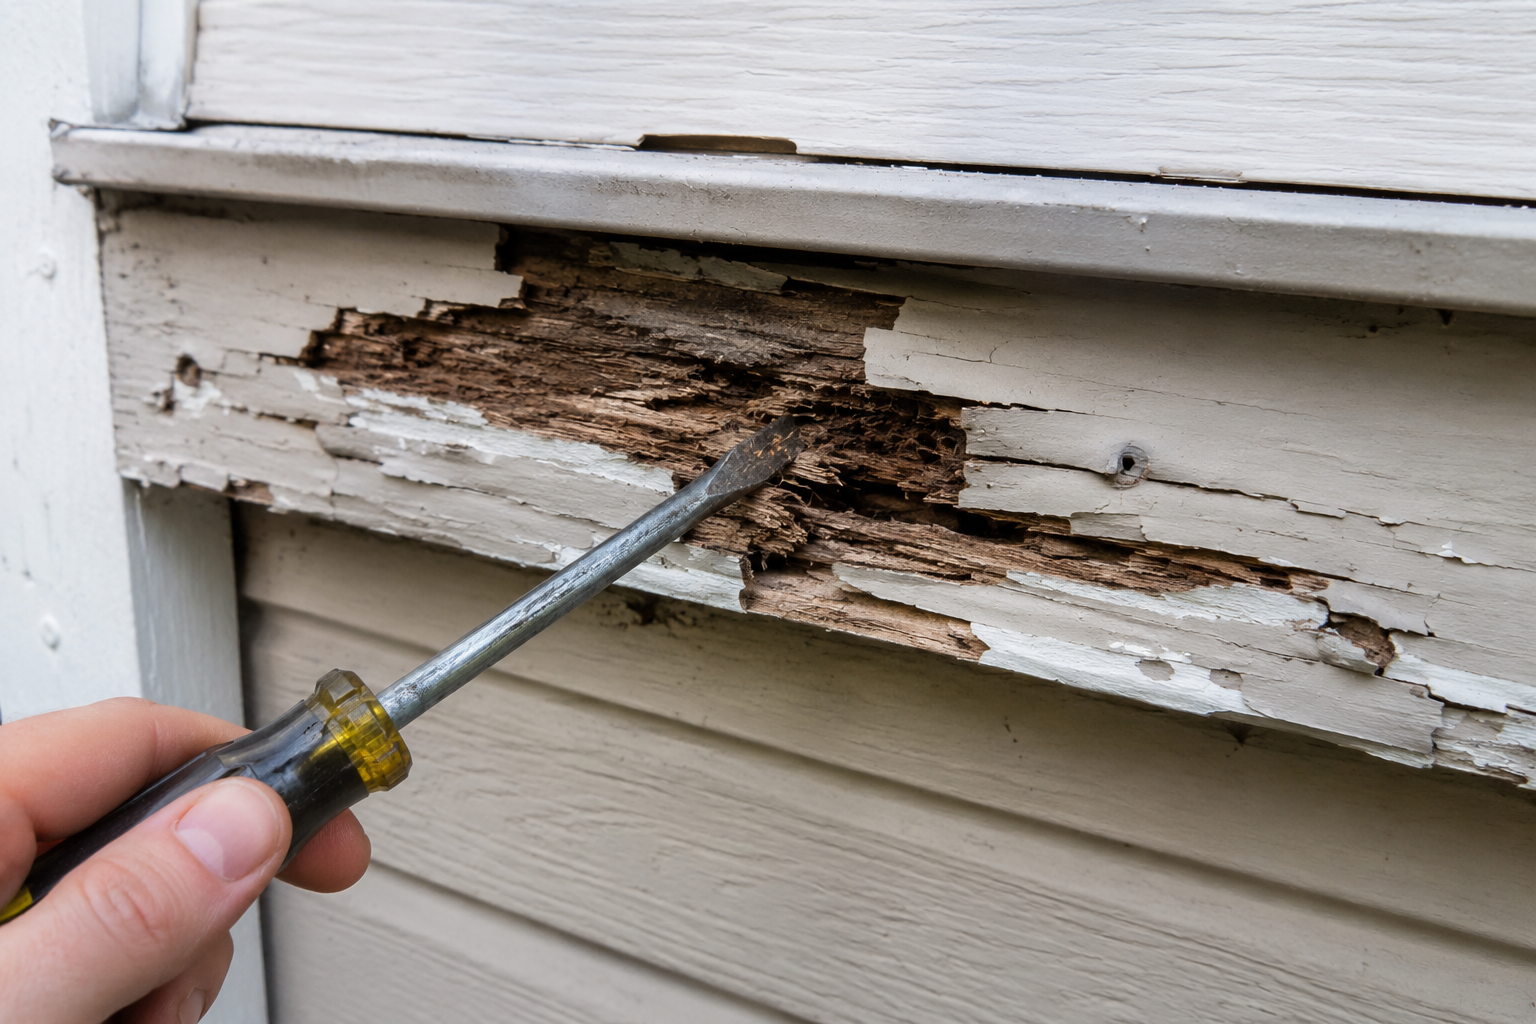
The Screwdriver & Awl Inspection
Don’t just look at the wood. Take a flathead screwdriver or an awl and press firmly into the dark, discolored zones.
The Good Sign: If the wood looks terrible but feels firm—or if your screwdriver only sinks in a few millimeters before striking a hard, unyielding core—the wood can be saved.
The Dealbreaker: If the tool sinks an inch or more with zero effort, or if the wood crumbles into a fibrous, wet powder, the cellulose structure is completely gone.
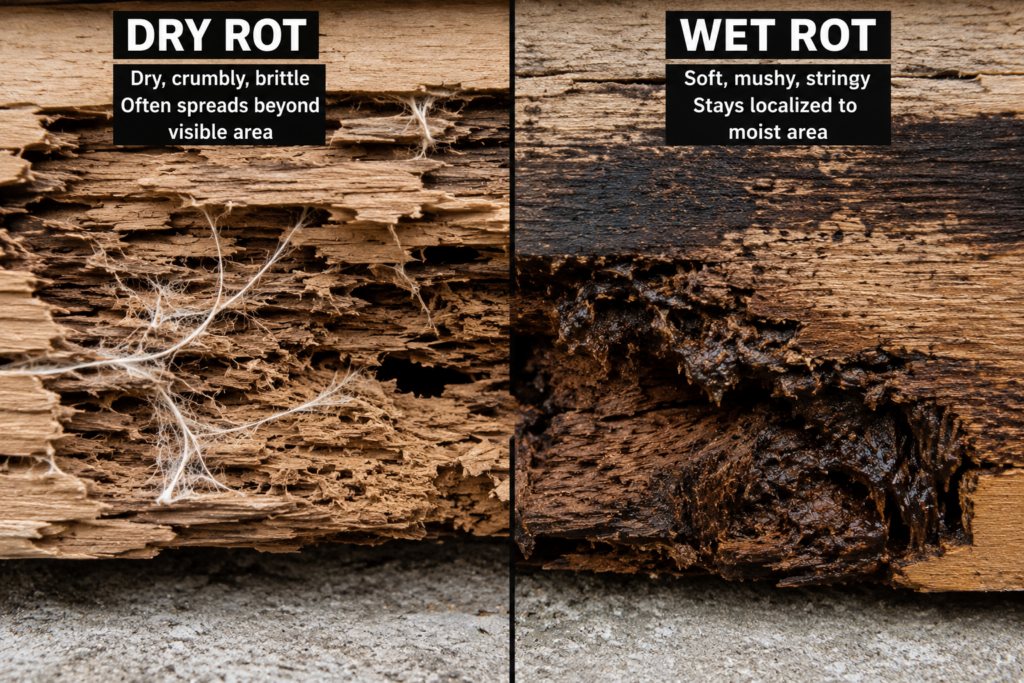
Dry Rot vs. Wet Rot
It is vital to know what type of fungus you are fighting.
Wet Rot: Requires consistent high moisture levels (such as a leaking gutter hitting a fascia board). It stays localized. If you stop the water, you stop the rot.
Dry Rot (Serpula lacrymans): This is the dangerous one. While it needs an initial moisture source to take hold, dry rot can transport moisture through its specialized fungal network (rhizomorphs), allowing it to spread efficiently and destroy completely dry wood far beyond the original damp area. If you see thick, mushroom-like growths or white, fluffy, vine-like strands (mycelium), you are dealing with dry rot.
💸 Cost Difference: Repairing vs. Replacing
Let’s talk numbers. Ignoring wood rot because you’re afraid of the cost is the fastest way to multiply your final bill by ten.
If that rot is left to spread from the trim into your home’s framing, sheathing, or structural rim joists, you cross over from a simple afternoon project into major contractor territory:
Hiring a Framing Contractor: $75 – $150 per hour plus materials.
Replacing a Structural Sill Plate/Rim Joist: $2,000 – $6,000+, depending on accessibility.
Replacing a Rotted Exterior Wall Section: $3,500 – $8,000+.
⚠️ Warning: If you are buying an older home, never accept a seller’s claim that a soft spot on the porch or siding is “just cosmetic.” Always insist on a deep inspection of the structural framing behind it.
❌ 3 Fatal Mistakes DIYers Make With Wood Rot
Over years of inspecting home renovations and working on older properties, professional builders see the same three mistakes ruin repairs within a single season.
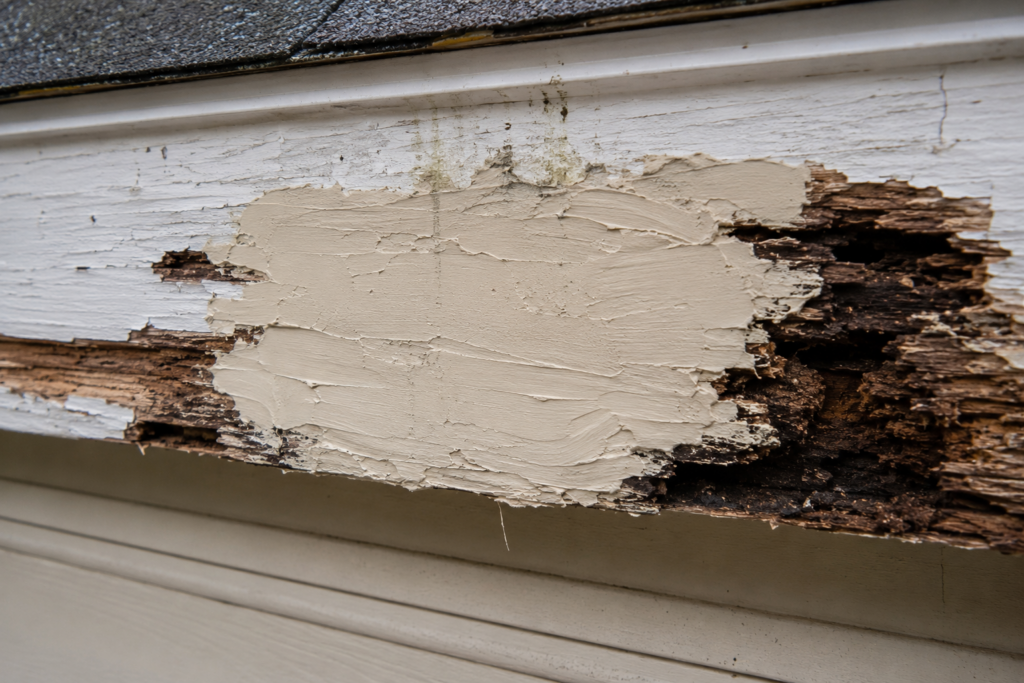
1. The “Bondo-Over-Moisture” Blunder
The single biggest mistake is applying wood filler or automotive body filler directly over damp wood. Epoxy and polyester resins form an airtight, waterproof barrier. If you trap moisture inside the wood fibers underneath that barrier, you create a perfect, warm, dark greenhouse for wood-destroying fungi. The rot will accelerate hidden beneath your beautiful new repair, and within 12 months, the whole patch will fall out, revealing a hollowed-out cavern.
2. Failing to Treat Beyond the Visible Rot Line
Fungal spores and microscopic root systems (hyphae) extend well beyond the wood that looks visibly brown or soft. If you only scrape out the obviously soft pulp and immediately fill it, the surviving fungus hidden within the seemingly “solid” adjacent wood will wake up the next time humidity rises and resume eating your house.
3. Using the Wrong Materials for Structural Wood
Never use liquid wood hardeners or cosmetic epoxy fillers on joists, beams, headers, or wall studs. These products do not restore the wood fibers’ structural load-bearing capacity; they merely consolidate loose mush into a solid, brittle plastic plug. If a structural piece of wood is compromised, it must be sistered with new lumber or completely replaced.
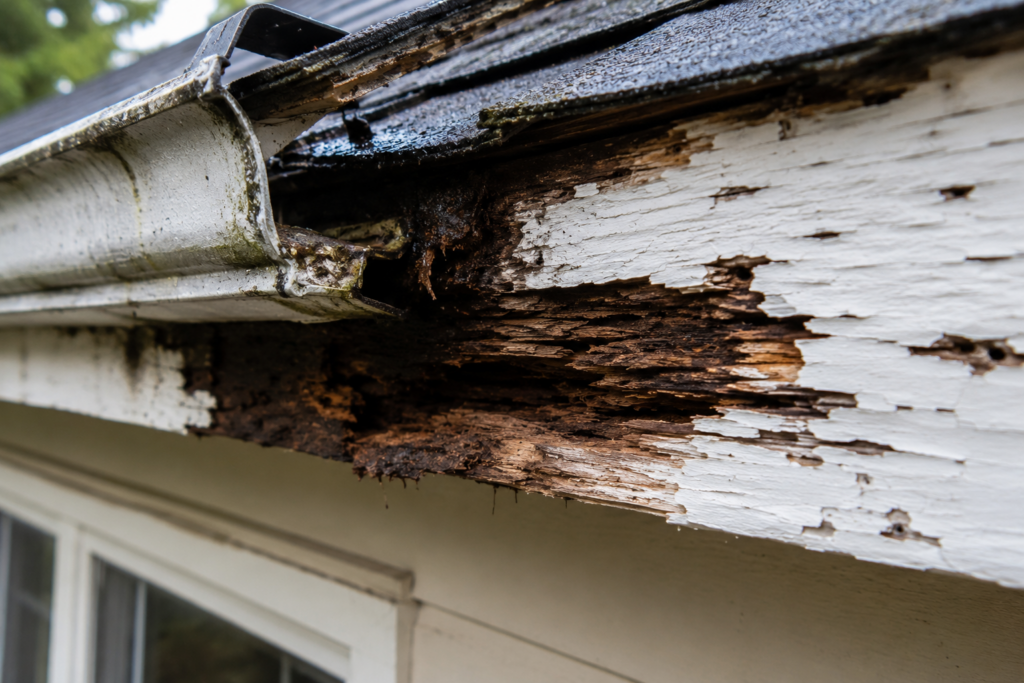
😬 The $4,000 Regret: A Cautionary Tale
Many homeowners learn the true cost of procrastination the hard way. In one common scenario, a homeowner noticed a small soft spot on the exterior fascia board right under the roofline of their garage—a classic case of a blocked gutter overflowing backward under the shingles.
Because they were busy, they decided to ignore the root cause and patch it over quickly. They bought a tub of cheap exterior spackle, crammed it into the soft void, smoothed it over, and slapped a coat of white paint on top. From the driveway, it looked brand new.
Two years later, they noticed the garage door track was beginning to sag and misalign. When a contractor opened up the drywall inside the garage, the hidden damage was staggering. The water had kept leaking, trapped behind that waterproof cosmetic patch. The rot had spread from the fascia into the structural double header above the garage door, ruining two adjacent wall studs. What would have been a $40 wood replacement and a 20-minute gutter cleaning turned into a $4,200 professional construction repair involving temporary structural jacks and structural reconstruction.
The lesson is simple: Fix the source of the moisture before attempting any cosmetic repair.
🛠️ Step-by-Step Blueprint: How to Save Rotten Wood
If your wood passed the screwdriver test and isn’t holding up your roof, here is the exact industrial-grade method to cure the rot and make the wood stronger than it was originally.
Step 1: Eliminate the Water Source
If you don’t stop the moisture, don’t bother doing the repair.
Clean and repair leaking gutters.
Fix faulty flashing around windows and doors.
Re-route misdirected lawn sprinklers away from wood siding.
Check out our detailed guide on preventing exterior wood decay to ensure your property remains completely dry before moving forward.
Step 2: Excavate Every Ounce of Rotten Fiber
Grab a heavy-duty wood chisel, a paint scraper, or a rotary tool fitted with a wire brush attachment. Dig out every bit of dark, soft, crumbly wood. Keep digging until you hit pale, dry, completely solid wood fibers. If you have to dig out half the board’s thickness, do it.
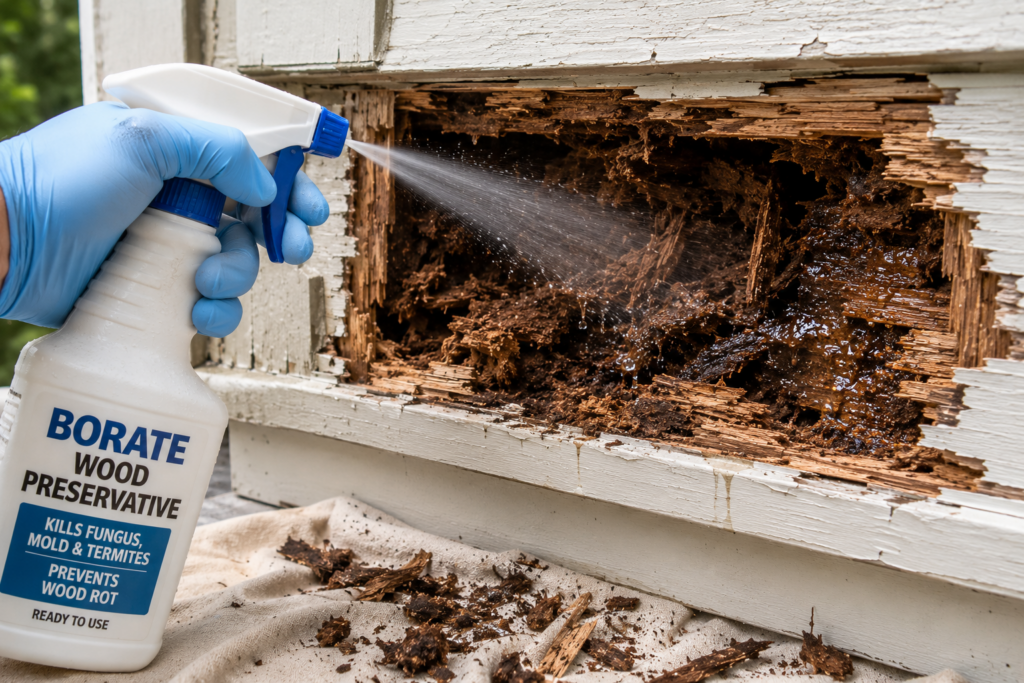
Step 3: Sterilize and Eradicate the Fungus
To make absolutely sure the rot won’t return, you must kill any microscopic fungal elements left behind.
The Budget Method: Spray the raw cavity thoroughly with a borate-based solution (such as Tim-bor or Bora-Care) or a DIY mix of copper naphthenate.
Allow the wood to dry out completely for 48 to 72 hours. You can speed this up by setting up a fan or heat lamp over the area. Ideally, the wood moisture content should be below about 12% before applying epoxy.
Step 4: Apply a Liquid Wood Hardener
Once the wood is bone dry, apply a generous coat of a deep-penetrating liquid wood hardener. Brands like Minwax or PC-Rot Terminator work exceptionally well. The wood will drink up this thin liquid like a sponge. It penetrates deep into the remaining porous fibers and cures into a rock-hard, crystalline plastic matrix that reinforces the wood’s internal structure.
Apply multiple coats while the previous coat is still tacky until the wood can no longer absorb any more liquid. Let it dry completely for 24 hours.
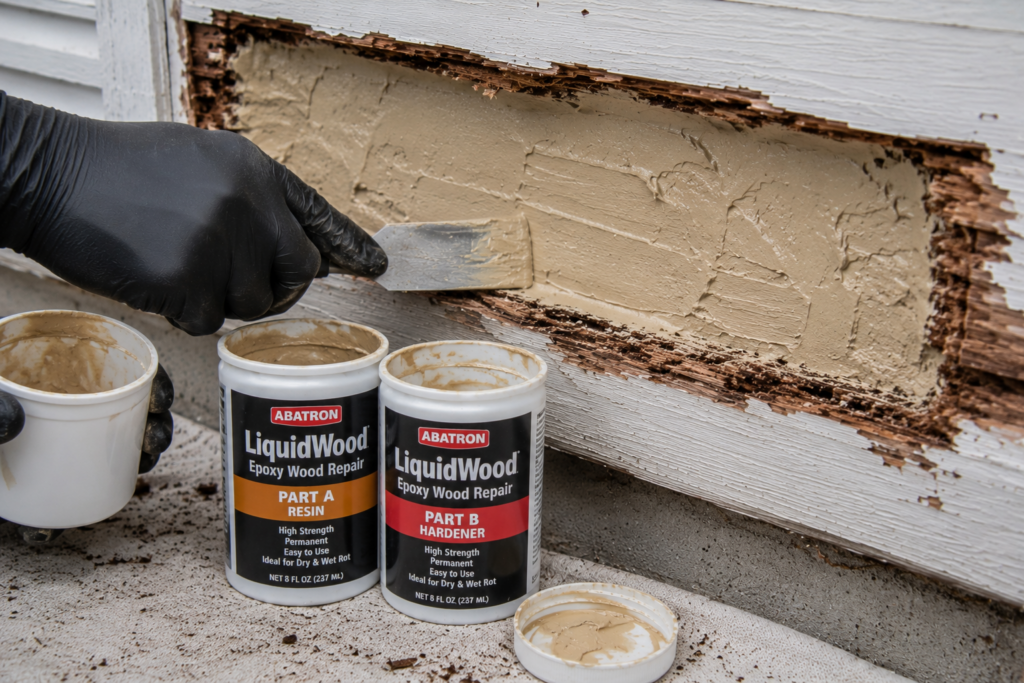
Step 5: Fill the Void with Structural Epoxy
Now it is time to rebuild the wood’s shape. Do not use standard lightweight wall spackle or cheap polyester body fillers for deep exterior cavities. Use a true two-part epoxy wood replacement compound (such as TotalBoat, Abatron WoodEpox, or PC-Woodcraft).
Mix equal parts of the resin and hardener according to the manufacturer’s instructions.
Pack the mixture firmly into the cavity using a putty knife, ensuring there are no hidden air pockets.
Leave the epoxy slightly proud (overfilled) of the surrounding wood surface, as you will sand it down flush later.
For vertical or overhead repairs, you can build a simple cardboard or plastic tape mold to hold the wet epoxy in place while it sets.
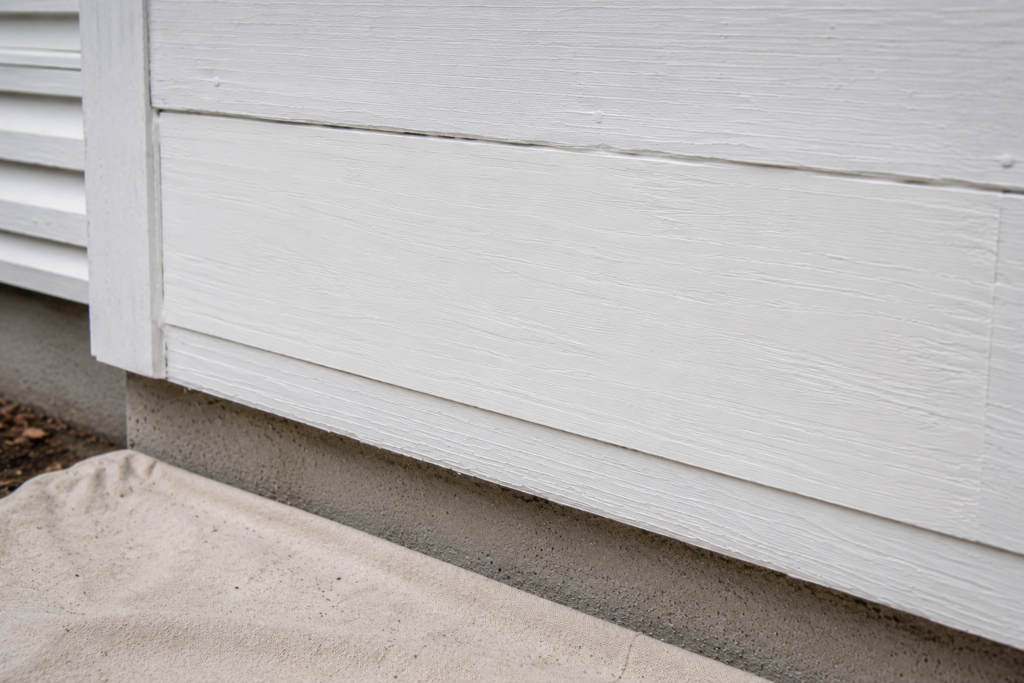
Step 6: Shape, Sand, Prime, and Paint
Once the epoxy has fully cured (usually 12 to 24 hours), it can be worked exactly like real wood. You can plane it, drill it, saw it, and sand it.
Use 80-grit sandpaper to knock down the high spots, then finish with 120-grit sandpaper until the transition between the epoxy patch and the natural wood is completely seamless to the touch.
Wipe away all dust.
Crucial Step: Apply a high-quality, oil-based or high-build exterior primer over the entire repair area. Epoxy does not hold up well against raw UV sunlight; paint is what actually protects your repair from weathering over time.
Apply two topcoats of premium exterior acrylic latex paint.
📢 FTC Affiliate Disclosure
This section contains affiliate links to products like Bora-Care, Abatron, TotalBoat, and Minwax. If you click these links and make a purchase, we may earn a small commission at no additional cost to you, which helps support our deep-dive repair guides.
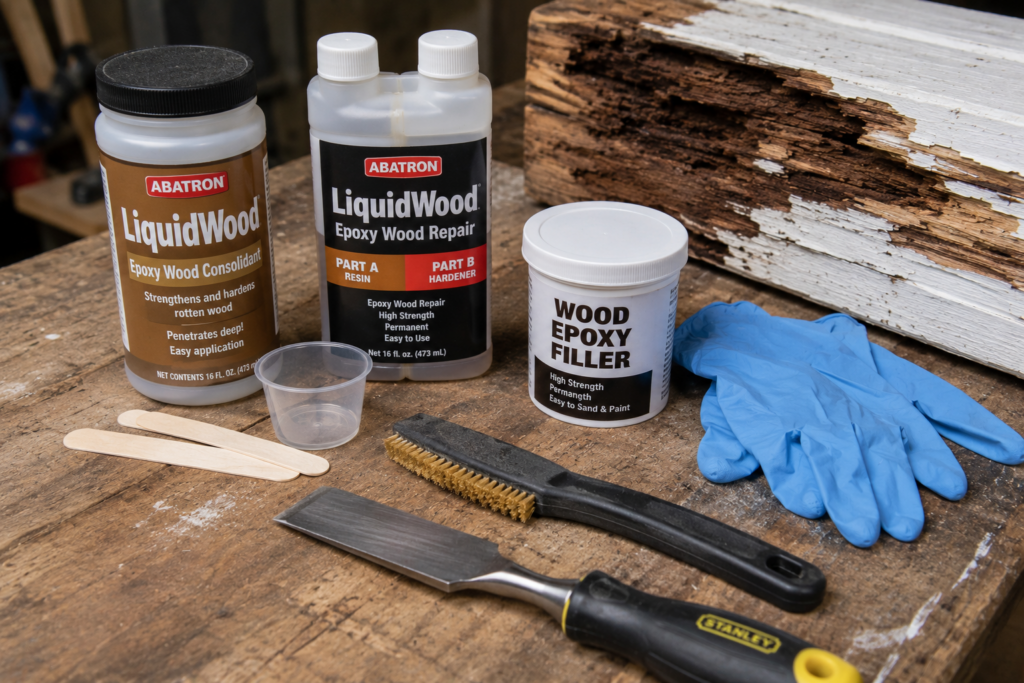
🛒 The Ultimate Wood Salvage Shopping List
If you are ready to tackle this project this weekend, here are the exact, field-proven supplies you will need to get the job done right.
Why it matters: This penetrates deep into the wood cells to ensure that any remaining dormant fungi or boring insects are permanently eradicated before you seal everything up.
Why it matters: It acts like a structural consolidation fluid, turning soft, stringy, compromised wood sections back into ultra-dense, water-impermeable composite structures.
Why it matters: This stuff is legendary among historic home restoration professionals. It doesn’t shrink or crack; it expands and contracts at roughly the same rate as natural wood, and it can be sculpted like modeling clay.
📌 Maintenance Tactics to Prevent Future Rot
Saving your wood once is a triumph; never having to do it again is the real goal. Once your repairs are complete, add these inspection items to your seasonal home care checklist.
Keep a 2-Inch Clearance: Ensure that exterior wood trim, siding, and wood fencing sit at least two inches above concrete sidewalks, patios, or roof shingles to prevent water from wicking upward into the grain.
Maintain the Caulk Line: Inspect the caulked joints around windows, doors, and trim boards every autumn. If you see cracking, peeling, or gaps, scrape out the old material and apply a fresh bead of premium polymer or silicone caulk. For help picking out structural alternatives if you do have to build anew, read our review on the best exterior plywood options for wet conditions.
Keep Vegetation Cut Back: Trim shrubs, ivy, and tree branches back at least 12 to 18 inches from your home’s wooden siding. Dense vegetation traps humid air against the wood surface and blocks out the sunlight needed to dry it out after a heavy storm.
The Final Verdict
Can rotting wood be saved? Absolutely. If the damage is cosmetic or confined to non-load-bearing trim, modern epoxies and hardeners allow you to execute a permanent repair that saves you thousands compared to total demolition.
Just remember the cardinal rules of the craft: test the depth with an awl, eliminate the underlying leak first, treat the wood fibers with a chemical to kill the hidden fungus, and always use a premium two-part epoxy system rather than a cheap cosmetic fix. Your house—and your wallet—will thank you for years to come.
Dealing with Wet and Warped Plywood: What You Can Do by Admin March 21, 2025 Repairs Dealing with Wet and Warped Plywood: A Practical Guide We have prepared a reference guide for you—an easy checklist for your convenience. Wet_and_Warped_Plywood_Checklist_ThePlywoodDownload If you’ve…
Can You Use Plywood for a Deck? Pros, Cons & Costs by Admin June 2, 2026 DIY Choosing the right material for a deck determines how long the structure will last, how much maintenance it will require, and how safe it will…