Having a basement in a home adds much-needed space. Unfortunately, not all homes come with them. But for those which do, the extra space can be used for storage or converted to additional living space, as the owner prefers. But that extra space doesn’t come without some potential for problems. Basements can flood and animals can get into them. Proper care must be taken of the basement, just like any other part of a home.
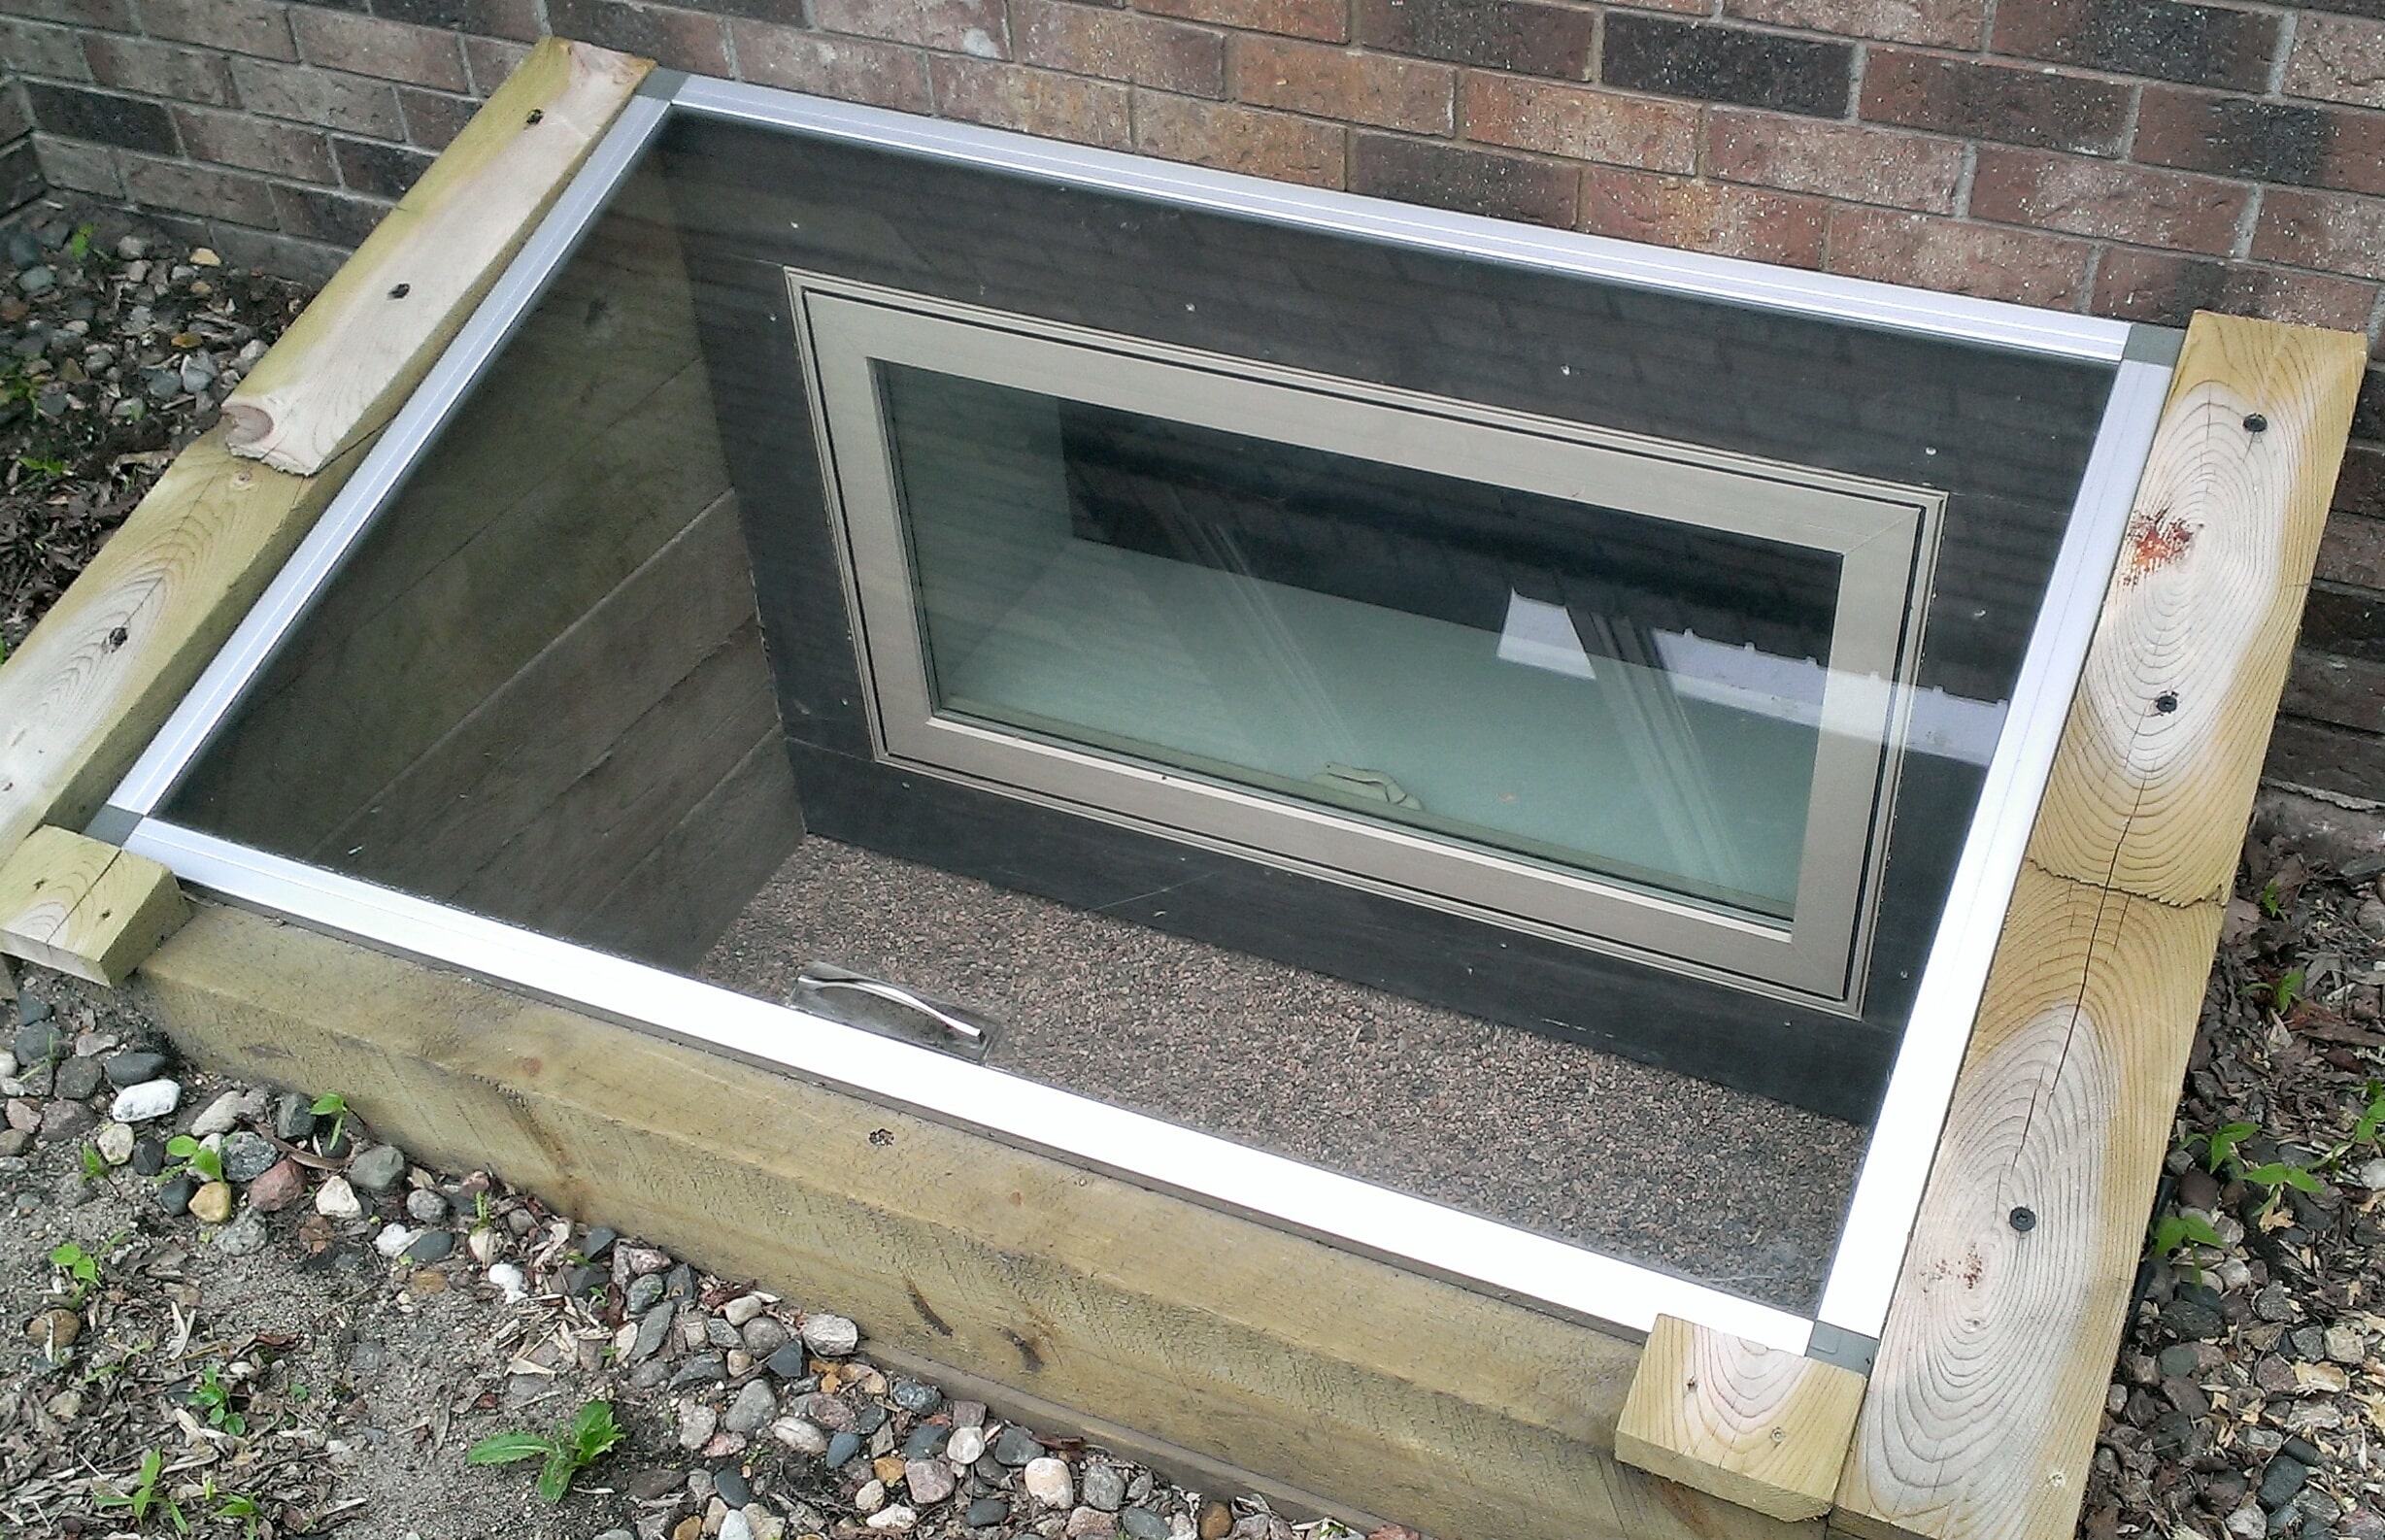
One of the problem areas for basements is the windows. Building code requires that egress windows be installed in basements as fire escapes and especially in bedrooms that are built in basements. But that window, and the window well that goes with it, can be a place for water to leak into the home, for kids to drop their toys and for stray animals to get trapped. If there are trees nearby, you can be sure that the leaves will fill up the window well and need to be cleaned out.
The solution to those potential problems is to install window well covers. This is a fairly easy and inexpensive fix, for what otherwise can turn into a source of headaches. Window well covers are clear plastic, so they are unobtrusive, attractive and come in a variety of styles, which don’t really affect the appearance of your home. Even so, they are imminently practical.
Measure the Window Well
Before heading off to the local home improvement warehouse to buy the window well covers, it’s a good idea to measure the window well. There are two main measurements of concern, the width of the window well where it makes contact with the wall, as that will be its widest point and how far out the window well protrudes. If the top of the window is above the top of the window well, measure how high it sticks up too.
Not all window wells are shaped the same either. At one time, they were almost always semi-circular, but that style has been replaced by a squared off one, with rounded corner. Some of those squared off window wells might stick out quite a ways and even contain a ladder. Cement and treated wood window wells might be square or even trapezoidal in shape. Keep in mind that a home might have more than one style, especially if an addition has been made to the home.
While looking at the home, take a look at where the siding falls in relation to the window and well. In most cases, there should be some concrete showing above the window well, allowing the window well to be attached directly to it. On brick homes, the window well can be attached to the brick. But on homes with siding, the flange on the window well might need to tuck under the siding to prevent leaks.
The measurements will help with selecting the right sort of window well cover to fit those window wells. There are two basic styles: flat and domed. Windows which stick up more than a couple of inches above the edge of the window well probably need the domed covers; otherwise, either kind can be used for any home’s windows. Domed ones also shed melting snow better, which is another advantage to them. The other consideration is that they come in styles which are semi-circular and squared off, to match the different styles of window wells out there. On the other hand, flat ones are easier for egress from the home, if the window is an egress. Some of these flat ones are even hinged to make egress easier.
Select a window well cover that fits the window wells on the home, based upon the dimensions taken. The cover needs to be just a little bit wider and a little bit deeper than the window well itself; ideally, less than two inches. Since everything is made to standard sizes, except for concrete and pressure-treated wood window wells, it shouldn’t be hard to find something that will provide a good fit.
Installing the Window Well Cover
Both styles of window well covers need to be attached to the wall, but some flat ones might also need to be attached to the edge of the window well itself, in order to keep kids and animals from raising it up.
Center the window well cover over the window well to check fit. It may or may not come with holes pre-drilled in the flange for attaching to the wall; but in most cases it will not. Mark the center of the flange and four to six inches from both ends. For domed window well covers, add markings near the bottom of the flange on both sides. That should be enough for holding it in place, but there’s no problem with adding additional mounting holes if they are deemed necessary.
Drill the hole that were just marked with a 3/16” drill bit. Go slowly while drilling to prevent cracking the plastic. A block of scrap wood, backing up the flange while drilling, will give it some support and help to prevent cracking.
Place the window well covered back over the window well and center it. Then, using it as a template, mark the home’s wall, where the mounting hole are, using a fairly fine point magic marker.
If the home has siding installed which the cover is going to mount to, drill pilot hole in the siding, right through the holes already drilled in the flange of the cover. The pilot hole shouldn’t be any bigger than the minor diameter of the screw (that’s the diameter of the central shaft of the screw, without the threads).
If the cover comes with screws, those can be used to install the cover. If it does not, then what’s really needed is round head or ash head wood screws. If those aren’t available, then round headed sheet metal screws can be used. To help prevent cracking of the plastic, it’s a good idea to use fender washers under the screws.
If the cover is being mounted to either brick or concrete, remove the cover, so that the hole can be drilled into the side of the home. These will need to be drilled with a masonry bit and hammer drill (masonry bits won’t go into masonry with a normal drill). Proper sizing of the drill bit, to match the anchors that will be used is essential, as otherwise the anchors will not hold. As they really don’t need to hold any weight, simple plastic expansion anchors can be used; more expensive ones are not necessary.
These anchors are installed by simply hammering them into the hole. Do not use a lot of force, as that can cause the anchor to deform. Rather, lightly tap it in, taking care not to hit the anchor off-center. Make sure that it is fully driven into the hole, so that it does not protrude out of the wall.
Replace the window well cover on the window well, aligning the hole in the cover with the anchors mounted in the wall. The anchors will probably have come with sheet metal screw which are the right length and diameter to fit the anchor. It is best to use those. Adding a fender ash of the appropriate size between the screw head and the plastic cover can help prevent stress cracking.
Window Well Covers with Clips
Some window well covers will use clips, attaching to the edge of the window well, in addition to being mounted with screw. These are commonly used for egress windows, with the cover being hinged. In that case, it is necessary to add clips to the cover, which will hold it in place on the top of the window well. These clips look much like a slightly smaller version of the ones that mount to the wall for holding mops, brooms and rakes.
With the window well cover in place, mark the location of the three clips, directly over the edge of the window well. One should be mounted directly in the center of the window well and the other two should be six to eight inches from the wall, on either side. This is best done while marking for the mounting hole in the flange.
Some window wells may need to have the flange cut, in order for the clip to fit. This is something to be avoided, if possible; but there are occasions when there is no other option. In those cases, use a grinder to take off no more of the flange than is necessary to allow the clip to fit onto the remaining edge.
As an alternative to grinding off part of the flange, if galvanized steel window wells are installed, magnetic cabinet catches can be attached to the bottom side of the window well cover, to hold it in place. Choose a magnetic catch with a strong magnet for this, not the cheapest one available, to keep the wind from blowing it loose.
Drill out these three hole with a 3/16” drill bit, taking care, as mentioned above, to avoid splitting the plastic. Then mount the clips on the bottom of the flange. The screw should go through the clip from the bottom, then through the flange. Secure it on the top side with a cap or acorn nut and ash. Tighten the screw and nut, so that it won’t come loose.
Check the fit of all these clips, ensuring that they make good contact with the window well and secure the cover to it.


")


")