This article contains affiliate links. As an Amazon Associate, theplywood.com earns from qualifying purchases at no extra cost to you.
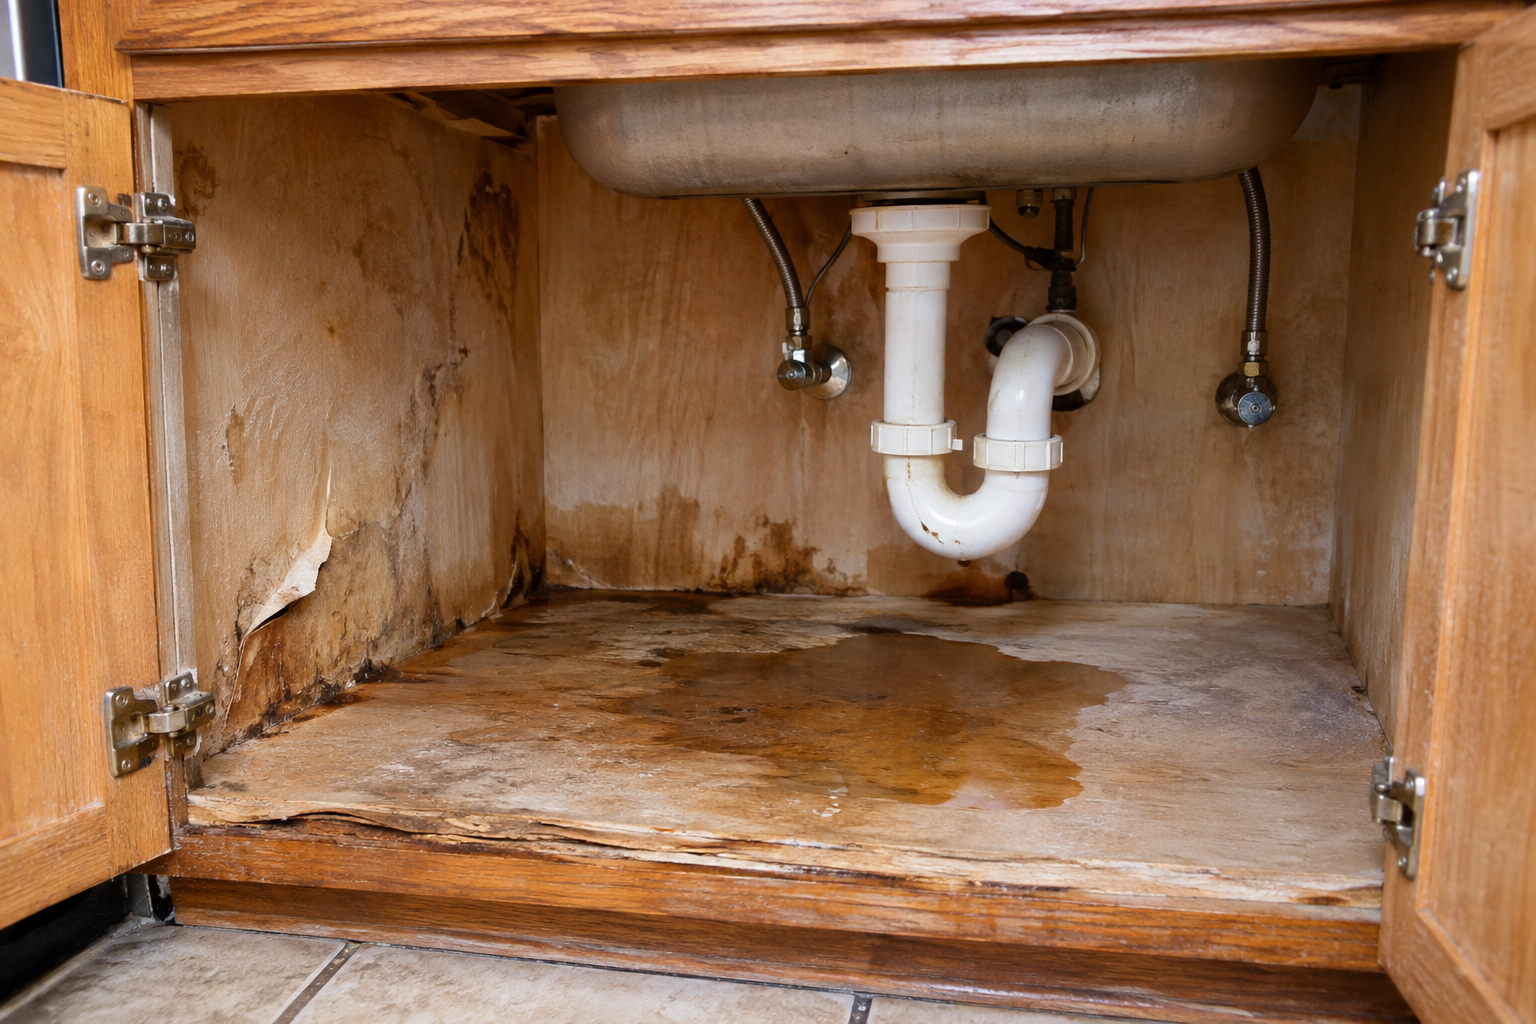
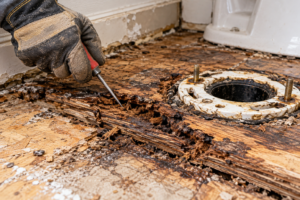
Most water-damaged plywood cabinets can be repaired. Fix the leak, dry the cabinet completely, and then deal with the damage. Stains, bubbled veneer, and slightly swollen edges can be fixed in place. Soft, rotted, or badly delaminated parts, usually the floor of a sink base, need that piece cut out and replaced. Replace the entire cabinet only when major structural components are damaged or when replacing the individual parts is impractical.
This guide covers how to dry the cabinet, the tests that tell you whether you can fix it or need to replace it, and the repair for each type of damage.
Quick Answer
First: stop the leak, empty the cabinet, and start drying it within 24–48 hours to keep mold from growing.
Dry fully: wait until a moisture meter reads the same on the wet area as on a dry part of the same cabinet. That often takes several days.
Fix in place: water stains, lifted finish, small veneer bubbles, slight edge swelling.
Replace the component: soft or rotted panels, large delamination, a sagging sink base floor, or swollen particleboard or MDF parts that have lost their shape or strength.
Replace the cabinet: only when major structural components are damaged or replacing individual parts is impractical.
Fix or Replace? Damage Chart for Water-Damaged Plywood Cabinets
Damage
How to Tell
Fix
Repair in Place?
Water stain or white haze
Dark ring or cloudy finish, wood still hard
Light sanding, stain removal, refinish
Yes
Bubbled face veneer
Raised blister, hollow sound when tapped
Slit, inject glue, clamp flat
Yes, if the veneer is intact
Missing or torn veneer
Bare core plies showing
Cut out a clean patch and glue in new veneer
Yes
Swollen or split edges
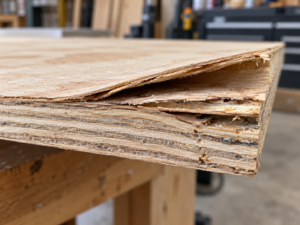
Plies fanned apart at the cut edge
Dry, glue and clamp the plies, or trim the edge off
Usually
Localized soft spot
Awl sinks in easily in a small area, surrounding wood is firm
Remove all deteriorated wood, harden with epoxy consolidant, fill
Yes, only if non-structural and the plywood around it is sound
Rot, sagging, or weakened panel
Large soft area, panel flexes or sags, or it carries real weight
Cut out and install a new panel
No, replace the panel
Superficial mold
Spotted growth on the surface, wood still hard
Clean with detergent and water, dry thoroughly
Yes, if small and on the surface
Penetrating or recurring mold
Growth into the wood, soft material, or mold that returns
Replace the affected panel
No
Swollen particleboard or MDF
Crumbly, puffed edges, no visible plies
Replace that shelf, floor, or part
Replace the component, not necessarily the cabinet
Damaged sides or face frame
Soft or failed wood in the parts that carry the cabinet
Replace the cabinet if repairing the part isn’t practical
Usually no
Quick test: Press a sharp awl or small screwdriver into the damaged area, then into a dry part of the same cabinet. If the damaged spot takes noticeably less force, the wood has lost strength and filler alone won’t fix it.
Why Plywood Cabinets Hold Up Better Than You’d Expect
Most cabinet plywood is hardwood plywood made to ANSI/HPVA HP-1. Cabinet specifications commonly call for the Type II (Interior) bond, which resists water but is not waterproof. It handles drips and short soakings. Standing water left for days can weaken the glue lines, which is why the veneer bubbles and edges fan apart.
The bigger risk is rot. Research from the USDA Forest Products Laboratory shows that decay fungi need wood moisture content of at least 20% to grow. A cabinet that gets soaked and then dried quickly usually stays sound. A cabinet that stays wet for weeks from a slow drip under the sink is where rot starts.
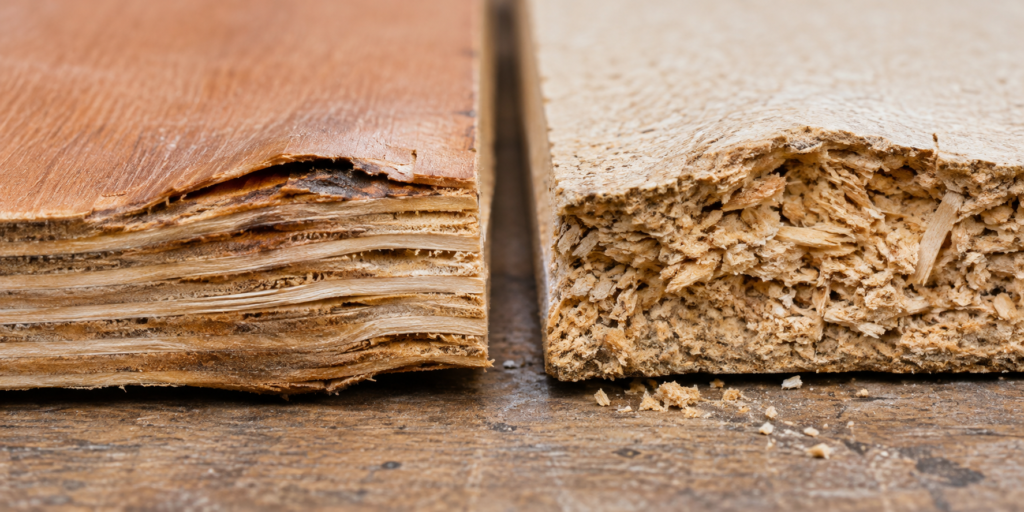
One more thing to check first: plenty of “plywood” cabinets only use plywood for the sides. Floors, shelves, backs, and doors are often particleboard or MDF. Those materials don’t recover well from swelling, so replace those components when they’ve lost their shape or strength. Swapping a swollen shelf or bottom panel is usually much less work than replacing the cabinet. If you’re not sure what a part is made of, look at a cut edge. Plywood shows distinct layers. Particleboard looks like packed chips. If you need help telling them apart, see plywood vs MDF vs particleboard.
Step 1: Stop the Water and Empty the Cabinet
Find the source before doing anything else. Under sinks it’s usually a supply line, a P-trap slip nut, a failed faucet seal, or the dishwasher connection. In bathrooms, check the drain tailpiece and the caulk line where the sink meets the countertop.
Take everything out of the cabinet. If the toe kick or bottom shelf traps water underneath, pry it loose so air can reach the wet wood.
Warning: Don’t do any repair work until the leak is fixed and has been dry for a day. Patching over an active leak wastes the repair and hides new damage.
Step 2: Dry the Plywood Completely
The EPA advises drying water-damaged materials within 24–48 hours to keep mold from growing. Start right away:
Leave the cabinet doors open and remove any drawers.
Point a box fan or air mover straight into the cabinet.
Run a dehumidifier in the room, with the windows closed.
Pull back shelf liner or contact paper. It traps water against the wood.
The surface will feel dry long before the inner plies are. Use a pin moisture meter and compare the wet area with a dry part of the same cabinet, such as an upper side panel. Keep drying until the two readings match. Readings on plywood are approximate because of glue lines and species differences, so the comparison matters more than any single number. For a closer look at how plywood dries, see can plywood get wet and how to dry it.
Costly mistake: Sealing, painting, or gluing over plywood that’s still damp inside. The moisture gets trapped, the finish peels, and mold can grow under the new coating.
Step 3: Check for Mold and Clean It
Check the cabinet floor, the back panel, and the wall behind it. Plywood is porous, so mold can grow below the surface as well as on it.
Small areas of superficial mold on sound plywood may be cleaned with detergent and water, followed by thorough drying.
If mold has penetrated the plywood, the material is soft, or growth keeps returning, replacement may be necessary.
Don’t paint or caulk over mold. The EPA notes that paint applied over mold is likely to peel.
Wear gloves, eye protection, and an N95 respirator while cleaning.
If the moldy area is larger than about 10 square feet (roughly 3 ft by 3 ft), or the wall behind the cabinet is wet, consider hiring a professional.
If the drywall behind a sink base is wet or stained, cut a small inspection hole in the back panel and look. Hidden mold in the wall cavity is a common reason a cabinet keeps smelling after it’s been repaired.
Step 4: Repair the Damage on Water-Damaged Plywood Cabinets
Work through these from least to most severe. Most cabinets need one or two of them.
Water Stains and Clouded Finish
If the wood is hard and only the surface is marked, this is a cosmetic job. Sand lightly with 180–220 grit, treat dark stains, and refinish to match. Step-by-step methods are in how to remove old water stains from wood. Hardwood face veneer is thin, often well under 1/32 inch, so sand by hand and stop as soon as the mark is gone.
Bubbled or Lifted Veneer
A blister forms when the glue under the face veneer lets go and the veneer swells.
Use a sharp utility knife to slit the bubble along the grain.
Use a glue syringe to inject waterproof wood glue under both sides of the slit.
Press the veneer flat, wipe off squeeze-out, and put wax paper over the area.
Clamp it flat with a block of wood or weight it down overnight.
Sand lightly and touch up the finish.
If the veneer is torn or missing, cut a clean rectangle or diamond around the damage, glue in matching veneer, and sand it flush. More on handling veneer bubbles is in how to repair plywood.
Swollen or Split Edges
Cabinet floor edges at the front of a sink base often swell and fan apart.
Light swelling: Once dry, the plies may flatten under clamping pressure. Work glue between the separated plies, clamp them between cauls, and sand flush once cured.
Heavy swelling: If the edge won’t close up, trim it back to sound wood with a circular saw or oscillating tool. Then glue on a hardwood or iron-on edge strip.
Epoxy consolidant and filler may be used for small, localized, non-structural damage after all deteriorated wood is removed and the surrounding plywood is sound. Replace any panel that has lost significant strength or supports substantial weight.
If the damage fits that description:
Dig out all of the soft, crumbly wood with a chisel or awl until you reach firm wood on every side.
Check the surrounding plywood with an awl. If it’s soft too, stop and replace the panel.
Brush on a liquid epoxy consolidant so the remaining fibers soak it up and harden.
Fill the cavity with two-part epoxy wood filler, slightly overfilled.
Sand it flush once cured, then prime and paint or finish.
Standard solvent-based or latex wood filler isn’t suitable for this. It shrinks and pops out of soft spots. For non-structural gaps and seams, see how to fill gaps in wood.
Rotted or Sagging Sink Base Floor (Replace the Panel)
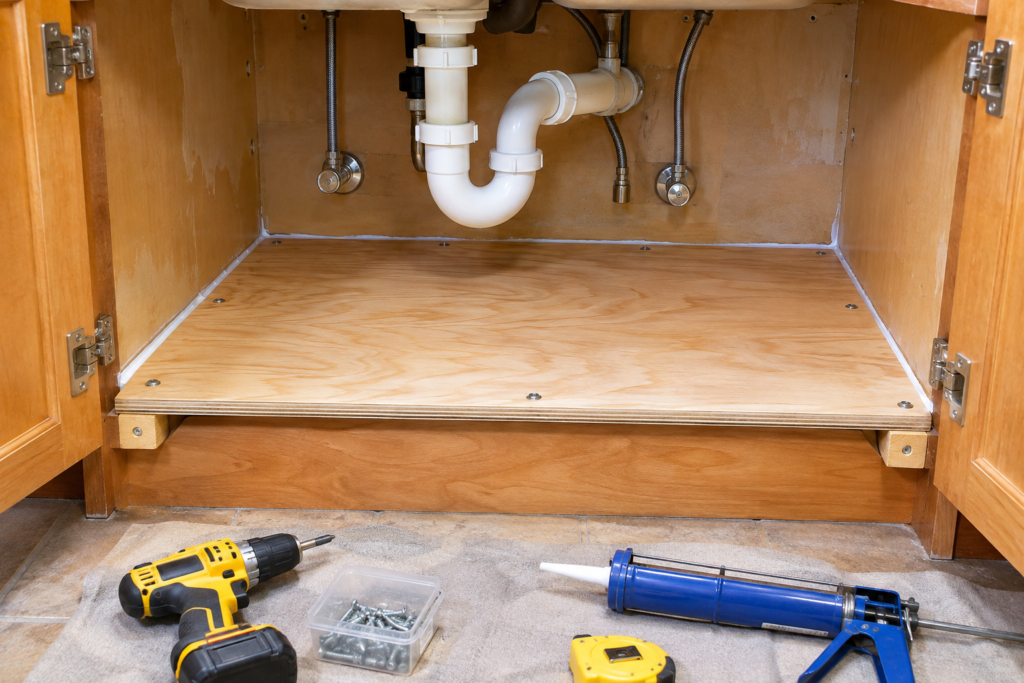
This is the most common major repair, and it’s usually done without removing the cabinet. The same method works for a swollen particleboard or MDF cabinet floor.
Shut off the water and disconnect the drain and supply lines if they’re in the way.
Cut out the old floor with an oscillating tool, staying just inside the cabinet sides and face frame.
Screw 1×2 cleats to the cabinet sides and back so their tops sit level with the old floor.
Cut a new plywood panel to fit, matching the original thickness (usually 1/2 or 3/4 inch). It often has to go in as two pieces with a seam on a cleat so it fits past the face frame.
Seal all faces and every edge of the new panel before installing it.
Set the panel on the cleats and screw it down. Caulk the back and side joints.
Cost difference: A new sink base floor takes a fraction of a plywood sheet plus some scrap for cleats. Replacing the whole cabinet means removing the countertop and sink. When the damage is limited to the floor or a shelf, replacing that component is almost always the cheaper fix. Check local pricing for your sheet goods.
Step 5: Seal the Repair So It Doesn’t Happen Again
Seal every edge. Cut plywood edges soak up water much faster than faces. Give the repaired area and all exposed edges two or three coats of polyurethane.
Caulk the joints. Run a bead of silicone or polyurethane caulk where the cabinet floor meets the sides and back.
Add a sink mat. A raised-edge under-sink mat holds small leaks so they don’t soak into the plywood.
Install a leak alarm. A battery water sensor on the cabinet floor catches slow drips weeks earlier than you’d notice them.
Waterproof wood glue, for veneer bubbles and split edges. Titebond III meets the ANSI/HPVA Type I water-resistance rating: Titebond III Ultimate Wood Glue
When not to DIY: If the countertop is loose, the wall behind the cabinet is soft or moldy, or the mold covers more than about 10 square feet, the job is bigger than the cabinet. Bring in a plumber or a mold remediation contractor first.
6 Mistakes That Make Water Damage Worse
Fixing the cabinet before fixing the leak. The new repair gets soaked again, and you’ve paid for materials twice.
Sealing damp plywood. Moisture gets trapped under the finish, so the finish peels and mold can grow under it.
Patching weakened panels with filler. Regular wood filler doesn’t bond to rotted fibers and falls out within months. Even epoxy is only for small, non-structural spots, and a panel that has lost real strength needs replacing.
Waiting for swollen particleboard to go back down. It usually won’t. Replace that shelf or panel instead of sanding and painting over it.
Ignoring the wall behind the cabinet. Wet drywall behind the back panel keeps the musty smell and the mold coming back.
Leaving cut edges bare. A new floor panel with unsealed edges soaks up the next drip like a sponge.
Frequently Asked Questions
Can water-damaged plywood cabinets be saved?
Usually, yes. If the wood is still hard after it dries, stains, veneer bubbles, and swollen edges can all be repaired in place. Rotted, sagging, or swollen parts, most often the sink base floor, can usually be replaced on their own without replacing the whole cabinet.
How long does it take wet plywood cabinets to dry?
Start drying within 24–48 hours to prevent mold. Getting the inner plies fully dry often takes several days with fans and a dehumidifier running. Use a moisture meter, and wait until the wet area reads the same as a dry part of the same cabinet.
Will swollen plywood go back to normal?
Lightly swollen plywood often flattens once it dries and is clamped with glue. Heavily swollen edges usually won’t close up and should be trimmed off. Swollen particleboard and MDF don’t recover well, so replace those components when they’ve lost their shape or strength.
Small areas of superficial mold on sound plywood may be cleaned with detergent and water, followed by thorough drying. If mold has penetrated the plywood, the material is soft, or growth keeps returning, the affected panel may need to be replaced. Get a professional for mold covering more than about 10 square feet.
What’s the best way to fix a rotted sink base floor?
Cut out the old floor, screw cleats to the cabinet sides and back, and drop in a new plywood panel with every face and edge sealed. Caulk the joints, then add a sink mat and a leak alarm to protect it.
Bottom Line
Repairing water-damaged plywood cabinets comes down to two things: dry them completely and be honest about what’s soft. Hard wood with stains, bubbles, or swollen edges can be fixed in place. Weakened, rotted, or swollen components get replaced one at a time. Replace the whole cabinet only when major structural parts are damaged or swapping them isn’t practical.
USDA Forest Products Laboratory, research on decay fungi and wood moisture content thresholds
ANSI/HPVA HP-1, American National Standard for Hardwood and Decorative Plywood
Related Posts:
Plywood Delamination: When to Repair vs Replace by Admin October 12, 2026 DIY Repair plywood delamination only when the separated area is small (about the size of your palm or less), the wood is dry and firm, and…
Can OSB Get Wet? Swelling, Repair and When to Replace by Admin October 6, 2026 DIY Yes, OSB can get wet. A standard Exposure 1 panel is built to handle normal construction delays without losing its structural strength. The catch is…