Plyo, short for plyometric exercise, is a form of extreme aerobics, involving a lot of jumping and rapid stretching of large muscle groups. The exercises are intended to cause muscles to exert maximum force in short, quick intervals of time. This pushes the muscles to their maximum effort and endurance, stimulating muscles in a way that causes them to grow.
This form of exercise is mostly used by highly trained athletes; people who are in top physical condition. But it is not limited to them. Others who are trying to work their way up to that level may include plyo in their workout routines, mixing it with other types of exercise, doing plyo two or three times per week.
Even people who are not in as great a condition can make use of plyo for fat burning. This high intensity workout is a great fat burner. However, people who are overweight must be careful not to overdo it, as they can cause serious harm to their bodies, straining muscles and ligaments if they do more than their body can handle.
A number of different pieces of equipment can be used in plyometric exercise, basically floor equipment to help with jumping. Amongst these pieces of equipment, the most common is the plyo box. While some are made out of fiber-filled polymers, it’s not uncommon to encounter plywood ploy boxes, making this an ideal DIY project for those who practice plyometrics.
Rectangular or Trapezoidal?
If you buy a trapezoidal plyo box, it will most likely be trapezoidal in shape. The main reason for this is supposed to be so that you won’t hurt yourself as badly, if you miss a jump and bang your shin into it. But considering how little a difference there is between the angles of the corners on a rectangular or trapezoidal one, that’s more a selling point, than it is reality. It will still hurt.
The other thing that making boxes trapezoidal does for the manufacturer is ensure that when you need to increase the height, you have to buy a new box. In contrast to that, making your own rectangular box gives you the opportunity to incorporate three different heights into the same box. So as your ability increases, all you need to do is flip the box to another side and you’ve got a taller box.
It’s also easier to make and to store a rectangular box; which are both good reasons why it’s beneficial to make a trapezoidal box for your DIY project.
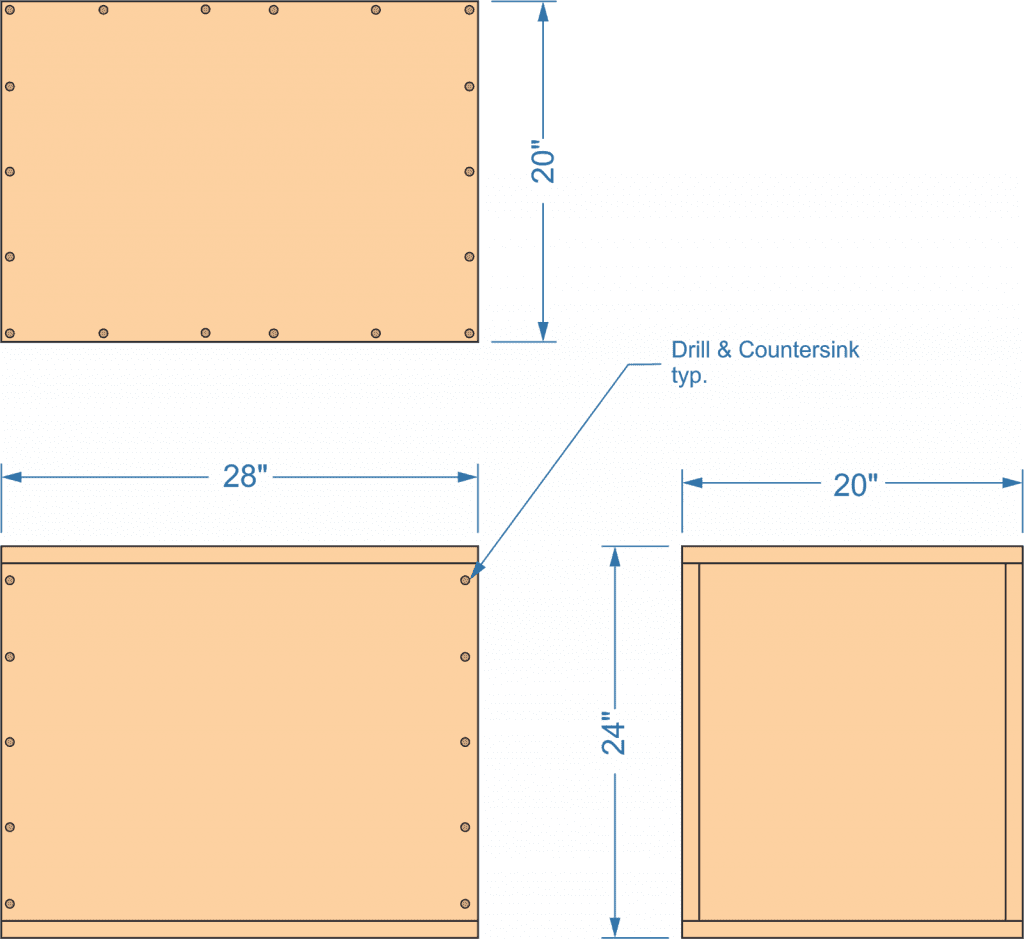
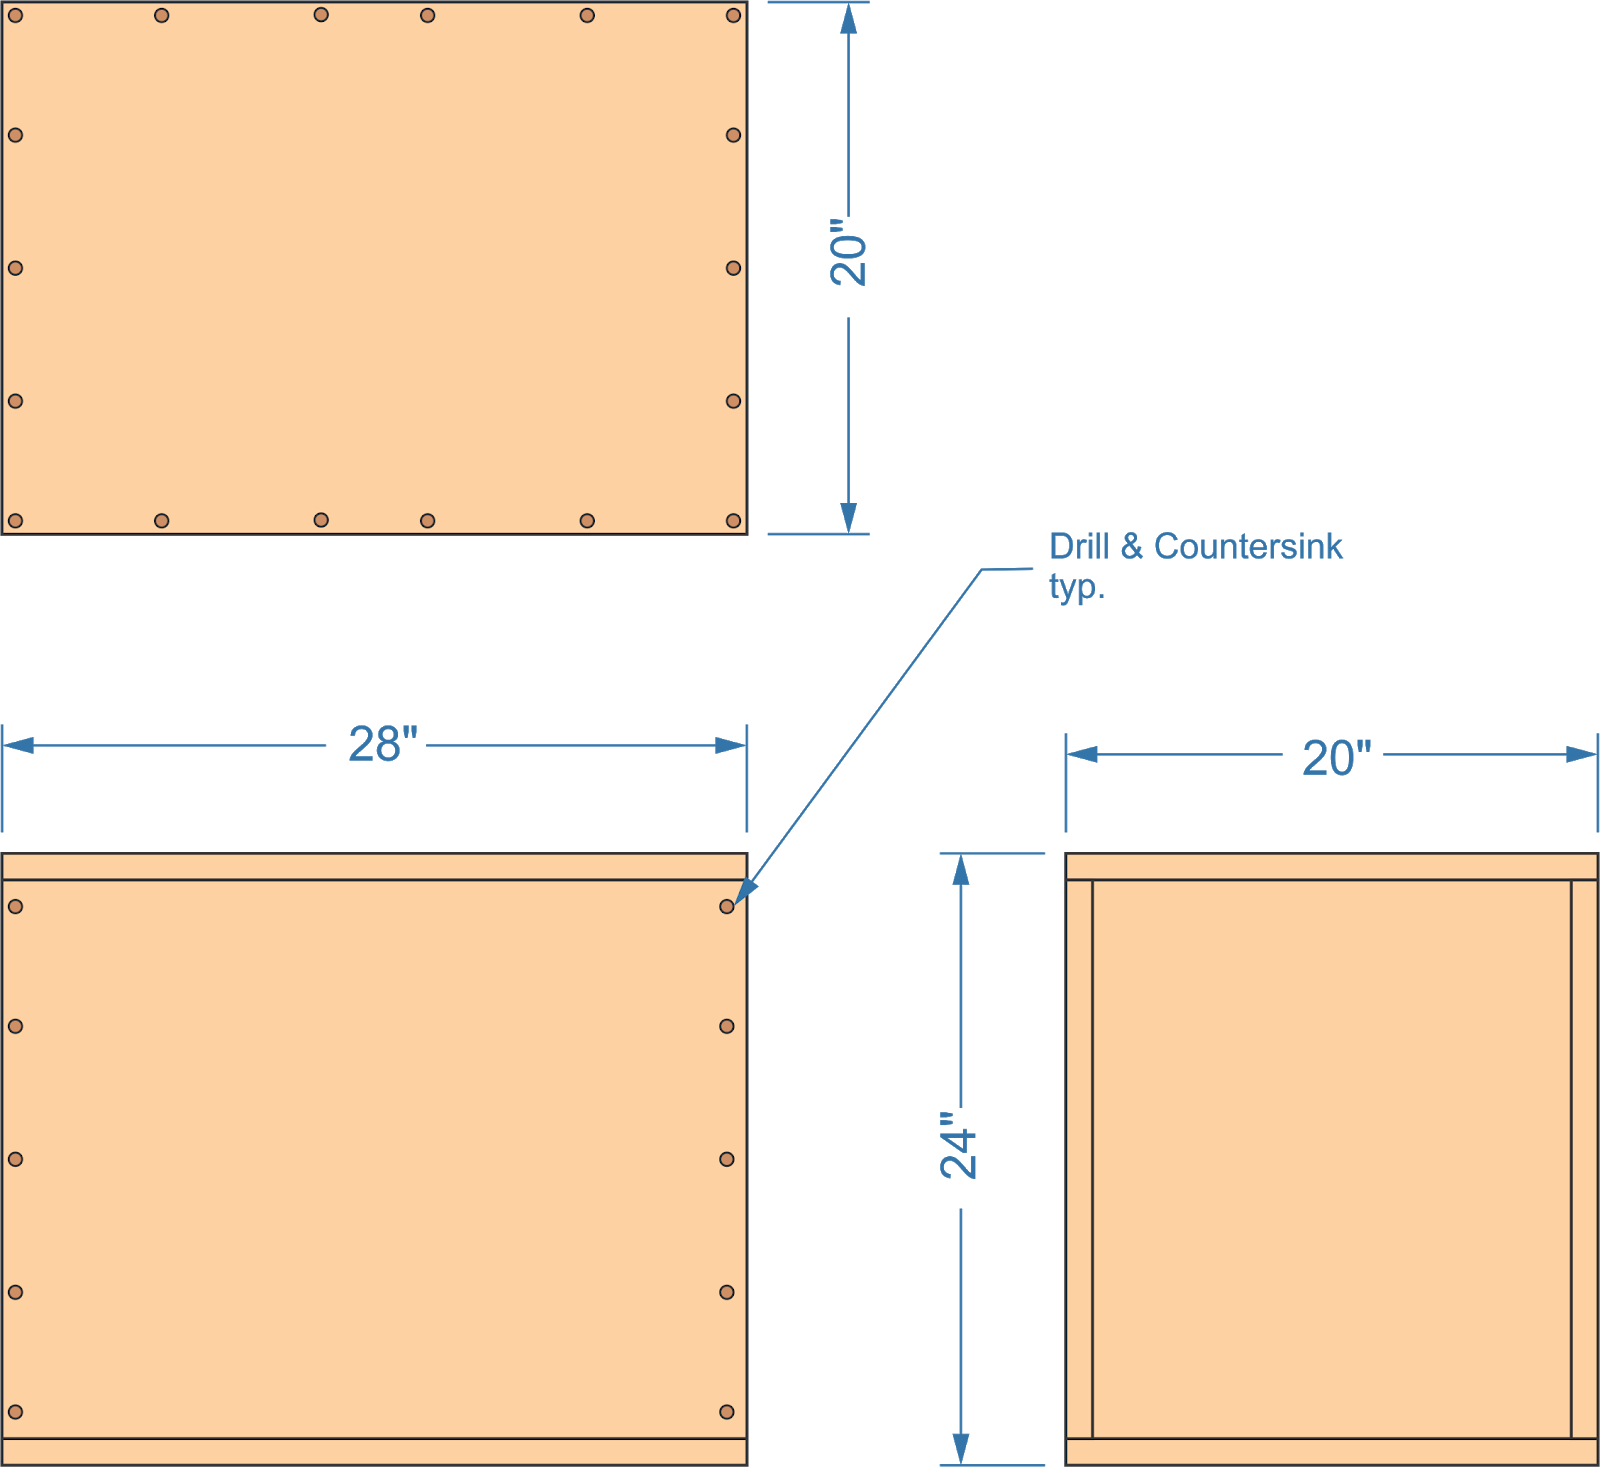
The overall dimensions for the box we’re going to make are: 20” x 24” x 28”. We can do this out of one sheet of ¾” plywood, wood screws and wood glue. This is a fairly easy project, which can be made with minimal tools in a short amount of time.
Making the Plyo Box
While you only need one sheet of plywood to make a plyo box, you’ve got to decide what sort of plywood you’re going to use. At the low end of the cost range, you can get by with ¾” thick BC softwood plywood. While that may not give you the best appearance or the smoothest surface, it will give you a good price. If you want a better finish, you might want to consider paying a little bit more for birch plywood.
Cutting the Wood
Cut your plywood to give you the following pieces on a table saw or with a circular saw:
- 2 pieces – 28” x 20”
- 2 pieces – 28” x 22.5”
- 2 pieces – 22.5” x 18.5”
In order to make your pieces come out best, it’s a good idea to tape over the place you will be cutting with masking tape. This will help keep the plywood from splintering and causing splinters, especially on cuts made across the grain.
If you have one, a saw guide can help you to make straighter cuts when using a circular saw for long cuts like this. If you don’t have one, but have a straight piece of lumber or metal that’s long enough, you can clamp that to the sheet of plywood with bar clamps or C clamps, giving you a straight edge to run your saw’s foot along, keeping the cut line straight.
Before going any farther, it’s a good idea to sand the edges of your plywood, removing any splinters and smoothing out saw blade marks in the edge of the wood.
Assembling the Box
The box is both screwed and glued together, using wood glue and 1 ½” long or longer drywall screws. Longer screws will add additional strength, but will also be harder to install, as you are installing them into the edge of a sheet of plywood. If your holes are not straight or the screw goes crooked upon installation, there is a chance of it punching through the side of the box.
Before assembling, drill and countersink the various pieces, so that it will be easier to assemble them. See the diagram below, to determine which pieces need holes drilled in them. These holes should be 3/8” from the edge of the board and spaced roughly five to six inches apart. A 1/8” to 5/32” holes size is adequate for the screws being used. Use a screw as a gauge for countersinking, to verify that the countersinks are deep enough that the entire screw head will fit in them.

All of the edges should be glued, as well as screwed, applying the glue to the end of the piece of plywood, that will be butting up against the other piece. Take care here, as it is easy to get confused and apply the glue to the wrong edge. While that will not be a major problem and can be cleaned off, it doesn’t do anything to hold your box together.
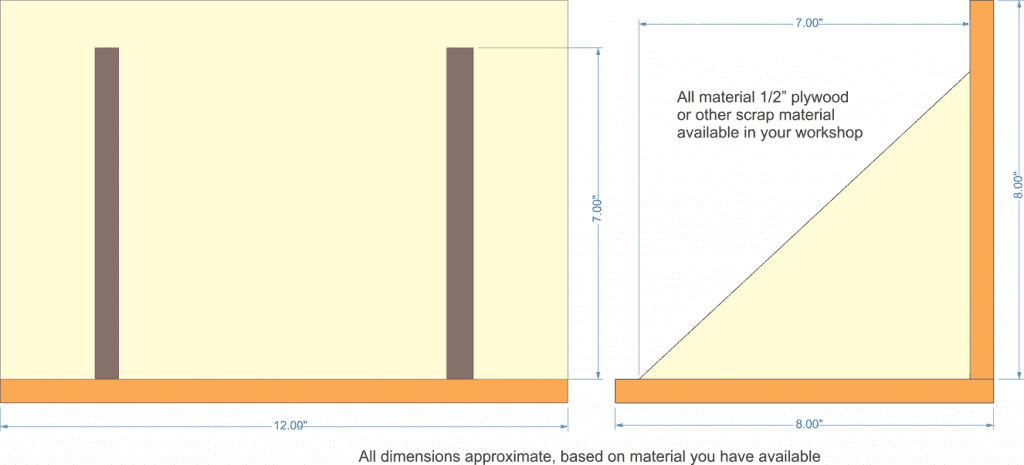
It’s a good idea to use corner clamps to hold your box together for screwing. If you do not have corner clamps, you can easily make a 3D square, as shown in the drawing below, out of scrap material you have in your shop. Be cautious as you assemble it though, using a square you already have to verify that it is exactly 90 degrees. You can always shim the two triangular pieces, if necessary, to get the angle correct.

With this 3D square, it is possible to clamp the two sides being attached, using either spring clamps or short bar clamps, depending on what you have available in your workshop. That will help keep the pieces from sliding, making your corners imperfect in your plyo box.
Although it is not absolutely required, it’s a good idea to drill a small pilot hole, about 1/16” into the end grain of the plywood pieces, using the countersunk holes as a pattern. Be careful to center this hole accurately, or the pieces will pull slightly out of alignment when tightening the screws down. If you choose to use screws longer than 1 ½”, dipping the tips into liquid dish soap or rubbing the tips on a bar of soap will help them go in more easily, as the soap will act as a lubricant.
Finishing Your Plyo Box
Once the plyo box is fully assembled, allow the glue to dry overnight. Then chip off any glue squeeze out with a wood chisel. This is better than wiping the glue off with a wet rag or paper towel, as wiped glue fills pores in the wood, causing a stain in the finish.
Sand all sides of the box with a power sander, starting with 80 or 100 grit sandpaper, then moving to 120 or 150 grit. Pay particular attention to all the edges, ensuring that there are no rough spots for you to scrape your skin on. It wouldn’t hurt to round the edges and corners slightly either, so as to help avoid scraped skin.
It’s up to you whether you apply a finish to your plyo box. It is usable as it is. But if you do apply a finish, it will give you a smoother surface, which is less likely to develop splinters at some time in the future. It will also provide some waterproofing, protecting the wood from sweat and spilled drinks.
A couple of coats of varnish will provide a nice finish, especially if you have chosen to make your box out of birch plywood, rather than construction-grade softwood plywood. If you have used softwood plywood instead, you’ll probably want to paint it instead. Avoid high gloss paint, as that makes for a more slippery surface.
If you chose to use construction-grade plywood, it might be necessary to use some wood filler for knotholes and cracks in the surface of the plywood, before painting. I would recommend slightly overfilling these features in the wood, before sanding, then sanding the filler flush with the surface of the wood. This may require more than one application, if the wood has serious flaws in it.


