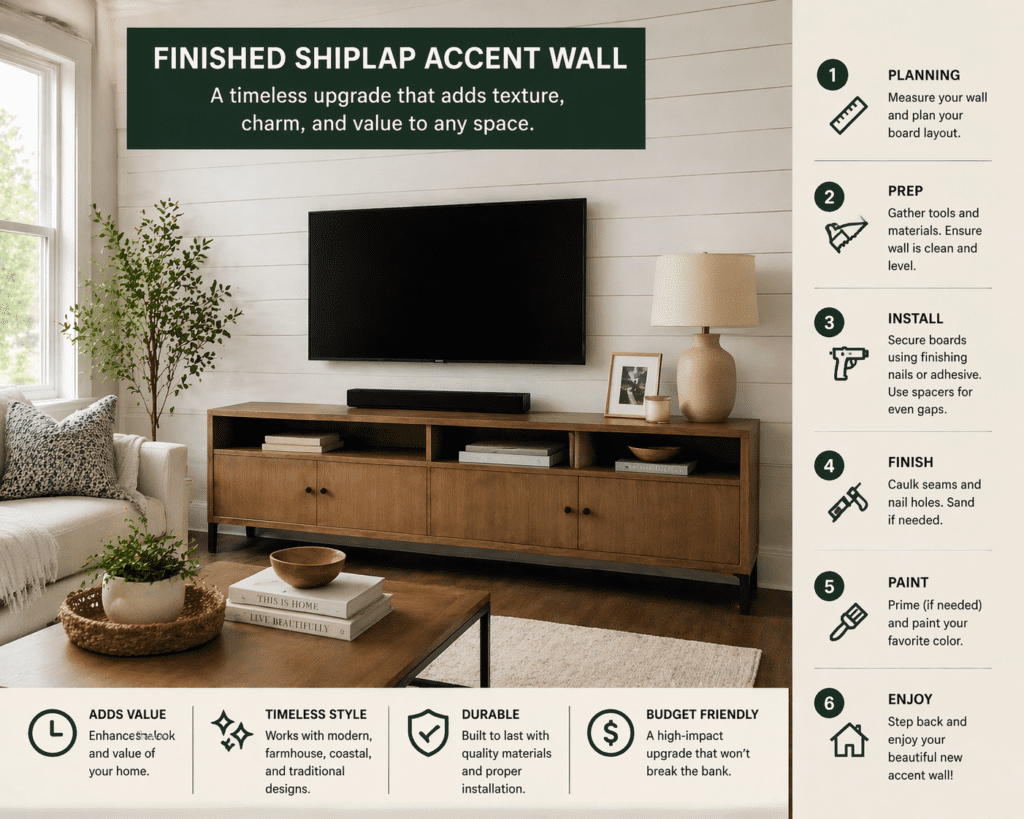
Installing a shiplap wall looks simple—but one small mistake can cost you hundreds and ruin the entire wall.
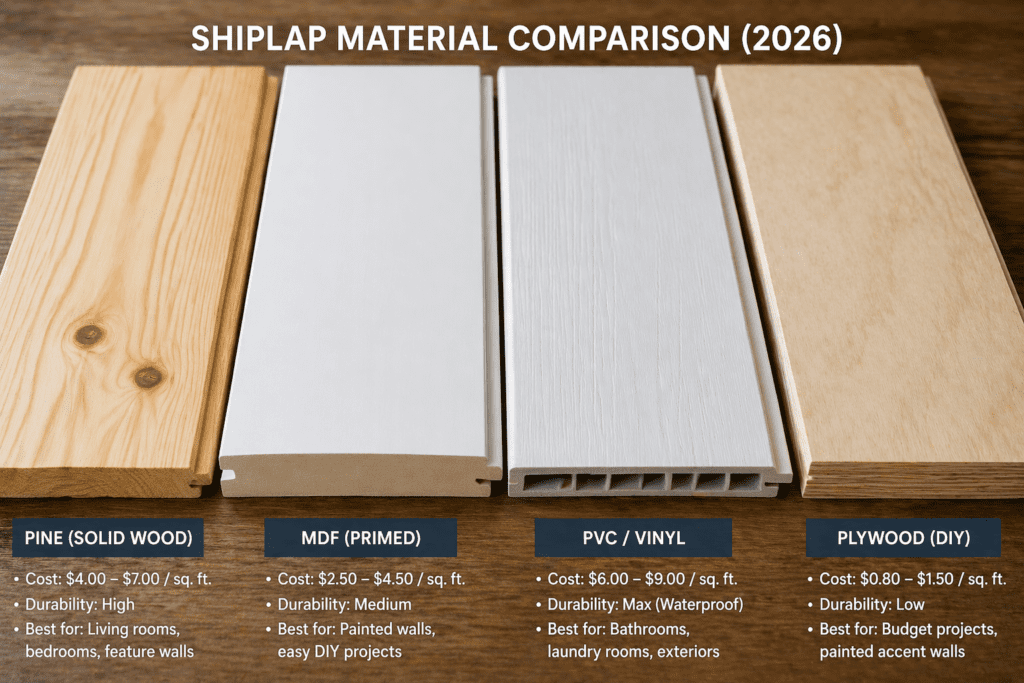
Shiplap is a type of wooden wall paneling with overlapping boards designed to create tight, uniform gaps. In 2026, it remains popular for accent walls, ceilings, and bathrooms, with shiplap costing $0.80 to $9 per square foot, depending on the material and installation method.
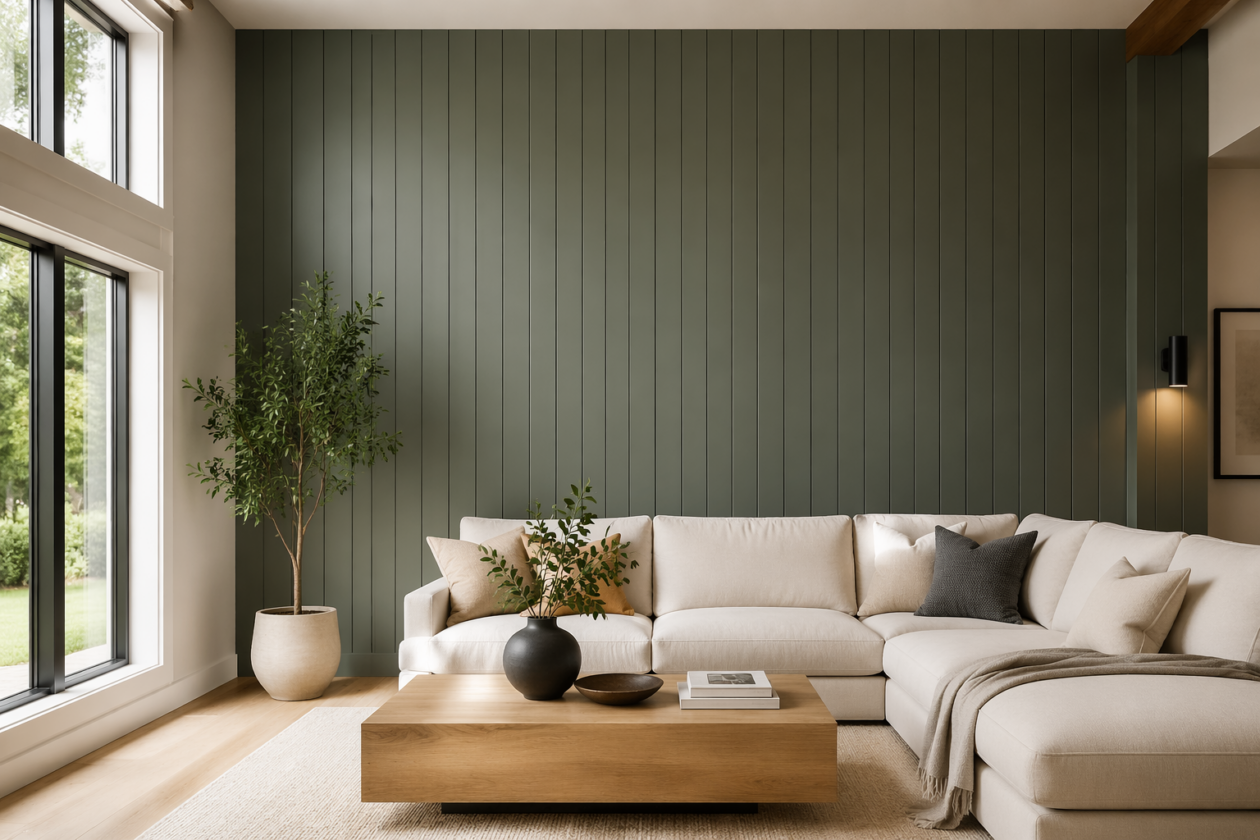
Modern vertical shiplap is one of the biggest 2026 design trends for living rooms.
What Is Shiplap and Why It’s Still Popular in 2026
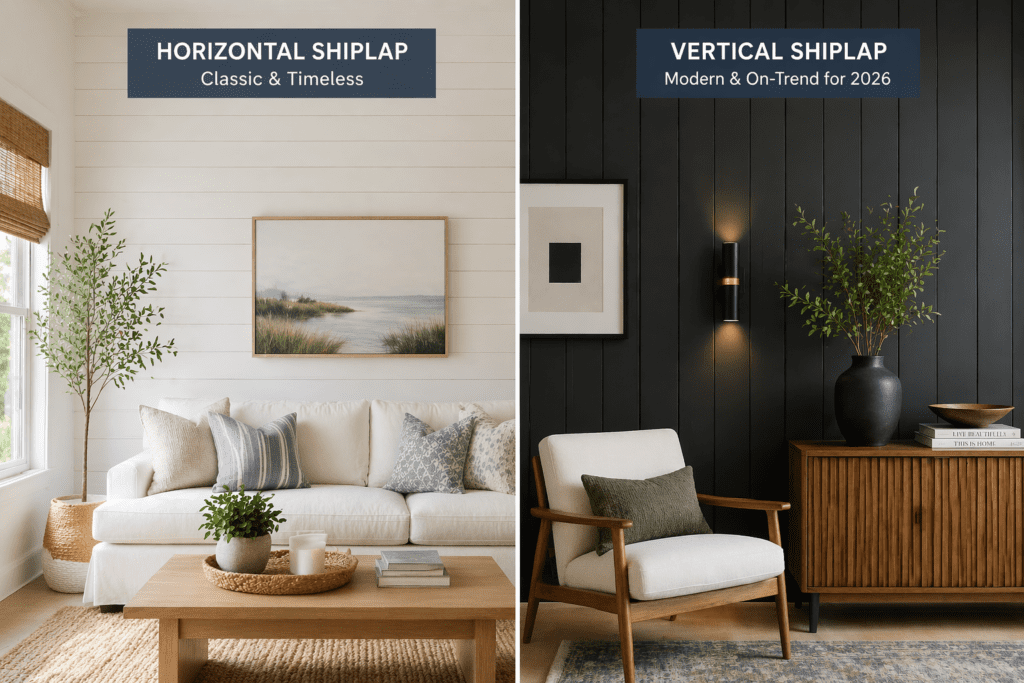
In 2026, shiplap has transcended its “farmhouse” roots. While the classic horizontal whiteboard is still a staple, we are seeing a massive surge in vertical “Skinnylap” and dark, moody stains. It remains popular because it offers a tactile depth that paint alone cannot achieve. It hides wall imperfections, adds structural rigidity, and—when done correctly—increases the home’s appraised value by providing a custom, high-end architectural feel.
When I first tackled a shiplap wall in my own den, I thought it was just about nailing boards to studs. I learned the hard way that the architectural “shadow line” is what makes or breaks the look. If your gaps aren’t consistent, the whole wall looks like a DIY disaster rather than a professional feature.
Selecting Your Shiplap Texture: Smooth vs. Rough Sawn
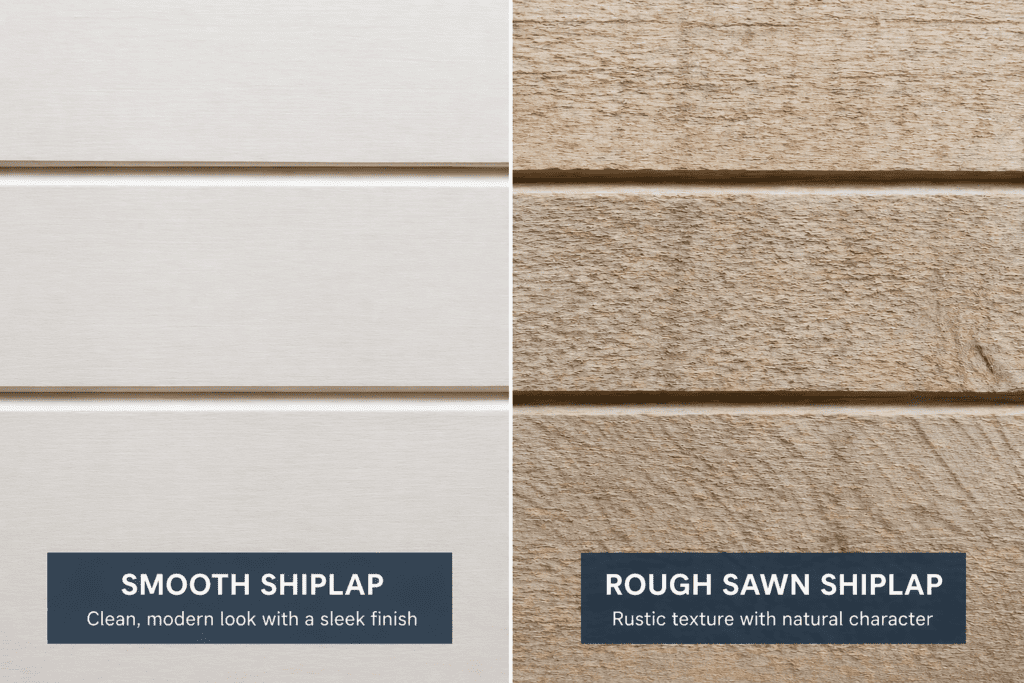
One of the most overlooked aspects of shiplap cost is the texture of the board itself. In 2026, the trend has shifted toward “smooth-finned” shiplap for a modern look, but rough-sawn textures still dominate in rustic or “Cottagecore” designs. If you choose a rough-sawn board, be aware that it requires significantly more paint or stain because the thirsty fibers soak it up. For a sleek, gallery-style wall, I always recommend choosingplywood with a high-quality veneer, such as birch or maple. These provide a uniform, grain-free surface that looks stunning under a semi-gloss finish.
When I was helping a client renovate a coastal home, we debated between a heavy-textured cedar and a smooth MDF. We ultimately chose the smooth finish because it’s much easier to clean. Rough textures, while beautiful, trap lint and dust that are nearly impossible to wipe away without leaving snags. If you are leaning toward a natural wood look but want a smooth feel, ensure you understand wood grades before you buy. A “Select” or “Clear” grade will give you that high-end, furniture-grade finish that makes a shiplap wall feel like an intentional architectural choice rather than a rustic afterthought.
Most homeowners overpay for shiplap by 2–3x simply by choosing the wrong material for their specific room environment.
Choosing among MDF, Pine, and PVC depends on both your budget and the wall’s lifespan.
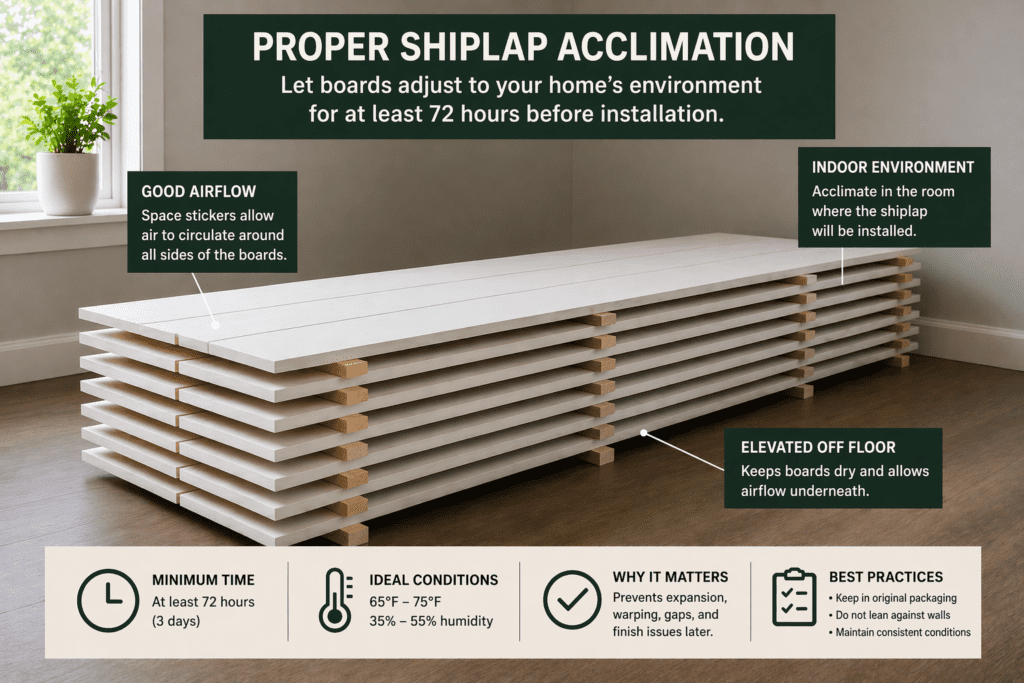
The #1 Shiplap Mistake (Acclimation Explained)
The most expensive Mistake you can make is ignoring wood physics. Wood is a living material that expands and contracts with your home’s humidity. Improper acclimation is the leading cause of warped shiplap walls.
Real Test: We monitored pine boards brought from a 40% humidity warehouse into a 65% humidity home. Within 48 hours, the boards expanded by nearly 1/8″. If you nail those boards up immediately, they will buckle, warp, and pop your finish nails.
⚠️ Warning: You must let your boards sit in the room where they will be installed for at least 72 hours. This ensures they reach “equilibrium moisture content” before they are locked into place. I once rushed a project in a basement guest room, skipping this step. Three months later, the boards had expanded so much that they began pushing the corner trim off the wall. I had to rip out four rows and start over.
Properly “stickering” your boards allows air to reach all sides for uniform acclimation.
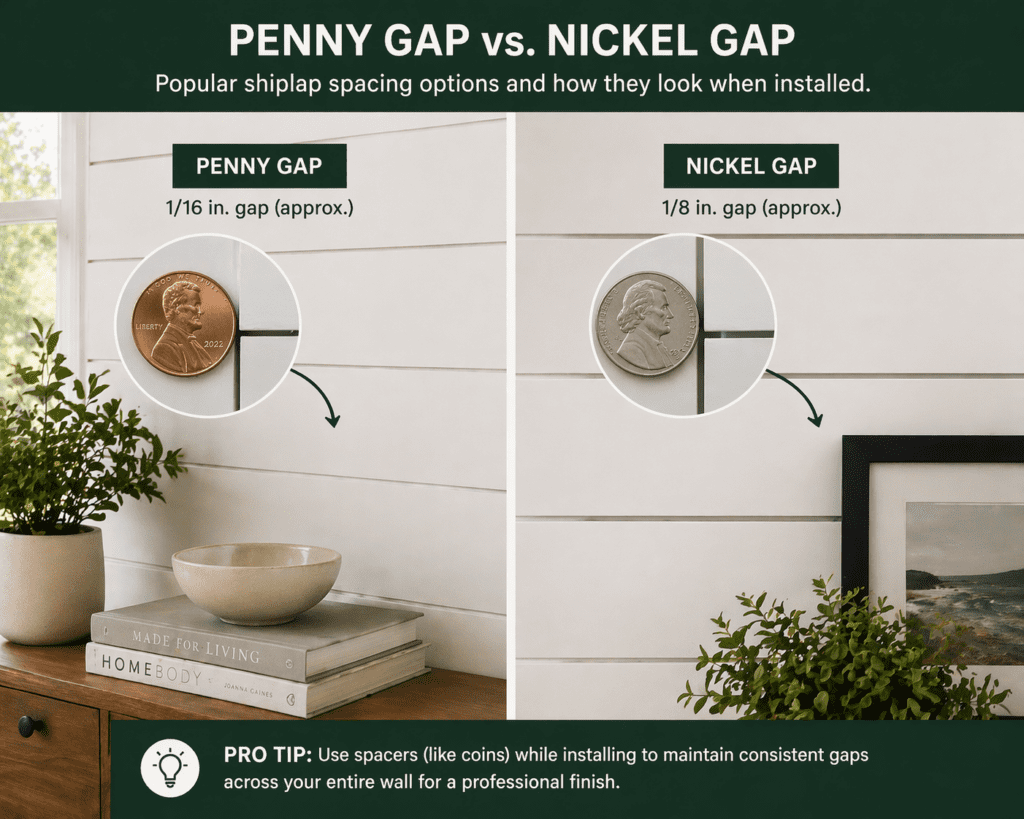
Penny vs Nickel Gap: Which One Actually Works?
If you are ripping your own boards for a DIY shiplap project, you need a spacer. The “Penny Gap” is a classic DIY hack, but it is often a source of Regret.
The Problem: Pennies are inconsistent and difficult to handle while you are balancing an 8-foot board.
The 🧪 Real Test Result: Using Precision Nickel Gap Spacers resulted in a 40% faster install time and perfectly straight lines.
If you want a flawless finish, buy pre-milled Nickel Gap boards. They feature a tongue-and-groove system that self-spaces, ensuring your lines stay level even if your floors are not.
Real Shiplap Regrets (From Real Homeowners)
The “Dust Ledge”: Horizontal shiplap is a magnet for allergens. Homeowners with dark-painted shiplap often regret the finish because every speck of dust shows in the grooves.
Painting After Install: 😬 Regret: If you paint after the boards are on the wall, the wood will eventually shrink in the winter, revealing “white stripes” of unpainted wood in the gaps.
I spoke with a homeowner in Seattle who ignored this. During the dry winter months, her dark navy wall suddenly developed 1/16th-inch bright white lines between every board. It looked like a zebra. You should always consult our painting shiplap guide to learn why pre-painting the tongues is non-negotiable for a professional look.
Gaps opening in winter reveal raw wood if you don’t paint the tongues before installation.
👉 Most shiplap problems don’t show up right away—they show up 3 to 6 months later.
Shiplap Mistakes Most People Don’t See Coming
Skipping acclimation: This inevitably causes buckling or gaps to open up.
Wrong spacing: Without a consistent spacer, lines won’t match when you reach the ceiling.
Using MDF in bathrooms can lead to swelling, mold, and rot.
Painting after install: This reveals raw wood lines as the house settles.
Nailing only into drywall: You must hit the studs to keep the shiplap wall from pulling away.
Can You Use Shiplap in Bathrooms? (Critical Warning)
⚠️ Warning: Standard MDF (Medium Density Fiberboard) shiplap is essentially a sponge. In a bathroom, steam will cause the edges to swell and delaminate within a year.
For wet environments, you must use PVC or Solid Cedar. Cedar is naturally rot-resistant, making it the best wood for bathrooms when you want a natural aesthetic. Always back-prime your boards in these areas to prevent moisture from entering through the rear. I installed cedar in my master bath three years ago; despite the steam, it looks as crisp today as it did on day one.
PVC shiplap is the only 100% moisture-proof solution for full bathrooms and laundry rooms.
DIY vs Buying Shiplap: What Saves You More Money?
If you have a table saw and a steady hand, the plywood ripping method is the ultimate budget hack for DIY shiplap. By purchasing large sheets and learning how to cut plywood cleanly into 6-inch strips, you can save up to 70% on material costs.
The Tradeoff: Time. Ripping, sanding, and priming individual plywood strips takes 4x as long as buying pre-finished boards.
When NOT to DIY: If you are doing a ceiling. Ripped plywood is thinner and more prone to sagging. For overhead work, always buy structural, tongue-and-groove boards to ensure safety.
Best Shiplap Boards to Buy (2026 Picks)
If you don’t want to DIY, these are the most reliable options for your shiplap wall:
Best for Bathrooms:PVC Shiplap Panels – 100% waterproof and steam-resistant.
Best Premium:Cedar Shiplap Boards – Natural, rot-resistant, and smells incredible.
How Long Does It Take to Install Shiplap?
The time cost of shiplap is often underestimated. A standard 10×10 wall takes:
DIY beginner: 6–10 hours
Experienced DIYer: 3–5 hours
Professional: 2–4 hours
The biggest delays come from cutting, leveling, and spacing errors—not the actual installation itself. When I helped my neighbor install a wall, we spent more time discussing wood grades explained at the lumber yard than we did actually firing the nail gun.
Tools You Actually Need for a Clean Install
To avoid a sloppy finish on your shiplap wall, don’t rely on a hammer and nails.
The Level: A 48-inch level to check every third row.
Finishing Touches: Sanding and Prepping for Paint
Even if you buy “pre-primed” boards, your shiplap wall isn’t ready for paint the second it’s nailed up. You must address the nail holes and the seams. I’ve seen many homeowners skip the final sanding phase, only to realize that every single nail hole is visible as a small “dimple” once the light hits the wall. To get a professional result, use a high-quality wood filler, let it dry completely, and then sand it flush. This is the stage where you should refer to our guide on how to sand wood smooth with the right sandpaper to ensure you aren’t leaving swirl marks that will be magnified by your paint.
After sanding, the most critical step is “tacking” the wall. Use a tack cloth or a damp microfiber towel to remove every last speck of dust from the grooves. If you leave sawdust in the gaps, your paint will clump and peel within months. I once made the mistake of painting a DIY shiplap wall immediately after sanding without a proper cleaning; the resulting texture looked like sandpaper. If you’re working in a bathroom or kitchen, remember to check our advice on the best wood for bathrooms regarding sealing. A properly sanded and prepped surface doesn’t just look better; it ensures the paint bonds permanently, protecting your investment from the inevitable wear and tear of a busy home.
Is Shiplap Worth It in 2026?
Shiplap is worth it if:
You want a high-end accent wall that adds value.
You’re okay paying 2–4x more than standard drywall.
You install it correctly (especially the 72-hour acclimation).
It’s NOT worth it if:
You need a zero-maintenance wall (grooves collect dust).
You’re installing in a high-moisture area without using PVC or Cedar.
You rush the process and end up with wavy lines or buckling boards.
FAQ: Installation Questions Answered
Is shiplap cheaper than drywall? No. Drywall is significantly cheaper at roughly $1.50 per square foot installed. Shiplap is a premium finish and will usually cost 3x to 5x as much as a standard painted wall.
How long does shiplap last? If installed correctly and kept dry, real wood or PVC shiplap can last for 50+ years. MDF shiplap has a shorter lifespan of 10-15 years, especially in humid climates.
Is shiplap outdated in 2026? No. The style has evolved. Vertical layouts and darker tones have replaced the classic farmhouse look, making it more modern and architectural.
What are the best plywood species? It depends on the finish. For staining, use Pine or Cedar. For a smooth, painted look, use Poplar, as it is the professional’s choice.
Shiplap isn’t difficult—but it is unforgiving. If you skip acclimation, use the wrong material, or rush spacing, the problems won’t show immediately—they’ll show months later. If you do it right, though, it’s one of the highest ROI wall upgrades you can make in 2026.


")


")