When I built my very first goat barn, I went into it with pure confidence and almost no real knowledge. If you had asked me back then, I would’ve told you that a barn was just a slightly fancier version of a shed. Throw up some walls, put a roof over it, and you’re basically done. I didn’t worry about where rainwater ran off, or where the wind usually came from, or how air would move inside the building. I also never considered how goats behave in a small space or which types of wood can handle months of damp weather. Instead of planning, I just grabbed some materials I thought were “good enough,” set up a simple rectangle, and went for it.
For a short while, everything looked fine. The goats moved in without hesitation. They explore anything new as if they invented it, so their approval made me feel like I did something right. But the first long stretch of wet spring weather showed me every mistake I had made. The bottom of the plywood started swelling. The ground right under the barn stayed wet longer than the ground everywhere else. The inside held this heavy, musty smell that made me think of old basements. And no matter how much bedding I added or how often I cleaned, the barn never felt fresh. The goats didn’t complain — goats rarely complain — but I was miserable dealing with constant fixes.
Slowly, after weeks of frustration, I realized the problem wasn’t the goats, the bedding, or even how often I cleaned. The problem was the barn itself. A goat barn isn’t just a shelter; it’s part of your whole system. If it’s poorly built, every chore becomes harder. Feeding takes longer. Cleaning feels like punishment. Even just walking inside can put you in a bad mood.
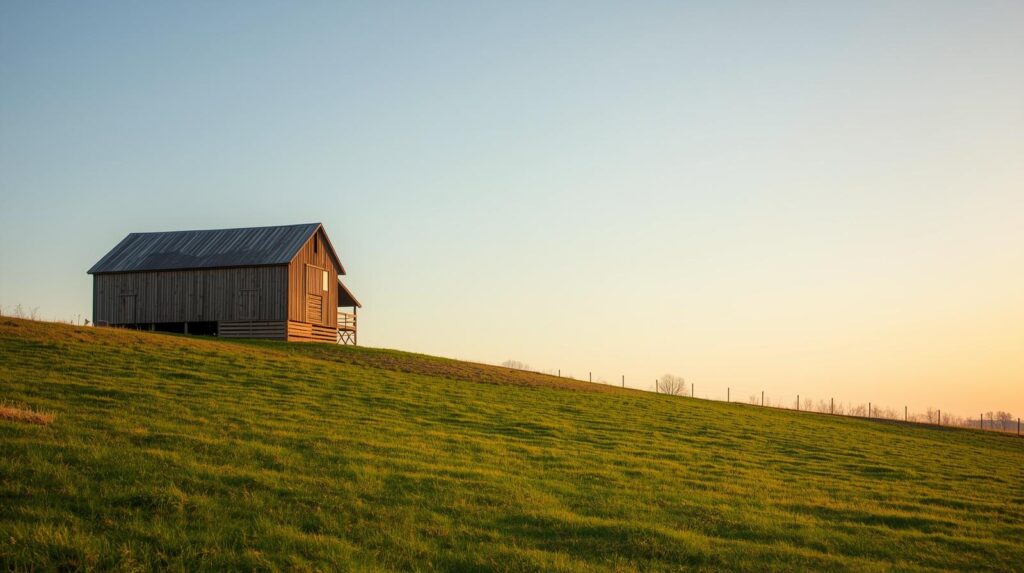
That realization changed everything. After pulling off the parts of the barn that clearly weren’t going to last, the whole project slowed down. Instead of guessing again, the yard itself became the teacher. During the next rain, the water showed exactly where it liked to sit and where it disappeared quickly. The wind had its own routine, too, always pushing in from one side more than the other. Even the old boards told a story — a few were still solid, while others had turned soft and crumbly. All those little observations shaped the next build far more than any plan on paper ever could. And then I built the second barn with those observations in mind, not with blind confidence. That second barn is still standing today, and I haven’t had to replace any major parts. So let me share everything I learned — the real lessons you won’t fully understand until you’ve made the mistakes yourself to build a goat barn.
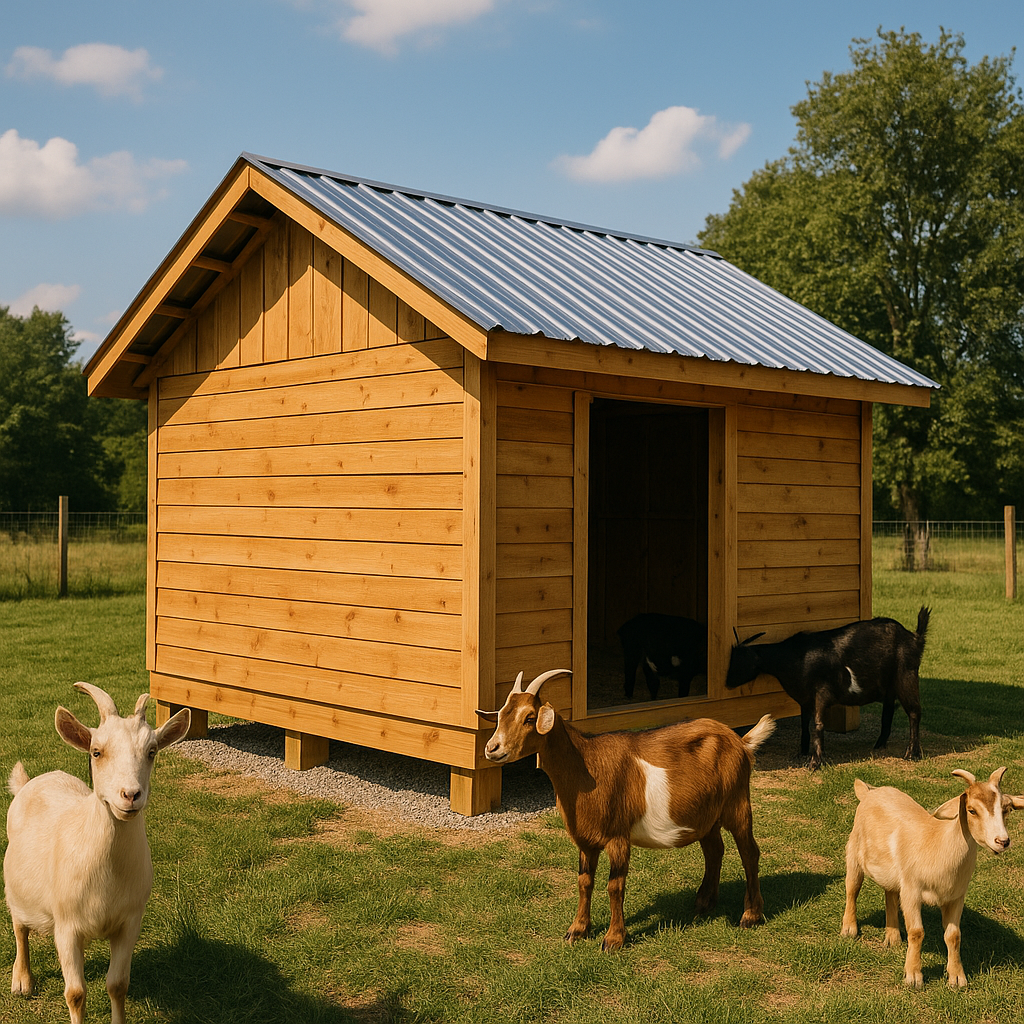
⭐ Start With the Ground: It Matters More Than the Barn Itself
If your barn sits in the wrong place, it doesn’t matter how well you build it — it will fight you forever. I learned this the hard way. My first barn was in a “convenient” spot, but it was also the lowest area of the yard. I didn’t notice that because it didn’t look sloped. But when the rain came, the puddles told me the truth. The barn sat in a slow-moving pool of water after every storm, and that moisture crept into everything.
When choosing a spot, walk around after a rainfall and look at where water settles. Your barn does not belong in any of those places. High ground is ideal. Even a very slight rise helps more than you’d think. Morning sun is also your friend — a barn facing east dries out faster and stays fresher. And please, learn from my mistake: don’t build the barn so far away that you dread carrying hay to it in February.
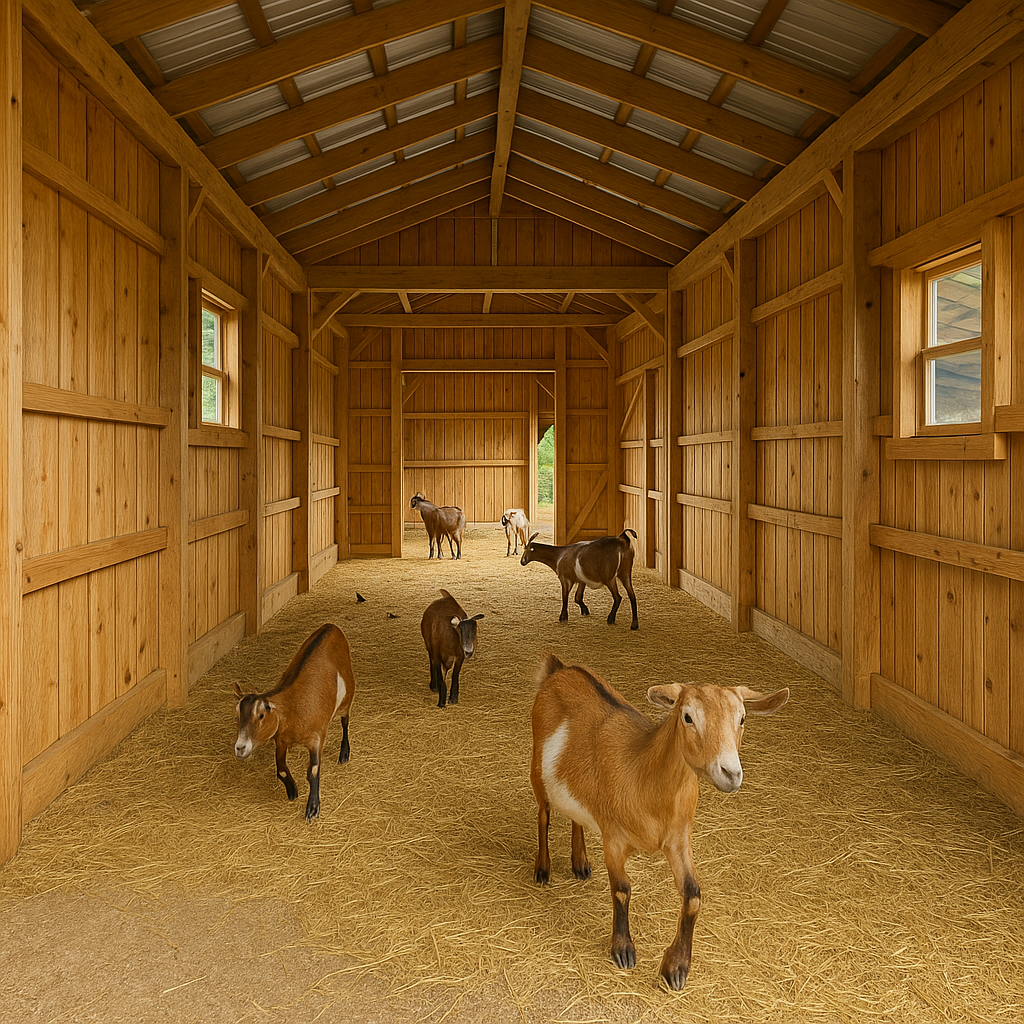
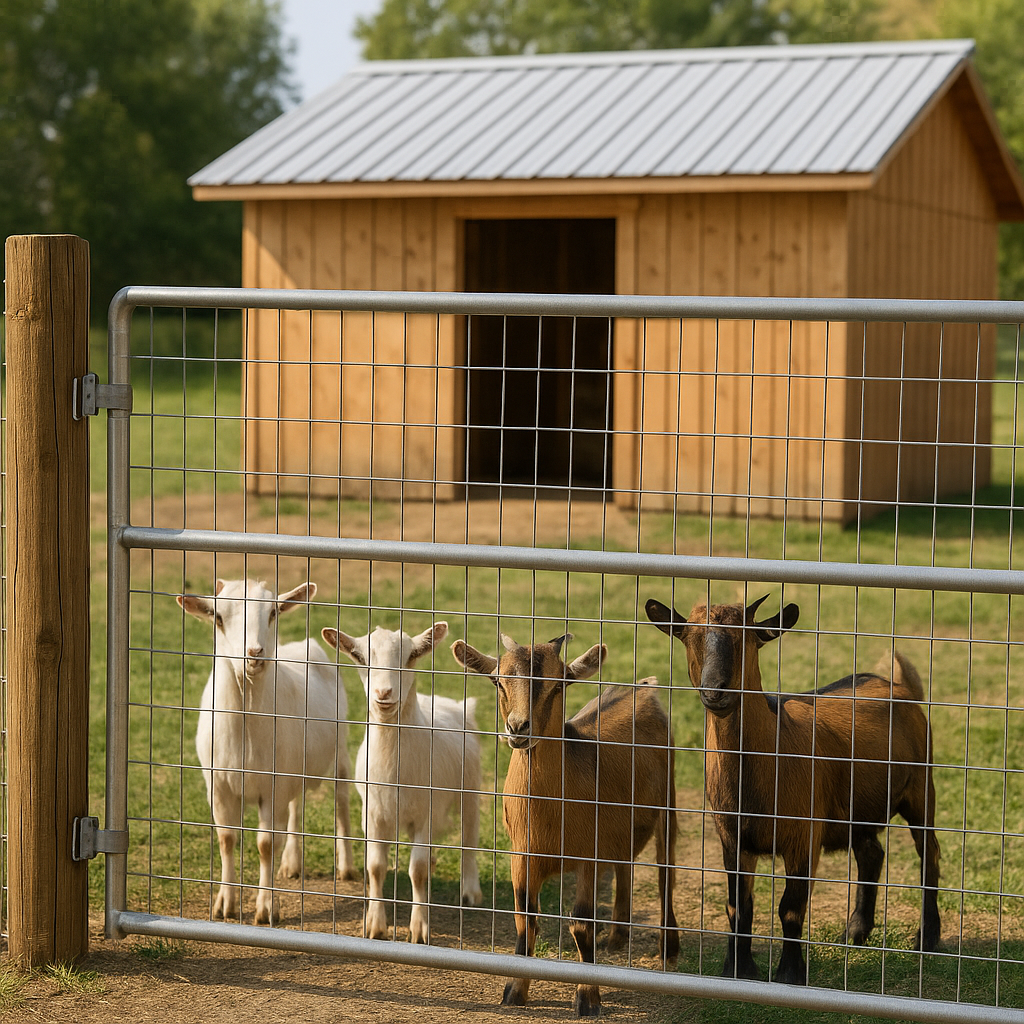
⭐ Give Yourself and the Goats Enough Space
Space solves problems before they happen. Goats bump into each other constantly. They climb everything. They’ll wrestle for fun. They’ll steal each other’s hay. And sometimes they decide to sprint from one end of the barn to the other as if they’re late for something.
If you underestimate the space they need, they’ll tell you very quickly. Tension rises, bedding gets trashed in minutes, and feeding time looks like a parade of tiny troublemakers.
As a starting point:
Small goats can get by with about 10–15 square feet inside
Medium goats are happier with 15–20
Large goats appreciate 20–25
Kidding pens should be big enough for you to kneel comfortably next to a doe without feeling jammed in a corner. Outdoor space matters too — the more room goats have to move, the calmer the herd becomes.
And here’s my favorite rule: if you’re trying to decide between two barn sizes, pick the bigger one. You will never regret building slightly larger than you had planned.
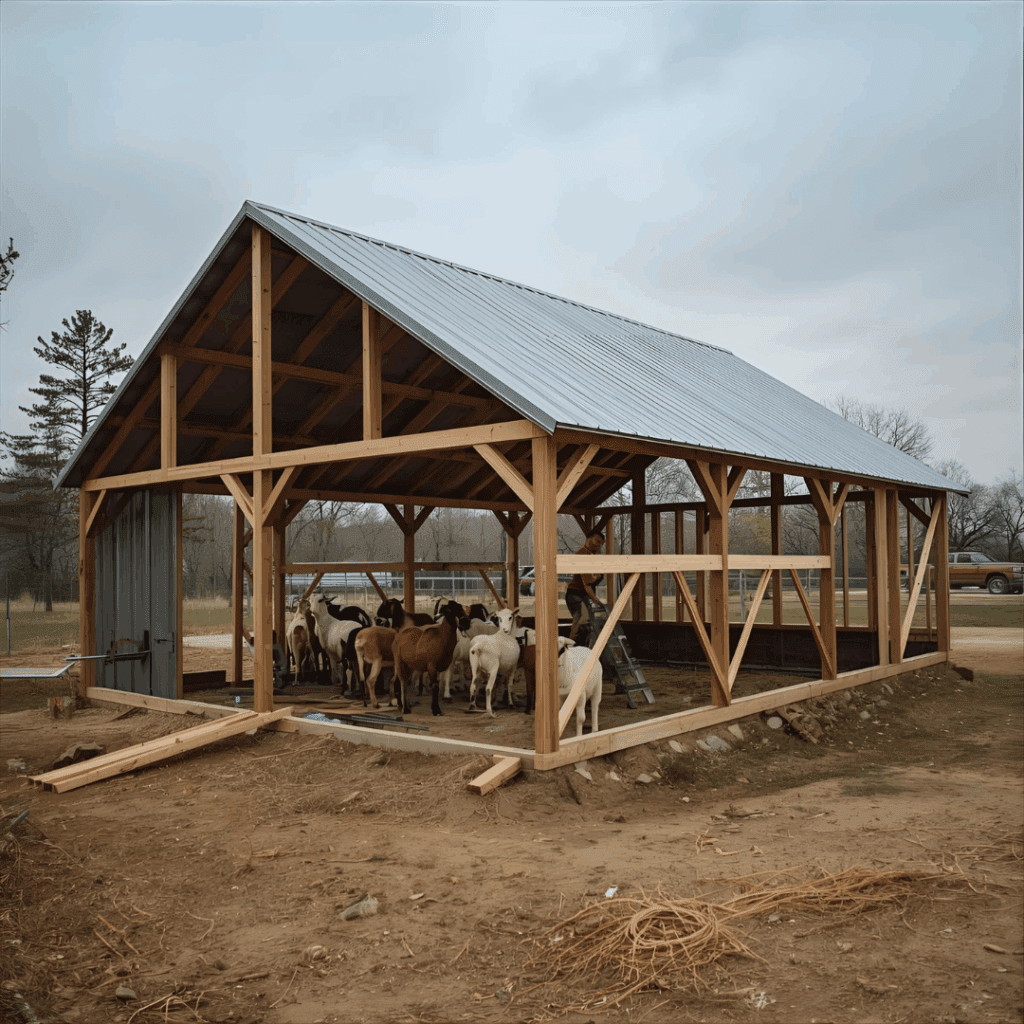
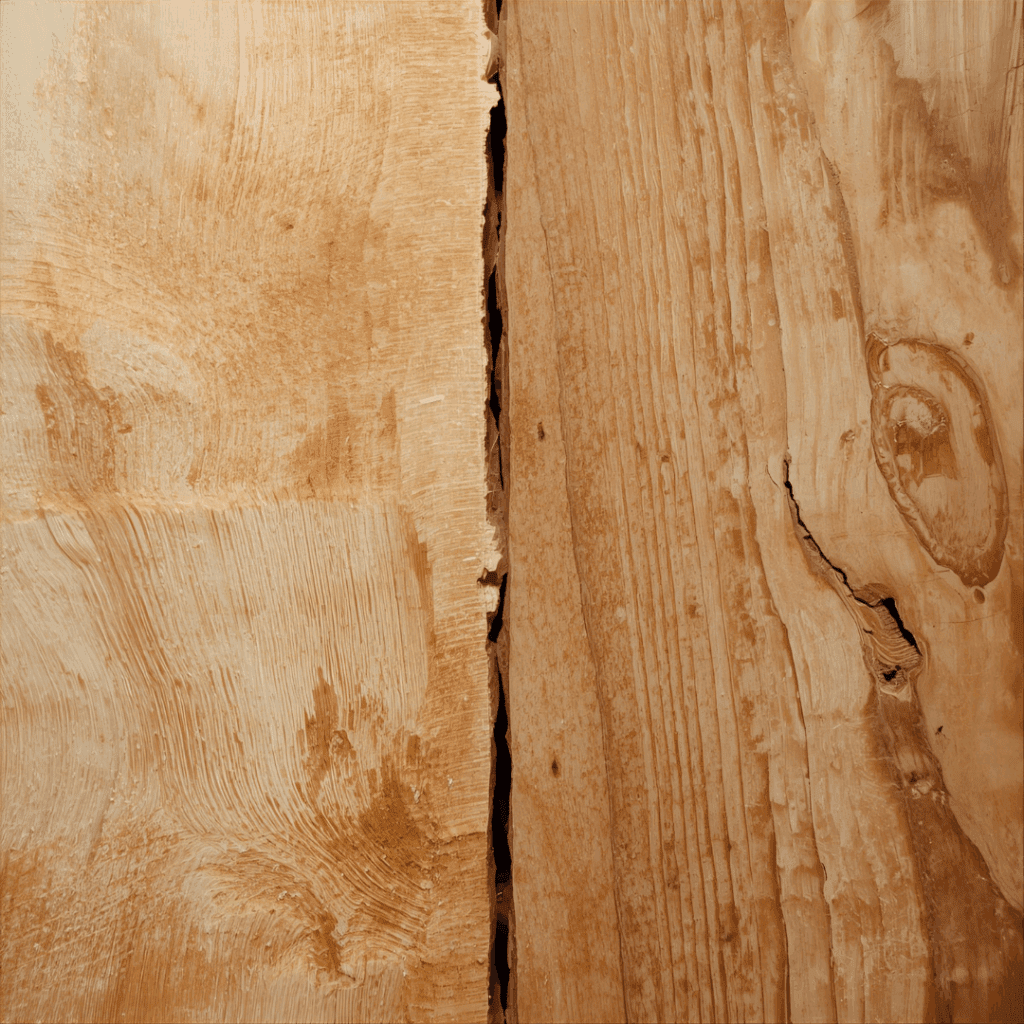
⭐ Materials Make a Bigger Difference Than You Expect
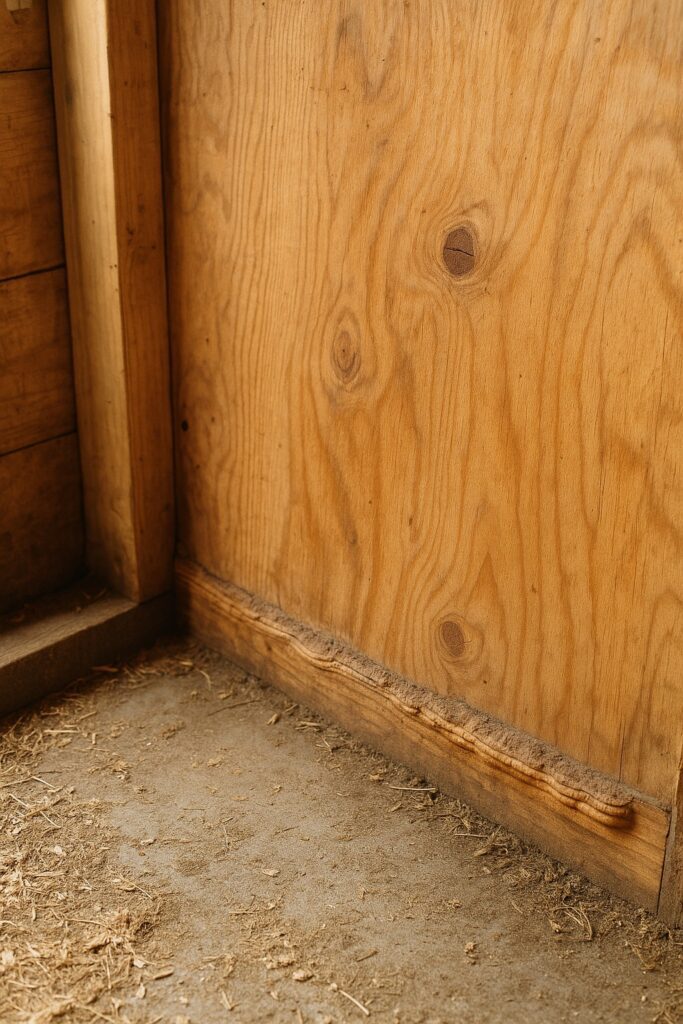
When I built the first barn, I thought all plywood was basically the same. I learned very quickly that it is not. Cheap plywood acts like a sponge. If moisture even looks at it for too long, it starts swelling. The goats also treated the flimsy edges like a snack bar. That combination doomed the barn from the start.
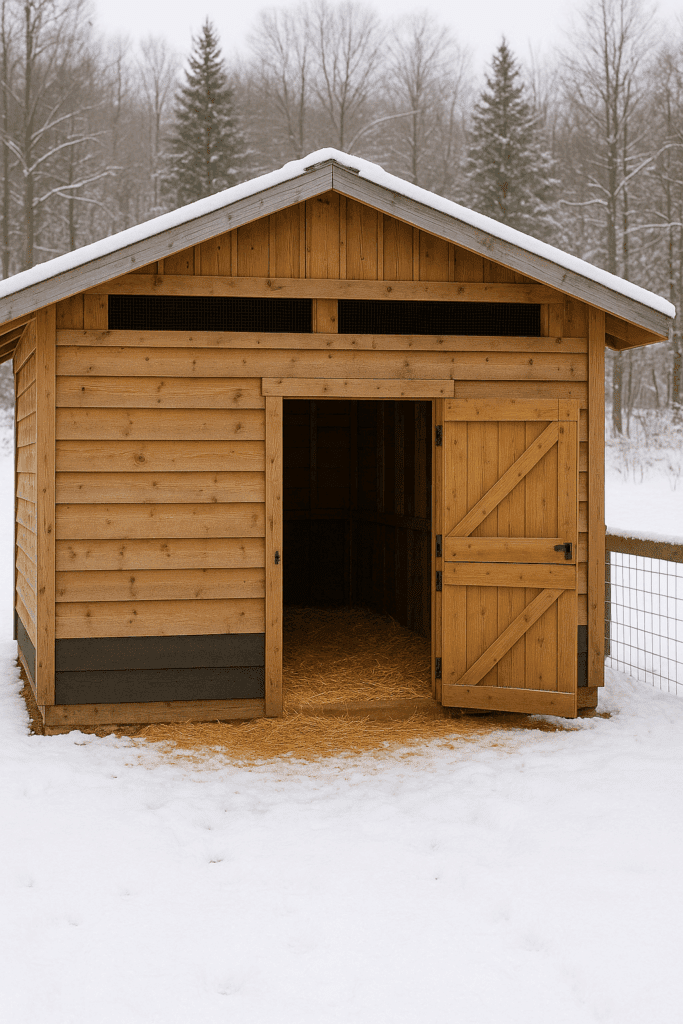
The second time around, I used pressure-treated posts, exterior-grade plywood, and metal roofing. There’s a noticeable difference in how everything handles weather. Metal roofing, especially, has been a game-changer. It sheds rain beautifully, handles snow well, and goats can’t damage it, even when they climb on it or slam into it.
Here are some tools and materials I highly recommend:
Link Suggestions: For more on choosing plywood for outdoor structures: 👉 T1-11 Siding Guide
Good materials don’t make the barn fancy — they make it last.
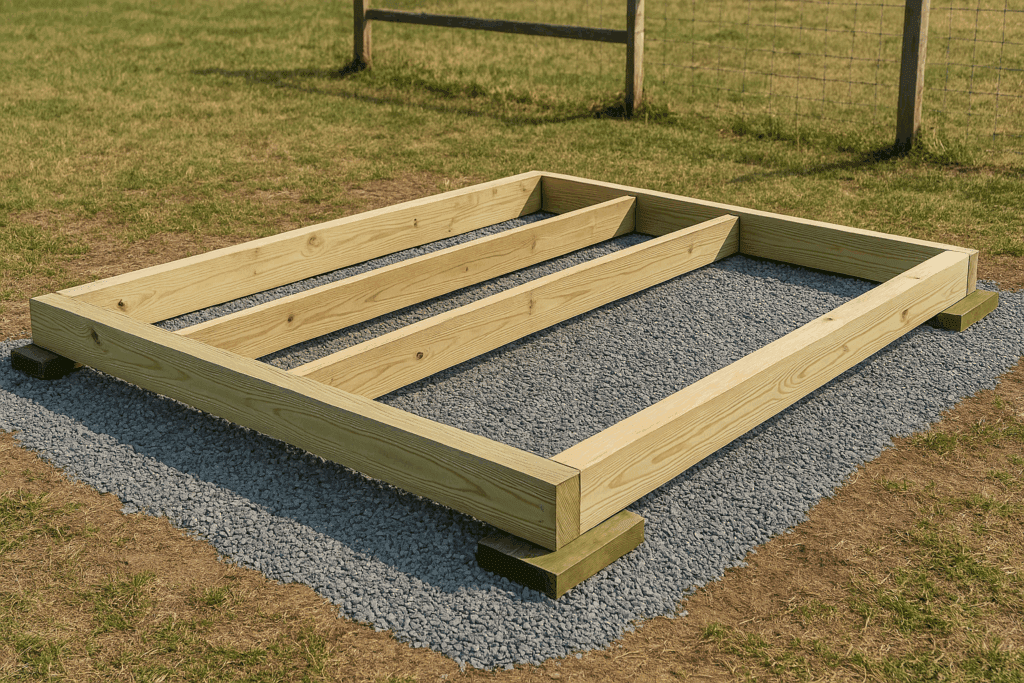
⭐ The Foundation Should Never Sit Directly on Soil
My first barn sat on bare dirt because I wanted to finish it fast. Dirt shifts, especially when it rains. The barn slowly sank, and the moisture wicked up the posts like a slow-moving disaster.
For your first barn, gravel plus skids is the easiest and most practical system. It drains water away and keeps the structure off the ground. Concrete blocks are also excellent for small- and medium-sized barns.
A concrete slab is fantastic if your budget allows it — nothing beats it for easy cleaning — but it isn’t required.
The bottom line? Anything is better than placing wood directly on soil.
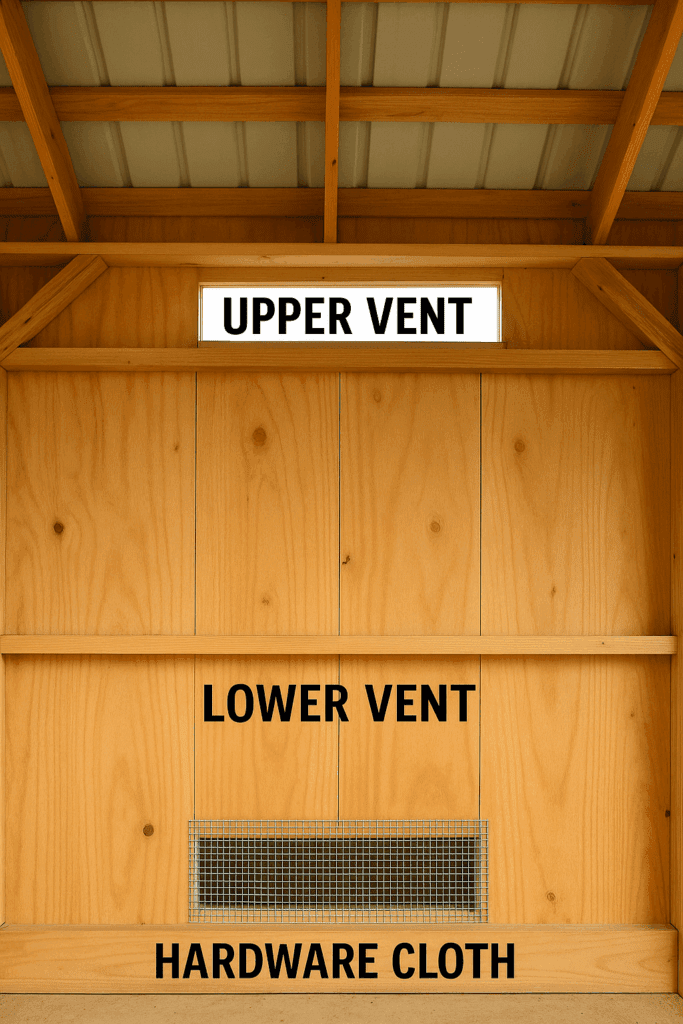
⭐ Ventilation Isn’t Optional — It Makes the Entire Goat Barn Work
This was the biggest mistake in my first barn. I thought if I sealed everything tightly, the goats would be warmer in winter. What actually happened was the opposite. Ammonia built up, moisture never escaped, and the barn felt damp and stuffy even when it was cold outside.
Goats need fresh air, not a sealed box. A good barn breathes naturally.
You want:
High vents under the roof eaves (let rising warm air escape)
Low vents near ground level (bring fresh air in)
½-inch hardware cloth covering every vent( 🛠 Amazon Hardware Cloth)
Predators cannot rip hardware cloth the way they can destroy chicken wire.
Once I added real ventilation, the barn immediately felt drier, cleaner, and more comfortable.
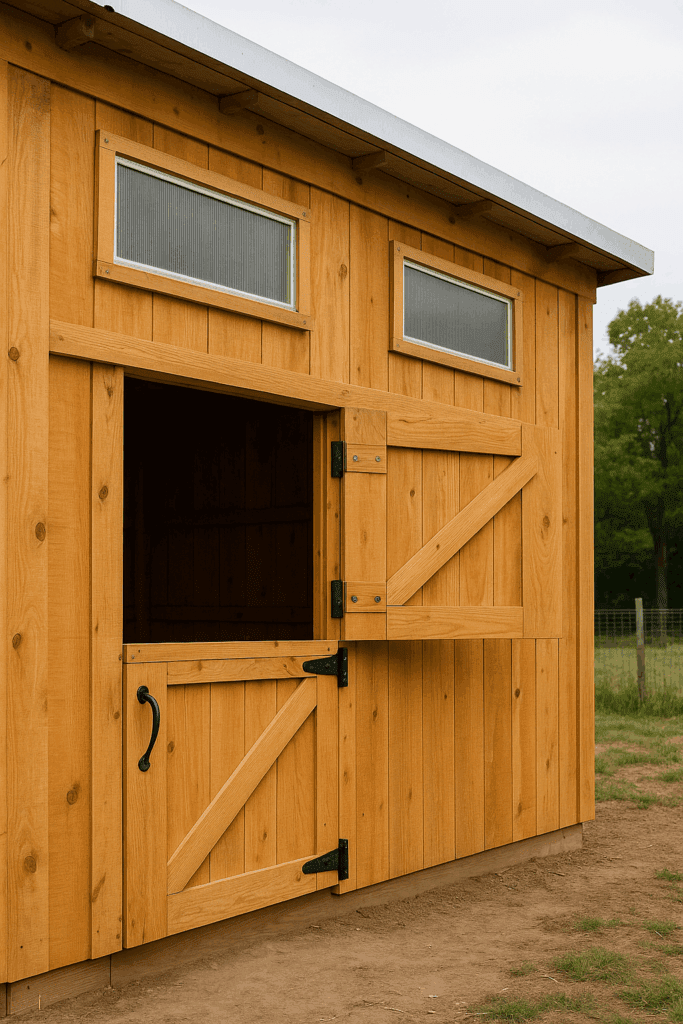
⭐ Doors and Windows: Don’t Overthink Them, but Don’t Get Them Wrong
Narrow doors make chores harder. A wide door — ideally a Dutch door — makes feeding, mucking out, and carrying hay or tools so much easier.
⭐ Drainage Fixes More Problems Than Wood or Roofing Ever Will
You can build a barn from the strongest, most beautiful materials, but if the ground is always wet, you’ll be fighting rot, odors, and insects forever.
Here’s what solved the issue for me:
A gravel border around the entire barn
A slight grade that sends rainwater downhill
Gutters with downspouts that redirect water far away
Optional French drain if your soil stays wet
Once drainage improved, smells decreased, bedding lasted longer, and the barn stayed clean with half the effort.
This is one of the biggest misconceptions among new goat owners. I made the same mistake during my first winter: I sealed every crack, every vent, every opening.
The barn was warmer, but also damp. Dampness is worse for goats than cold.
Goats handle cold temperatures remarkably well as long as they stay dry and out of the wind.
Think of every dollar you spend on durable materials as future repairs you never have to make.
⭐ Final Thoughts: What I Wish Someone Had Told Me
If I could go back in time, I’d tell the younger version of myself — the one proudly hammering cheap plywood onto a crooked frame — to slow down.
A goat barn is not just a box for your animals. It’s a system.
When airflow, drainage, and good materials come together, everything becomes easier. Chores take less time. The goats stay healthier. And the barn lasts for years without frustration.
If your first barn isn’t perfect, that’s okay. Mine wasn’t either. But now you don’t have to repeat my mistakes.
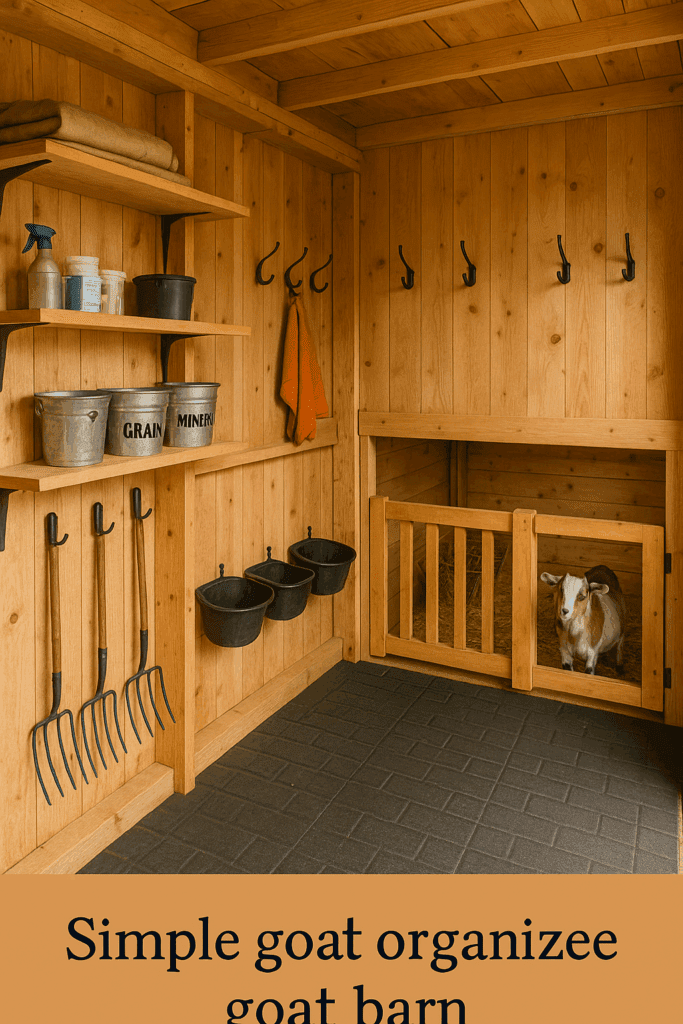
⭐ Extra Tips That Make Everyday Barn Life Easier
Small details can make a big difference in how your barn feels and functions. These are the little upgrades I ignored the first time but added later—and now I can’t imagine living without them.
Here are some of the easiest improvements:
Rubber stall mats (they protect floors and save bedding)
Corner feeders (less hay waste)
Hooks for buckets, harnesses, and brushes
Shelves for medications and minerals
Motion lights so you’re never stumbling in the dark
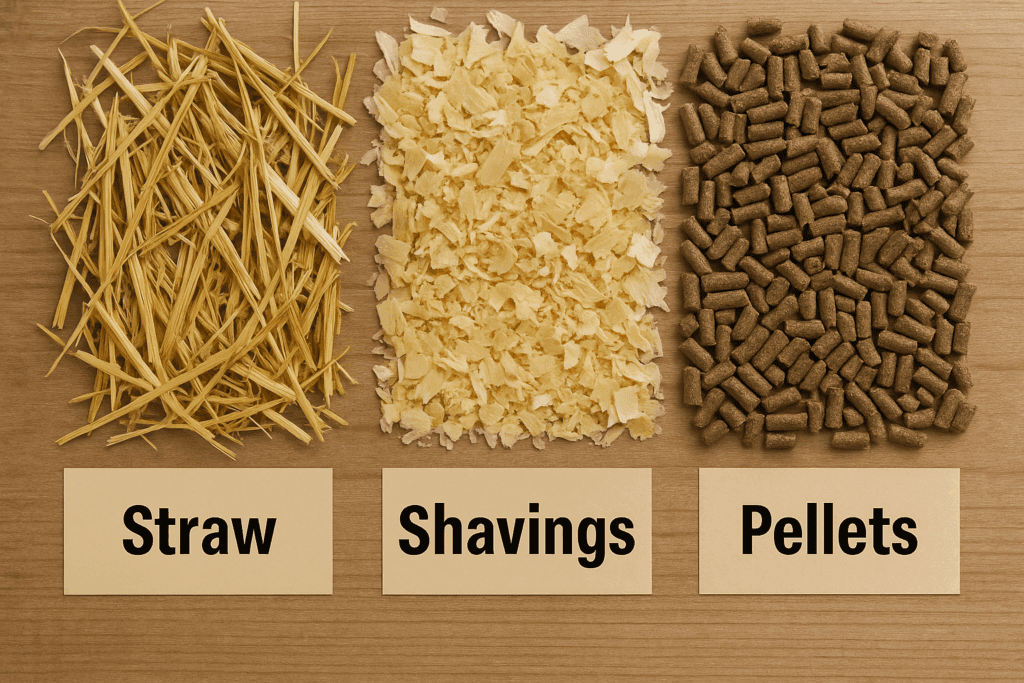
Straw — excellent insulation, great for deep-litter
Pine shavings — easy to clean
Pelleted bedding — extremely absorbent
Avoid cedar (strong aroma can irritate goats)
Link Suggestion: If you want to compare how different wood materials behave indoors and outdoors: 👉 Hardwood vs Softwood
⭐ Cleaning & Weekly Maintenance
A well-designed barn is easier to keep clean. My first barn felt impossible to maintain — every chore took twice as long because moisture kept returning, bedding stayed damp, and airflow was nonexistent.
The second barn? A completely different experience.
Here’s the simple routine I follow:
Daily
Remove wet bedding
Refresh water
Check minerals and hay
Weekly
Add fresh bedding
Sweep corners
Check fencing
Knock down cobwebs
Monthly
Inspect the roof
Check vents
Look for chewing or damage
Add gravel to muddy areas outside
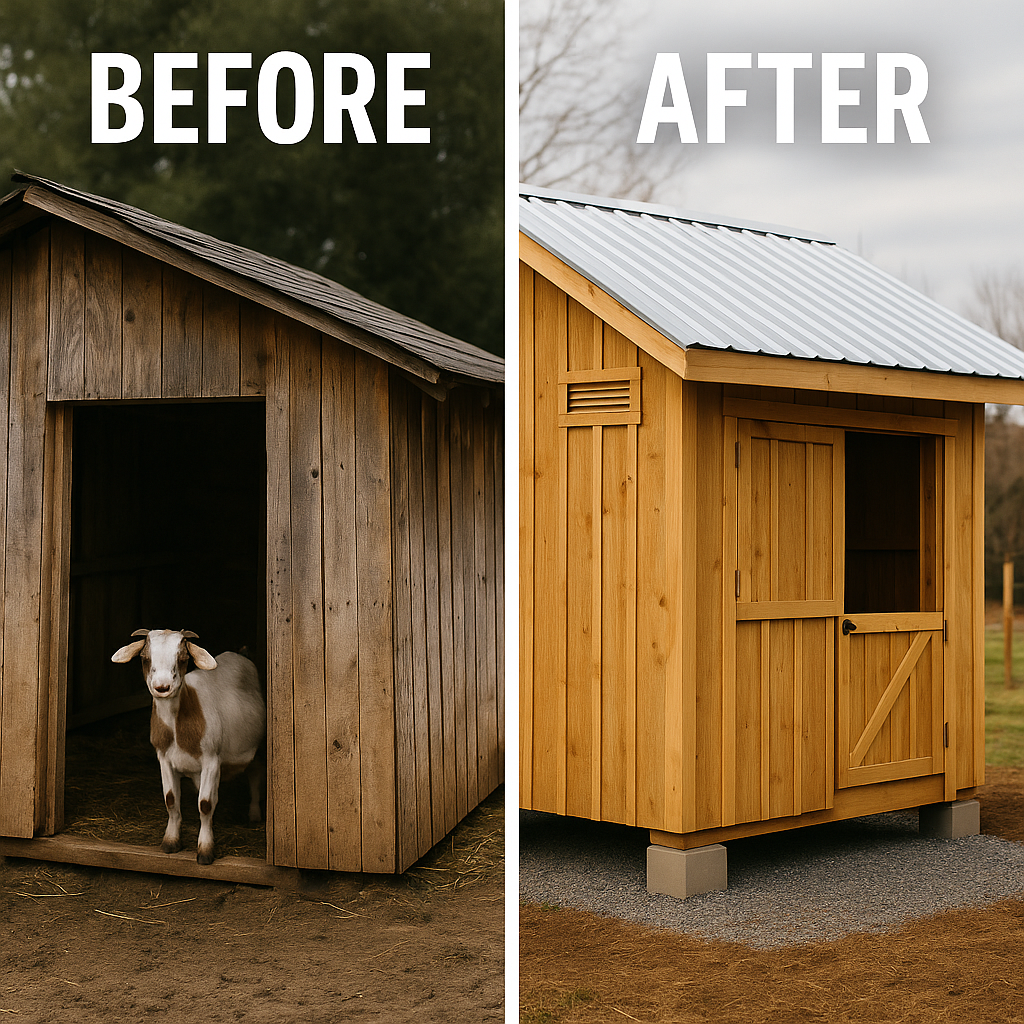
⭐ Before & After: What Changed Between My First and Second Goat Barn
The most helpful comparison is seeing exactly what changed — because these changes are what transformed the barn from a frustration into something I barely think about anymore.


")

")
")
