Hanging curtains is something that’s simple enough that it really shouldn’t cause any problems. Nevertheless, after a lifetime of hanging curtains and seeing other people do so, I can assure you that this is actually much more challenging than just putting in a couple of screws with either a drill/driver or a screwdriver.
The problem can be further complicated by the weight of the curtains, when hanging heavy draperies or using heavy curtain rods. Running a screw into drywall or into the cheap plastic anchors that are commonly supplied with curtain rods isn’t enough to support the weight. And when you add the stress that is put on that anchor by pulling the drapery cord to open and close the windows, you end up with a formula guaranteed for failure.
Nevertheless, it is possible to put drapery rods up in such a way that they won’t fall down. All it takes is one of two things:
- Knowing where the studs are and making use of them
- Using anchors that are solid enough to withstand the strain being put on them
Either of these will work and the two can be used in conjunction with one another, using one at one end and the other at the other. It might also be necessary to use different methods if hanging both a rod for the curtain and one for a valance.
Using the Studs
If the spacing works out, the easiest way to install drapery rods is to take advantage of the studs inside the wall and mount them to those studs, through the drywall. The drywall itself is strong enough that it shouldn’t crush under the weight of the curtain hanging on the rod and the screw going through the bracket and into the stud will transfer the weight to the home’s structure, which won’t notice the difference.
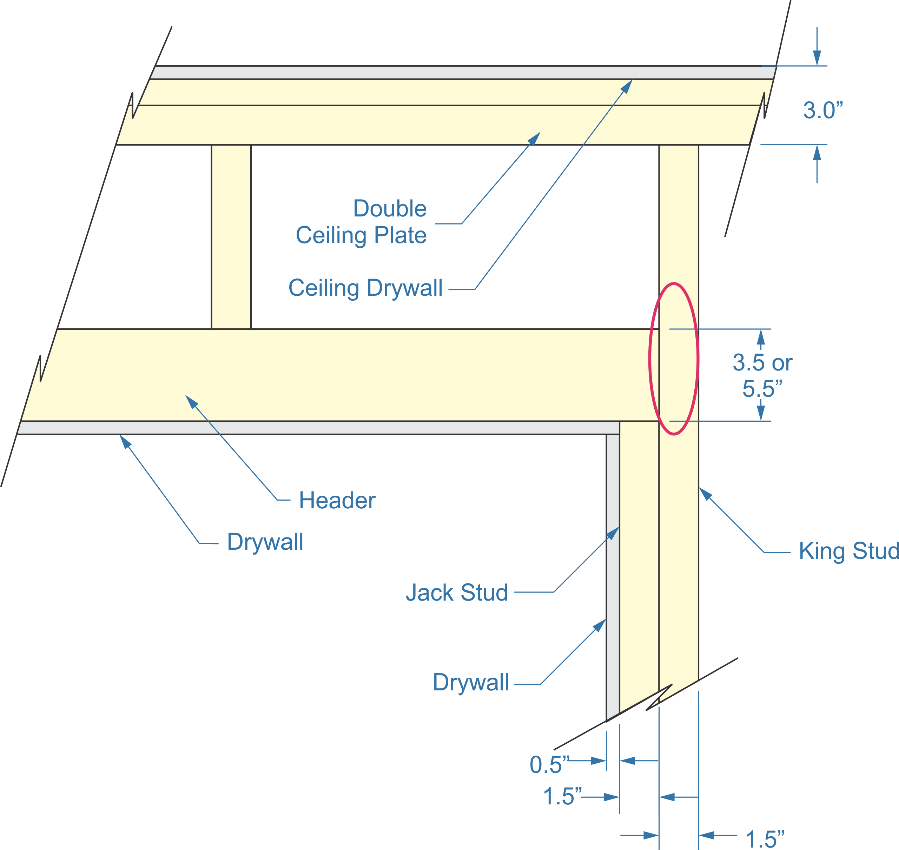
The key is in spacing; knowing where the studs are located, so that the brackets can be mounted in those places. The drawing below shows the typical framing of a window opening, providing some useful dimensional information.
As we can see from the drawing, the window opening is encased in ½” thick drywall. On the side of that, there are two studs, each of which are 1-1/2” wide. There’s also a header above the window, which is usually 5-1/2” high. The area with the red oval is the ideal place to mount the drapery rod bracket, in order to ensure that the hardware will find wood when it goes through the drywall.
Make sure to include the ½” thickness, when measuring the placement of the bracket. If it is intended to go into the king stud, it should be 2-1/2” to 3” outside the window opening. If for some reason the brackets need to be closer to the window, perhaps because the curtains aren’t wide enough, then make sure that they are 1” to 3” above the window opening, so that the screw will go into the header.

It may be necessary to use different screw than what come with the curtain rods. Those are usually ¾” to 1” long. While 1” long screws will go through the drywall and into the stud or header behind it, it would be better to use 1-1/2” long screws.
Using Anchors into Drywall
It might seem that it would be unnecessary to use anchors into the drywall, considering how much wood there is for the screw to go into. But in the case of draperies that are considerably wider than the window or in the case of hanging a valance over the curtains, there’s a strong chance that it will be necessary to use anchors that just go into the drywall, without attaching to any structural wood behind it.
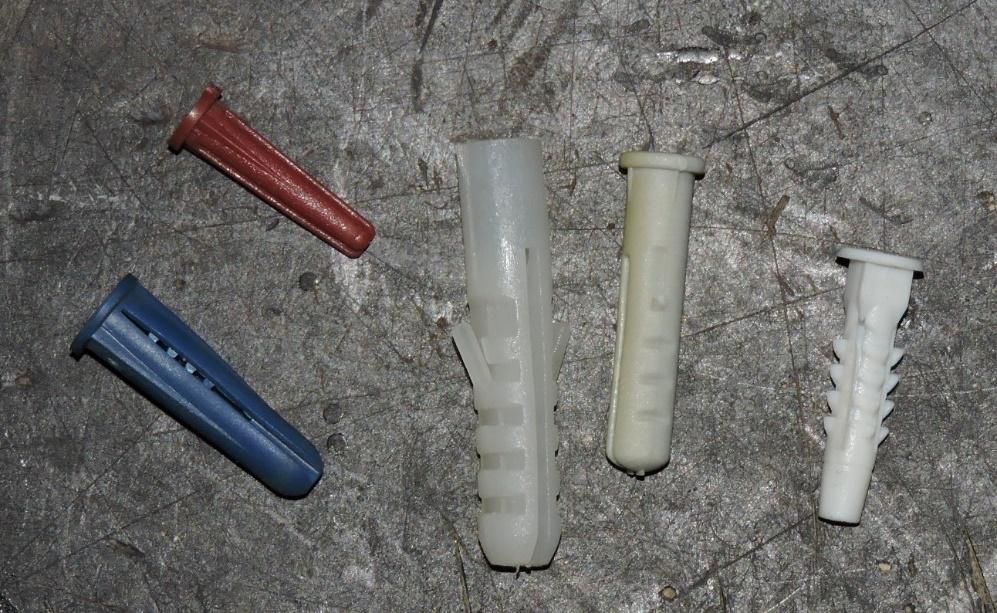
The anchors that come with the rod are probably something like the ones shown below. These are supposed to split apart, making wing that grip the drywall when the screw is run into them, after being inserted into the hole. There are a couple of problems with this. First, the company that manufactures the rod rarely mentions what size hole to drill and if the hole size isn’t just right, they don’t work properly. Secondly, they are just about as likely to break when the screw is put into them, as they are to split.

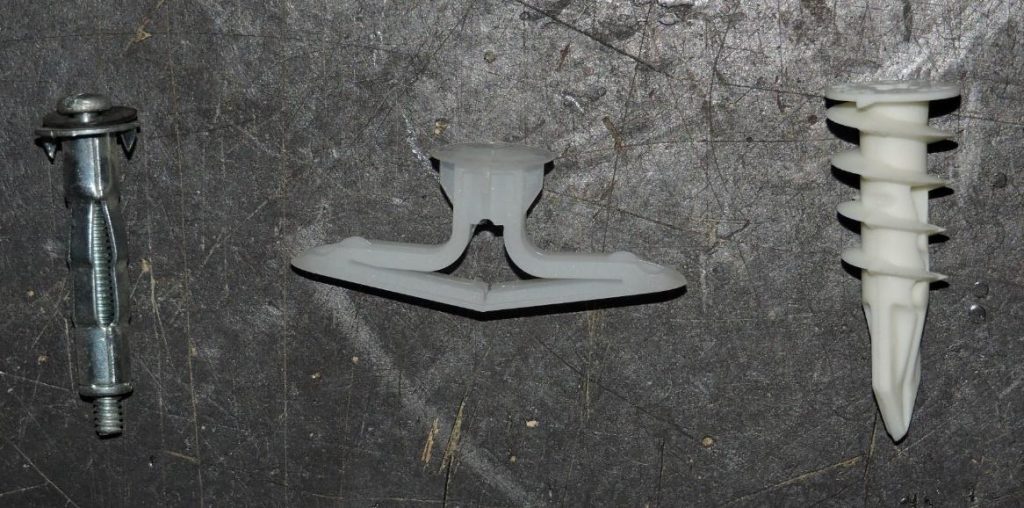
It is best not to use these, but to use one of the types of drywall anchors shown below, especially if the drapes are heavy, there is a pull cord to deal with or children are likely to be pulling on the drapes.

These three anchors, from left to right are:
- Molly bolt – Designed to go into a ¼” hole, the fastener is pounded into the hole, so that the two prongs on the built-in ash stick into the drywall. Then the portion that is slit expands outwards as the screw is tightened, capturing the drywall between the wings that are created and the face. This is a rather old design, but still works very well.
- Plastic molly bolt – Designed to replace the metal one, the wing on this one are folded together and then the fastener is pounded into a 5/16” hole in the drywall (I’ve had it work fine, making a hole by pounding a #2 Phillips screwdriver through the drywall). Once the face washer is flush up against the drywall, a small pin, that comes with the fasteners, is inserted in the hole, popping the wings out to this position, where they are up against the back side of the drywall. The screw is then run into the fastener.
- Plastic screw-in anchor – Requires only a ¼” hole and that doesn’t have to be exact. The wide threads on the fastener dig into the drywall, as the fastener is screwed into it. It isn’t visible in the picture, but there is a #2 Phillips recess molded into the face washer. These can be installed with a screwdriver or a drill/driver, just as long as care is taken to not overtighten the fastener.
Please note that there are other new varieties of anchors which have been developed for mounting things in drywall. Some have a rather high weight rating, allowing one fastener to hold as much as 50 or 75 pounds of weight.
For the curtain rods, only one of these fasteners is needed for each side and that should be used for the top screw hole on the rod bracket. Typically, the brackets have two holes and the bottom hole should still be used, inserting the screws that come with the curtain rod. Take care not to overtighten them to the point where they strip out. As long as they aren’t overtightened, they will work to stabilize the curtain rod bracket and keep it from turning.
