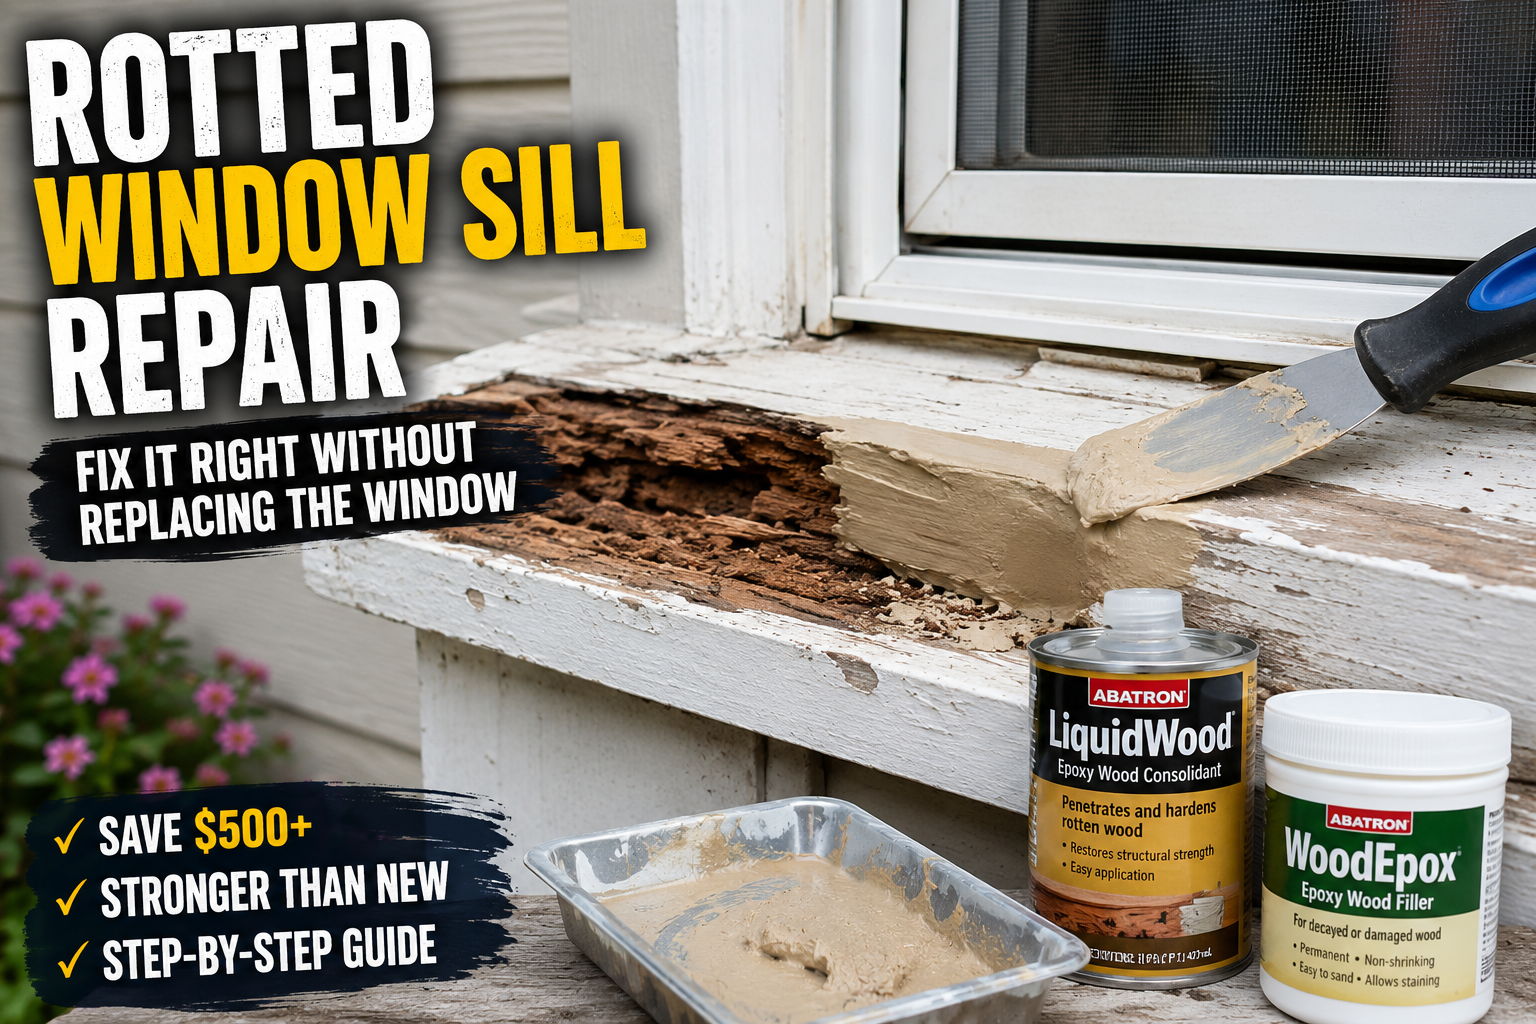
I found the soft spot the way most people do — pressing my thumb into the paint on a Saturday morning and feeling it sink in like wet cardboard. That window sill had been quietly rotting under three coats of paint for who knows how long, and I almost talked myself into a $600 window replacement before I even tried to fix it.
I didn’t need a new window. I needed two hours, some epoxy, and a little patience.
Here’s the comparison table I wish I’d had before I started — it would have saved me a trip to the store and about $40 in wasted materials.
Rotted Window Sill Repair: Quick Comparison
Method
Best For
Cost
Time
Lasts
Wood epoxy filler (Abatron WoodEpox)
Small to medium soft spots, surface rot
$35–$60
2–3 hrs + cure
10–15 years
Two-part liquid consolidant + filler
Punky/crumbly wood, deeper rot
$50–$90
3–4 hrs + cure
10–15 years
Dutchman repair (wood patch splice)
Larger rotted sections, structural sills
$20–$40 in lumber
4–6 hrs
15–20+ years
Full sill replacement
Rot through to the frame, sill pulling away
$150–$400 (DIY) / $400–$900 (pro)
Full day+
20+ years
If your screwdriver sinks more than an inch into the wood, skip ahead to the replacement section — epoxy won’t save it, and I learned that the expensive way.
❌ The Mistake I Made the First Time
The first time I tackled a rotted sill, I painted right over it. I could see the paint was bubbling slightly at the corner, and instead of investigating, I sanded it smooth and put down a fresh coat. Classic mistake — I was treating a structural problem like a cosmetic one.
Eighteen months later, the “fixed” spot wasn’t just soft; it was gone. A putty knife went straight through. What started as a $40 epoxy job turned into a half-day Dutchman repair because I’d let moisture keep working beneath a fresh coat of paint as if nothing was wrong.
If you take one thing from this article, take this: paint does not stop rot. It hides it.
What Actually Causes a Window Sill to Rot
Window sills rot for one reason — water gets in and doesn’t leave. Usually it’s a combination of:
Caulk that’s cracked or pulled away from the frame, letting water track in behind the trim
A sill angle that’s too flat, so water pools instead of running off
Condensation from the inside of the glass dripping down onto the sill year after year
Old or missing drip caps above the window letting rain run straight down the face of the trim
In my case, it was the caulk. A hairline gap at the corner joint had been letting water in for probably three or four seasons before I noticed anything. By the time I caught it, the rot had traveled about four inches into the sill from that corner.
If you’re seeing this same pattern in more than one spot around your house, it’s worth understanding the broader timeline for how long wood takes to rot, since sills are usually just the first place it becomes visible.
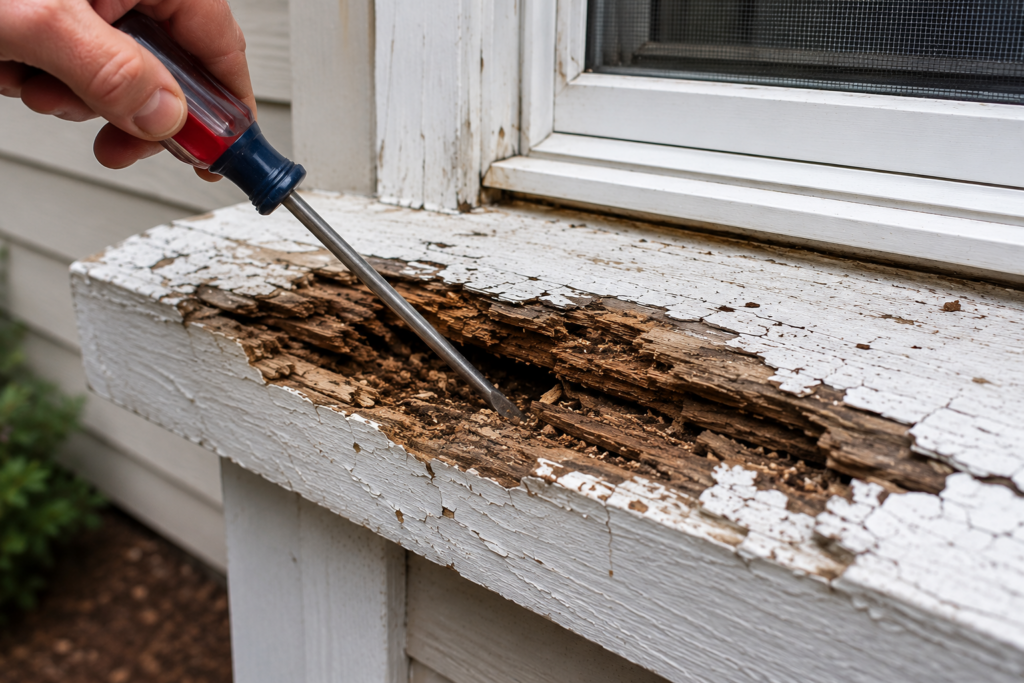
🧪 The Screwdriver Test (Do This Before You Buy Anything)
Before you decide on epoxy versus a full Dutchman repair, run this test — it took me five minutes and told me exactly what I was dealing with.
Take an awl or a flathead screwdriver and probe the suspicious area. Push firmly, not aggressively. Here’s how to read it:
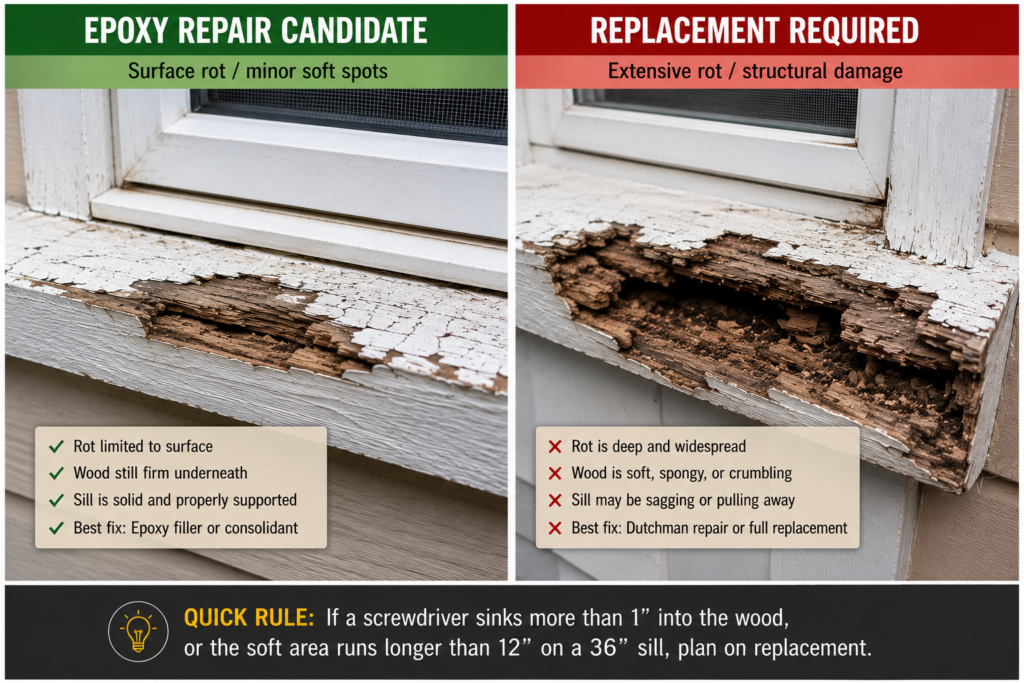
Wood resists, maybe a slight give — surface rot only, epoxy filler will work fine
Screwdriver sinks half an inch with some resistance — moderate rot, plan on a consolidant plus filler
Screwdriver sinks an inch or more, or pushes through entirely — you’re past the point of filler. You need a Dutchman patch or full replacement
As a rule of thumb, if the soft section extends beyond about 12 inches on a typical 36-inch sill — roughly a third of its length — plan on a Dutchman repair rather than filler, even if the depth seems manageable. Length matters almost as much as depth once rot is past the surface stage.
I ran this test around the entire perimeter of the sill, not just the spot I could see was discolored. Rot travels under paint, and the visible damage is almost never the full extent of it. On my project, the visible bad spot was about 3 inches wide, but the screwdriver test showed soft wood extending almost 7 inches once I checked the whole length.
💸 What This Actually Costs (Epoxy vs. Replacement)
I priced this out both ways before committing, and the gap surprised me.
Epoxy repair, materials only:
Wood hardener/consolidant: $22
Two-part epoxy filler: $38
Sandpaper, putty knife, mixing sticks: $12
Total: roughly $72
Full sill replacement, hiring it out:
I got two quotes from local carpenters: $450 and $610
Both quotes assumed removing trim, cutting out the old sill, fitting and painting a new one
That’s roughly $500 saved on a repair that, done correctly, lasts just as long as a replacement. The only time replacement wins on cost is if the rot has spread into the window frame itself, which makes this a different, bigger job.
Tools and Materials for the Epoxy Method
This is the method that probably covers 80% of rotted sill situations — surface and moderate rot where the underlying wood structure is still sound.
You’ll need:
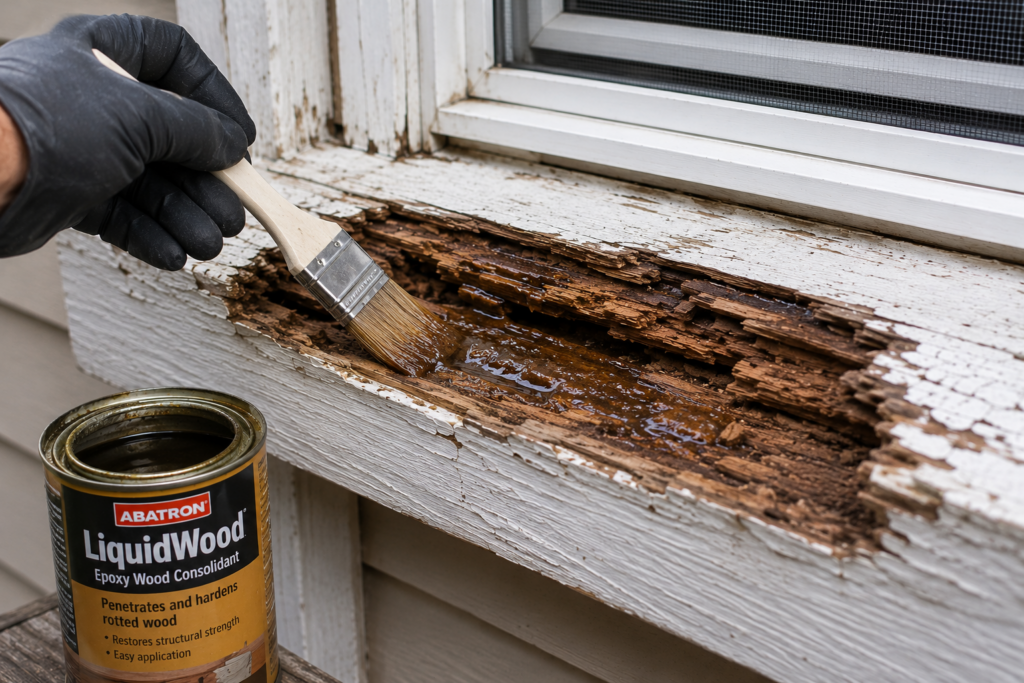
Wood hardener or epoxy consolidant (I used Abatron LiquidWood)
Disposable gloves — this stuff doesn’t come off skin easily once it cures
Step-by-Step: How I Repaired My Sill
Step 1: Strip the paint and find the true edges of the rot. I used a heat gun on low and a scraper to remove paint from a 6-inch radius around the visible damage. This is the step people skip, and it’s why repairs fail — you have to expose the actual boundaries of the rot, not just the spot that looks bad.
Step 2: Dig out every soft, punky section. Using a small chisel, I removed all the wood that didn’t hold up under pressure. This felt aggressive at the time — I was carving out way more than the original soft spot suggested — but leaving any punky wood behind means the rot keeps spreading under the repair.
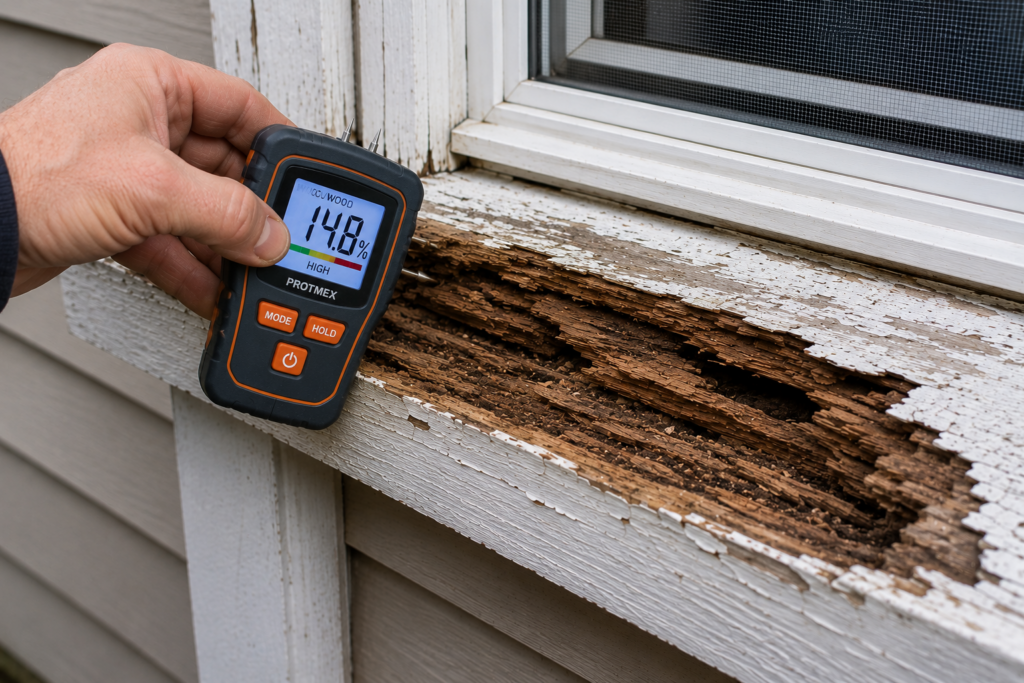
Step 3: Let it dry completely. I waited two full dry days, checking moisture with a meter before continuing, rather than just eyeballing it. Epoxy doesn’t bond to wet wood, and rushing this step is the single most common reason these repairs fail within a year or two. A cheap pin-type moisture meter reads under 15% before I’ll touch it with epoxy — anything higher and I give it another day.
Step 4: Apply the wood hardener. I brushed the LiquidWood consolidant generously over the exposed wood fibers, letting it soak in. This step rebuilds strength into wood that’s gone soft but isn’t fully gone — it’s the difference between a repair that holds and one that crumbles again in a season.
Step 5: Mix and apply the epoxy filler. WoodEpox comes as two putty-like components you knead together by hand until the color is uniform. I overfilled the cavity slightly, knowing I’d sand it back down once cured.
Step 6: Shape, sand, and prime. After a 24-hour cure, I shaped the filler with a rasp, then sanded it down to match the original sill profile. Primed it the same day, then painted it two days later.
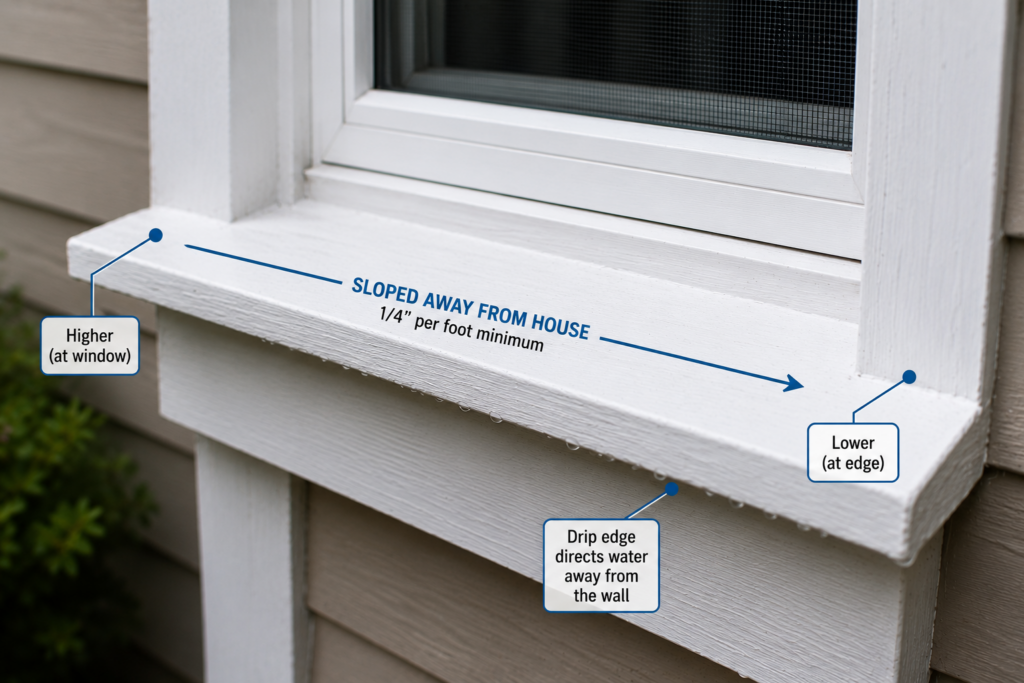
⚠️ Warning: Don’t Skip the Slope
Here’s something nobody told me the first time, and it’s the reason my original “repair” failed: a window sill needs to slope slightly away from the house, usually about 5 to 10 degrees. When I rebuilt the profile with epoxy, I shaped it flat rather than restoring the slope.
Flat sills hold water rather than shed it. Within a year, I had a new soft spot forming about an inch from my original repair, caused by water sitting where it should have been running off. When you’re shaping the epoxy filler, hold a level against it and make sure water still runs away from the window, not toward it.
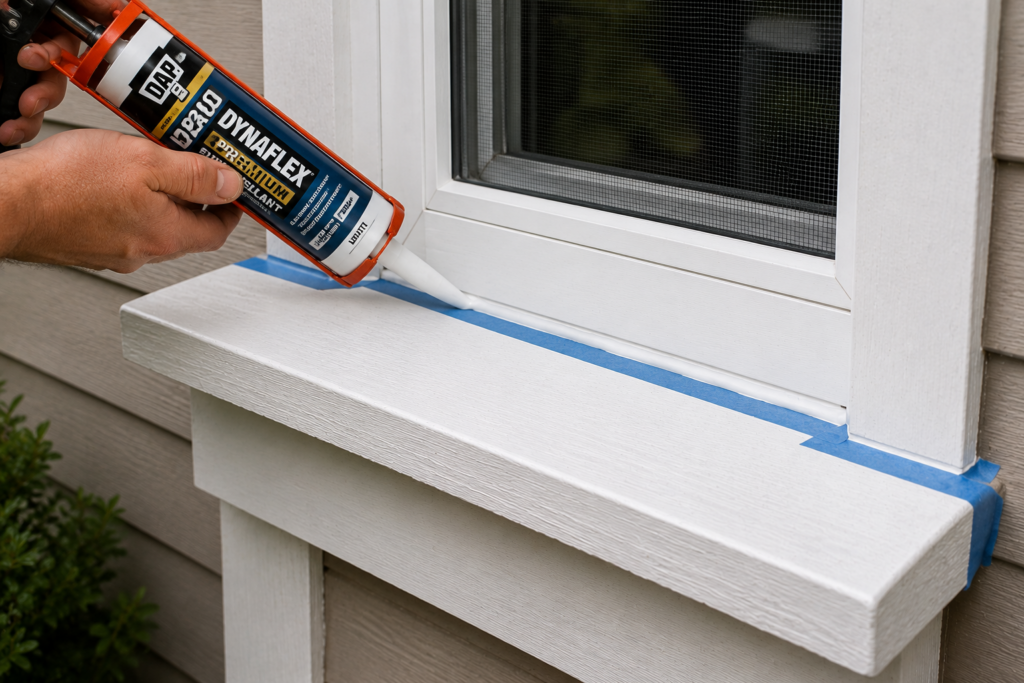
😬 The Regret: Caulk I Should Have Replaced First
I patched the wood and repainted, but I reused the old caulk line around the window because it “still looked fine.” It wasn’t fine. It had micro-cracks I couldn’t see without really looking, and that’s almost certainly what let the original water in to begin with.
If I’m honest, the epoxy work was the easy part. The part I regret skipping was a $6 tube of quality exterior caulk and twenty minutes with a caulk gun. Replace your caulk every single time you do a sill repair, even if the old caulk looks okay from three feet away. It’s the cheapest insurance you’ll ever buy on this project.
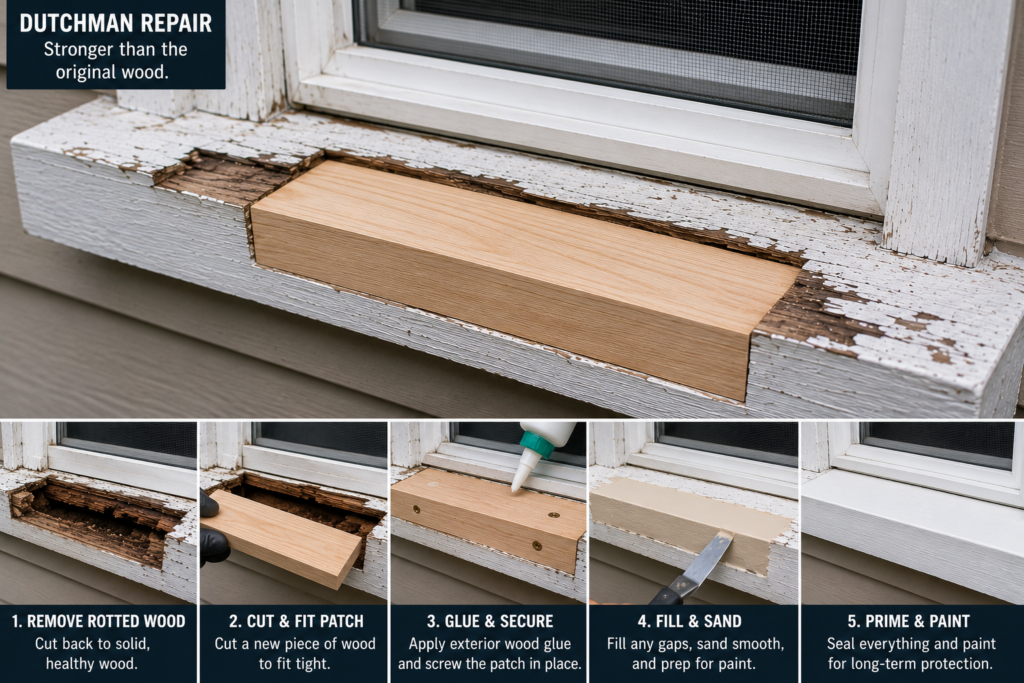
When Epoxy Won’t Cut It: The Dutchman Repair
If your screwdriver test showed rot deeper than about an inch, or running more than 12 inches on a standard 36-inch sill, epoxy is patching over a problem that’s bigger than cosmetic. A Dutchman repair — cutting out the rotted section and splicing in new wood — is more work but holds up far better in the long term.
I go through a full selection of plywood and dimensional lumber for sill splices in my guide on choosing the right plywood thickness for outdoor projects, since exterior-grade material matters much more here than people expect.
Preventing It From Happening Again
A few things I do now on every window in the house, learned the hard way:
Re-caulk window frames every 2–3 years, not when they look bad, but on a schedule
Check sill slope with a level once a year — settling can flatten a slope over time
Keep an eye on interior condensation, especially in winter, and wipe sills dry
Inspect drip caps above windows; if they’re missing or bent, water runs straight down the trim face
For anyone dealing with rot elsewhere on the exterior, the underlying causes and fixes overlap a lot with what I cover in how to stop wood rot permanently, especially around moisture management before it ever reaches the wood.
One pack covers rough shaping through final smoothing before primer
FAQ
Can you repair a rotted window sill without removing the window? Yes, in most cases. If the rot is confined to the sill itself and hasn’t spread into the window frame or jambs, you can repair it in place using wood hardener and epoxy filler, or a Dutchman patch for more extensive damage, without removing the window.
How do you know if a window sill is too rotted to repair? Use a screwdriver or awl to probe the wood. If it sinks more than an inch with little resistance, or the damage extends more than a third of the sill’s length, the structural integrity is compromised enough that replacement is usually more reliable than patching.
What’s the best filler for a rotted window sill? Two-part epoxy wood fillers like Abatron WoodEpox are the standard for sill repairs because they cure hard, accept paint, resist moisture, and won’t shrink or crack over time, unlike standard wood putty.
How long does an epoxy window sill repair last? A properly done epoxy repair, including wood hardener for the surrounding soft fibers, typically lasts 10 to 15 years, comparable to the lifespan of the surrounding original wood, provided water intrusion is also addressed.
Do you need to replace the caulk when repairing a window sill? Yes. Old or cracked caulk is the most common cause of sill rot. Replacing it during the repair addresses the root cause rather than just the symptom, and skipping it significantly increases the odds of recurring rot.
Can you use Bondo on a window sill? Standard auto-body Bondo isn’t designed for exterior wood and tends to crack and pop loose once it’s exposed to repeated wetting, freezing, and UV — it doesn’t flex or bond the way wood-specific epoxy does. Bondo does make a dedicated wood-repair line, including a rotted-wood restorer that behaves more like the consolidant-and-filler systems in this guide and is a reasonable alternative to Abatron for smaller spots.
Will insurance cover a rotted window sill? Usually not. Standard homeowners policies treat wood rot as gradual deterioration or a maintenance issue, which is specifically excluded from most coverage. The exception is when the rot is a direct result of a sudden, covered event, like a burst pipe or storm damage that let water in, rather than slow exposure over time. If you suspect a covered cause, document it and call your insurer before starting repairs.
Related Posts:
RV Paneling: Repair, Replacement, and Maintenance Guide by Admin September 14, 2025 Installing Owning a recreational vehicle brings freedom and adventure, but it also comes with upkeep. One of the biggest hidden problems RV owners encounter is RV…